
As autumn’s vibrant hues paint the landscape, we’re drawn to the cozy comfort of homemade jams that capture nature’s bounty. These recipes spotlight seasonal fruits like apples, pears, and berries, turning them into sweet preserves that evoke crisp harvest days and warm kitchens.
We love how easy it is to whip up these jams, preserving fall’s flavors for year-round enjoyment. Whether you’re a novice or a seasoned canner, our autumn jam recipes offer simple twists that bring a confident, homemade touch to your table.
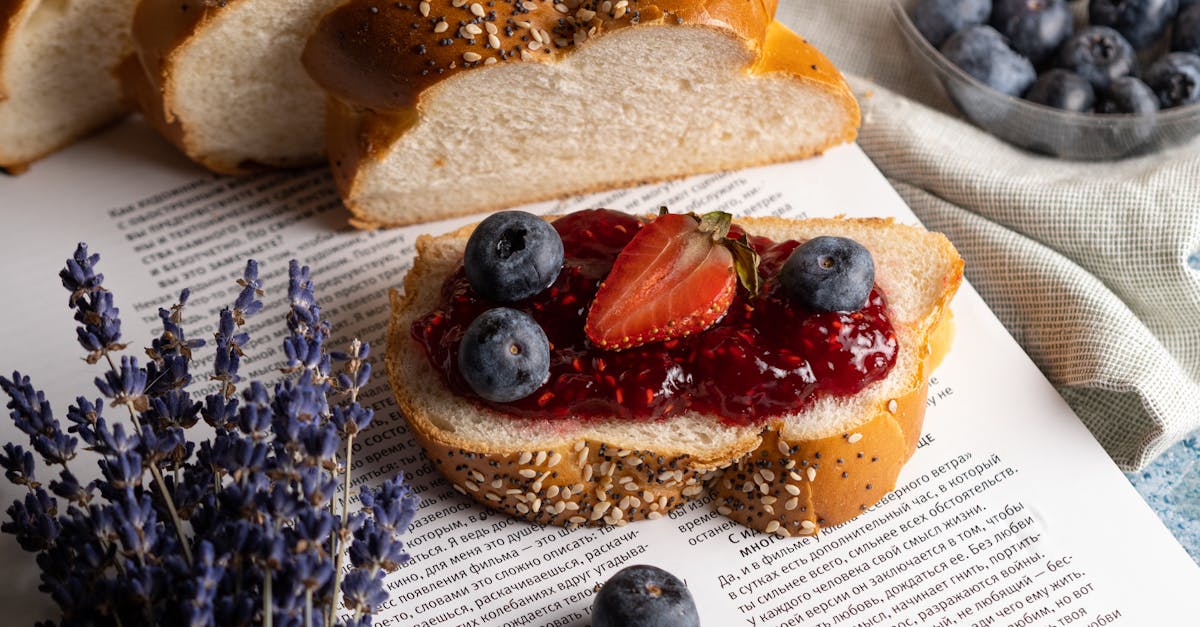
Ingredients
In our autumn jam recipes, we focus on vibrant, seasonal fruits like apples, pears, and berries to capture the essence of fall. These ingredients not only preserve the fresh flavors for year-round enjoyment but also allow beginners and seasoned canners to create personalized preserves with ease.
To keep things organized, we’ve grouped the ingredients by recipe. We’ll list them in the order they’re typically used during preparation, including any prep specifics for accuracy.
Apple Jam Ingredients
For our Apple Jam, we start with the base fruit and move to sweeteners and acids:
- 4 cups fresh apples, chopped (we suggest using tart varieties like Granny Smith for a balanced flavor; peel and core them before chopping)
- 2 cups granulated sugar, to enhance the natural sweetness and aid in setting
- 1 tablespoon lemon juice, freshly squeezed (this adds acidity to help with gelling and prevents browning)
- 1 teaspoon ground cinnamon, for a warm autumn spice that complements the apples
- 1/2 cup water, to create the initial syrup base
Pear Jam Ingredients
For our Pear Jam, we begin with the pears and follow with complementary elements:
- 4 cups ripe pears, diced (opt for Bosc or Bartlett varieties for their firm texture; peel and remove seeds for even cooking)
- 1.5 cups granulated sugar, measured to draw out the pears’ natural juices
- 2 tablespoons orange zest, finely grated (this provides a citrusy brightness without overpowering the pears)
- 1/4 cup lemon juice, to ensure proper pH for safe canning and a tangy note
- 1 teaspoon vanilla extract, added later for depth and aroma
Berry Jam Ingredients
- 3 cups mixed berries (such as blackberries, raspberries, and blueberries; wash and pat dry to remove any stems or debris)
- 2 cups granulated sugar, stirred in to create a thick jam consistency
- 1 tablespoon pectin, if needed for a firmer set (we recommend natural sources for beginners)
- 1/2 teaspoon nutmeg, ground (this autumn spice ties in the seasonal theme)
- 1/4 cup apple cider, for a subtle tartness and to adjust liquid levels during cooking
Tools and Equipment
As we move from gathering our fresh ingredients for Apple Jam, Pear Jam, and Berry Jam, selecting the right tools ensures safe and efficient jam-making. These essentials help us preserve the vibrant flavors of autumn fruits while minimizing risks during canning.
Essential Tools for Jam-Making
To create our homemade jams, we rely on a few key items that streamline the process. Below, we list the must-have tools, organized by their primary use:
- Large Stockpot: A heavy-bottomed pot with at least 8-quart capacity is crucial for cooking large batches of jam. We use it to simmer fruits and sugar evenly, preventing scorching and ensuring a smooth texture.
- Canning Jars and Lids: We recommend using 8-ounce or 12-ounce glass jars with two-piece lids for sealing. These allow us to store jams safely for up to a year, capturing the essence of seasonal flavors like the spiced warmth in our Apple Jam.
- Jar Lifter: This specialized tongs tool lets us handle hot jars without burns, making it indispensable for our Berry Jam recipe where precise placement in a water bath is key.
- Funnel: A wide-mouthed funnel helps us pour hot jam into jars cleanly, reducing mess and waste—especially useful for the thicker consistency of Pear Jam.
- Ladle or Heat-Resistant Spoon: We use a stainless-steel ladle to transfer jam from the pot to jars, ensuring accurate measurements and maintaining the jam’s vivid colors and aromas.
- Candy Thermometer: For precise temperature control, we attach this to our stockpot to reach the 220°F setting point, which is vital for achieving the perfect gel in all our recipes.
- Cutting Board and Sharp Knife: Essential for prepping fruits, we opt for a sturdy board and a 8-inch chef’s knife to chop apples, pears, or berries efficiently before cooking.
Safety and Preparation Tips
When preparing our tools, we always prioritize safety. For instance, sterilize jars by boiling them for 10 minutes to prevent contamination, and inspect lids for any defects before use. If you’re new to canning, invest in a basic canning kit that bundles items like the jar lifter and funnel for convenience.
| Tool Category | Recommended Size/Type | Why It’s Important |
|---|---|---|
| Stockpot | 8-12 quarts, heavy-bottomed | Handles large volumes without overheating, ideal for fruit mixtures in jam recipes. |
| Canning Jars | 8-12 ounces, glass with lids | Ensures proper sealing and long-term storage, preserving autumn flavors effectively. |
| Thermometer | Digital or analog, up to 250°F | Guarantees accurate temperature for setting, reducing the risk of spoiled jams. |
Instructions
Now that we have gathered our fresh ingredients and essential tools, let’s walk through the steps to create our delightful autumn jams. We’ll provide clear, step-by-step guidance to ensure safe and successful results for Apple Jam, Pear Jam, and Berry Jam.
Preparing the Fruit
Before we begin cooking, proper fruit preparation is key to achieving the best texture and flavor in our jams. Start by selecting ripe, seasonal fruits as outlined in our ingredients section—ensuring they are fresh and free from blemishes for optimal taste.
For Apple Jam, follow these steps:
- Wash the apples thoroughly under cold water to remove any dirt.
- Peel and core the apples using a sharp knife, then chop them into even 1-inch pieces to promote uniform cooking.
- Measure out the prepared apples to match the specified quantity in our ingredients list.
For Pear Jam, proceed as follows:
- Rinse the pears under cool water and pat them dry.
- Peel and remove the cores, slicing the pears into 1-inch cubes for consistent softening during cooking.
- Set aside the exact amount needed, incorporating the orange zest for added zestiness.
For Berry Jam, here’s how to prepare:
- Gently wash the mixed berries in a colander under cold water to preserve their delicate structure.
- Remove stems and any unripe berries, then lightly crush about half of them with a fork to release natural juices and enhance the jam’s texture.
- Verify the measurement to align with our ingredients for a balanced blend.
Cooking the Jam
Once the fruit is prepped, we’ll cook our jams to capture the vibrant flavors and rich aromas of autumn—transforming simple ingredients into glossy, fragrant preserves that fill the kitchen with warm, inviting scents.
For Apple Jam:
- In a large stockpot, combine the chopped apples, granulated sugar, lemon juice, ground cinnamon, and water.
- Heat the mixture over medium heat, stirring constantly with a heat-resistant spoon until the sugar dissolves and the apples release their juices, creating a bubbling symphony of sweet and spicy notes.
- Bring to a rolling boil, then reduce to a simmer for 20-25 minutes; use a candy thermometer to monitor when it reaches 220°F (105°C) for the perfect set, watching as the mixture thickens to a luscious, cinnamon-kissed consistency.
For Pear Jam:
- Add the prepared pears, sugar, orange zest, lemon juice, and vanilla extract to the stockpot.
- Stir over medium heat until the sugar melts and the pears soften, infusing the air with a bright, citrusy aroma that evokes crisp autumn days.
- Boil the mixture vigorously, then simmer for 15-20 minutes until it reaches 220°F (105°C), stirring occasionally to prevent sticking and achieve a smooth, velvety texture.
For Berry Jam:
- Mix the berries, sugar, pectin, nutmeg, and apple cider in the stockpot.
- Cook over medium heat, stirring until the sugar dissolves and the berries burst, releasing a burst of tangy, fruity essence with subtle nutmeg warmth.
- Bring to a full boil and simmer for 10-15 minutes; test for doneness at 220°F (105°C) by placing a small amount on a chilled plate—if it wrinkles when pushed, it’s ready for that perfect, jewel-toned spread.
Canning and Storing
With the jam cooked to perfection, we’ll now focus on canning and storing to preserve the fresh flavors of autumn for months—ensuring safety and longevity with the tools we discussed earlier.
For all jams:
- Sterilize your canning jars and lids by boiling them in water for 10 minutes, then remove with a jar lifter and place on a clean towel.
- Ladle the hot jam into the jars using a funnel, leaving 1/4-inch headspace at the top to allow for proper sealing and prevent spoilage.
- Wipe the jar rims with a clean, damp cloth to remove any residue, then secure the lids and rings fingertip-tight.
Process the jars:
- Submerge the filled jars in a boiling water bath using your large stockpot, ensuring they are covered by at least 1 inch of water.
- Boil for 10 minutes (adjust for altitude—add 1 minute per 1,000 feet above sea level), then carefully remove the jars with the jar lifter and let them cool on a towel.
- Once cooled, check that the lids have sealed by pressing the center—if it doesn’t pop, the jar is sealed. Store in a cool, dark place for up to 1 year.
- For quick reference, here’s a simple table on jam storage guidelines:
| Storage Method | Duration | Conditions |
|---|---|---|
| Sealed jars (pantry) | Up to 1 year | Cool, dark, dry environment |
| Opened jars (fridge) | Up to 3 months | Tightly sealed, 40°F or below |
Make-Ahead Instructions
As jam enthusiasts, we understand that life gets busy, especially during the autumn harvest season. To help you streamline your autumn jam recipes without sacrificing flavor or safety, we outline practical make-ahead strategies. These steps allow you to prepare components in advance, ensuring your Apple Jam, Pear Jam, and Berry Jam turn out perfectly every time.
Prepping Fruits Ahead
One of the easiest ways to save time is by preparing your fruits in advance. Fresh, seasonal fruits like apples, pears, and berries retain their vibrant flavors when handled correctly. Follow these steps to prep and store them safely:
- For Apple Jam, wash, peel, core, and chop 2 pounds of apples. Place them in an airtight container, sprinkle with 1 tablespoon of lemon juice to prevent browning, and refrigerate for up to 24 hours.
- For Pear Jam, rinse, peel, and cube 2 pounds of ripe pears. Toss with 1 tablespoon of orange zest and store in a sealed bag in the fridge for up to 48 hours—this keeps their natural sweetness intact.
- For Berry Jam, wash and lightly crush 2 pounds of mixed berries. Spread them on a baking sheet, freeze for 1-2 hours until firm, then transfer to freezer-safe bags. They can be stored frozen for up to 3 months, ready for quick thawing.
Preparing Jam Mixtures in Advance
We recommend mixing your base ingredients ahead to simplify cooking day. This approach works well for capturing the essence of autumn spices while minimizing last-minute effort.
- Combine dry ingredients first: For Apple Jam, mix 4 cups of granulated sugar with 1 teaspoon of ground cinnamon in a bowl. Seal and store at room temperature for up to 1 week.
- For Pear Jam, blend 4 cups of sugar with 1 teaspoon of vanilla extract in a separate container. Keep it in a cool, dry place for up to 5 days to preserve the aromatic notes.
- In the case of Berry Jam, stir together 4 cups of sugar and 2 tablespoons of pectin. Store in an airtight jar for up to 7 days, ensuring the mixture remains dry to maintain its gelling properties.
Storage and Safety Tips
To ensure your make-ahead efforts result in safe, delicious jams, focus on proper storage. Always prioritize food safety to avoid contamination and extend shelf life.
| Make-Ahead Component | Storage Method | Maximum Duration | Key Safety Notes |
|---|---|---|---|
| Prepped Fruits (e.g., chopped apples or pears) | Refrigerated in airtight containers | 24-48 hours | Add acid like lemon juice to prevent oxidation; check for spoilage before use. |
| Frozen Berries | Freezer bags or containers | Up to 3 months | Thaw in the fridge overnight; discard if there’s any mold or off odors. |
| Dry Mixtures (e.g., sugar and spices) | Airtight containers at room temperature | Up to 7 days | Keep away from moisture; label with dates to track freshness. |
By following these make-ahead instructions, we empower you to enjoy the rich, comforting tastes of autumn jam recipes with less hassle. Always inspect ingredients before proceeding to the cooking stage for the best results.
Conclusion
We’ve loved sharing these autumn jam adventures with you, turning seasonal fruits into lasting treasures that bring warmth to any day. It’s rewarding to capture fall’s essence in a jar, creating personalized delights that enhance our meals and memories.
As we wrap up, let’s encourage you to experiment and make these recipes your own. You’ll find joy in the process and the flavors that keep autumn alive long after the leaves have fallen.
Frequently Asked Questions
What fruits are best for making autumn jams?
Autumn jams shine with seasonal fruits like apples, pears, and berries. These provide fresh, vibrant flavors that preserve easily. Using ripe produce ensures the best taste and texture, making your homemade jams a delightful way to capture fall’s essence.
How do I make Apple Jam?
To make Apple Jam, wash, peel, core, and chop fresh apples. Combine with sugar, lemon juice, cinnamon, and water in a pot. Cook until thickened, then can in sterilized jars. This simple recipe yields about 4-5 jars and takes around 45 minutes, perfect for beginners.
What equipment do I need for jam-making?
Essential tools include a large stockpot for cooking, canning jars and lids, a jar lifter for safe handling, a funnel for filling, a ladle, a candy thermometer for checking consistency, and a sharp knife with a cutting board. These ensure safe, efficient preparation and help avoid contamination.
How should I store homemade jams?
Store sealed jars in a cool, dark place for up to a year. Once opened, keep in the fridge and use within a month. Always inspect lids for proper sealing after processing in a boiling water bath to maintain freshness and safety.
Can beginners make these jam recipes?
Yes, these recipes are beginner-friendly. They use simple steps and common ingredients, with tips on fruit prep and safety. Start with basic tools and follow the instructions closely for great results, building confidence for more advanced canning.
What are some tips for safe jam canning?
Sterilize jars and lids before use, use a candy thermometer to reach the right temperature, and process in a boiling water bath for 10 minutes. Always inspect equipment for damage and handle hot items with care to prevent contamination and ensure food safety.
How can I prepare jam ingredients in advance?
Prep fruits ahead by washing, peeling, and chopping apples or pears, then refrigerate for up to 24 hours. Freeze berries for later use. Mix dry ingredients like sugar and spices in advance, but store properly to maintain freshness and follow safety guidelines for best results.