
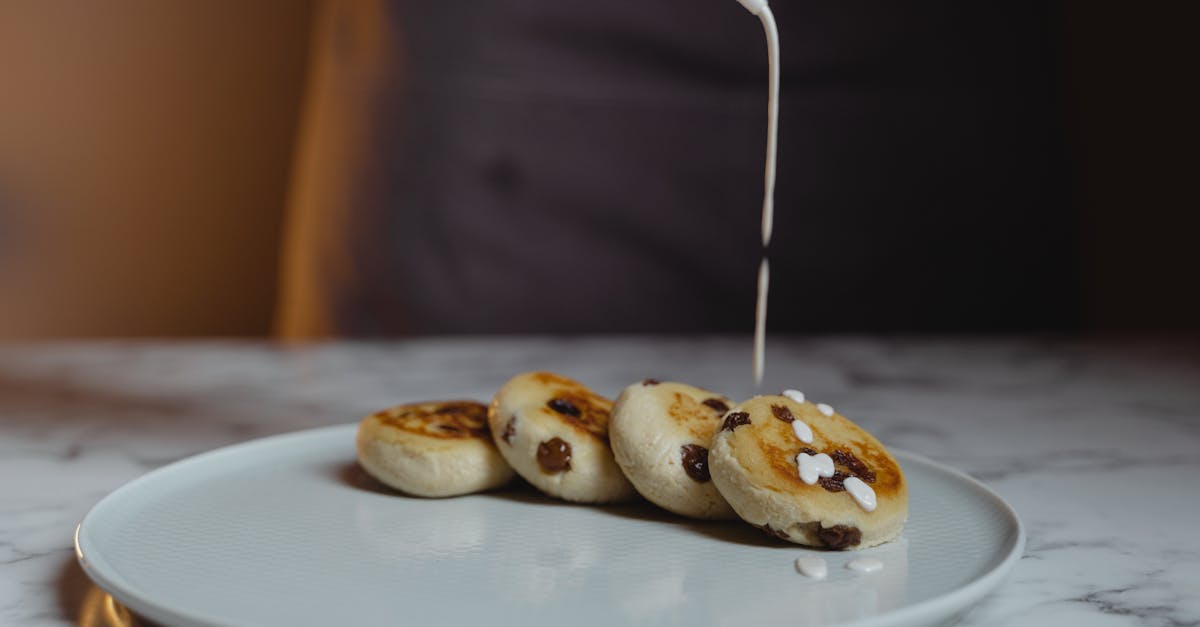
We’ve always been captivated by the warm, golden braids of raisin Challah, a delightful twist on a classic Jewish bread that’s perfect for family gatherings or cozy breakfasts. Its origins trace back to traditional Sabbath loaves, but we’ve infused ours with plump raisins for an extra burst of sweetness that elevates every slice.
What makes this recipe special is how simple it is to bake from scratch, bringing that fresh-baked aroma right into your kitchen. Join us as we guide you through creating this timeless favorite that’s sure to become a staple in your home.
Ingredients
To create our flavorful Raisin Challah, we gather these key ingredients in the order they are typically used during preparation. Each one contributes to the bread’s soft texture, subtle sweetness, and irresistible aroma that fills the kitchen.
- Active dry yeast (1 packet or 2 1/4 teaspoons): We start with this to activate the dough and ensure a perfect rise.
- Warm water (1 cup, about 110°F): This helps dissolve the yeast quickly for a lively fermentation.
- Granulated sugar (1/2 cup): We add this next to feed the yeast and infuse a gentle sweetness into the bread.
- All-purpose flour (4 1/2 cups): The foundation of our dough, providing structure and a tender crumb.
- Large eggs (2): Beaten and incorporated for richness, they give the challah its signature golden hue.
- Vegetable oil (1/4 cup): We use this to keep the bread moist and add a subtle gloss to the finished loaf.
- Salt (1 teaspoon): A crucial element to balance flavors and enhance the overall taste.
- Raisins (1 cup, preferably plump and seedless): Folded in last, these deliver bursts of juicy sweetness that make our Raisin Challah a standout treat.
Tools and Equipment
To bring our Raisin Challah to life, we rely on a few essential tools that make the process smooth and efficient. These items help us achieve the perfect rise, texture, and golden crust, ensuring our homemade bread rivals any bakery favorite.
Here’s a list of the key tools and equipment we recommend, organized by their use in the recipe:
- Large Mixing Bowl: We start with this to dissolve the yeast in warm water, allowing for even mixing and proper activation that leads to a soft, airy dough.
- Measuring Cups and Spoons: Accuracy is crucial for baking, so we use these to measure ingredients like flour, sugar, and oil precisely, preventing any imbalances that could affect the bread’s subtle sweetness.
- Whisk or Wooden Spoon: For blending the wet ingredients, we prefer a whisk to incorporate eggs and oil smoothly, creating a uniform mixture that enhances the dough’s rich flavor.
- Stand Mixer with Dough Hook (optional): If we want to save time, we use this to knead the dough, developing gluten for that signature chewy texture without overworking by hand.
- Dough Scraper: We employ this tool to handle sticky dough when shaping the loaves, ensuring clean cuts and even portions for a professional-looking braid.
- Plastic Wrap or Clean Kitchen Towel: This keeps the dough covered during rising, maintaining a warm, draft-free environment that allows our Raisin Challah to double in size with its irresistible aroma.
- Baking Sheet or Loaf Pan: We bake on a lined baking sheet for braided loaves or in a loaf pan for a simpler shape, promoting even browning and a crisp exterior.
- Oven Thermometer: To guarantee the best results, we use this to verify our oven’s temperature, as precise heat is key for that golden, fragrant finish.
- Pastry Brush: Finally, we apply an egg wash with this for a shiny crust, adding visual appeal and a delightful crunch to our finished bread.
With these tools in hand, we’re fully prepared to transition seamlessly from measuring ingredients to crafting our delicious Raisin Challah.
Instructions
Now that we have gathered our ingredients and tools, let’s bring our Raisin Challah to life with these straightforward steps. We’ll walk you through the process to achieve a soft, golden loaf bursting with sweet raisin flavor and a heavenly aroma.
Prepare the Dough
To start, activate the yeast by dissolving 2 1/4 teaspoons of active dry yeast in 1 cup of warm water (around 110°F) in a large mixing bowl. Add 1/2 cup of granulated sugar and stir until it dissolves, watching for the mixture to become frothy after about 5-10 minutes—this signals the yeast is alive and ready.
Next, in the same bowl, whisk in 2 large eggs, 1/4 cup of vegetable oil, and 1 teaspoon of salt using a whisk or wooden spoon. Gradually add 4 to 5 cups of all-purpose flour, one cup at a time, stirring until the dough forms a shaggy ball. Knead the dough on a lightly floured surface for 8-10 minutes until it’s smooth and elastic, then fold in 1 cup of raisins evenly throughout for that signature sweet burst in every bite.
First Rise
Once the dough is prepared, transfer it to a lightly oiled bowl and turn it to coat all sides. Cover the bowl with a clean kitchen towel or plastic wrap and place it in a warm, draft-free spot.
Let the dough rise for about 1-2 hours, or until it has doubled in size—the warm environment allows the yeast to work its magic, filling the kitchen with a tantalizing, yeasty sweetness that hints at the bread’s fluffy texture to come.
Shape and Braid the Challah
After the first rise, punch down the dough gently to release air bubbles, then turn it out onto a floured surface. Divide the dough into 3-6 equal portions depending on your braid style—for a classic three-strand braid, roll each portion into a long rope about 12-15 inches long.
Braiding the Challah is key for its iconic look: arrange the ropes side by side, pinch them together at one end, and weave them over and under each other tightly. Once braided, tuck in the ends and place the loaf on a parchment-lined baking sheet, ensuring the raisins peek through for an inviting, dotted appearance that promises bursts of flavor.
Second Rise
Cover the braided dough loosely with a kitchen towel and let it rise again in a warm area for 45-60 minutes, or until it puffs up noticeably.
During this time, the dough will develop a light, airy structure, enhancing the Raisin Challah‘s soft crumb and allowing the sweet raisin notes to intensify, preparing it for a perfect bake.
Bake the Challah
Preheat your oven to 350°F and position a rack in the center. For a glossy finish, brush the risen loaf with a beaten egg wash (1 large egg mixed with 1 tablespoon of water).
Bake the Challah for 25-35 minutes, rotating the pan halfway through, until the crust turns a deep golden brown and sounds hollow when tapped—the kitchen will fill with an irresistible aroma of warm bread and sweet raisins that evokes cozy family gatherings. Let it cool on a wire rack before slicing.
Make-Ahead Instructions
One of the beauties of our Raisin Challah recipe is its flexibility for busy schedules. We often prepare components in advance to enjoy fresh-baked bread without the last-minute rush. Below, we outline reliable methods to make this delightful bread ahead of time, ensuring Raisin Challah retains its soft texture and sweet aroma.
Preparing Dough in Advance
To streamline your baking day, we suggest making the dough up to 24 hours ahead. Follow these steps for optimal results:
- Activate the yeast as usual: Dissolve 2 1/4 teaspoons of active dry yeast in 1/2 cup of warm water with 1 tablespoon of granulated sugar. Let it sit for 5-10 minutes until foamy.
- Mix and knead the dough: Combine the yeast mixture with 4 cups of all-purpose flour, 2 large eggs, 1/4 cup of vegetable oil, 1 teaspoon of salt, and 1 cup of raisins as detailed in our earlier steps. Knead until smooth and elastic.
- First rise in the refrigerator: Instead of letting the dough rise at room temperature, cover the bowl tightly with plastic wrap and refrigerate it for 8-24 hours. This slow rise enhances the flavor, developing a deeper, more complex taste.
- Shaping and second rise: Remove the dough from the fridge and let it sit at room temperature for 30-45 minutes to soften. Shape and braid as instructed, then allow a second rise for 1-2 hours until doubled in size before baking.
Freezing Unbaked Dough
For longer storage, freezing the shaped dough works wonders. We find this method ideal for planning ahead up to a month.
- Shape the dough first: After the first rise, shape and braid the dough as per the recipe.
- Freeze immediately: Place the shaped loaf on a baking sheet lined with parchment paper and freeze until solid, about 2 hours. Once frozen, wrap it securely in plastic wrap and aluminum foil to prevent freezer burn.
- Thawing and baking: Transfer the frozen dough to the refrigerator 12-24 hours before baking. Let it come to room temperature for 1-2 hours, apply the egg wash, and bake at 350°F for 25-35 minutes, adding 5-10 minutes to the original baking time for a golden crust.
Freezing Baked Raisin Challah
If you prefer to bake first and store, our Raisin Challah freezes beautifully for up to 3 months.
| Storage Method | Duration | Thawing Instructions | Reheating Tips |
|---|---|---|---|
| Whole loaf | Up to 3 months | Thaw at room temperature for 2-3 hours or overnight in the fridge | Preheat oven to 350°F, wrap in foil, and heat for 15-20 minutes until warm |
| Sliced | Up to 2 months | Thaw slices on a wire rack for 30-60 minutes | Toast directly for a quick, fresh taste or microwave for 10-15 seconds |
By using these make-ahead techniques, we ensure your Raisin Challah is always ready to impress at family gatherings or breakfasts, maintaining its irresistible aroma and texture.
Conclusion
We’ve truly enjoyed guiding you through this Raisin Challah adventure. It’s more than just bread—it’s a way to create lasting memories around the table.
Baking from scratch lets you savor that homemade magic. Give it a try and make it your own tradition—we’re confident it’ll delight everyone who tastes it.
Frequently Asked Questions
What is Raisin Challah?
Raisin Challah is a sweet twist on traditional Jewish Sabbath bread, featuring plump raisins for added flavor. It’s perfect for family gatherings or breakfasts, offering a soft texture and delightful aroma. Originating from classic Challah loaves, this version is simple to bake at home and can become a cherished family staple.
What ingredients are needed for Raisin Challah?
To make Raisin Challah, you’ll need active dry yeast, warm water, granulated sugar, all-purpose flour, large eggs, vegetable oil, salt, and raisins. These ingredients create a soft, sweet bread with a perfect rise and irresistible aroma, ensuring a delicious result every time.
What tools are required to bake Raisin Challah?
Essential tools include a large mixing bowl for yeast activation, measuring cups and spoons for accuracy, and a whisk or wooden spoon for mixing. Optional items like a stand mixer with a dough hook, dough scraper, and oven thermometer make the process easier and help achieve precise results.
How do I make Raisin Challah?
Start by activating yeast in warm water and sugar, then mix in flour, eggs, oil, salt, and raisins to form the dough. Let it rise, shape and braid it, allow a second rise, apply an egg wash, and bake at the recommended temperature until golden brown. Cool before slicing for the best texture and flavor.
Can I prepare Raisin Challah in advance?
Yes, you can make the dough up to 24 hours ahead by mixing and kneading it, then refrigerating for a slow rise that enhances flavor. You can also freeze unbaked dough or baked loaves; thaw in the fridge overnight and bake as needed to keep it fresh for family events.
How should I store Raisin Challah?
Store cooled Raisin Challah in an airtight container at room temperature for up to 2 days, or refrigerate for up to a week to maintain freshness. For longer storage, freeze the baked bread for up to 3 months; thaw at room temperature and warm in the oven to restore its soft texture and aroma.