
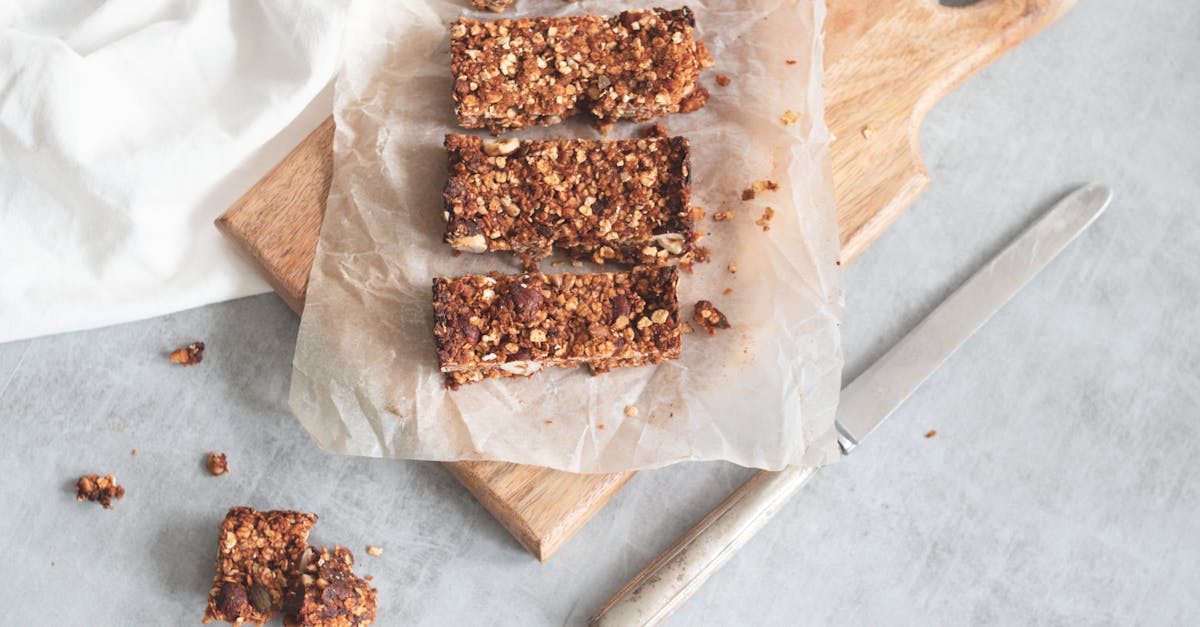
We’ve always cherished the rustic charm of farmhouse cookies, those hearty treats that evoke memories of cozy kitchens and fresh-baked goodness. Originating from simple farm life, our Farmhouse Cookies Recipe blends wholesome ingredients like oats and nuts for a delightful twist on classic baking.
These cookies aren’t just tasty—they’re easy to whip up and perfect for family gatherings or a quiet afternoon. Join us as we guide you through this timeless favorite that’s sure to become a staple in your home.
Ingredients
As we dive into our Farmhouse Cookies Recipe, we gather wholesome ingredients that bring out the rustic charm and comforting flavors you’ve come to love. These components, inspired by traditional baking with a modern twist, ensure each cookie is hearty, chewy, and packed with nostalgic appeal.
Here’s our curated list of ingredients, ordered as they’ll be used in the preparation. We’ve bolded key terms for emphasis and included prep specifics in italics to guide you seamlessly.
- All-purpose flour (2 cups, sifted to ensure lightness and prevent clumping)
- Rolled oats (1 ½ cups, uncooked for that classic chewy texture we adore)
- Unsalted butter (1 cup, softened at room temperature to blend smoothly and enhance rich flavor)
- Brown sugar (1 cup, packed to add deep, caramel-like sweetness)
- Granulated sugar (½ cup for balanced crispness on the edges)
- Large eggs (2, at room temperature to promote even binding and fluffiness)
- Vanilla extract (1 teaspoon, pure for a warm, aromatic depth)
- Baking soda (1 teaspoon to help the cookies rise and achieve a perfect golden brown)
- Salt (½ teaspoon to accentuate the flavors without overpowering)
- Chopped nuts (1 cup, such as walnuts or pecans, toasted for added crunch and nutty essence)
- Dried fruits or chocolate chips (½ cup, optional like raisins or dark chocolate for a personalized twist we recommend for extra indulgence)
Tools and Equipment
Having gathered our wholesome ingredients for Farmhouse Cookies, we now turn to the essential tools that make baking these rustic treats straightforward and enjoyable. With the right equipment, we ensure precision and ease, allowing us to create chewy, flavorful cookies that evoke cozy kitchen memories.
To prepare efficiently, here’s a curated list of tools, organized by their role in the process:
- Measuring cups and spoons: These are crucial for accurately portioning ingredients like flour, oats, and sugars. We recommend a set that includes both dry and liquid measurements to avoid any guesswork.
- Large mixing bowl: Ideal for combining dry ingredients such as rolled oats and all-purpose flour. Opt for a sturdy, heat-resistant bowl that gives us plenty of room to mix without spills.
- Electric mixer or wooden spoon: For creaming butter and sugars or blending the dough. If we use an electric mixer, it speeds up the process for a smoother texture; otherwise, a wooden spoon works for a hands-on approach.
- Baking sheet and parchment paper: A standard rimmed baking sheet lined with parchment paper prevents sticking and ensures even baking. We find that a 13×18-inch sheet accommodates a full batch perfectly.
- Spatula or cookie scoop: This helps us portion the dough into uniform balls. A 1.5-tablespoon scoop ensures consistent cookie sizes for that signature hearty shape.
- Oven and oven mitts: Preheat your oven to 350°F for optimal results. Oven mitts protect our hands when handling hot trays, making the process safe and seamless.
- Wire cooling rack: After baking, this allows the cookies to cool evenly, preserving their chewy texture and preventing sogginess.
By using these tools, we guarantee that our Farmhouse Cookies turn out just right every time, blending tradition with modern convenience.
Instructions
Now that we have our wholesome ingredients and essential tools prepared, let’s walk through the simple steps to create these hearty, chewy farmhouse cookies packed with oats and nuts. We ensure each stage is straightforward for delicious results that evoke cozy, rustic charm.
Prep
Before we begin, gather and measure all ingredients to streamline the process. Preheat your oven to 350°F (175°C) for even baking, and line your baking sheet with parchment paper to prevent sticking and achieve a perfect golden-brown finish. In a large mixing bowl, whisk together 2 cups all-purpose flour, 1 cup rolled oats, 1 teaspoon baking soda, and ½ teaspoon salt until well combined—this sets the base for our cookies’ chewy texture and nutty flavor.
Mix Dough
Start by creaming the wet ingredients for a smooth base. In the same large mixing bowl, beat 1 cup unsalted butter (softened) with 1 cup brown sugar and ½ cup granulated sugar using an electric mixer on medium speed for about 2 minutes until light and fluffy, releasing a sweet, buttery aroma that promises indulgence. Add 2 large eggs and 2 teaspoons vanilla extract, then mix on low speed until fully incorporated, creating a rich, glossy mixture. Gradually fold in the dry ingredients from the prep step using a wooden spoon, followed by 1 cup chopped nuts and optional ½ cup dried fruits or chocolate chips, until the dough forms a cohesive, slightly sticky mass that holds together with a satisfying, hearty feel.
Shape Cookies
With the dough ready, portion it out for uniform cookies. Use a cookie scoop or tablespoon to portion 1-2 tablespoons of dough per cookie, rolling each into balls and placing them 2 inches apart on the prepared baking sheet to allow for even spreading and a classic rustic shape. Gently flatten each ball slightly with your fingers or a fork for a homey, irregular texture that enhances the cookies’ appeal, ensuring they bake up with a delightful, golden edge and soft center.
Bake
Slide the baking sheet into the preheated oven and bake the cookies for 10-12 minutes, rotating the sheet halfway through for consistent results. Watch as they turn a beautiful golden brown, filling your kitchen with the irresistible scent of warm oats and vanilla—pull them out when the edges are set but the centers remain soft for that signature chewy bite we love in farmhouse cookies.
Cool
Immediately transfer the baked cookies to a wire cooling rack using a spatula to prevent sogginess. Let them cool for at least 5 minutes on the rack, allowing the flavors to settle and the texture to firm up into a perfect, chewy consistency that makes these cookies irresistible for snacking or sharing.
Make-Ahead Instructions
One of the joys of our Farmhouse Cookies recipe is the flexibility to prepare them ahead, ensuring fresh-baked treats are always ready for busy days or impromptu gatherings. Let’s break down the steps to make this process simple and efficient.
Preparing the Dough in Advance
To keep things straightforward, we recommend chilling or freezing the dough before baking. This method preserves the cookies’ hearty, chewy texture and rustic flavors of oats and nuts.
- Mix the dough as directed: Follow the earlier steps to combine dry ingredients like flour, oats, and baking soda with wet ingredients such as butter, sugars, eggs, and vanilla extract until fully incorporated.
- Shape the dough balls: Use a cookie scoop or spoon to form dough into 1-inch balls and place them on a parchment-lined baking sheet.
- Chill in the refrigerator: Cover the baking sheet with plastic wrap and refrigerate the dough balls for up to 3 days. This enhances the flavors and makes the cookies easier to handle.
- Freeze for longer storage: For extended make-ahead options, transfer the shaped dough balls to a freezer-safe bag or container after chilling. Freeze them for up to 3 months to maintain their fresh, wholesome taste.
Baking from Make-Ahead Dough
When you’re ready to bake, our method ensures the cookies come out golden-brown and irresistible every time.
- Thaw if frozen: Move frozen dough balls to the refrigerator overnight or let them sit at room temperature for 30 minutes until softened but still firm.
- Preheat and bake: Arrange the dough on a parchment-lined baking sheet, preheat your oven to 350°F, and bake for 10-12 minutes until edges are lightly browned. This step delivers that signature chewy consistency we adore.
- Cool properly: Transfer baked cookies to a wire rack immediately to cool, allowing the rustic charm of nuts and oats to shine through.
Storage Guidelines
Proper storage is key to keeping your Farmhouse Cookies fresh and flavorful. Below is a quick reference table for optimal results:
| Storage Method | Duration | Tips for Best Results |
|---|---|---|
| Refrigerated dough | Up to 3 days | Keep in an airtight container to prevent drying; bring to room temperature before baking for even texture. |
| Frozen dough | Up to 3 months | Label with the date; thaw in the fridge to avoid sogginess and ensure the cookies hold their shape. |
| Baked cookies (room temperature) | Up to 1 week | Store in an airtight container; add a slice of bread to maintain moisture and that nostalgic, cozy appeal. |
| Frozen baked cookies | Up to 2 months | Cool completely before freezing; reheat in a 300°F oven for 5 minutes to refresh their warm, inviting aroma. |
By following these steps, we can enjoy the comforting essence of Farmhouse Cookies anytime, blending tradition with effortless convenience.
Conclusion
We’ve cherished sharing this farmhouse cookies recipe with you. It’s more than baking—it’s about creating joyful moments and traditions that linger.
As we wrap up, remember these cookies bring warmth to any day. Try them and see how they become a staple in your home.
Frequently Asked Questions
What are Farmhouse Cookies?
Farmhouse Cookies are a nostalgic treat with a rustic charm, evoking memories of cozy kitchens. They feature wholesome ingredients like oats and nuts for a hearty, chewy texture. This easy recipe adds a modern twist to traditional baking, perfect for family gatherings or relaxed afternoons, blending delicious flavors with simple preparation.
What ingredients are needed for Farmhouse Cookies?
You’ll need all-purpose flour, rolled oats, unsalted butter, brown sugar, granulated sugar, large eggs, vanilla extract, baking soda, salt, chopped nuts, and optional add-ins like dried fruits or chocolate chips. These ingredients create a hearty, flavorful dough that enhances the cookies’ rustic appeal, making them both nutritious and delicious.
What tools are required to bake Farmhouse Cookies?
Essential tools include measuring cups and spoons, a large mixing bowl, an electric mixer or wooden spoon, a baking sheet with parchment paper, a spatula or cookie scoop, an oven, oven mitts, and a wire cooling rack. These items ensure easy preparation and help achieve the perfect chewy texture for a seamless baking experience.
How do I make Farmhouse Cookies?
Start by preheating your oven and mixing dry ingredients like flour, oats, baking soda, and salt. Cream butter with sugars, add eggs and vanilla, then combine with dry mix and add-ins. Shape dough into balls, place on a lined baking sheet, and bake at 350°F for 10-12 minutes until golden-brown. Cool on a wire rack for the best chewy results.
Can I prepare Farmhouse Cookies in advance?
Yes, you can make the dough ahead by chilling it in the fridge for up to 3 days or freezing shaped balls for up to 3 months. When ready, bake from chilled or frozen, adding a few extra minutes if needed. This method keeps the texture and flavor intact, making it ideal for busy schedules or spontaneous treats.
How should I store Farmhouse Cookies?
Store baked cookies in an airtight container at room temperature for up to 1 week, or refrigerate for up to 2 weeks to maintain freshness. For longer storage, freeze them for up to 3 months. Dough can be refrigerated for 3 days or frozen for 3 months. Proper storage preserves the chewy texture and nostalgic flavor for enjoyable snacking anytime.