
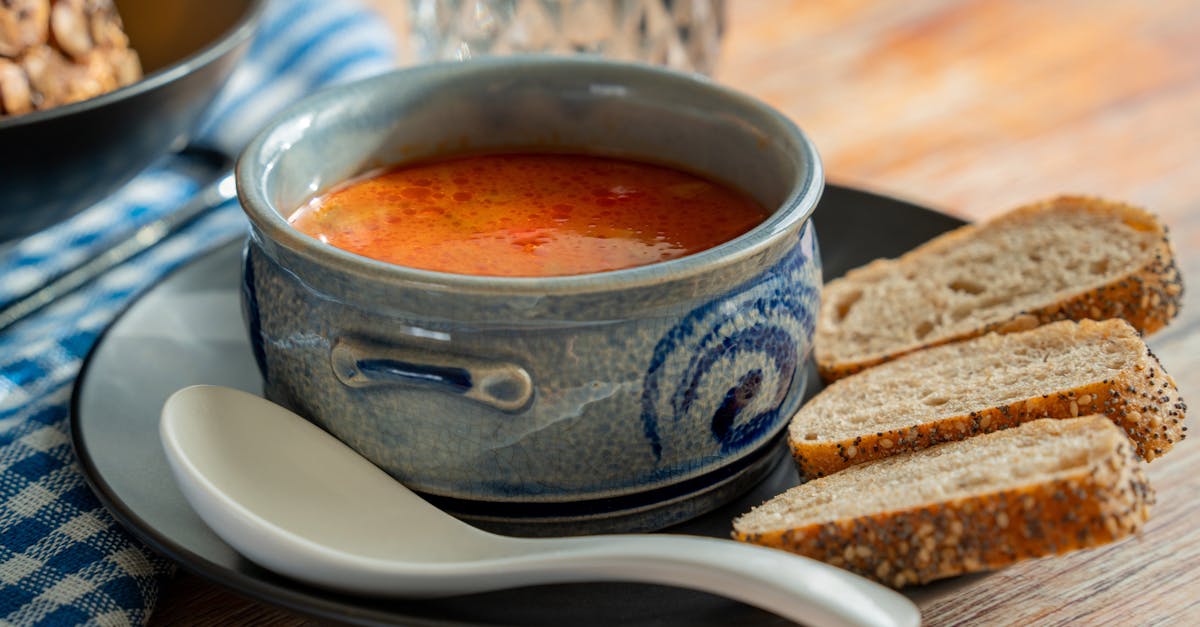
We’ve always been fans of Rye Dill Bread for its hearty, aromatic charm that brings a taste of Eastern European traditions to our kitchens. This simple loaf combines the nutty depth of rye flour with the fresh zing of dill, making it perfect for sandwiches or a cozy side.
It’s not just delicious—it’s a nutritious choice that elevates everyday meals with its unique flavor profile. We’ll show you how easy it is to bake this crowd-pleaser at home, so you can enjoy its wholesome goodness anytime.
Ingredients
In our Rye Dill Bread recipe, we gather simple, wholesome ingredients that capture the hearty essence of this Eastern European classic. We’ve organized them below in the order they are used, from dry basics to flavorful additions, ensuring you can follow along seamlessly for a successful bake.
Dry Ingredients
- 2 cups rye flour: We start with this key component for its nutty flavor and dense texture, sifted to remove any lumps.
- 1 ½ cups all-purpose flour: Added next for structure, ensuring the bread rises properly without becoming too heavy.
- 1 tablespoon active dry yeast: Essential for fermentation; proof it in warm water first to activate its rising power.
- 1 teaspoon salt: Provides balance; use fine sea salt for even distribution.
Wet Ingredients
- 1 ¼ cups warm water (around 110°F): Used to dissolve the yeast; temperature is crucial—too hot and it kills the yeast, too cool and it won’t activate.
- 2 tablespoons olive oil: Incorporated for moisture and a subtle richness that enhances the bread’s shelf life.
- 1 tablespoon honey: Sweetens the dough mildly, helping with yeast activity and complementing the dill’s herbal notes.
Flavor Enhancers
- 2 tablespoons fresh dill, chopped: Our signature herb, added for its vibrant, aromatic punch; if using dried dill, reduce to 1 tablespoon.
- 1 teaspoon caraway seeds (optional): For an authentic twist, these add a slight earthiness that pairs well with rye.
This selection not only delivers the nutritional benefits highlighted earlier—such as fiber from rye flour and antioxidants from dill—but also makes the bread versatile for sandwiches or as a side. Gather these, and we’re ready to move to the preparation steps.
Tools and Equipment
To seamlessly transition from preparing our ingredients to baking the hearty Rye Dill Bread, we need a selection of essential tools and equipment. These items ensure that our process is efficient, precise, and yields the best texture and flavor in every loaf.
Here is a curated list of the key tools, organized by their use in the recipe sequence:
- Large mixing bowl: We use this to combine dry ingredients like rye flour and yeast, providing ample space for even mixing and dough development.
- Measuring cups and spoons: Accurate measurements are crucial for our Rye Dill Bread; use a set of dry measuring cups for flours and liquid measuring cups for water and oil to avoid inconsistencies.
- Whisk or wooden spoon: Ideal for stirring the wet and dry components together, this tool helps activate the yeast and incorporate flavors like fresh dill smoothly.
- Dough scraper or spatula: We rely on this for scraping down the sides of the bowl and handling sticky rye dough, making kneading and shaping easier.
- Loaf pan (9×5 inches): This essential baking vessel gives our Rye Dill Bread its classic shape and even rise, promoting a golden crust while retaining moisture.
- Oven thermometer: To guarantee perfect fermentation and baking, we recommend this for monitoring oven temperature, as rye bread benefits from consistent heat.
- Kitchen scale: For precise weighing of ingredients such as flour, which can vary by packing; this tool enhances the reliability of our recipe outcomes.
| Tool | Recommended Specification | Why It’s Important |
|---|---|---|
| Measuring cups | Set with 1-cup, ½-cup, etc. | Ensures accurate volume for liquids and dry goods to maintain bread’s texture. |
| Loaf pan | 9×5 inches, non-stick | Provides the ideal size for even baking and a professional loaf shape. |
| Kitchen scale | Digital, up to 5 kg | Offers precision in weighing, reducing errors in flour measurement for consistent results. |
Instructions
We guide you through the straightforward steps to create our hearty Rye Dill Bread, ensuring a perfect balance of nutty rye flavor and fresh dill aroma in every loaf. With precise techniques, we help you achieve a golden crust and tender crumb that elevates your homemade baking.
Prepare the Ingredients
Before we begin, we gather and measure all ingredients to streamline the process. Start by measuring 2 cups of rye flour for its nutty base, 1 ½ cups of all-purpose flour for structure, and 1 tablespoon of active dry yeast for reliable fermentation. Chop 1 tablespoon of fresh dill finely to release its vibrant, herbaceous essence that will infuse the bread.
Next, prepare the wet components: warm 1 ¼ cups of water to about 110°F for optimal yeast activation, measure 2 tablespoons of olive oil for moisture, and 1 tablespoon of honey for subtle sweetness. If using, add 1 teaspoon of caraway seeds for an optional earthy crunch. This preparation ensures our Rye Dill Bread dough comes together smoothly and efficiently.
Mix the Dough
We start by activating the yeast to guarantee a good rise. In a large mixing bowl, dissolve 1 tablespoon of active dry yeast in 1 ¼ cups of warm water and let it sit for 5 minutes until it foams, indicating it’s ready.
Add 2 tablespoons of olive oil, 1 tablespoon of honey, and the chopped 1 tablespoon of fresh dill to the yeast mixture, stirring with a wooden spoon until combined. Gradually incorporate the dry ingredients—2 cups of rye flour, 1 ½ cups of all-purpose flour, and 1 teaspoon of caraway seeds if desired—mixing until a sticky dough forms. Knead the dough on a lightly floured surface for 8-10 minutes until it becomes smooth and elastic, allowing the dill’s fresh aroma to blend seamlessly with the rye’s hearty notes.
First Rise
Once the dough is mixed, we let it rest to develop flavor and texture. Transfer the dough to a lightly oiled bowl, turning it to coat all sides, then cover with a clean kitchen towel.
Place the bowl in a warm, draft-free spot and let the dough rise for about 1 hour or until it doubles in size. During this time, the yeast works its magic, filling the air with the enticing scent of rising Rye Dill Bread and creating a soft, airy interior that enhances its wholesome appeal.
Shape the Loaf
After the first rise, we punch down the dough to release gases and prepare it for shaping. Gently punch the center of the risen dough to deflate it, then turn it out onto a lightly floured surface.
Knead briefly for 1-2 minutes to redistribute the dill and rye flavors. Shape the dough into a loaf by rolling it into a 9-inch log and placing it seam-side down in a greased 9×5 inch loaf pan. This step ensures our Rye Dill Bread achieves an even rise and a crusty exterior that contrasts beautifully with the soft, dill-infused crumb inside.
Second Rise
For the second rise, we allow the shaped dough to proof further for optimal volume. Cover the loaf pan loosely with a kitchen towel and set it in a warm area.
Let it rise for 30-45 minutes or until the dough crowns above the pan’s edge, puffing up to create a light, fluffy texture. This final proofing step intensifies the bread’s fresh dill aroma and rye depth, setting the stage for a perfectly baked result.
Bake the Bread
Now we bake our Rye Dill Bread to golden perfection. Preheat your oven to 375°F and position the rack in the center for even heat distribution.
Place the risen loaf in the oven and bake for 30-35 minutes, or until the crust turns a deep golden brown and an internal thermometer reads 190°F when inserted into the center. As it bakes, the kitchen fills with the irresistible scent of fresh dill and toasted rye, yielding a loaf that’s crisp outside and moist inside, ready to slice and enjoy.
Make-Ahead Instructions
One of the beauties of our Rye Dill Bread is its flexibility for busy schedules. We often prepare the dough in advance to enjoy fresh-baked loaves with minimal effort on the day of serving. Below, we outline step-by-step methods to make this hearty bread ahead of time, ensuring you capture its nutty rye flavor and aromatic dill notes without compromising texture or taste.
Preparing the Dough in Advance
To maximize convenience, we recommend making the dough up to 24 hours ahead. This allows for a slow rise in the refrigerator, which enhances the bread’s complex flavors.
- Step 1: After mixing the dough as described in our earlier instructions, cover the bowl tightly with plastic wrap or a damp cloth. We suggest refrigerating it immediately to slow fermentation.
- Step 2: Let the dough chill for 12 to 24 hours. This cold proofing develops deeper, more robust tastes from the rye flour and dill.
- Step 3: When ready to bake, remove the dough from the refrigerator and let it sit at room temperature for about 1 hour. This warms it up for easier shaping and a better rise.
Freezing the Dough or Baked Loaf
Freezing is another excellent option for extending the bread’s shelf life while preserving its moist interior and golden crust. Here’s how we do it:
- For unbaked dough: Shape the dough into a loaf after the first rise, as per our baking steps. Wrap it securely in plastic wrap, then aluminum foil, and freeze for up to 1 month. To bake, thaw in the refrigerator overnight, let it rise at room temperature for 1 to 2 hours, then proceed with baking as instructed.
- For baked loaves: Once the bread has cooled completely, slice it if desired for easier use. Wrap the whole loaf or slices in plastic wrap and aluminum foil, then freeze for up to 3 months. To serve, thaw at room temperature for 2 to 3 hours or toast slices directly from frozen for a quick, crispy revival of its dill-infused aroma.
Storage Tips and Thawing Guidelines
Proper storage is key to maintaining the bread’s wholesome qualities, like the fiber from rye flour and antioxidants from dill. We recommend the following for optimal results:
| Storage Method | Duration | Thawing/Baking Instructions |
|---|---|---|
| Refrigerated Dough | Up to 24 hours | Remove from fridge; let sit for 1 hour before shaping and baking. |
| Frozen Dough | Up to 1 month | Thaw in fridge overnight; rise for 1–2 hours at room temperature before baking. |
| Frozen Baked Loaf | Up to 3 months | Thaw at room temperature for 2–3 hours; reheat in a 350°F oven for 10 minutes to restore freshness. |
By following these make-ahead strategies, we ensure your Rye Dill Bread remains a versatile staple, ready to enhance sandwiches or sides with its signature hearty appeal.
Conclusion
We’ve truly enjoyed guiding you through this Rye Dill Bread adventure
It’s a rewarding bake that brings hearty flavors and traditions to our tables
Let’s cherish the fresh aroma and versatile uses in our daily meals
Baking it at home keeps us connected to wholesome eating and simple joys
Frequently Asked Questions
What is Rye Dill Bread?
Rye Dill Bread is a hearty, flavorful loaf rooted in Eastern European traditions, combining rye flour and fresh dill for a unique taste. It’s versatile for sandwiches or as a side dish, offering nutritional benefits like fiber from rye and antioxidants from dill. This homemade bread brings a wholesome, nutty flavor to your table.
What ingredients are needed for Rye Dill Bread?
Key ingredients include 2 cups rye flour for nutty flavor, 1.5 cups all-purpose flour for structure, 1 tablespoon active dry yeast for rising, 1.25 cups warm water, 2 tablespoons olive oil, 1 tablespoon honey, fresh dill, and optional caraway seeds. These components create a nutritious, flavorful bread that’s easy to bake at home.
What tools are required to bake Rye Dill Bread?
Essential tools include a large mixing bowl, measuring cups and spoons, a whisk or wooden spoon, a dough scraper or spatula, and a 9×5 inch loaf pan. For precision, use an oven thermometer and kitchen scale to ensure the best texture and flavor in your loaf.
How do I make Rye Dill Bread step by step?
Start by activating the yeast in warm water with honey. Mix dry ingredients (rye flour, all-purpose flour, and dill), then add wet ingredients to form dough. Knead, let rise for about an hour, shape into a loaf, and rise again. Bake at 375°F for 30-40 minutes until golden. Cool before slicing for the perfect result.
Can I prepare Rye Dill Bread in advance?
Yes, prepare the dough ahead and refrigerate for 12-24 hours to enhance flavor. You can also freeze unbaked dough or baked loaves for up to 3 months. Thaw in the fridge overnight and bake as needed, making it ideal for busy schedules while keeping its hearty appeal.
What are the health benefits of Rye Dill Bread?
Rye Dill Bread provides fiber from rye flour, aiding digestion, and antioxidants from dill that support overall health. It’s a nutritious alternative to white bread, offering sustained energy and a hearty taste, making it a wholesome choice for everyday meals.
How should I store homemade Rye Dill Bread?
Store cooled bread in an airtight container at room temperature for up to 3 days, or refrigerate for up to a week to maintain freshness. For longer storage, freeze slices or the whole loaf; thaw at room temperature or toast directly to preserve its moist interior and flavor.