
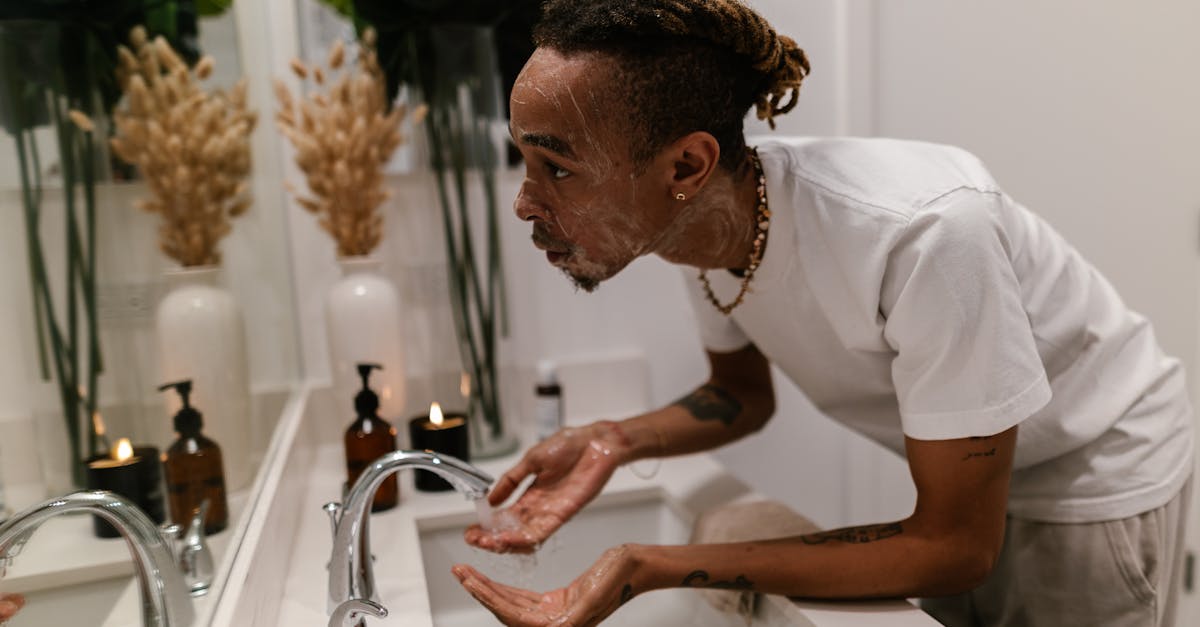
Dive into the world of natural skincare with our homemade facial soap recipe! We’re thrilled to share a simple yet effective way to craft a gentle cleanser tailored for your face. Unlike store-bought options often packed with harsh chemicals, our recipe uses nourishing ingredients that pamper your skin while cleansing away impurities.
Originating from age-old traditions of soap-making, facial soaps have evolved into customizable blends that cater to specific skin needs. Whether you’ve got sensitive skin or you’re battling acne, we’ll guide you through creating a bar that’s just right for you. It’s all about harnessing nature’s best to keep your complexion glowing!
Benefits of Homemade Facial Soap
Dive into the world of homemade facial soap with us as we uncover the incredible perks of crafting your own natural skincare solution. Unlike commercial products loaded with harsh chemicals, our custom facial soap recipe offers a gentle yet effective cleanse that nurtures your skin. Let’s explore why making your own facial cleanser at home is a game-changer for achieving a radiant complexion.
Gentle on Skin with Natural Ingredients
We love how homemade facial soap allows us to control every ingredient ensuring only the most skin-loving elements touch our face. By using nourishing components like shea butter, coconut oil, and essential oils, we create a soap that soothes even the most sensitive skin. Say goodbye to the irritation caused by synthetic additives in store-bought soaps. Instead embrace a cleanser that hydrates and protects leaving your skin feeling soft and supple after every wash.
Customizable for Your Skin Type
One of the standout benefits of our facial soap recipe is the ability to tailor it to our unique skin needs. Whether we battle acne-prone skin or struggle with dryness, we can adjust the formula. Add tea tree oil for its antibacterial properties to fight breakouts or infuse lavender oil for a calming effect on irritated skin. This personalized approach ensures our soap works in harmony with our complexion delivering targeted care no commercial product can match.
Cost-Effective and Eco-Friendly
Crafting our own homemade facial soap isn’t just good for our skin—it’s also kind to our wallet and the planet. Let’s break down the savings and environmental impact with a quick look at the numbers.
| Aspect | Homemade Facial Soap | Commercial Soap |
|---|---|---|
| Cost per Bar | $1.50 (approx.) | $5.00 – $10.00 |
| Packaging Waste | Minimal (reusable molds) | Plastic wrappers or boxes |
| Chemical Load | None (natural ingredients) | High (synthetic additives) |
By making our own facial cleanser, we reduce packaging waste and avoid harmful chemicals that can harm the environment. Plus the cost savings over time are undeniable allowing us to invest in quality ingredients without breaking the bank.
Free from Harsh Chemicals
We can’t stress enough how liberating it is to ditch the harsh detergents and artificial fragrances found in many commercial soaps. Our homemade facial soap recipe skips sulfates and parabens that strip our skin of natural oils. Instead we nourish with organic components that cleanse without disrupting our skin’s delicate balance. The result? A healthy glow that speaks to the power of nature-based skincare.
A Therapeutic Crafting Experience
Beyond the physical benefits creating our own facial soap is a deeply rewarding process. Mixing ingredients pouring into molds and watching our creation come to life offers a sense of accomplishment. It’s a mindful activity that connects us to the art of soap-making—a craft rooted in history. As we stir in essential oils the calming aromas fill the air turning our kitchen into a mini spa. This hands-on journey enhances our appreciation for natural beauty and self-care.
Ingredients for Facial Soap Recipe
Let’s dive into the heart of our homemade facial soap recipe by exploring the essential components that make it a gentle and nourishing cleanser. Crafting this soap with natural ingredients ensures a soothing experience for all skin types.
Base Ingredients
These are the foundational elements of our facial soap recipe that create its structure and moisturizing properties. We’ve chosen each ingredient for its ability to cleanse without stripping your skin of natural oils.
- Lye (Sodium Hydroxide) – 4.2 oz (wear gloves and goggles when handling; essential for saponification)
- Distilled Water – 10.9 oz (ensures purity and prevents impurities in the final product)
- Coconut Oil – 8 oz (melted; adds cleansing power and a creamy lather)
- Shea Butter – 6 oz (melted; deeply moisturizes and soothes sensitive skin)
- Olive Oil – 10 oz (provides a gentle and conditioning base)
- Castor Oil – 2 oz (enhances lather and adds a silky texture)
Safety Note: Always handle lye with extreme caution. Mix it with water in a well-ventilated area and never the other way around to avoid dangerous reactions.
Essential Oils and Additives
To customize our facial soap recipe for specific skin needs and to add a touch of therapeutic aroma, we incorporate essential oils and other natural additives. These ingredients elevate the soap’s benefits and create a luxurious cleansing ritual.
- Lavender Essential Oil – 1 oz (calms the skin and mind with its soothing scent)
- Tea Tree Essential Oil – 0.5 oz (fights acne-causing bacteria and refreshes the skin)
- Dried Calendula Petals – 2 tbsp (optional; adds a gentle exfoliation and anti-inflammatory properties)
- Oatmeal – 1 tbsp (finely ground; soothes irritation and provides mild exfoliation)
| Ingredient | Quantity | Benefit |
|---|---|---|
| Lavender Essential Oil | 1 oz | Calms skin and reduces stress |
| Tea Tree Essential Oil | 0.5 oz | Combats acne and refreshes skin |
| Dried Calendula Petals | 2 tbsp | Anti-inflammatory and exfoliating |
| Oatmeal | 1 tbsp | Soothes irritation and gently exfoliates |
Feel free to tweak these additives based on your skin’s unique needs. Whether you’re targeting acne with tea tree or seeking a calming effect with lavender, these elements allow us to personalize our homemade facial soap for a truly bespoke skincare experience.
Equipment Needed
To craft our homemade facial soap, we need the right tools and safety gear to ensure a smooth and secure soap-making process. Let’s dive into the essential equipment that will help us create a gentle cleanser tailored for our skin’s needs.
Safety Gear
Safety is our top priority when making facial soap since we’re working with caustic lye which can be hazardous if mishandled. Equip ourselves with the following protective items to stay safe during the process:
- Safety Goggles: Protect our eyes from accidental splashes of lye or raw soap mixture.
- Rubber Gloves: Shield our hands from irritation or burns caused by lye and other ingredients.
- Long-Sleeved Shirt and Pants: Cover our skin to minimize exposure to potentially harmful substances.
- Closed-Toe Shoes: Keep our feet safe from spills or drips.
- Face Mask or Respirator: Prevent inhalation of lye fumes especially when mixing with water as it can release strong vapors.
- Ventilated Workspace: Ensure we’re working in a well-ventilated area to avoid buildup of fumes.
Remember the wise saying, “Safety first is safety always.” Let’s gear up properly to enjoy a worry-free soap-making experience while protecting ourselves from any risks.
Soap-Making Tools
Having the right tools makes crafting our custom facial soap efficient and enjoyable. Below is a list of essential equipment we’ll need to create a nourishing cleanser that pampers our skin:
- Digital Scale: Measure ingredients like lye and oils with precision for accurate results. Aim for measurements to the nearest gram or 0.1 ounce.
- Stick Blender: Blend the lye solution and oils to reach trace—a pudding-like consistency crucial for soap formation.
- Heat-Resistant Pitcher or Container: Mix lye and water in a container that can withstand high temperatures as the reaction generates heat.
- Mixing Bowls: Use stainless steel or heat-safe plastic bowls for combining oils and other ingredients.
- Thermometer: Monitor temperatures of the lye solution and oils to ensure they’re within the ideal range of 100-110°F (38-43°C) when combined.
- Soap Mold: Shape our facial soap using a silicone or plastic mold that holds about 2-3 pounds of soap batter for small batches.
- Parchment Paper: Line the mold for easy soap removal once it’s set.
- Spatula: Scrape every bit of soap batter from bowls to avoid waste.
- Knife or Soap Cutter: Cut the soap into bars after it has hardened for 24-48 hours.
- Measuring Spoons and Cups: Portion out smaller quantities of additives like essential oils or colorants.
| Tool | Purpose | Specific Notes |
|---|---|---|
| Digital Scale | Precise ingredient measurement | Accuracy to 0.1 oz or 1 gram |
| Stick Blender | Blend to trace consistency | Essential for emulsification |
| Thermometer | Monitor lye and oil temperatures | Ideal range: 100-110°F (38-43°C) |
| Soap Mold | Shape the final product | Suitable for 2-3 lb batches |
Safety Precautions
When crafting our homemade facial soap, safety is paramount. Working with ingredients like lye (sodium hydroxide) can be hazardous if not handled correctly. We must prioritize protective measures to ensure a secure and enjoyable soap-making experience. Let’s dive into the critical safety steps and guidelines to follow while creating our natural skincare masterpiece.
Handling Lye with Care
Lye is a caustic substance that can cause severe burns if it comes into contact with skin or eyes. We always wear safety goggles and rubber gloves when working with it. Ensure that our workspace is well-ventilated to avoid inhaling fumes. Never mix lye with water in a metal container as it can react dangerously. Instead, use a heat-resistant plastic or glass container. Remember our golden rule: always add lye to water—never the other way around—to prevent violent reactions. Keep a bottle of vinegar nearby as a quick neutralizer in case of accidental spills on skin.
Protective Gear Checklist
To safeguard ourselves during the soap-making process, we equip ourselves with essential safety gear. Here’s what we need:
- Safety Goggles: Protects our eyes from splashes of lye or raw soap mixture.
- Rubber Gloves: Shields our hands from caustic ingredients.
- Long-Sleeved Clothing: Covers our arms to minimize skin exposure.
- Closed-Toe Shoes: Prevents accidental spills from reaching our feet.
- Face Mask: Reduces inhalation of lye fumes especially in poorly ventilated areas.
Safe Workspace Setup
We set up our soap-making area in a clutter-free and well-ventilated space away from children and pets. A kitchen with an open window or an exhaust fan works perfectly. Cover work surfaces with newspaper or a plastic sheet for easy cleanup. Keep all tools and ingredients labeled and within reach to avoid confusion. We also ensure that distractions are minimized—soap-making demands our full attention to prevent mishaps.
Emergency Preparedness
Accidents can happen even with the best precautions. We prepare by keeping a first aid kit handy with burn ointment and bandages. Know the location of the nearest water source for rinsing off any accidental exposure. In case of lye contact with skin, rinse immediately with cool water for at least 15 minutes and apply vinegar to neutralize. For eye exposure, flush with water and seek medical attention right away. As we always say, “Better safe than sorry!”—being prepared keeps our facial soap recipe journey stress-free.
Storage and Disposal Guidelines
Store lye in a clearly labeled airtight container out of reach of children and pets. Never reuse containers that held lye for food or drink purposes. When disposing of leftover lye solution or soap batter, we dilute it with plenty of water and pour it down the drain only if local regulations permit. Otherwise, consult local waste management for proper disposal methods. Keeping our environment safe is just as important as protecting ourselves during this natural skincare crafting process.
Safety Timing Table
To help us manage critical safety checks, here’s a quick reference table for key timing considerations:
| Safety Step | Recommended Timing | Notes |
|---|---|---|
| Wear Protective Gear | Before starting any mixing | Essential for handling lye and oils |
| Ventilate Workspace | Before mixing lye with water | Prevents fume buildup |
| Rinse Spills Immediately | Within seconds of contact | Reduces risk of burns |
| Neutralize Lye Spills with Vinegar | After rinsing with water | Helps stop caustic reaction |
| Seek Medical Help for Eye Contact | Immediately after flushing | Do not delay for severe exposure |
By adhering to these Safety Precautions, we ensure that our adventure into crafting homemade facial soap remains a rewarding and hazard-free experience. Let’s keep safety at the forefront as we create a gentle cleanser tailored to our unique skin needs.
Instructions for Making Facial Soap
Let’s dive into the step-by-step process of crafting our very own homemade facial soap. With careful attention to detail and safety, we’ll create a gentle cleanser that nourishes and pampers our skin.
Prep Stage
Before we start mixing ingredients for our facial soap recipe, we need to prepare our workspace and gear up for safety. Set up in a well-ventilated area and lay down newspaper or a protective mat to catch any spills. Wear your safety goggles, rubber gloves, and long-sleeved clothing to protect yourself from lye splashes. Gather all tools including a digital scale, stick blender, thermometer, mixing bowls, and soap mold. Weigh out the following ingredients precisely as per our recipe:
- Lye (sodium hydroxide): 4.2 oz
- Distilled water: 10.9 oz
- Coconut oil: 8 oz
- Shea butter: 4 oz
- Olive oil: 12 oz
- Castor oil: 2 oz
Double-check measurements using a digital scale for accuracy. Keep everything organized and within reach to ensure a smooth soap-making process.
Mixing the Lye Solution
Now let’s tackle the critical step of preparing the lye solution for our facial soap. Always add lye to water and never the other way around to prevent dangerous reactions. In a well-ventilated space, slowly pour the lye into the distilled water in a heat-safe container. Stir gently with a stainless steel spoon until fully dissolved. You’ll notice the mixture heating up—this is normal. Set it aside to cool to around 100-110°F. Monitor the temperature with a thermometer and avoid inhaling the fumes by keeping your face away from the container. Safety is paramount here so maintain your protective gear throughout this step.
Combining Oils and Lye
With the lye solution cooling, let’s move to blending our oils for the facial soap. In a large heat-safe bowl or pot, combine the coconut oil, shea butter, olive oil, and castor oil. Heat them gently over low heat until melted and mixed, aiming for a temperature of 100-110°F to match the lye solution. Once both the oils and lye solution are at similar temperatures, slowly pour the lye solution into the oils while blending with a stick blender. Blend in short bursts until you reach a light trace—a thin pudding-like consistency. Keep blending until you achieve a medium trace where the mixture holds its shape slightly. This step is crucial for ensuring our soap base forms properly.
Adding Essential Oils and Additives
At this stage, we can personalize our homemade facial soap with essential oils and additives for added skin benefits and aroma. Add 1 oz of lavender essential oil for a calming effect or 0.5 oz of tea tree essential oil for acne-prone skin. For a touch of exfoliation, mix in 1 tablespoon of finely ground oatmeal or dried calendula petals. Blend these into the soap batter at medium trace using the stick blender until fully incorporated. Work quickly as the mixture will start to thicken. These additions transform our soap into a luxurious cleanser tailored to our skin’s needs.
Pouring into Molds
Once our facial soap batter is ready, it’s time to pour it into the mold. Line your soap mold with parchment paper if it’s not silicone for easy removal later. Carefully pour the batter into the mold, tapping gently to release any air bubbles. Smooth the top with a spatula for a polished look. Cover the mold with a piece of cardboard and wrap it in a towel. Place it in a safe spot away from disturbances to start the saponification process. The soap will generate heat as it hardens so avoid peeking for at least 24-48 hours. This step sets the foundation for our beautifully crafted facial soap.
Curing Process
The final stage of our facial soap recipe is the curing process which transforms our soap into a gentle and long-lasting bar. After 24-48 hours, unmold the soap and cut it into bars if using a loaf mold. Place the bars on a drying rack or parchment paper in a well-ventilated area. Allow them to cure for 4-6 weeks, turning occasionally to ensure even drying. During this time, the soap hardens and excess water evaporates resulting in a milder and more skin-friendly cleanser. The wait is worth it as we’ll end up with a batch of homemade facial soap that feels silky on the skin and smells divine with every use.
Tips for Customization
Crafting a homemade facial soap allows us to tailor the recipe to suit specific skin needs and personal preferences. Whether we’re addressing sensitive skin, combating acne, or simply indulging in a favorite scent, customization is the heart of this natural skincare journey. Let’s explore how we can modify our facial soap recipe with targeted ingredients and creative touches to make it uniquely ours.
Adjusting for Skin Types
Different skin types require distinct care and we can tweak our facial soap to match these needs effortlessly. Here’s how we can adapt the recipe:
- Dry Skin: Boost moisturizing properties by increasing the amount of shea butter or adding a touch of avocado oil (about 1-2 ounces per 32-ounce batch) for extra hydration. These ingredients create a creamy lather that soothes and nourishes.
- Oily Skin: Incorporate activated charcoal (1 teaspoon per pound of soap) to detoxify and absorb excess oil. Pair it with a few drops of tea tree essential oil for its antibacterial benefits.
- Sensitive Skin: Stick to gentle additives like colloidal oatmeal (1 tablespoon per pound of soap) to calm irritation. Avoid strong fragrances and opt for unscented or lightly scented options with lavender essential oil.
- Combination Skin: Balance cleansing and hydration by blending kaolin clay (1 teaspoon per pound) for gentle detoxification with a small amount of sweet almond oil for moisture.
Experimenting with these adjustments helps us create a custom facial soap that feels just right for our skin.
Enhancing with Essential Oils
Essential oils not only add delightful aromas but also bring therapeutic benefits to our homemade facial soap. We can mix and match to craft a sensory experience while addressing skin concerns. Here’s a quick guide to popular choices:
| Essential Oil | Benefit | Recommended Amount (per pound of soap) |
|---|---|---|
| Lavender | Calming and soothing | 0.7 ounces |
| Tea Tree | Antibacterial and acne-fighting | 0.5 ounces |
| Peppermint | Refreshing and cooling | 0.5 ounces |
| Rosemary | Clarifying and stimulating | 0.6 ounces |
Always blend essential oils at trace (when the soap batter thickens) to preserve their properties. We recommend testing small batches to ensure the scent strength suits our preference. As a pro tip, combine complementary oils like lavender and rosemary for a balanced floral-herbal aroma that elevates our natural skincare routine.
Adding Natural Colorants and Exfoliants
For a visually stunning and functional facial soap, we can incorporate natural colorants and exfoliants. These additions make each bar a work of art while enhancing the cleansing experience. Consider these options:
- Natural Colorants: Use spirulina powder for a soft green hue or turmeric powder for a warm golden tone. Start with 1/2 teaspoon per pound of soap and adjust for desired intensity.
- Exfoliants: Add gentle scrubbers like ground oatmeal or poppy seeds (1-2 teaspoons per pound) for mild exfoliation that’s safe for facial use. These ingredients slough off dead skin without irritation.
Mix these at trace to ensure even distribution throughout the soap batter. We love how a swirl of color or a sprinkle of exfoliant transforms a simple bar into a luxurious treat for both skin and eyes.
Personalizing Scents and Textures
Beyond essential oils, we can play with other elements to personalize the scent and feel of our homemade facial soap. Infusing oils with dried herbs like calendula or chamomile before soap-making imparts subtle fragrances and skin-soothing properties. Simply steep 1-2 tablespoons of dried herbs in the base oils for 4-6 weeks or use a quick heat infusion method over low heat for 1-2 hours.
For texture, consider superfatting—a technique where we add extra oils (5-8% of total oil weight) after trace to create a silkier feel. This enhances the moisturizing quality of our facial soap recipe making it even gentler on the skin.
Experimenting with Shapes and Designs
Finally, let’s have fun with the aesthetics of our custom facial soap by experimenting with molds and designs. Use silicone molds in unique shapes like hearts or flowers to make each bar a visual delight. For a rustic look, line a loaf mold with parchment paper and cut the soap into chunky bars after curing.
We can also try layering techniques or swirling colors for artistic effects. Pour half the batter tinted with a natural colorant into the mold then swirl in the remaining uncolored batter for a marbled finish. These creative touches make our homemade facial soap not just a skincare product but a personal statement of natural beauty and self-care.
Storing Your Facial Soap
After crafting our homemade facial soap, ensuring proper storage is crucial to maintain its quality and extend its shelf life. We’ve put so much care into creating a gentle cleanser with natural ingredients like shea butter and essential oils, and now it’s time to protect that effort. Proper storage prevents premature degradation, keeps the soap’s moisturizing properties intact, and ensures it remains a luxurious treat for our skin. Let’s dive into the best practices for storing our facial soap to keep it fresh and effective for every use.
Best Conditions for Storage
To preserve the integrity of our homemade facial soap, we need to store it in conditions that minimize exposure to elements that can break down its natural components. Keep the soap in a cool, dry place away from direct sunlight and humidity. Excessive heat can cause the soap to soften or “sweat,” while moisture can lead to a soggy texture and bacterial growth. A cupboard or shelf in a bedroom or bathroom with good ventilation works perfectly. Avoid storing near windows or in damp areas like near a shower without proper coverage.
We also recommend wrapping each bar in breathable material like wax paper or parchment paper to protect it from dust while allowing air circulation. This prevents the soap from becoming sticky or losing its delightful scent from essential oils like lavender or tea tree. If you’ve added natural colorants or exfoliants, proper storage ensures they don’t fade or degrade over time.
Containers and Packaging Ideas
Choosing the right container or packaging is key to safeguarding our facial soap while adding a touch of personal style. Here are some ideas we love for storing our handmade creations:
- Soap Dishes with Drainage: Opt for a slotted or perforated soap dish to keep bars elevated and dry between uses. This prevents water pooling and extends the life of each bar.
- Airtight Containers: For long-term storage of unused bars, use airtight glass or plastic containers to shield them from humidity. Line the container with parchment paper for extra protection.
- Decorative Tins or Boxes: Store cured bars in metal tins or wooden boxes for a charming, eco-friendly option. Ensure the container allows some airflow to avoid trapping moisture.
- Labeled Bags: If gifting or storing multiple batches, place wrapped bars in breathable cotton or muslin bags with labels noting the skin type (like dry skin or oily skin) or added essential oils. This keeps our custom facial soaps organized and ready to use or share.
Remember to check stored soaps periodically for any signs of rancidity or mold, especially if using natural additives like avocado oil which can spoil over time. As a rule of thumb, “Store smart to keep the art” of our soap-making alive in every bar!
Shelf Life and When to Discard
Understanding the shelf life of our homemade facial soap helps us use it at its peak while avoiding potential skin irritations from spoiled ingredients. Typically, a well-made and properly stored facial soap can last between 6 to 12 months. Soaps with high amounts of nourishing oils like olive oil or shea butter may have a shorter shelf life due to the risk of rancidity, while those with minimal additives can last longer.
Here’s a quick guide to help us monitor the shelf life based on ingredients:
| Ingredient/Additive | Approximate Shelf Life Impact | Storage Tip |
|---|---|---|
| High Olive Oil Content | 6-8 months | Store in a cool dark place |
| Shea Butter or Avocado Oil | 6-9 months | Check for rancid smell periodically |
| Essential Oils (like Lavender) | 8-12 months | Avoid direct sunlight to preserve scent |
| Activated Charcoal or Clays | 9-12 months | Keep dry to maintain texture |
Discard any bar that shows signs of spoilage such as an off or rancid odor, visible mold, or a slimy texture. If the soap develops orange spots—often a sign of rancid oils—it’s time to toss it. We prioritize safety and quality in our natural skincare routine, so using a compromised bar isn’t worth the risk. Always label batches with the date of creation to track freshness and ensure we’re pampering our skin with the best homemade facial soap possible.
Conclusion
We’re thrilled to share this journey of crafting homemade facial soap with you. It’s a rewarding process that lets us take control of our skincare while embracing natural beauty.
By making our own soap, we’re not just creating a product we’re building a connection to self-care and sustainability. Let’s continue experimenting with new ingredients and designs to keep our skincare routine fresh and personalized.
Join us in this creative adventure and share your unique soap-making stories in the comments below!
Frequently Asked Questions
What are the benefits of homemade facial soap?
Homemade facial soap offers a gentle, natural alternative to commercial soaps, avoiding harsh chemicals that can irritate skin. It’s customizable to suit specific needs, like adding tea tree oil for acne or shea butter for hydration. Additionally, it’s cost-effective, eco-friendly by reducing packaging waste, and fosters a deeper appreciation for natural skincare and self-care.
What ingredients are essential for homemade facial soap?
Key ingredients include lye, distilled water, coconut oil, shea butter, olive oil, and castor oil for cleansing and moisturizing. Optional additives like lavender or tea tree essential oils enhance benefits and scent, allowing personalization for different skin types.
Is it safe to make facial soap at home?
Yes, it’s safe if proper precautions are followed. Always wear safety gear like goggles and gloves when handling lye, work in a well-ventilated area, and prepare for emergencies. Following a detailed guide and safety checklist ensures a secure soap-making process.
How can I customize homemade facial soap for my skin type?
You can tailor your soap by adding ingredients like avocado oil for dry skin or activated charcoal for oily skin. Essential oils such as lavender for calming or tea tree for acne-fighting properties can also be included, along with natural colorants or exfoliants for texture.
How long does homemade facial soap last?
The shelf life depends on ingredients, but it typically lasts 6-12 months if stored properly in a cool, dry place away from sunlight. Label batches with creation dates and discard bars showing signs of spoilage like rancid smells or mold.
What equipment do I need for making facial soap?
Essential tools include a digital scale, stick blender, thermometer, soap mold, and safety gear like goggles and gloves. These help ensure accurate measurements, smooth mixing, and a safe, enjoyable soap-making experience in a well-prepared workspace.
How do I store homemade facial soap to maintain its quality?
Store soap in a cool, dry place away from sunlight and humidity. Wrap bars in breathable materials like paper or use ventilated containers to prevent moisture buildup. Proper storage extends shelf life and keeps the soap gentle and effective.