
We’ve got a treat that’ll make your taste buds dance: our Cherry Nice Cream Recipe, a fresh twist on frozen desserts that’s as easy as it is irresistible. Drawing from simple, wholesome ingredients, it’s our go-to for a guilt-free indulgence that captures summer’s essence in every creamy bite.
Perfect for health-conscious folks, this recipe swaps out heavy creams for frozen fruits, letting us create a velvety delight that’s naturally sweet and packed with nutrients. Whether you’re new to plant-based eats or a pro, we’ll guide you through making this cherry-packed favorite in minutes.
Ingredients
As we dive into creating our Cherry Nice Cream recipe, let’s start with the key ingredients that make this frozen dessert so simple and wholesome. We’ve selected these based on their natural sweetness and nutritional benefits, ensuring a treat that’s both delicious and easy to prepare.
Below, we list the ingredients in the order they’ll be used, with specific measurements and prep notes for accuracy. This setup allows us to blend everything seamlessly for that creamy texture we love.
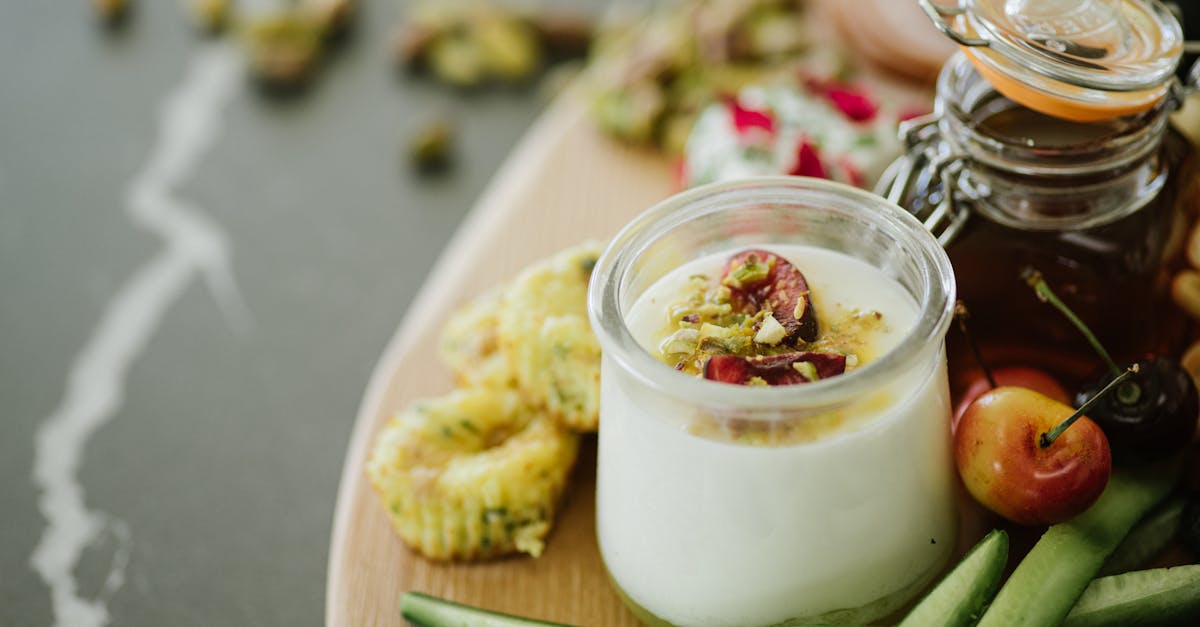
- Frozen cherries: 2 cups (pitted and frozen for at least 4 hours to ensure a rich, tart flavor that forms the base of our Cherry Nice Cream).
- Frozen bananas: 3 medium bananas (sliced and frozen beforehand to provide natural creaminess and sweetness without added sugars).
- Plant-based milk: ¼ cup (such as almond or oat milk, added for blending ease and to achieve the perfect scoopable consistency).
- Maple syrup: 1 tablespoon (optional, for extra sweetness if your cherries aren’t naturally sweet enough—stir in just before blending).
- Vanilla extract: 1 teaspoon (pure extract for a subtle depth of flavor that enhances the overall cherry notes in our Cherry Nice Cream).
These ingredients highlight the nutrient-rich nature of our recipe, using frozen fruits to mimic traditional ice cream while keeping it vegan and guilt-free. Now, we’re ready to move on to the preparation steps in the next section.
Equipment Needed
To prepare our refreshing Cherry Nice Cream, we need a few essential tools that ensure a smooth blending process and help achieve that creamy, frozen texture without any fuss. Let’s outline the key equipment below, focusing on items that make the recipe accessible and efficient.
- High-Speed Blender or Food Processor: This is the star of our setup, as it effortlessly purees the frozen cherries and bananas into a velvety base. We recommend one with at least 1,000 watts for optimal results, preventing any icy chunks in your Cherry Nice Cream.
- Measuring Cups and Spoons: Accuracy is key for our recipe’s balance of flavors, so use these to measure out the 2 cups of frozen cherries and other precise quantities. Opt for a set with clear markings to avoid any guesswork.
- Spatula: A sturdy silicone spatula helps us scrape down the sides of the blender during mixing, ensuring every bit of our frozen fruits blends evenly for that perfect, guilt-free dessert.
- Freezer-Safe Container: Once blended, we’ll transfer the Cherry Nice Cream into this for quick freezing. Choose one with a lid, like a loaf pan or airtight tub, to maintain freshness and prevent freezer burn.
With these tools in hand, we’re all set to move seamlessly from gathering ingredients to blending our delightful treat.
Instructions
Now that we have gathered our wholesome ingredients and essential tools, let’s guide you through creating our irresistible Cherry Nice Cream with straightforward steps that yield a creamy, naturally sweet delight bursting with cherry flavor.
Prepare the Ingredients
Before blending, we ensure everything is prepped for optimal results. Start by measuring out 2 cups of frozen cherries and 3 medium frozen bananas to maintain their icy texture for a velvety base—freeze bananas in advance if they’re not already. Pour ¼ cup of plant-based milk into a small bowl, and if desired, add 1 tablespoon of maple syrup for extra sweetness and 1 teaspoon of vanilla extract to enhance the fruity aroma. Arrange these items near your blender to streamline the process, allowing us to capture the fresh, vibrant essence of summer cherries in every scoop.
Blend the Nice Cream
With ingredients ready, we blend to achieve that perfect, scoopable consistency. Add the frozen cherries and bananas to the blender or food processor first, then pour in the plant-based milk, maple syrup if using, and vanilla extract. Pulse on high speed for 1-2 minutes, stopping to scrape down the sides with a spatula as needed, until the mixture transforms into a smooth, fluffy cream—aim for a texture reminiscent of soft-serve ice cream, with the tart burst of cherries balanced by the bananas’ natural creaminess. Be careful not to over-blend; this keeps our Cherry Nice Cream light and airy, preventing it from becoming too liquid.
Serve
To serve our Cherry Nice Cream at its best, spoon the freshly blended mixture into bowls or cones immediately for a cool, refreshing treat that highlights its vivid red hue and silky mouthfeel. If storing, transfer to a freezer-safe container and freeze for up to 2 hours to firm up, then scoop and garnish with fresh cherries or a sprinkle of nuts for added crunch—we recommend enjoying within a day to preserve the bright flavors and nutrient-rich goodness.
Make-Ahead and Storage
As we wrap up our Cherry Nice Cream adventure, let’s dive into smart strategies for making this frozen delight ahead of time and storing it to preserve its creamy texture and vibrant cherry flavor. This ensures we can enjoy a quick, guilt-free treat whenever cravings hit.
Make-Ahead Tips
Preparing Cherry Nice Cream in advance keeps things simple and efficient, especially for busy days or gatherings. We recommend these steps to maintain the dessert’s natural sweetness and nutritional benefits:
- Prep Ingredients Early: Freeze your cherries and bananas the night before. For 2 cups of frozen cherries and 3 medium frozen bananas, wash and pit the cherries, then slice the bananas into even pieces before freezing. This step helps achieve that smooth, fluffy consistency without last-minute rush.
- Blend and Freeze in Batches: If serving a crowd, we suggest blending the full recipe as outlined earlier and portioning it into individual servings right away. Use a freezer-safe container to avoid waste and make scooping easier later.
- Enhance Flavors: To boost the cherry essence, add the 1 teaspoon of vanilla extract and optional 1 tablespoon of maple syrup during blending, then freeze immediately for up to 24 hours. This allows flavors to meld, resulting in a more intense, naturally sweet profile.
Storage Guidelines
Proper storage is key to keeping our Cherry Nice Cream tasting fresh and retaining its scoopable texture. Below, we break down the essentials, including how long it lasts and best practices.
| Storage Method | Duration | Key Tips |
|---|---|---|
| Freezer (in an airtight container) | Up to 2 weeks | Store in a shallow, freezer-safe container to minimize ice crystals; cover the surface with parchment paper for added protection against freezer burn, ensuring the vibrant cherry color and creaminess remain intact. |
| Refrigerator (for short-term thawing) | 10–15 minutes before serving | If the Nice Cream has hardened, transfer it to the fridge briefly to soften; avoid longer times to prevent melting and loss of that light, airy feel. |
When it’s time to enjoy, we advise scooping directly from the freezer and garnishing with fresh cherries for an extra burst of summer-fresh flavor. Always use clean utensils to prevent contamination, helping our wholesome treat stay at its best.
Conclusion
We’ve loved sharing this Cherry Nice Cream recipe as a simple way to enjoy summer’s best flavors without the guilt. It’s a versatile treat that fits seamlessly into our healthy routines, offering natural sweetness and nutrients in every scoop.
As we wrap up, we’re confident you’ll find it easy to customize and make your own. Give it a try and let this delightful dessert become a staple in your kitchen—it’s sure to brighten any day!
Frequently Asked Questions
What is Cherry Nice Cream?
Cherry Nice Cream is a simple, frozen dessert made from wholesome ingredients like frozen fruits, perfect for a guilt-free summer treat. It’s a vegan alternative to traditional ice cream, using cherries and bananas for natural sweetness and creaminess, making it ideal for health-conscious folks.
What ingredients are needed for Cherry Nice Cream?
You’ll need 2 cups of frozen cherries, 3 medium frozen bananas, ¼ cup of plant-based milk, 1 tablespoon of optional maple syrup, and 1 teaspoon of vanilla extract. These ingredients provide natural sweetness and nutrients, keeping the recipe vegan and easy to prepare.
Is Cherry Nice Cream recipe vegan?
Yes, it’s completely vegan! It uses only plant-based ingredients like frozen cherries, bananas, plant-based milk, and optional maple syrup, avoiding any animal products. This makes it a healthy, guilt-free option for anyone following a plant-based diet.
How do I make Cherry Nice Cream?
Start by preparing your frozen cherries and bananas. Blend them in a high-speed blender or food processor with plant-based milk, optional maple syrup, and vanilla extract until smooth and fluffy. Serve immediately for the best texture, or freeze for later. The whole process takes just a few minutes.
What equipment do I need for this recipe?
You’ll need a high-speed blender or food processor for blending, measuring cups and spoons for accuracy, a spatula for mixing, and a freezer-safe container for storage. These tools help achieve a creamy texture without much hassle.
How should I store Cherry Nice Cream?
Store it in an airtight, freezer-safe container for up to two weeks. For the best texture, thaw briefly in the refrigerator before serving. Always use clean utensils to maintain quality, and consider making batches ahead for easy access to this refreshing treat.