
We absolutely love chocolate chip sticks for their irresistible mix of gooey chocolate and crisp edges, making them a fun twist on the classic cookie. They’re perfect for quick snacks or sharing with friends, and we’ve perfected this recipe to bring a bit of homemade joy to your kitchen.
Drawing from American baking traditions, our version keeps things simple yet delicious, using everyday ingredients that deliver big flavor. Whether you’re a baking newbie or a pro, you’ll find this treat easy to whip up and utterly satisfying.
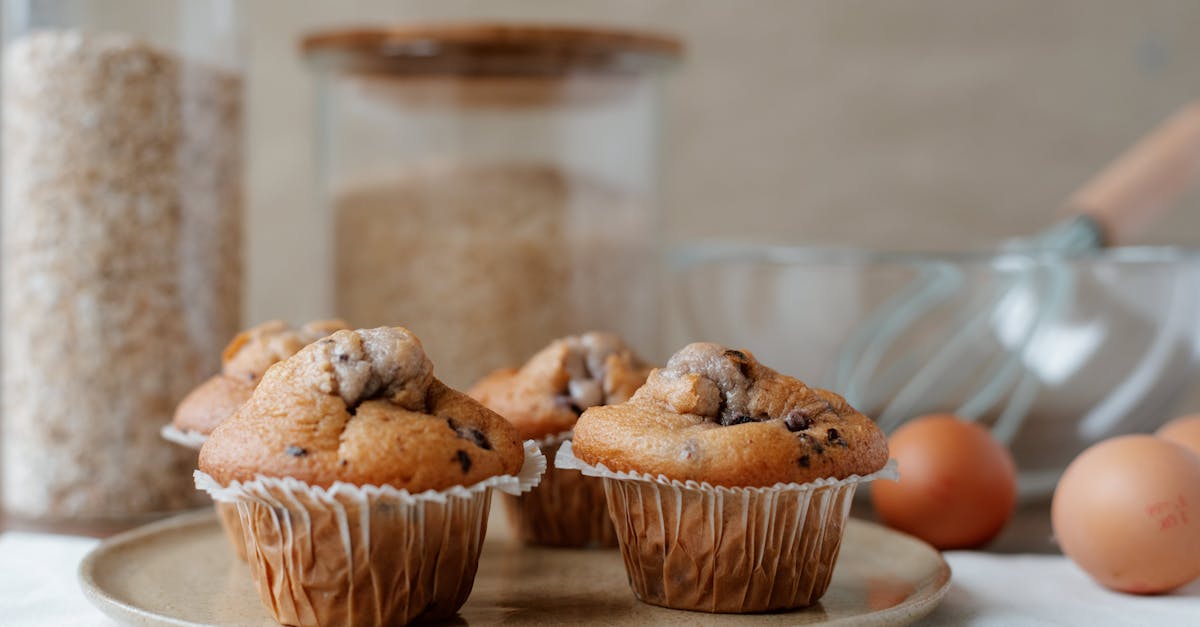
Ingredients
In our perfected recipe for chocolate chip sticks, we focus on simple, everyday ingredients rooted in American baking traditions to deliver that irresistible blend of gooey chocolate and crisp edges. Below, we list the ingredients in the order they are used, with precise measurements and any necessary prep notes for effortless preparation.
- 1 cup unsalted butter, softened: Start by creaming this for a smooth base that ensures tender texture.
- ½ cup granulated sugar: Add next to balance sweetness and contribute to the golden crust.
- ½ cup packed brown sugar: Follow with this for rich, caramel-like depth that enhances the gooey center.
- 2 large eggs: Incorporate these to bind the dough and add moisture for a chewy finish.
- 2 teaspoons vanilla extract: Stir in for a warm, aromatic flavor that elevates the overall taste.
- 2¼ cups all-purpose flour: Sift if possible before adding to prevent clumping and ensure even mixing.
- 1 teaspoon baking soda: Include this leavening agent to help achieve the perfect rise and crisp edges.
- ½ teaspoon salt: Mix in to enhance flavors without overpowering the chocolate notes.
- 2 cups semisweet chocolate chips: Fold these in last for even distribution and those signature melty pockets.
Required Equipment
To prepare our chocolate chip sticks with precision and ease, we rely on essential baking tools that ensure perfect results every time. Building on the ingredients we’ve gathered, let’s outline the key equipment needed, organized by function for straightforward setup.
Basic Mixing Tools
- Mixing bowls: We recommend two medium-sized stainless steel or glass bowls—one for dry ingredients and one for wet—to keep things organized and prevent cross-contamination.
- Measuring cups and spoons: Accurate measurements are crucial for baking success; use a set of dry measuring cups (for flour and sugars) and liquid measuring cups (for extracts and eggs), along with a spoon set for smaller quantities.
Preparation and Baking Essentials
- Electric mixer or whisk: A hand-held electric mixer speeds up creaming butter and sugar, but a sturdy whisk works if you’re aiming for a more hands-on approach.
- Baking sheet: Opt for a standard half-sheet pan (approximately 18×13 inches) lined with parchment paper to achieve those crisp edges without sticking.
- Spatula: A silicone spatula is ideal for folding in chocolate chips gently, ensuring even distribution without deflating the batter.
Additional Tools for Finishing
- Cooling rack: This allows our chocolate chip sticks to cool evenly post-baking, preserving their texture—aim for a wire rack that fits your baking sheet.
- Oven thermometer: For optimal baking, we suggest using one to verify your oven’s temperature accuracy, as even slight variations can affect the final product’s gooey center and crisp exterior.
By having these tools ready, we ensure a seamless transition from mixing to baking, making our chocolate chip sticks recipe accessible and enjoyable for all.
Instructions
Now that we have gathered our ingredients and tools, let’s guide you through creating our irresistible chocolate chip sticks with straightforward steps. We’ll ensure every detail leads to a batch with gooey centers and crisp edges that everyone will love.
Prepare the Ingredients
Before we start mixing, it’s essential to measure and prep our ingredients accurately for the best texture and flavor. Begin by softening 1 cup of unsalted butter at room temperature—cut it into cubes for faster softening. In a medium bowl, whisk together ¾ cup of granulated sugar and ¾ cup of packed brown sugar to remove any lumps, ensuring they blend smoothly. Crack 2 large eggs into a separate small bowl to check for shells, then measure out 2 teaspoons of vanilla extract. For the dry components, sift 2 ¼ cups of all-purpose flour with 1 teaspoon of baking soda and ½ teaspoon of salt in another bowl to aerate them. Finally, measure 2 cups of semisweet chocolate chips, setting them aside so they’re ready to fold in later. This preparation step keeps our workflow efficient and helps achieve that perfect chocolate chip sticks consistency.
Mix and Form the Dough
With ingredients prepped, we combine them to form a rich dough that captures the essence of classic baking. In a large mixing bowl, use an electric mixer on medium speed to cream the softened butter with the granulated and brown sugars until light and fluffy—this takes about 2-3 minutes and incorporates air for a tender texture. Add the eggs one at a time, beating well after each to ensure even distribution, then mix in the vanilla extract for a warm, aromatic boost. Gradually add the sifted flour mixture to the wet ingredients, stirring with a silicone spatula on low speed until just combined—overmixing can make the dough tough. Gently fold in the chocolate chips using the spatula, distributing them evenly for pockets of gooey goodness in every chocolate chip sticks piece. Once mixed, turn the dough out onto a lightly floured surface and shape it into a log about 12 inches long and 4 inches wide, then transfer it to a parchment-lined half-sheet pan and press it down to about ½-inch thickness for even baking.
Bake the Sticks
Preheat your oven to 375°F using the oven thermometer for accuracy, as this temperature is key to achieving golden edges without burning the chocolate. Place the shaped dough on the center rack and bake for 20-25 minutes, rotating the pan halfway through for uniform browning—watch for a light golden color and chocolate chip sticks that are set around the edges but still soft in the center. The aroma of melting chocolate and warm vanilla will fill your kitchen, signaling a successful bake. Once done, remove the pan from the oven immediately to prevent overcooking, as the sticks will continue to firm up as they cool.
Cool and Serve
Allow the baked chocolate chip sticks to rest on the pan for 5 minutes to set, then transfer them to a cooling rack for 10-15 minutes to cool completely and develop that ideal crisp exterior with a chewy inside. Once cooled, use a sharp knife to cut the log into 1-inch wide sticks for easy serving. For the best experience, enjoy them warm with a glass of cold milk to highlight the contrast of textures and flavors—store any leftovers in an airtight container at room temperature for up to 3 days to maintain freshness. These chocolate chip sticks make a fantastic snack or dessert option for sharing with family and friends.
Make-Ahead Instructions
One of the joys of our chocolate chip sticks recipe is its flexibility for busy schedules—we can prepare the dough or even bake the sticks in advance without sacrificing that irresistible gooey chocolate center and crisp edges. This approach lets us enjoy fresh-baked treats whenever the craving hits, making it ideal for meal prep or spontaneous gatherings.
Preparing the Dough Ahead
To get a head start, we begin by mixing the dough as outlined in the previous steps. Once the dough is formed, we divide it into portions for easy storage. For instance, shape the dough into logs or balls before chilling—this not only simplifies portioning later but also preserves the rich, buttery flavor that makes chocolate chip sticks so addictive.
Storage Options
We recommend these methods to keep the dough fresh and ready:
- Refrigerator Storage: Transfer the dough to an airtight container or wrap it tightly in plastic wrap. This method maintains the dough’s texture, ensuring it remains soft and pliable for baking.
- Freezer Storage: For longer-term planning, place the wrapped dough in a freezer-safe bag. Freezing locks in the fresh-baked essence, allowing us to pull it out for a quick treat.
If you’re storing baked chocolate chip sticks, let them cool completely first, then store in an airtight container to prevent sogginess and retain their crisp golden exterior.
Baking from Stored Dough
When it’s time to bake, we thaw and proceed with confidence. Here’s how:
- From the Refrigerator: Remove the dough and let it sit at room temperature for 15-20 minutes to soften. Shape as needed and bake at 375°F for the standard time—this ensures even browning and that signature melt-in-your-mouth chocolate.
- From the Freezer: Thaw the dough in the refrigerator overnight for the best results. Once thawed, follow the same shaping and baking instructions. Avoid rushing the thaw to prevent uneven cooking.
For precise storage durations, refer to the table below to maximize freshness:
| Storage Method | Duration | Key Tips |
|---|---|---|
| Refrigerator (Dough) | Up to 3 days | Use within this window for optimal texture; dough may firm up but remains workable. |
| Freezer (Dough) | Up to 3 months | Label with date; double-wrap to avoid freezer burn and preserve flavor. |
| Room Temperature (Baked) | Up to 2 days | Store in a cool, dry place; reheat in oven for 5 minutes to restore crispness. |
| Refrigerator (Baked) | Up to 1 week | Ideal for maintaining moisture; warm before serving to enhance the gooey chocolate appeal. |
| Freezer (Baked) | Up to 2 months | Flash-freeze on a tray first, then transfer to bags; this keeps the sticks from sticking together. |
By following these steps, we ensure our chocolate chip sticks stay deliciously fresh, ready to delight with minimal effort.
Conclusion
We’ve loved sharing this chocolate chip sticks recipe with you, as it’s a simple way to bring warmth and flavor into your kitchen. It’s perfect for creating memorable moments with family or friends, turning everyday ingredients into something truly special.
Remember, baking these sticks lets us experiment and make them our own, adding a personal touch that makes every batch unique. We’re confident you’ll enjoy the results as much as we do, so dive in and savor the homemade goodness.
Frequently Asked Questions
What are chocolate chip sticks?
Chocolate chip sticks are a fun twist on traditional chocolate chip cookies, featuring gooey chocolate and crisp edges. They’re perfect for quick snacks or sharing, made with simple ingredients rooted in American baking traditions. This recipe brings homemade joy to any kitchen, ideal for novice and experienced bakers alike.
What ingredients are needed for chocolate chip sticks?
Key ingredients include unsalted butter, granulated sugar, brown sugar, eggs, vanilla extract, all-purpose flour, baking soda, salt, and semisweet chocolate chips. Each adds to the texture and flavor—butter for richness, sugars for sweetness, and chips for gooey bites. Prep notes ensure easy measurement and mixing for perfect results.
What tools do I need to make chocolate chip sticks?
You’ll need two medium mixing bowls, measuring cups and spoons, an electric mixer or whisk, a half-sheet pan with parchment paper, a silicone spatula, a cooling rack, and an oven thermometer. These tools help with seamless preparation, ensuring even baking and accurate temperatures for the best outcome.
How do I make chocolate chip sticks step by step?
Start by softening butter and sifting dry ingredients. Cream butter and sugars, add eggs and vanilla, then mix in dry components without overmixing. Fold in chocolate chips, spread dough on a lined pan, and bake at 375°F until golden. Cool on a rack and serve warm with milk for the ultimate treat.
Can I prepare chocolate chip sticks ahead of time?
Yes, make the dough in advance and store it in the refrigerator for up to 3 days or freeze for up to 2 months. Thaw in the fridge before baking. This flexibility is great for busy schedules, allowing you to bake fresh sticks whenever needed without much effort.
How should I store chocolate chip sticks?
Store cooled sticks in an airtight container at room temperature for up to 5 days, or refrigerate for a week to keep them fresh. For longer storage, freeze baked sticks for up to 3 months; thaw at room temperature. Always reheat briefly in the oven for that just-baked taste.
What tips ensure perfect chocolate chip sticks?
Use precise measurements, avoid overmixing the dough, and preheat your oven with a thermometer for accuracy. Line the pan with parchment for easy removal and even baking. For best results, let sticks cool completely on a rack to maintain crisp edges and gooey centers.