
We’ve always been captivated by the Cocoons Recipe, a crispy, golden delight that’s become a staple in our kitchen adventures. Hailing from the vibrant traditions of Middle Eastern cuisine, it’s a simple yet irresistible treat that wraps layers of flaky pastry around sweet fillings for a burst of flavor.
Our version brings this classic to your table with ease, promising a fun twist on familiar ingredients that keeps everyone coming back for more. Whether you’re hosting a party or craving a cozy snack, it’s the perfect recipe to master.
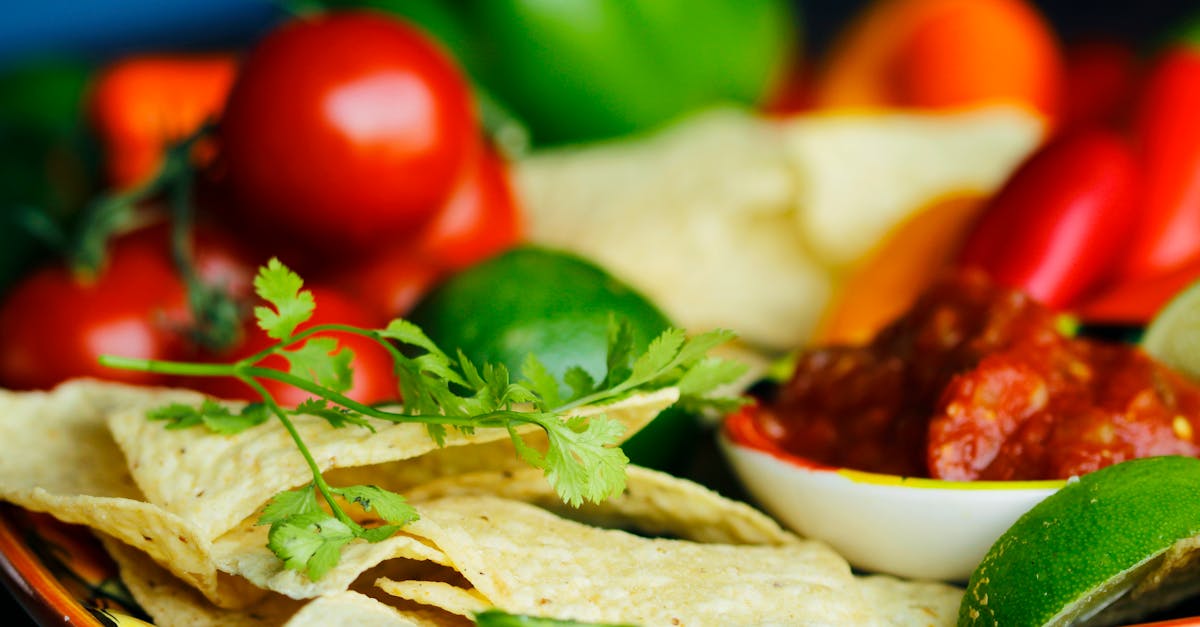
Ingredients
For our Cocoons Recipe—a crispy, golden treat from Middle Eastern cuisine—we gather these essential ingredients in the order we use them. This ensures a seamless preparation process, highlighting traditional flavors like sweet fillings that make this dish irresistible.
Dough Ingredients
- 2 cups all-purpose flour: Sifted to achieve a smooth, elastic dough base.
- 1 teaspoon active dry yeast: Dissolved in warm water for rising and a light texture.
- 1 cup warm water: Used to mix with yeast and flour, ensuring the dough proofs properly.
- 1 tablespoon sugar: Added to the dough mixture to enhance fermentation and add a subtle sweetness.
- 1/2 teaspoon salt: Incorporated into the dough for balanced flavor.
Filling Ingredients
- 1 cup chopped dates: Pitted and finely chopped for the sweet, gooey center.
- 1/2 cup crushed walnuts: Toasted lightly for added crunch and nutty depth.
- 2 tablespoons honey: Drizzled into the filling mixture for natural sweetness and moisture.
- 1 teaspoon ground cinnamon: Mixed in for a warm, aromatic spice that complements the dates.
Frying and Finishing Ingredients
- 1 cup vegetable oil: For frying to golden perfection, heated to 350°F for even cooking.
- 1/4 cup powdered sugar: Dusted on top after frying to finish with a sweet, elegant touch.
- Optional: 1 tablespoon rose water: Sprinkled for a floral hint, evoking authentic Middle Eastern essence.
Required Equipment
To prepare our delicious Cocoons Recipe with its crispy exterior and sweet fillings, we need a few essential tools that make the process smooth and efficient. Building on the ingredients we’ve outlined, these items ensure precision in mixing, shaping, and frying for the best results.
We recommend gathering the following equipment, organized by their role in the recipe:
- Mixing Bowls: Two medium-sized bowls for combining dough ingredients and preparing the filling; opt for ones with non-slip bases for stability during stirring.
- Measuring Cups and Spoons: A set of standard cups (1 cup, ½ cup, etc.) and spoons for accurate measurements of flour, water, and other components, ensuring our dough turns out perfectly elastic.
- Rolling Pin: A wooden or silicone pin to roll out the dough evenly; this helps achieve the thin, golden layers that make Cocoons Recipe irresistible.
- Knife and Cutting Board: A sharp chef’s knife for chopping dates and walnuts, paired with a sturdy board to keep prep safe and quick.
- Frying Pan or Deep Fryer: A large, heavy-bottomed pan or dedicated fryer for submerging the cocoons in hot oil; maintain oil at 350°F for that signature crispy texture.
- Tongs or Slotted Spoon: Heat-resistant tongs for safely flipping and removing fried pieces, preventing oil splatters and ensuring even cooking.
- Baking Sheet with Wire Rack: A sheet for cooling the fried cocoons and a rack to drain excess oil, keeping them light and not greasy.
With these tools in hand, we can seamlessly transition from mixing our dough and filling to frying and finishing our Cocoons Recipe for a flawless outcome.
Instructions
Now that we have gathered our ingredients and essential equipment, let’s guide you through creating our irresistible Cocoons Recipe, a crispy delight from Middle Eastern cuisine that’s perfect for any occasion.
Prep
In this step, we focus on preparing the dough and filling to ensure everything is ready for assembly. Start by activating the yeast: In a mixing bowl, combine 1 packet (about 2 1/4 teaspoons) active dry yeast with 1 cup warm water (around 110°F) and 1 tablespoon sugar. Stir gently and let it sit for 5-10 minutes until it becomes frothy, signaling the yeast is active.
Next, make the dough: In the same bowl, add 2 cups all-purpose flour, 1 teaspoon salt, and mix with a spoon until a shaggy dough forms. Knead on a lightly floured surface for 5-7 minutes until smooth and elastic. Cover the dough with a clean kitchen towel and let it rise in a warm spot for 1 hour, or until it doubles in size.
For the filling, in a separate bowl, mix 1 cup chopped dates, 1/2 cup crushed walnuts, 2 tablespoons honey, and 1 teaspoon ground cinnamon. Stir until well combined, creating a sweet and aromatic mixture that’s the heart of our Cocoons Recipe.
Cook
Once prepped, we move to cooking, where we’ll fry the assembled cocoons to achieve that signature golden brown exterior. Heat 2 cups vegetable oil in a frying pan or deep fryer over medium-high heat until it reaches 350°F – use a thermometer for accuracy.
Carefully lower 3-4 assembled cocoons into the hot oil using tongs or a slotted spoon. Fry for 2-3 minutes per side, flipping once, until they turn a crispy, golden brown. Remove them with the tongs and place on a baking sheet lined with a wire rack to drain excess oil and keep them light and crunchy.
Assemble
With the prep complete, we assemble our Cocoons Recipe by combining the dough and filling for that irresistible sweet center. Roll out the risen dough on a floured surface to about 1/4-inch thickness, then use a knife to cut it into 3-inch squares or circles.
Spoon 1-2 teaspoons of the filling mixture onto the center of each piece. Fold the dough over the filling to form a sealed pocket – pinch the edges firmly to prevent leakage. Arrange the shaped cocoons on a baking sheet and let them rest for 10 minutes before cooking, ensuring they hold their form and deliver that authentic Middle Eastern flavor.
Make-Ahead Tips
To make our Cocoons Recipe even more convenient for busy days or gatherings, we often prepare components in advance without compromising that crispy exterior and sweet, aromatic filling. This approach lets us focus on frying and enjoying the golden treats fresh when needed. Let’s break down the key strategies step-by-step.
Preparing the Dough Ahead
We suggest making the dough up to 24 hours in advance for optimal flavor and texture. Activate the yeast as described in the earlier steps, then knead and let it rise fully. Once ready, wrap the dough tightly in plastic wrap or place it in an airtight container, and refrigerate it. This chilling process enhances the dough’s elasticity, making it easier to roll out later. When you’re ready to use it, let the dough sit at room temperature for about 30 minutes to soften before proceeding with assembly.
Making the Filling in Advance
The sweet filling—featuring chopped dates, crushed walnuts, honey, and ground cinnamon—can be prepared up to 48 hours ahead. Simply mix the ingredients as outlined, then store the mixture in a sealed container in the refrigerator. This allows the flavors to meld beautifully, resulting in a more intense, aromatic center. Before using, give it a quick stir to ensure even distribution, as the honey might cause slight clumping.
Assembling Cocoons Early
For even greater efficiency, we recommend assembling the cocoons (dough pockets filled with the mixture) up to 12 hours in advance. After rolling and filling the dough, place the uncooked cocoons on a baking sheet lined with parchment paper, ensuring they don’t touch. Cover them loosely with plastic wrap and refrigerate. This step maintains the dough’s integrity, preventing sogginess while keeping the filling fresh. Fry them directly from the fridge, adding 1–2 minutes to the cooking time for a perfectly golden brown finish.
Storage and Reheating Guidelines
If you need to extend preparation further, freeze the assembled but uncooked cocoons for up to one month. Arrange them on a baking sheet to freeze individually first, then transfer to a freezer-safe bag. When ready, thaw in the refrigerator overnight and fry as usual. For reheating fried cocoons, we advise using a 350°F oven for 5–7 minutes to restore crispiness without overcooking the filling.
| Make-Ahead Option | Preparation Time | Storage Method | Key Benefits |
|---|---|---|---|
| Dough | Up to 24 hours | Refrigerate in airtight container | Enhances elasticity and flavor |
| Filling | Up to 48 hours | Refrigerate in sealed container | Allows flavors to intensify |
| Assembled Cocoons | Up to 12 hours | Refrigerate on lined baking sheet | Maintains shape and freshness |
| Frozen Cocoons | Up to 1 month | Freeze in bags after initial freeze | Provides long-term convenience |
Conclusion
We’ve loved diving into the Cocoons Recipe with you, turning simple ingredients into a delightful Middle Eastern treat that’s perfect for any occasion.
It’s a versatile dish that brings warmth and flavor to our kitchens, whether we’re hosting friends or enjoying a quiet snack.
Give it a try and see how it adds a touch of joy to your meals—we’re confident it’ll become a favorite in your home too.
Frequently Asked Questions
What is the Cocoons Recipe?
The Cocoons Recipe is a popular Middle Eastern treat featuring crispy, golden dough pockets filled with sweet ingredients like dates, walnuts, honey, and cinnamon. This easy version adds a fun twist to traditional flavors, making it ideal for snacks or gatherings. It’s simple to prepare and offers an authentic taste with minimal effort.
What ingredients are needed for the Cocoons Recipe?
For the dough, you’ll need all-purpose flour, active dry yeast, warm water, sugar, and salt. The filling includes chopped dates, crushed walnuts, honey, and ground cinnamon. For frying and finishing, use vegetable oil and powdered sugar, with optional rose water for extra flavor. These create a sweet, aromatic treat.
What equipment is required for the Cocoons Recipe?
You’ll need basic kitchen tools like mixing bowls, measuring cups and spoons, a rolling pin, a knife and cutting board, a frying pan or deep fryer, tongs or a slotted spoon, and a baking sheet with a wire rack. These ensure smooth preparation and help achieve the perfect crispy texture.
How do I prepare the Cocoons Recipe?
Start by activating yeast and kneading the dough, letting it rise. Mix the filling separately. Roll out dough, add filling, seal into pockets, and fry until golden brown. Dust with powdered sugar and add rose water if desired. The process takes about 1-2 hours total, including rising time.
Can I make the Cocoons Recipe ahead of time?
Yes, prepare the dough up to 24 hours in advance and refrigerate it for better flavor. The filling can be made 48 hours ahead to let flavors meld. Assemble cocoons up to 12 hours before and chill, or freeze uncooked ones for up to a month. This makes it convenient for busy days.
How should I store the Cocoons?
Store cooked cocoons in an airtight container at room temperature for up to 2 days, or refrigerate for up to 5 days to keep them fresh. For longer storage, freeze them for up to a month and reheat in the oven. Always cool them completely before storing to maintain crispiness.
What tips ensure the best Cocoons Recipe results?
Use fresh yeast for proper rising, seal dough pockets tightly to prevent filling leaks, and fry at the right temperature for a golden exterior. Let flavors in the filling meld by preparing ahead. Experiment with rose water for authenticity, and dust with powdered sugar just before serving for the perfect treat.