
We love how liquor filled chocolates blend rich, velvety cocoa with a spirited kick making them the ultimate indulgence for special occasions. These treats trace their roots to European chocolatiers where they’ve charmed palates for generations adding a touch of elegance to any gathering.
In our kitchen we’ve simplified the process so you can whip up these homemade delights with ease. Whether you’re gifting them or savoring a quiet evening our recipe promises that perfect balance of flavors that’ll impress everyone.
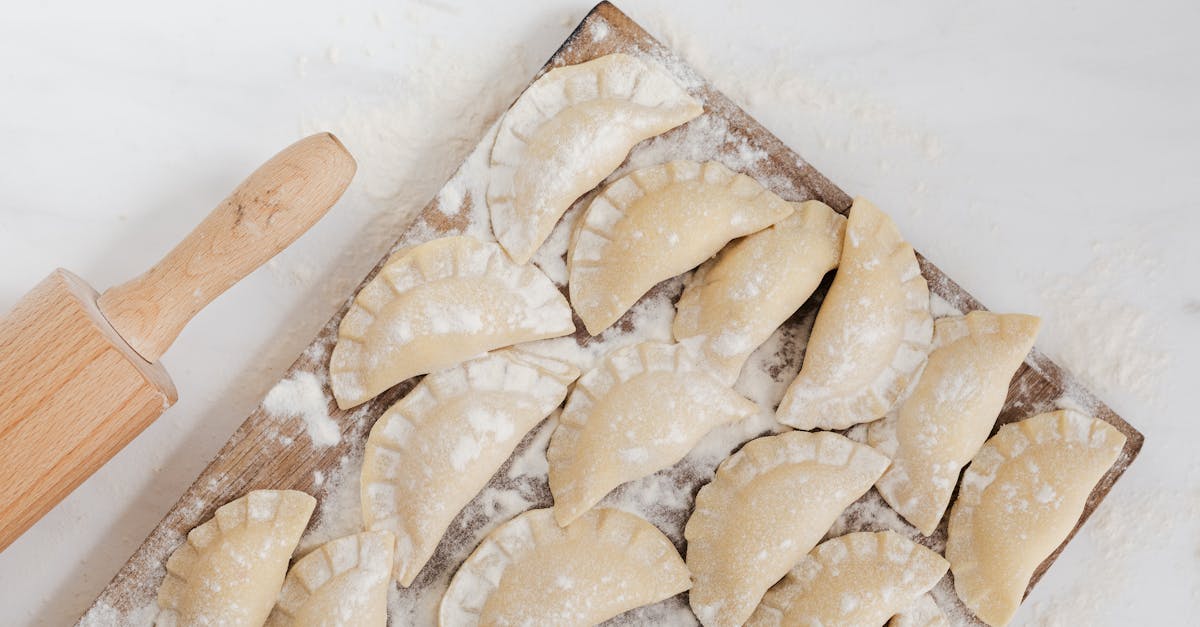
Ingredients
In our journey to craft irresistible liquor-filled chocolates at home, we begin with the essential ingredients that form the foundation of this decadent treat. We’ve curated this list based on their order of use, ensuring you have everything prepared for seamless preparation. Remember, selecting high-quality ingredients like premium chocolate and your favorite liquor elevates the final product, delivering that perfect blend of rich flavors we adore.
Chocolate Shell Ingredients
- 12 ounces dark chocolate (finely chopped): We start with this as the base for our chocolate shells. Opt for at least 70% cocoa for a deep, sophisticated taste that melts smoothly.
- 1 tablespoon coconut oil (melted): Added to the chocolate for a glossy finish and easier molding; melt it just before combining.
Filling Ingredients
- 1/2 cup heavy cream: Used next to create a creamy ganache; heat it gently to avoid curdling for the smoothest texture.
- 1/4 cup granulated sugar: Incorporate this into the cream mixture to sweeten the filling; adjust based on your liquor’s sweetness.
- 1/2 cup liquor (such as rum or whiskey, at room temperature): The star of the show, added after the cream base to infuse bold, aromatic flavors—choose a high-proof variety for intensity without overpowering the chocolate.
| Ingredient | Quantity | Purpose |
|---|---|---|
| Dark chocolate | 12 ounces | Forms the outer shell |
| Coconut oil | 1 tablespoon | Enhances shine and moldability |
| Heavy cream | 1/2 cup | Creates a silky ganache base |
| Granulated sugar | 1/4 cup | Balances and sweetens the filling |
| Liquor | 1/2 cup | Infuses the signature flavor |
Required Tools and Equipment
To craft our liquor-filled chocolates successfully, we need a selection of essential tools and equipment that ensure precision and ease in the process. Building on the ingredients we’ve outlined, these items help us achieve a professional finish while maintaining safety and efficiency.
Must-Have Tools
We recommend the following key tools, organized by their role in the recipe:
- Chocolate molds: Use silicone or polycarbonate molds in various shapes (like hearts or spheres) to create the perfect shells for our liquor-filled chocolates. They provide flexibility and easy release for a polished result.
- Double boiler or microwave-safe bowl: Essential for melting chocolate evenly without scorching. We prefer a double boiler for better temperature control, ensuring our dark chocolate achieves that glossy, smooth texture.
- Mixing bowls: Opt for heat-resistant glass or stainless steel bowls in different sizes. These allow us to combine ingredients like heavy cream and liquor without risk of cracking under heat.
- Measuring cups and spoons: Accurate measurements are crucial for balancing flavors, so we rely on a set of these for ingredients such as granulated sugar and coconut oil.
- Whisk or spatula: A sturdy silicone whisk helps us blend the ganache smoothly, while a spatula aids in scraping bowls clean for no waste.
- Piping bag or small funnel: Perfect for filling the chocolate shells with our liquor-infused mixture. We find a disposable piping bag convenient for precise, mess-free application.
- Candy thermometer: If we’re tempering chocolate for a professional snap and shine, this tool monitors temperatures accurately—aim for 88-90°F (31-32°C) for dark chocolate.
Additional Equipment for Efficiency
For larger batches or advanced techniques, consider these extras to elevate our homemade treats:
- Refrigerator or cooling rack: Helps set the chocolates quickly, preserving the creamy ganache’s texture inside.
- Baking sheet: Use this to stabilize molds during chilling, ensuring our liquor-filled chocolates maintain their shape.
By preparing these tools in advance, we set ourselves up for a seamless experience that highlights the rich flavors and elegant presentation of our liquor-filled chocolates. Always prioritize quality equipment to match our high-quality ingredients for the best results.
Instructions
Now that we have gathered our high-quality ingredients and essential tools, we’ll walk you through crafting liquor-filled chocolates step by step. Our method ensures a perfect blend of creamy textures and bold flavors for an indulgent treat.
Prep Work
Before we begin, let’s prepare our workspace to make the process smooth and efficient. First, measure out the ingredients in the order we’ll use them: 200 grams of dark chocolate for the shells, 1 tablespoon of coconut oil for a glossy finish, 100 ml of heavy cream for the ganache, 50 grams of granulated sugar for sweetness, and 60 ml of your chosen liquor—such as rum or brandy—for that signature infusion. Chop the dark chocolate into even pieces to ensure even melting and set aside in a microwave-safe bowl or double boiler. Next, grease your chocolate molds lightly with a neutral oil to prevent sticking and arrange them on a baking sheet for stability. We also recommend having a piping bag or small funnel ready for filling, along with a candy thermometer to monitor temperatures accurately. This preparation sets the stage for creating elegant, flavor-packed chocolates that shine on special occasions.
Making the Chocolate Shells
With our ingredients prepped, let’s create the sturdy yet glossy chocolate shells that will encase the liquor filling. Start by melting 200 grams of the chopped dark chocolate with 1 tablespoon of coconut oil in a double boiler over medium heat, stirring constantly with a whisk until it reaches 115°F for proper tempering—this step is crucial for a snapping texture and shiny appearance. Once melted, remove from heat and let it cool slightly to 90°F to maintain the temper. Using a spoon or pipette, carefully pour the tempered chocolate into the greased molds, filling each cavity about halfway and tapping the molds gently on the counter to eliminate air bubbles. Tilt the molds to coat the sides evenly, then pour out any excess chocolate back into the bowl. Place the molds in the refrigerator for 10-15 minutes to set, allowing the chocolate to form a firm, velvety shell that locks in the forthcoming flavors.
Filling with Liquor
Now that our shells are set, it’s time to add the star of the show—the liquor filling—for that bold, intoxicating burst in every bite. In a separate mixing bowl, heat 100 ml of heavy cream and 50 grams of granulated sugar over low heat until the mixture simmers and the sugar dissolves completely, creating a smooth base for our ganache. Remove from heat and stir in 60 ml of liquor, whisking vigorously until fully incorporated for a creamy, aromatic filling. Let the mixture cool slightly to thicken, then transfer it to a piping bag. Carefully pipe the filling into each chocolate shell, filling them about three-quarters full to avoid overflow—aim for a generous amount to deliver that rich, boozy essence without compromising the structure. This step infuses the chocolates with layers of flavor, making them ideal for gifting or savoring.
Sealing and Setting
To finish our chocolates, we’ll seal the shells and let them set for a professional, polished result. Re-melt any remaining tempered chocolate if needed, then spoon or pipe a thin layer over the filled molds to fully cover the liquor filling, ensuring each chocolate is completely enclosed for a seamless seal. Gently tap the molds again to smooth the tops and remove air pockets, then place them back in the refrigerator on a cooling rack for 20-30 minutes until fully hardened. Once set, pop the chocolates out of the molds by gently pressing from the bottom—this yields irresistibly smooth, firm treats with a perfect balance of chocolate and liquor. Store them in an airtight container at room temperature for up to a week to preserve their glossy finish and decadent flavors.
Make-Ahead and Storage Tips
To ensure your liquor-filled chocolates remain irresistibly smooth, glossy, and flavorful, we recommend planning ahead and storing them correctly. This approach allows you to prepare these elegant treats in advance for special occasions without compromising their rich, boozy allure.
Make-Ahead Tips
We often prepare liquor-filled chocolates a day or two before events to save time and enhance flavors. Here’s how to do it efficiently:
- Prepare the chocolate shells first: Melt and temper your dark chocolate as outlined in our earlier steps, then pour it into molds and let it set. You can make these shells up to 48 hours in advance. Store them in a cool, dry place to maintain their glossy finish and prevent any softening from humidity.
- Make the filling ahead: Combine the heavy cream, granulated sugar, and your chosen liquor to create the ganache filling. After cooling it, transfer to an airtight container and refrigerate for up to 24 hours. This allows the flavors to meld beautifully, resulting in a creamier, more decadent center when you’re ready to assemble.
- Assemble just before needed: For optimal texture, fill the shells and seal them no more than 12 hours before serving. If assembling earlier, keep the chocolates in the refrigerator to avoid the filling making the shells soggy.
By following these make-ahead tips, we can guarantee your homemade liquor-filled chocolates deliver that perfect balance of crisp shell and luscious, liquor-infused interior every time.
Storage Tips
Proper storage is key to preserving the sensory appeal of your liquor-filled chocolates—think that satisfying snap of the chocolate giving way to a velvety, boozy surprise. Always use airtight containers to lock in freshness and prevent exposure to air, which can dull flavors or cause condensation.
| Storage Method | Duration | Ideal Conditions | Notes |
|---|---|---|---|
| Refrigerator | Up to 1 week | 35–40°F (2–4°C) in an airtight container | Best for maintaining firmness; let them sit at room temperature for 10–15 minutes before serving to enhance flavors. |
| Room Temperature | Up to 3 days | 60–70°F (15–21°C) in a cool, dry spot | Ideal if your home is climate-controlled; avoid humid areas to prevent melting or softening. |
| Freezer | Up to 1 month | 0°F (-18°C) in a sealed, freezer-safe bag | Wrap individually first to avoid freezer burn; thaw in the refrigerator overnight for the best texture. |
Remember, always check for signs of spoilage like off odors or discoloration before enjoying. With these storage tips, we ensure your liquor-filled chocolates stay as delightful and shareable as the day you made them.
Conclusion
We’ve loved sharing how to craft these indulgent liquor-filled chocolates right in your kitchen. It’s a rewarding way to add a touch of luxury to any gathering.
Remember, experimenting with flavors lets you make these treats truly your own.
We’re confident you’ll enjoy the process and the delicious results as much as we do.
Frequently Asked Questions
What are liquor-filled chocolates?
Liquor-filled chocolates are indulgent treats featuring a chocolate shell filled with a boozy ganache, often originating from European chocolatiers. They’re prized for their rich flavors and elegant appeal, making them perfect for special occasions like holidays or gifts. These chocolates balance sweetness and alcohol for a sophisticated taste.
What ingredients are needed for liquor-filled chocolates?
You’ll need dark chocolate for the shell, coconut oil for gloss, heavy cream for the ganache, granulated sugar for sweetness, and your choice of liquor for flavor. Using high-quality ingredients ensures a smooth, flavorful result. Measure carefully to achieve the perfect balance.
What tools are required to make liquor-filled chocolates?
Essential tools include chocolate molds, a double boiler or microwave-safe bowl for melting, mixing bowls, measuring cups and spoons, a whisk or spatula, a piping bag or funnel, and a candy thermometer for tempering. A refrigerator or cooling rack helps set them quickly for a seamless process.
How do I make liquor-filled chocolates at home?
Start by tempering dark chocolate for shells, then create a ganache by heating cream and sugar with liquor. Pipe the filling into molds and seal with more chocolate. Chill to set. Follow the steps carefully for glossy, firm results that last up to a week.
Can I make liquor-filled chocolates in advance?
Yes, prepare chocolate shells up to 48 hours ahead and the filling a day in advance to enhance flavors. Assemble no more than 12 hours before serving for optimal texture. This makes them convenient for events or gifting without losing quality.
How should I store liquor-filled chocolates?
Store in an airtight container in the refrigerator for up to a week, at room temperature for up to three days, or freeze for up to a month. Thaw in the fridge if frozen to maintain smoothness and gloss. Proper storage keeps them fresh and flavorful.
Are liquor-filled chocolates suitable for gifts?
Absolutely, their elegant presentation and rich flavors make them ideal for gifting on special occasions. Use high-quality ingredients for a professional touch, and they can be prepared ahead for convenience. They’re sure to impress with their balance of chocolate and liquor.