
We love diving into wholesome recipes that balance flavor and health, and our low sugar apple jelly is a perfect example. Drawing from classic American preserving traditions, this twist uses fresh apples to create a naturally sweet spread that’s easy on the sugar.
It’s ideal for anyone seeking a guilt-free alternative to store-bought jams, letting us enjoy that tart apple goodness without overindulging. We’ll guide you through the simple steps to make your own batch today.
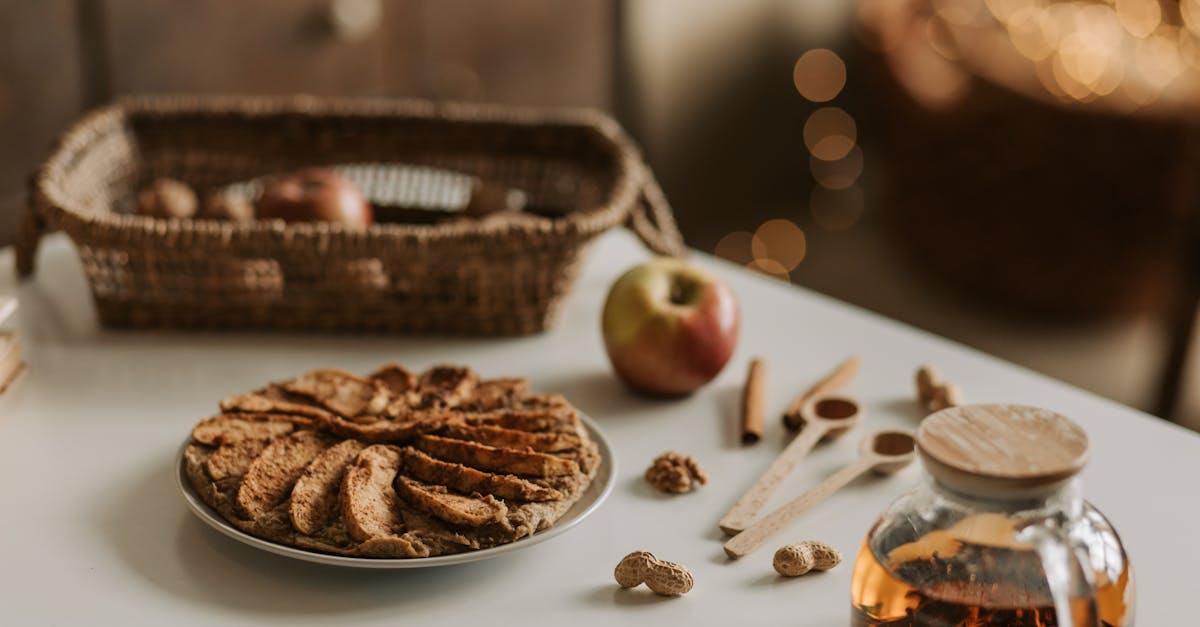
Ingredients
To craft our low-sugar apple jelly, we start by selecting high-quality, fresh ingredients that highlight the natural sweetness of apples while keeping sugar minimal. Below, we list them in the order they are used, with precise measurements and prep notes for accuracy.
- Fresh apples: 4 pounds (about 8-10 medium apples, such as Granny Smith or Honeycrisp; wash, core, and chop into quarters to extract maximum pectin and flavor).
- Water: 4 cups (use filtered water to help soften the apples during the initial cooking process).
- Lemon juice: ¼ cup (freshly squeezed from 2-3 lemons; this adds natural acidity to balance flavors and aid in setting the jelly).
- Low-sugar pectin: 1 packet (about 1.75 ounces; choose a brand like Sure-Jell for low-sugar recipes to ensure proper gelling without added sugars).
- Sweetener: 1 cup (options include honey, stevia, or erythritol; adjust based on taste preference to keep the jelly truly low-sugar while enhancing the apple’s natural tartness).
Equipment Needed
To bring our low-sugar apple jelly recipe to life, we need a few essential tools that ensure safe and efficient preparation. Building on our ingredients list, gathering the right equipment helps us maintain precision and achieve that perfect, naturally sweet spread without added complications.
Here’s a curated list of the key items we’ll use, organized by their role in the process:
- Large Stockpot: A 8- to 12-quart heavy-bottomed pot for simmering apples and extracting juice. We recommend one with a lid to control evaporation and ensure even cooking.
- Fine Mesh Strainer or Cheesecloth: Ideal for straining the apple mixture to get a clear, smooth jelly. Use a double layer of cheesecloth for finer results, as it captures pulp effectively and preserves the fresh apple flavor.
- Canning Jars and Lids: At least 4 to 6 half-pint jars with new lids for proper sealing. Opt for glass jars specifically designed for canning to maintain freshness and safety during storage.
- Water Bath Canner or Large Pot: A dedicated canner with a rack for processing jars, or a deep pot that can hold jars submerged in boiling water. This step is crucial for creating a shelf-stable jelly.
- Candy Thermometer: Essential for monitoring the jelly’s temperature to reach the gel point (around 220°F at sea level). Accurate readings prevent overcooking and help us lock in that vibrant, fruity essence.
- Measuring Cups and Spoons: Stainless steel sets for precise measurements of water, lemon juice, and pectin. We rely on these for consistency in every batch.
- Ladle and Funnel: A heat-resistant ladle for transferring hot jelly and a wide-mouth funnel for filling jars without mess. These tools make our process cleaner and more efficient.
With this equipment on hand, we’re set to move seamlessly into the preparation steps, focusing on quality and ease for our homemade low-sugar apple jelly.
Instructions
Now that we have gathered our fresh ingredients and essential equipment, let’s guide you through the simple, step-by-step process to create our delicious low-sugar apple jelly. We’ll focus on precise techniques to maximize flavor while keeping sugar minimal for a healthy, homemade treat.
Prepare the Apples
First, we wash 4 pounds of fresh apples—such as Granny Smith or Honeycrisp—under cool running water to remove any dirt or residue, ensuring they are clean and ready for use. Next, we core and chop the apples into quarters, including the skins and seeds for natural pectin, but discard any bruised or damaged parts to maintain the best flavor and texture.
Extract the Juice
In a large stockpot, we combine the chopped apples with 4 cups of filtered water and ¼ cup of freshly squeezed lemon juice, stirring gently to distribute the liquid evenly. We bring the mixture to a boil over medium-high heat, then reduce to a simmer for about 20-25 minutes until the apples soften and release their natural juices, filling the kitchen with a sweet, tangy aroma that hints at the jelly’s vibrant taste.
Cook the Jelly
Once the apples are soft, we strain the mixture through a fine mesh strainer or cheesecloth into a clean pot, pressing lightly to extract 4-6 cups of juice without forcing the pulp through for a clear result. To this juice, we add 1 packet of low-sugar pectin and 1 cup of a low-sugar sweetener like honey, stirring constantly as we bring it to a rolling boil over high heat. We continue boiling for 1-2 minutes until the mixture reaches 220°F on a candy thermometer, creating a thick, glossy jelly with a fresh, fruity essence that balances tartness and subtle sweetness perfectly.
Jar and Store
With the jelly cooked, we quickly ladle the hot mixture into sterilized canning jars, leaving ¼ inch of headspace at the top to ensure a proper seal. We wipe the jar rims clean, apply the lids and bands, and process the jars in a water bath canner for 10 minutes to create a vacuum seal, resulting in jars of low-sugar apple jelly that can be stored in a cool, dark place for up to 12 months for long-lasting enjoyment.
Make-Ahead and Storage Tips
To maximize convenience and extend the shelf life of our low-sugar apple jelly, we recommend these practical strategies. Building on the canning process outlined earlier, where we process jars for long-term preservation, let’s explore how to prepare components in advance and store your jelly safely.
Make-Ahead Strategies
We can simplify your jelly-making day by prepping elements ahead of time. Start with the apples: Wash and chop 4 pounds of fresh apples (such as Granny Smith or Honeycrisp) up to 24 hours in advance. Place them in an airtight container in the refrigerator to maintain their crisp texture and natural sweetness.
For the juice extraction step, we suggest boiling the chopped apples with 4 cups of filtered water and ¼ cup of freshly squeezed lemon juice as described, then strain and cool the mixture. Store this apple juice in a sealed container in the fridge for up to 48 hours. When you’re ready to finish, simply reheat the juice, add the low-sugar pectin and sweetener, and proceed with boiling to the desired temperature. This approach not only saves time but also preserves the vibrant, fruity essence of the apples, ensuring your low-sugar apple jelly remains fresh and full of flavor.
Storage Guidelines
Proper storage is key to enjoying your low-sugar apple jelly for months without compromising its delightful tart-sweet balance. After processing the jars in the water bath canner, allow them to cool completely at room temperature. For unopened jars, store them in a cool, dark place like a pantry to prevent spoilage.
Here’s a quick overview of storage durations and best practices:
| Storage Method | Duration | Conditions and Tips |
|---|---|---|
| Unopened jars | Up to 12 months | Keep in a cool (below 70°F), dark area. Check seals before storing—press the center of the lid; it should not flex. |
| Opened jars | Up to 1 month | Refrigerate immediately after opening. Always use a clean spoon to avoid contamination, and look for signs of spoilage like mold or off odors. |
| Freezer storage | Up to 6 months | For longer-term needs, transfer jelly to freezer-safe containers, leaving headspace for expansion. Thaw in the fridge overnight for the best texture. |
By following these tips, we ensure your homemade low-sugar apple jelly stays safe, delicious, and ready for your next meal or snack.
Conclusion
We’ve loved guiding you through this low-sugar apple jelly adventure, blending tradition with smart health choices. It’s rewarding to craft something that’s naturally sweet and versatile for your daily meals.
By making your own, you’re embracing a healthier lifestyle while enjoying fresh flavors. We’re confident you’ll find it a staple in your kitchen, so give it a try and savor the homemade magic.
Frequently Asked Questions
What is low-sugar apple jelly?
Low-sugar apple jelly is a healthier twist on traditional jelly, made from fresh apples with minimal added sweeteners. It offers a naturally sweet, guilt-free spread inspired by American preserving traditions, perfect for those watching their sugar intake while enjoying rich apple flavor.
What ingredients are needed for this recipe?
You’ll need 4 pounds of fresh apples (like Granny Smith or Honeycrisp), 4 cups of filtered water, ¼ cup of freshly squeezed lemon juice, 1 packet of low-sugar pectin, and 1 cup of a low-sugar sweetener such as honey, stevia, or erythritol. Focus on high-quality, fresh ingredients to enhance natural sweetness and minimize added sugar.
How do I make low-sugar apple jelly?
Start by washing and chopping 4 pounds of apples, then boil them with 4 cups of water and ¼ cup lemon juice to extract juice. Strain the mixture, add low-sugar pectin and 1 cup sweetener, boil to the right temperature, and pour into sterilized jars. Process in a water bath canner for a sealed, storable jelly ready in about an hour.
What equipment is required to make this jelly?
Essential tools include a large stockpot for simmering, a fine mesh strainer or cheesecloth for straining, canning jars and lids, a water bath canner or large pot, a candy thermometer for temperature checks, and measuring cups and spoons for accuracy. These ensure safe and efficient jelly preparation.
How long does homemade low-sugar apple jelly last?
Unopened jars can be stored in a cool, dark place for up to 12 months. Once opened, keep in the refrigerator for up to 1 month. For longer storage, freeze for several months. Always check for signs of spoilage before use to maintain safety and quality.
Can I substitute ingredients in this recipe?
Yes, you can swap apple varieties like using Honeycrisp instead of Granny Smith for different flavors, or choose alternative low-sugar sweeteners like erythritol for stevia. However, stick to low-sugar pectin to ensure proper setting, and avoid major changes to maintain the recipe’s balance and safety.
Is this recipe suitable for people with dietary restrictions?
Absolutely, it’s ideal for those reducing sugar intake, including diabetics, as it uses natural apple sweetness and minimal additives. Ingredients like fresh apples and low-sugar pectin make it gluten-free and vegan-friendly, but always verify individual sweetener compatibility with your diet.