
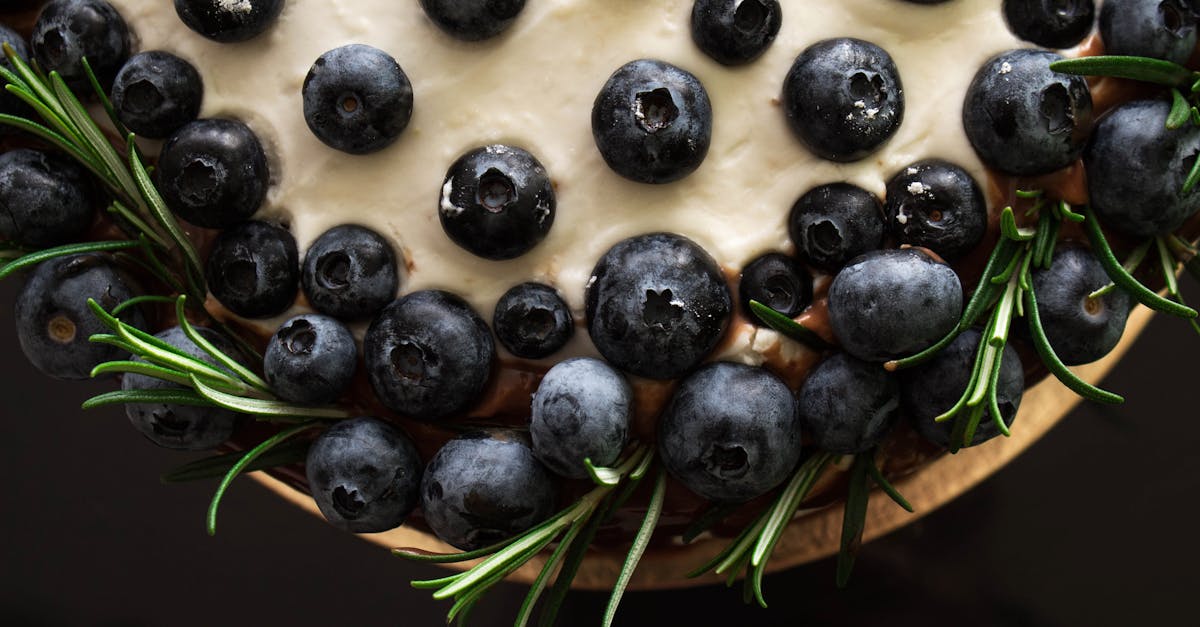
We’ve always been captivated by the Mosaic Pie, a stunning dessert that blends art and flavor in every slice. With its colorful layers of fruits and nuts forming a patchwork pattern, it’s a fresh twist on traditional pies that originated from inventive home bakers seeking visual wow-factor.
Our recipe brings this eye-catching treat to your kitchen, promising a fun baking experience that’s as rewarding as it is delicious. Whether you’re hosting a gathering or treating yourself, Mosaic Pie adds a burst of creativity to your table.
Ingredients
As we dive into crafting our Mosaic Pie, a dessert renowned for its vibrant layers of fruits and nuts, we start by gathering high-quality ingredients that ensure both visual appeal and flavor harmony. Below, we’ve organized the ingredients in the order they’re typically used, from base to filling, with prep specifics noted for precision.
Pie Crust Ingredients
- 2 cups all-purpose flour: Sifted to ensure a smooth, flaky base.
- 1/2 cup unsalted butter: Chilled and cubed for easy incorporation, creating a tender texture.
- 1/4 cup cold water: Added gradually to bind the dough without overworking it.
- 1/2 teaspoon salt: Enhances the crust’s flavor, balancing the sweetness of the pie.
Filling Ingredients
- 2 cups mixed fruits (such as fresh strawberries, blueberries, and raspberries): Washed, sliced, and arranged for that signature mosaic pattern, providing juicy, colorful layers.
- 1 cup nuts (like almonds or walnuts): Toasted and roughly chopped for added crunch and depth.
- 1/2 cup granulated sugar: Mixed with fruits to draw out natural juices and create a glossy filling.
- 2 large eggs: Beaten lightly to act as a binder, ensuring the layers set perfectly.
- 1 teaspoon vanilla extract: For a warm, aromatic note that ties the fruits and nuts together.
- 1 tablespoon lemon juice: Freshly squeezed to brighten the flavors and prevent fruits from browning.
Tools and Equipment
To bring our Mosaic Pie to life with precision and ease, we rely on a selection of essential tools and equipment. These items not only streamline the preparation process but also ensure that our vibrant layers of fruits and nuts form a flawless, artistic dessert. Below, we break down the key tools by their role in the recipe, helping you achieve professional results right in your kitchen.
Must-Have Baking Essentials
For crafting the pie crust and assembling the filling, these tools are indispensable:
- Mixing bowls: We recommend using a set of medium and large stainless-steel or glass bowls to combine ingredients like flour and butter. This allows for even mixing without the risk of sticking.
- Measuring cups and spoons: Accurate measurements are crucial for our pie’s balance of flavors, so opt for a standard set in both dry and liquid varieties to measure items such as granulated sugar and vanilla extract precisely.
- Rolling pin: A sturdy wooden or silicone rolling pin helps us roll out the dough evenly, creating a smooth, flaky base that holds the colorful mosaic pattern.
Preparation and Cutting Tools
When it comes to prepping fruits and nuts for the filling, these tools make the task efficient and safe:
- Cutting board and sharp knife: We use a dedicated cutting board paired with a chef’s knife to chop mixed fruits and nuts into uniform pieces, ensuring they layer beautifully and enhance the pie’s visual appeal.
- Food processor (optional but recommended): For finer textures, a basic food processor can quickly pulse nuts and fruits, saving time while maintaining consistency in our filling mixture.
Baking and Finishing Tools
These finalize the baking process and help present our Mosaic Pie as a showstopper:
- Pie dish or tart pan: A 9-inch ceramic or metal pie dish is ideal for baking, as it provides even heat distribution and supports the pie’s structure during the creation of those eye-catching layers.
- Oven thermometer: To guarantee perfect baking, we suggest an oven thermometer to monitor temperatures accurately—aim for 350°F (177°C) to avoid over-baking the crust.
- Spatula and whisk: A silicone spatula aids in folding ingredients gently, while a wire whisk ensures eggs and lemon juice blend smoothly for a cohesive filling.
For quick reference, here’s a comparison of essential tools and their impact on preparation time:
| Tool | Primary Use | Estimated Time Saved (minutes) | Why It’s Essential |
|---|---|---|---|
| Rolling Pin | Dough rolling | 5-10 | Ensures even crust thickness for a professional finish. |
| Food Processor | Chopping fruits and nuts | 10-15 | Reduces manual effort, allowing for consistent textures. |
| Oven Thermometer | Temperature monitoring | 5 | Prevents uneven baking, preserving the pie’s vibrant colors. |
With these tools at hand, we’re set to transition seamlessly into the preparation steps, making our Mosaic Pie not only delicious but also a true culinary masterpiece.
Instructions
Now that we have gathered our high-quality ingredients and essential tools, let’s walk through the steps to craft our vibrant Mosaic Pie. We ensure each phase is straightforward and yields a flaky crust and colorful, flavorful filling that delights the senses.
Prepare the Crust
First, we combine 2 cups of all-purpose flour and 1/2 teaspoon of salt in a large mixing bowl to form the base of our buttery, golden crust. Add 3/4 cup of cold, unsalted butter cut into small cubes, and use a pastry cutter or our fingers to work the butter into the flour until the mixture resembles coarse crumbs for that ideal flaky texture.
Next, sprinkle in 4-6 tablespoons of ice-cold water one tablespoon at a time, stirring with a fork until the dough holds together without being sticky. This step is crucial for achieving a tender, melt-in-your-mouth crust.
Shape the dough into a disc, wrap it in plastic wrap, and chill it in the refrigerator for at least 30 minutes to firm up and enhance its rich, buttery flavor.
Prepare the Filling
We start by preparing 2 cups of mixed fresh fruits—such as sliced strawberries, blueberries, and kiwi—for a burst of vivid colors and tangy sweetness that forms the pie’s mosaic pattern. In a separate bowl, chop 1 cup of nuts like almonds and walnuts into coarse pieces to add a satisfying crunch.
Whisk together 1 cup of granulated sugar, 2 large eggs, 1 teaspoon of vanilla extract, and 1 tablespoon of lemon juice until smooth, creating a glossy mixture that binds the fruits and nuts while amplifying their natural aromas. Gently fold in the fruits and nuts to coat them evenly, ensuring the filling promises a harmonious blend of juicy textures and aromatic flavors that will captivate your taste buds.
Assemble the Mosaic
Roll out the chilled dough on a lightly floured surface to a 12-inch circle, about 1/8 inch thick, then transfer it to a 9-inch pie dish for a snug fit. This precision helps create our pie’s eye-catching mosaic design.
Layer the fruit-nut filling into the crust, arranging the fruits and nuts in alternating patterns to form a visually stunning mosaic that showcases vibrant hues and textures. Press lightly to settle the layers, allowing the filling’s sweet, tangy scents to mingle with the crust’s buttery notes as we prepare for baking.
Bake the Pie
Preheat our oven to 375°F and place the assembled pie on the middle rack for even heat distribution. Bake for 40-45 minutes, or until the crust turns a golden brown and the filling bubbles with a glossy sheen, filling our kitchen with irresistible aromas of baked fruits and nuts.
To check for doneness, insert a knife into the center; it should come out clean, indicating the pie’s juicy interior has set perfectly. Once baked, let the pie cool on a wire rack for at least 1 hour before slicing, allowing the flavors to intensify and the mosaic pattern to shine through in every mouthwatering slice.
Make-Ahead and Storage
To keep your Mosaic Pie fresh and flavorful, we recommend planning ahead for convenience and proper storage to preserve its vibrant colors and textures. This approach allows you to enjoy the pie’s artistic layers without last-minute rushes.
Making Ahead
We love preparing components of the Mosaic Pie in advance to streamline baking day. Start with the crust dough, as it benefits from chilling. After mixing the dough, wrap it tightly in plastic wrap and refrigerate it for up to 24 hours. This resting period enhances its flakiness and makes rolling easier.
For the filling, we suggest prepping the fruits and nuts ahead too. Chop fresh fruits like berries or apples and mix them with chopped nuts, then store the mixture in an airtight container in the refrigerator for up to 12 hours. However, hold off on adding the wet ingredients—such as sugar, eggs, vanilla extract, and lemon juice—until you’re ready to assemble. Combining them early can make the fruits release juices prematurely, leading to a soggy mosaic.
If you want to go further, assemble the entire unbaked pie and freeze it. Roll out the dough, layer the filling into its colorful pattern, and place the pie (uncovered) in the freezer for about 1 hour until firm. Then wrap it securely in plastic wrap and aluminum foil. You can store it this way for up to 1 month—simply thaw it in the refrigerator overnight before baking as directed.
Storing Your Mosaic Pie
Once baked, proper storage is key to maintaining the Mosaic Pie’s crisp crust and juicy, nutty filling. Let the pie cool completely at room temperature for about 2 hours first, as this sets the layers and prevents condensation.
For short-term storage, transfer the cooled pie to the refrigerator. Cover it loosely with plastic wrap or place it in a pie keeper to avoid drying out. It will stay fresh for up to 3 days, retaining its eye-catching mosaic design and delightful blend of sweet and tangy flavors.
If you need longer preservation, freezing is our go-to method. Wrap the cooled pie tightly in plastic wrap, then in foil, and store it in the freezer. Here’s a quick breakdown of storage options in table form for clarity:
| Storage Method | Duration | Tips for Best Results |
|---|---|---|
| Refrigerator | Up to 3 days | Keep covered to maintain moisture and prevent the fruits’ colors from fading; reheat slices in the oven at 350°F for 10 minutes to refresh the texture. |
| Freezer | Up to 3 months | Freeze individual slices for easy serving; thaw overnight in the refrigerator and warm in the oven to restore the pie’s golden crust and vibrant layers. |
Always check for signs of spoilage, like off odors or mold, before consuming. By following these steps, we ensure your Mosaic Pie remains a showstopper for days to come.
Conclusion
We’re thrilled you’ve explored our Mosaic Pie recipe with us. It’s more than a dessert—it’s a canvas for creativity that brings joy to every gathering.
Crafting this pie lets us turn simple ingredients into something extraordinary, perfect for impressing friends or treating ourselves.
Give it a try, and let’s make more memorable moments in the kitchen.
Frequently Asked Questions
What is a Mosaic Pie?
A Mosaic Pie is a visually stunning dessert that features colorful layers of fruits and nuts, blending art and flavor. Originating from creative home bakers, it’s a fun, rewarding treat perfect for gatherings or personal enjoyment. This pie combines a flaky crust with a vibrant filling, making it a unique addition to any kitchen.
What ingredients are needed for Mosaic Pie?
For the crust, you’ll need all-purpose flour, unsalted butter, cold water, and salt. The filling requires mixed fruits, nuts, granulated sugar, eggs, vanilla extract, and lemon juice. These high-quality ingredients create a flavorful, eye-catching mosaic, ensuring a delicious balance of textures and tastes.
What tools are required to make Mosaic Pie?
Essential tools include mixing bowls, measuring cups, a rolling pin, cutting board, sharp knife, pie dish, and an oven thermometer. These items help with precise preparation, cutting, and baking, saving time and ensuring professional results in your home kitchen.
How do I prepare a Mosaic Pie?
Start by making the crust: mix flour and salt, add butter and ice-cold water, then chill. For the filling, combine fruits, nuts, sugar, eggs, vanilla, and lemon juice. Roll out the dough, layer the filling into a mosaic design, and bake until golden brown. Check doneness with a thermometer and cool before serving for the best results.
Can I make Mosaic Pie ahead of time?
Yes, prepare the crust dough and chop fruits and nuts in advance, then chill separately. Avoid mixing wet ingredients early to prevent sogginess. You can assemble and freeze the unbaked pie for up to a month, making it convenient for busy schedules or events.
How should I store Mosaic Pie?
Cool the baked pie completely before refrigerating or freezing. Store in an airtight container in the fridge for up to 3-4 days to keep the crust crisp. For longer storage, freeze for up to a month; thaw in the fridge before serving to maintain the vibrant layers and fresh flavor.