
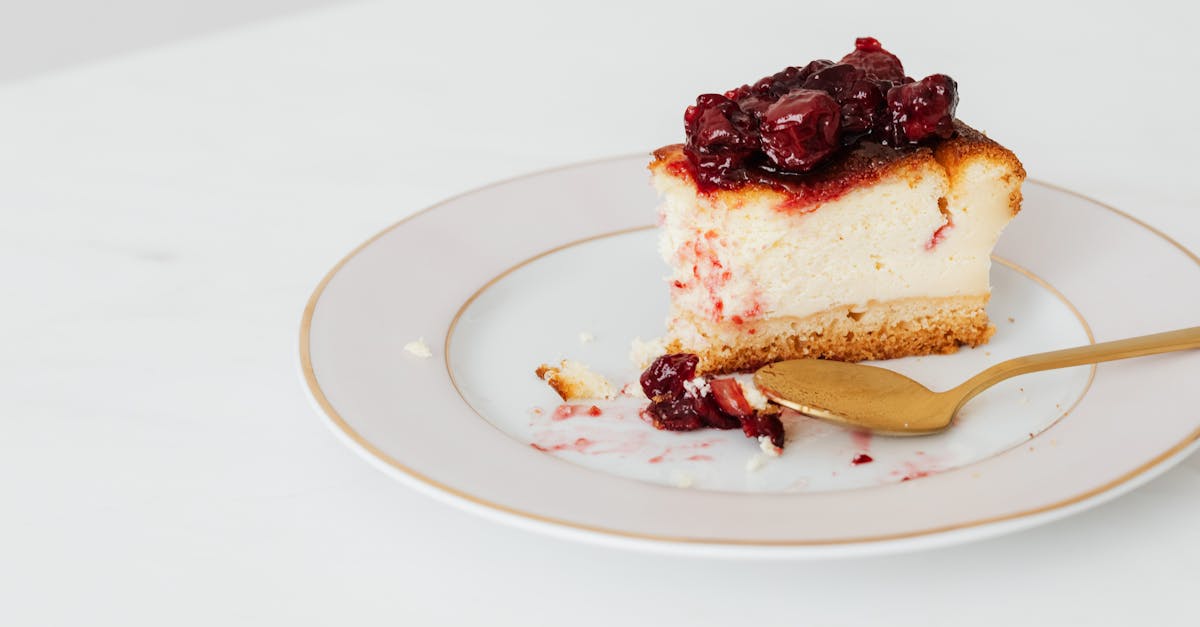
We absolutely love whipping up our Raspberry Strawberry Jam, a vibrant twist on a classic preserve that combines the tart sweetness of fresh berries for an irresistible burst of flavor. It’s perfect for those lazy weekend mornings when you want to add a homemade touch to your toast or yogurt.
Originating from simple kitchen traditions, we’ve simplified this recipe to make it accessible for everyone, whether you’re a jamming novice or a seasoned pro. With just a few ingredients, we’ll guide you to create a jar of sunshine that elevates any meal.
Ingredients
In our Raspberry Strawberry Jam recipe, we keep things simple yet flavorful, using just a handful of fresh, high-quality ingredients that come together to create a vibrant, homemade preserve perfect for your breakfast table. Below, we’ve listed the ingredients in the order they’re used, with specific prep notes for accuracy and ease.
- Fresh Raspberries: 2 cups, washed and gently patted dry to remove any excess moisture, ensuring the jam’s bright, tart flavor shines through.
- Fresh Strawberries: 2 cups, hulled and sliced into quarters for even cooking and to blend seamlessly with the raspberries.
- Granulated Sugar: 4 cups, measured precisely to achieve the ideal sweetness and help the jam set without overpowering the fruit’s natural taste.
- Lemon Juice: ¼ cup, freshly squeezed from about 2 lemons, to add acidity that enhances the fruit’s vibrancy and aids in the gelling process.
- Pectin: 1 packet (about 1.75 ounces), optional for a firmer set if you’re using low-sugar methods, but we recommend it for beginners to guarantee a perfect texture.
For optimal results, we source organic raspberries and strawberries when possible, as their freshness directly impacts the jam’s rich, fruity aroma and taste. If you’re scaling the recipe, refer to the table below for adjusted measurements based on batch size.
| Batch Size | Raspberries (cups) | Strawberries (cups) | Sugar (cups) | Lemon Juice (cups) | Pectin (packets) |
|---|---|---|---|---|---|
| Small (4 jars) | 2 | 2 | 4 | 0.25 | 1 |
| Medium (8 jars) | 4 | 4 | 8 | 0.5 | 2 |
| Large (12 jars) | 6 | 6 | 12 | 0.75 | 3 |
Required Tools and Equipment
Now that we’ve gathered our fresh raspberries, strawberries, and other key ingredients for our Raspberry Strawberry Jam, we turn our attention to the essential tools and equipment that make the jam-making process smooth and efficient. In our experience, having the right items on hand ensures precise preparation and safe canning, allowing us to create a vibrant, homemade preserve with minimal hassle.
To get started, here’s a detailed list of the tools we recommend:
- Large Saucepan or Jam Pot: We suggest using a heavy-bottomed saucepan with at least a 4-quart capacity to handle the fruit mixture without boiling over. This is crucial for even heating and preventing scorching during the cooking process.
- Measuring Cups and Spoons: Accurate measurements are key to our recipe’s success, so opt for a set of heat-resistant, stainless-steel measuring cups and spoons to precisely measure sugar, lemon juice, and any optional pectin.
- Wooden Spoon or Silicone Spatula: Essential for stirring the jam mixture, as these tools withstand high temperatures without scratching your pot. We prefer a long-handled wooden spoon to avoid splatters while monitoring the jam’s thickness.
- Candy Thermometer or Jam Thermometer: To achieve the perfect set, we rely on a thermometer that clips onto the pot’s side. Aim for a model that reads up to 220°F (104°C), helping us confirm when the jam reaches the ideal gelling point.
- Canning Jars and Lids: For storing our delicious Raspberry Strawberry Jam, use sanitized glass jars with airtight lids—typically 8-ounce or 12-ounce sizes. We recommend at least 4-6 jars per batch to preserve the jam’s fresh, fruity flavors for up to a year.
- Jar Lifter or Tongs: Safety first—we always use a jar lifter to handle hot jars during the sealing process, preventing burns and ensuring a secure fit for long-term storage.
- Funnel: A wide-mouthed funnel makes filling the jars neat and mess-free, which we find indispensable for maintaining hygiene and maximizing yield.
- Knife and Cutting Board: For prepping the fruit, a sharp knife and sturdy cutting board are must-haves. We advise using a serrated knife to easily hull and chop strawberries and raspberries without bruising them.
By preparing these tools in advance, we ensure our Raspberry Strawberry Jam turns out with its signature vibrant color and irresistible tart-sweet balance. Always prioritize clean, food-grade equipment to avoid contamination and achieve professional results right in our own kitchen.
Instructions
Now that we have gathered our fresh raspberries, strawberries, granulated sugar, lemon juice, and essential tools, we guide you through crafting our vibrant Raspberry Strawberry Jam with simple, precise steps for perfect results every time.
Prepare the Fruit
First, we rinse 4 cups of fresh raspberries and 4 cups of fresh strawberries under cold water to remove any dirt. Next, we hull the strawberries by removing the green tops and stems with a knife then roughly chop them into small pieces for even cooking.
We mash the prepared fruits together in a large bowl using a wooden spoon or potato masher until they form a chunky mixture—this helps release their natural juices and enhances the tart-sweet balance of our Raspberry Strawberry Jam.
Measure out 6 cups of granulated sugar and add it to the fruit mixture along with 1/4 cup of lemon juice, stirring gently to combine. Note: If using optional pectin, incorporate 1 packet (about 1.75 ounces) at this stage for a firmer set, as outlined in the ingredients list.
Cook the Jam
We transfer the fruit mixture to a large saucepan and heat it over medium-high heat, stirring constantly with a wooden spoon to prevent sticking and ensure even distribution of sugar.
Once the mixture reaches a full rolling boil that cannot be stirred down, we reduce the heat to medium and continue boiling for 15-20 minutes, maintaining a temperature of 220°F as measured by our candy thermometer—this is crucial for achieving the perfect gel stage. Pro Tip: To test for doneness, we place a small amount on a chilled plate; if it wrinkles when pushed with a finger, our Raspberry Strawberry Jam is ready.
Throughout the process, we skim off any foam that forms on the surface for a clearer, more appealing final product.
Jar and Store
We carefully ladle the hot jam into sanitized canning jars using a wide-mouthed funnel, leaving 1/4 inch of headspace at the top to allow for proper sealing.
Next, we wipe the jar rims with a clean, damp cloth to remove any residue then secure the lids and rings fingertip-tight. For safe storage, we process the jars in a boiling water bath for 10 minutes—adjust processing time based on altitude as shown in the table below—then remove them with a jar lifter and let them cool undisturbed on a clean towel.
| Altitude (Feet) | Processing Time Adjustment (Minutes) |
|---|---|
| 0-1,000 | 10 |
| 1,001-3,000 | 15 |
| 3,001-6,000 | 20 |
| Above 6,000 | 25 |
Make-Ahead and Storage Tips
To ensure our Raspberry Strawberry Jam retains its vibrant, tart-sweet flavor and fresh berry essence, we recommend thoughtful make-ahead strategies and proper storage methods. These tips build on the jarring process we outlined earlier, helping you maintain quality and extend shelf life for maximum enjoyment.
Make-Ahead Strategies
Preparing elements of our jam recipe in advance allows for seamless cooking sessions, especially during busy seasons when fresh raspberries and strawberries are abundant. Here’s how we suggest planning ahead:
- Prep the Fruit Early: Wash and hull your berries up to 24 hours before cooking. Store them in an airtight container in the refrigerator to preserve their juicy texture and prevent oxidation, ensuring the final jam boasts a vibrant red hue and natural sweetness.
- Mix the Base Ingredients: Combine mashed berries, granulated sugar, and lemon juice in a bowl the night before. Cover and refrigerate the mixture for up to 12 hours. This step enhances flavor infusion without cooking, making it ideal for quick morning sessions while keeping the mixture’s fresh, fruity aroma intact.
- Batch Cooking for Freezing: If you’re making multiple batches, prepare the cooked jam base ahead and freeze it in freezer-safe containers for up to 3 months. Thaw in the refrigerator overnight before jarring, allowing you to capture peak berry season flavors year-round.
Storage Guidelines
Proper storage is key to preserving the glossy sheen and irresistible berry burst of our homemade jam. Always use clean, sanitized jars to avoid contamination, and adjust techniques based on your storage preference.
- Refrigeration for Short-Term Use: After jarring, let the jam cool completely at room temperature for about 12 hours to set properly. Store sealed jars in the refrigerator, where they will last up to 3 weeks. For the best taste, keep jars in a cool, dark spot to maintain the jam’s plump berry notes and prevent crystallization.
- Freezing for Extended Freshness: For longer storage, freeze jars of jam for up to 1 year. Leave about ½ inch of headspace in each jar to account for expansion, then thaw in the fridge for 24 hours before use. This method locks in the jam’s bright, sun-ripened flavors, perfect for unexpected breakfast spreads.
- Canning for Shelf Stability: If processing in a boiling water bath as mentioned earlier, store sealed jars in a cool, dark pantry. They can last up to 1 year unopened. Always check for signs of spoilage, such as bulging lids or off odors, before consuming to ensure safety.
| Storage Method | Shelf Life (Unopened) | Shelf Life (Opened) | Key Tips |
|---|---|---|---|
| Refrigeration | Up to 3 weeks | Up to 2 weeks | Store in the coldest part of the fridge to preserve texture. |
| Freezing | Up to 1 year | Up to 3 months after thawing | Use freezer-safe jars and label with dates for easy tracking. |
| Canning | Up to 1 year | Up to 3 weeks in fridge after opening |
Adjust processing time for altitudes above 1,000 feet to ensure proper sealing.
By following these tips, we can help you enjoy the delightful, homemade goodness of our Raspberry Strawberry Jam whenever you need a burst of fresh flavor.
Conclusion
We’ve loved sharing this Raspberry Strawberry Jam recipe, as it’s a simple way to bring fresh flavors into your kitchen. It’s rewarding to make something homemade that brightens meals and impresses friends.
Remember, experimenting with your own twists keeps things exciting while building on our tips. We’re confident you’ll enjoy every jar and create lasting memories with this delightful preserve.
Frequently Asked Questions
What is Raspberry Strawberry Jam?
Raspberry Strawberry Jam is a homemade preserve made from fresh raspberries and strawberries, mixed with sugar, lemon juice, and optional pectin. It’s a simple recipe that creates a vibrant, tart-sweet spread perfect for breakfasts or snacks, offering a fresh, fruity flavor that’s easy to make at home.
What ingredients are needed for Raspberry Strawberry Jam?
You’ll need fresh raspberries, strawberries, granulated sugar, lemon juice, and optional pectin. Use about 4 cups of berries, 4 cups of sugar, 2 tablespoons of lemon juice, and pectin if desired for better setting. Sourcing organic fruits enhances the flavor and ensures the best results.
What tools are required to make this jam?
Essential tools include a large saucepan or jam pot, measuring cups and spoons, a wooden spoon or silicone spatula, a candy thermometer, sanitized canning jars and lids, a jar lifter, a wide-mouthed funnel, and a knife with a cutting board. These items help ensure a smooth, safe process.
How do I prepare the fruit for Raspberry Strawberry Jam?
Start by rinsing and hulling the berries to remove stems and debris. Mash them gently to release juices, then mix with sugar and lemon juice. This step is crucial for achieving the jam’s vibrant color and flavor balance, and you can prep the fruit up to 24 hours ahead.
What are the steps to make Raspberry Strawberry Jam?
First, prepare and mash the fruit, then mix with sugar, lemon juice, and pectin if using. Cook over medium-high heat to a rolling boil, maintain the temperature until it reaches the gel stage (tested with a thermometer or plate method), then jar and process in a boiling water bath for sealing.
How should I store Raspberry Strawberry Jam?
Store in sanitized jars with proper headspace, then process in a boiling water bath for shelf stability. Refrigerate for up to 3 weeks, freeze the base for up to 3 months, or can for up to a year. Always check seals and use clean utensils to maintain freshness and safety.
Can I adjust the recipe for different batch sizes?
Yes, scale ingredients based on a batch size table. For example, double quantities for more jars, but keep ratios consistent. Use organic fruits for optimal flavor, and adjust cooking time as needed to reach the gel stage, ensuring the jam sets properly.