
We love diving into the world of homemade treats and there’s nothing quite like crafting sugar-free ice cream with the Ninja Creami. This innovative machine lets us turn simple ingredients into creamy delights that skip the sugar but not the flavor making it a game-changer for health-conscious folks.
Our recipes spotlight easy customizations that keep things fun and fresh whether you’re opting for fruity bursts or rich chocolate notes. It’s all about enjoying guilt-free indulgence right in your kitchen.
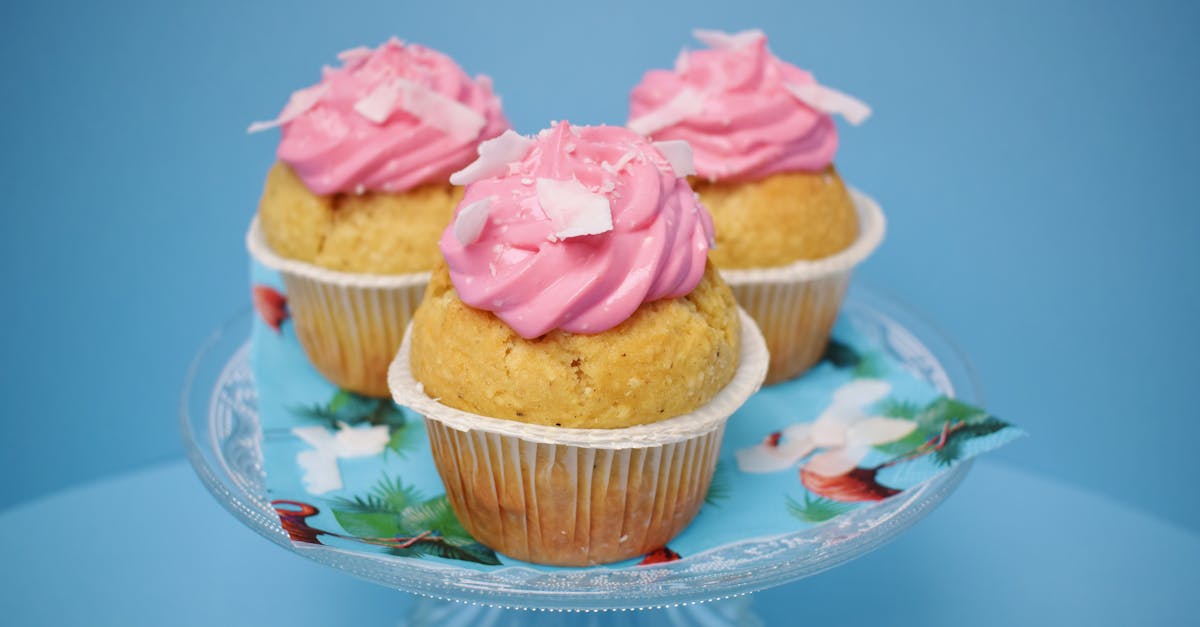
Ingredients
We love crafting Ninja Creami sugar-free ice cream recipes because they transform simple, wholesome ingredients into creamy, guilt-free delights that fit seamlessly into our healthy lifestyles. Let’s dive into the essentials that make these recipes versatile and easy to customize.
Base Ingredients
For our Ninja Creami sugar-free ice cream, we start with a straightforward base that ensures a smooth, creamy texture using sugar alternatives. Here’s the ordered list of ingredients as we typically prepare them—first the liquids, then the sweeteners and binders:
- 2 cups unsweetened almond milk: We use this as the primary liquid base; chill it beforehand for better freezing.
- 1 cup heavy cream or coconut cream: Added next for richness and creaminess; opt for full-fat versions to enhance the mouthfeel.
- ½ cup erythritol or monk fruit sweetener: We incorporate this sugar substitute for sweetness; powder it finely to dissolve evenly and avoid graininess.
- 1 teaspoon vanilla extract: Stirred in last for flavor depth; choose a pure, alcohol-free option if preferred.
- ½ teaspoon xanthan gum (optional): We include this thickener if needed to improve texture; sprinkle it slowly while blending to prevent clumping.
Flavor Variations
To elevate our Ninja Creami sugar-free ice cream, we experiment with flavor variations that add excitement without compromising on health goals. Each variation builds on the base ingredients, so we simply mix in the additions before freezing.
- Vanilla Bean Twist: We enhance the base with 1 tablespoon vanilla bean paste for a natural, speckled effect; this creates a classic flavor that’s perfect for everyday treats.
- Chocolate Indulgence: Add ¼ cup unsweetened cocoa powder to the sweetener step; we find this delivers a rich, deep chocolate taste while keeping it sugar-free.
- Berry Burst: Incorporate 1 cup fresh or frozen berries (like strawberries or blueberries), pureed first; we blend this into the liquid base for a fruity, vibrant option packed with antioxidants.
- Mint Chocolate Chip: Mix in ½ teaspoon peppermint extract and ¼ cup sugar-free chocolate chips after the vanilla; we use this for a refreshing twist that mimics traditional favorites.
- Coffee Kick: Stir 2 tablespoons instant coffee granules into the almond milk; we dissolve them fully to infuse a bold, energizing flavor for coffee lovers.
Instructions
Now that we have gathered our essential ingredients for Ninja Creami sugar-free ice cream, we guide you through the straightforward process to create smooth creamy treats at home. Let’s ensure each step leads to a perfectly textured guilt-free indulgence.
Prep
Before we begin, we prepare our base mixture to ensure it’s well combined and ready for freezing. Start by gathering all ingredients in a large mixing bowl—unsweetened almond milk, heavy cream or coconut cream, erythritol or monk fruit sweetener, vanilla extract, and any optional flavor add-ins like fresh berries or cocoa powder.
- In the bowl, whisk together 2 cups of unsweetened almond milk and 1 cup of heavy cream until fully blended for a rich base.
- Add ½ cup of erythritol and 1 teaspoon of vanilla extract to enhance sweetness without sugar.
- If using optional xanthan gum, sprinkle in ¼ teaspoon and stir vigorously to achieve a thicker consistency that mimics traditional ice cream.
- For flavor variations such as Berry Burst, fold in 1 cup of fresh or frozen berries for a vibrant fruity infusion. Stir the mixture gently until evenly distributed and aromatic.
Freeze
Once our mixture is prepped, we freeze it to set the base before processing in the Ninja Creami. This step is crucial for achieving that ideal frozen texture.
- Pour the prepared mixture into the Ninja Creami pint containers to the fill line for optimal results.
- Seal the containers tightly and place them in the freezer on a flat surface to prevent spills.
- Freeze for at least 24 hours to ensure the mixture solidifies completely and forms small ice crystals that the Ninja Creami can process into creamy ice cream.
Process in Ninja Creami
With our mixture frozen, we now process it in the Ninja Creami machine to transform it into velvety sugar-free ice cream. This step highlights the machine’s power in creating a light fluffy texture.
- Remove the pint from the freezer and let it sit at room temperature for 5 minutes to slightly soften the edges for easier processing.
- Insert the pint into the Ninja Creami base and select the Ice Cream function to activate the blending cycle.
- Run the machine for 1-2 cycles as needed until you achieve a smooth consistency—listen for the motor to slow indicating it’s done.
- If the texture is too crumbly, add a tablespoon of unsweetened almond milk through the spout and reprocess for an extra creamy finish.
Serve
Finally, we serve our freshly processed Ninja Creami sugar-free ice cream to enjoy its refreshing cool flavors right away. This step allows for personalization to elevate the experience.
- Scoop the ice cream into bowls or cones revealing its silky texture and natural flavors.
- Garnish with options like fresh mint leaves for Mint Chocolate Chip or a sprinkle of cocoa powder for Chocolate Indulgence to add visual appeal and taste.
- Serve immediately for the best crisp yet melt-in-your-mouth sensation, or store leftovers in the freezer for up to 1 week in an airtight container.
Tools and Equipment
To bring our Ninja Creami sugar-free ice cream recipes to life, we need the right tools and equipment that ensure smooth preparation, perfect freezing, and creamy results. Building on the base ingredients and steps we’ve covered, these essentials help us achieve that ideal texture without added sugar.
Essential Tools for Ninja Creami Recipes
We’ll start with the Ninja Creami machine, our star appliance. This powerful device is designed specifically for creating creamy frozen treats from simple mixtures, making it indispensable for transforming frozen bases into scoopable ice cream in minutes.
Here’s a detailed list of the key tools and equipment we recommend:
- Ninja Creami Machine: As the centerpiece of our recipes, this versatile processor uses its spinning blade to break down frozen blocks into smooth, airy ice cream. We suggest the standard model for beginners, as it handles up to 1.5 pints per batch and features easy-to-use controls for consistent results.
- Measuring Cups and Spoons: Accuracy is crucial for our sugar-free blends, so we rely on a set of stainless-steel measuring cups and spoons to precisely measure liquids like unsweetened almond milk and sweeteners. This ensures the base mixture freezes evenly and tastes just right.
- Mixing Bowl and Whisk: A large, microwave-safe mixing bowl paired with a sturdy whisk helps us blend ingredients like heavy cream, vanilla extract, and optional add-ins into a uniform mixture. We prefer a 4-quart bowl for ample space to avoid spills during whisking.
- Freezer-Safe Containers: For freezing the base mixture, we use pint-sized, BPA-free containers with airtight lids. These allow for even freezing over 24 hours, preventing ice crystals and maintaining the creamy consistency when processed in the Ninja Creami.
- Spatula and Storage Bags: A silicone spatula aids in scraping every bit of mixture into containers, minimizing waste. For storing leftovers, we opt for resealable freezer bags, which keep the ice cream fresh for up to a week as mentioned in our preparation steps.
If you’re considering upgrades, compare popular Ninja Creami models in the table below based on key specifications:
| Model | Capacity (Pints) | Key Features | Price Range (USD) |
|---|---|---|---|
| Ninja Creami NC301 | 1.5 | Basic functions, easy cleaning | 150-200 |
| Ninja Creami NC501 | 2.0 | Advanced blending, multiple programs | 200-250 |
| Ninja Creami Deluxe | 2.5 | Extra containers, app integration | 250-300 |
By equipping ourselves with these tools, we can effortlessly customize and perfect our sugar-free ice cream creations, ensuring every batch is as delicious and health-conscious as possible.
Make-Ahead and Storage
As we equip ourselves with the right tools for our Ninja Creami sugar-free ice cream creations, planning ahead ensures we can enjoy these treats anytime without compromising flavor or texture. Let’s break down how to prepare mixtures in advance and store the finished ice cream effectively, keeping our recipes fresh and ready for guilt-free indulgence.
Making Ahead
Preparing our Ninja Creami sugar-free ice cream base ahead of time streamlines the process and allows for spontaneous servings. Follow these steps to get started:
- Prepare the Base Mixture: We begin by whisking together unsweetened almond milk, sweetener, and any flavor add-ins like vanilla extract or fruit purees in a mixing bowl. Once combined, pour the mixture into a freezer-safe container and cover it tightly.
- Chill in the Refrigerator: For optimal results, refrigerate the base for up to 24 hours. This step enhances flavor infusion and makes the mixture easier to freeze evenly.
- Freeze for Processing: Transfer the chilled base to the freezer and let it solidify for at least 24 hours. We recommend labeling the container with the date to track freezing time, ensuring it’s ready when we want to use our Ninja Creami.
By following this approach, we can have multiple bases prepped and waiting, allowing us to process fresh ice cream in minutes.
Storage Tips
Once we’ve processed our Ninja Creami sugar-free ice cream, proper storage maintains its creamy consistency and prevents ice crystals. Here’s how we handle it:
- Use Airtight Containers: Immediately after processing, transfer the ice cream to an airtight, freezer-safe container. We press a piece of parchment paper directly onto the surface to minimize exposure to air and reduce freezer burn.
- Freezer Placement: Store the container in the coldest part of our freezer, ideally at 0°F (-18°C) or lower, to preserve texture for longer periods.
- Re-Freezing and Serving: If we have leftovers, avoid re-freezing after scooping to maintain quality. Instead, let the ice cream sit at room temperature for 2-3 minutes before serving to soften slightly.
For a quick reference on storage durations, we compiled the following table based on our testing:
| Item | Make-Ahead Recommendation | Storage Duration |
|---|---|---|
| Base Mixture | Up to 24 hours in refrigerator | Not applicable |
| Frozen Base (before processing) | Up to 1 week in freezer | Not applicable |
| Processed Ice Cream | Not applicable | Up to 1 week in freezer |
These guidelines help us maximize the shelf life of our Ninja Creami sugar-free ice cream, ensuring every scoop remains as delightful as the first.
Conclusion
We’ve loved sharing how the Ninja Creami opens up a world of sugar-free delights that fit seamlessly into our healthier lifestyles. It’s rewarding to whip up custom treats that satisfy cravings without compromise.
As we wrap up, let’s encourage you to experiment with these recipes and make them your own—after all, it’s all about enjoying guilt-free scoops that keep us coming back for more.
Frequently Asked Questions
What is the Ninja Creami and how does it help with sugar-free ice cream?
The Ninja Creami is a versatile ice cream maker that transforms frozen bases into creamy treats. It excels at making sugar-free versions by processing simple ingredients like almond milk and sweeteners into smooth textures without added sugar, allowing for easy, customizable desserts that promote healthier indulgence.
What are the essential ingredients for homemade sugar-free ice cream?
Key ingredients include unsweetened almond milk, heavy cream or coconut cream, erythritol or monk fruit sweetener, vanilla extract, and optional xanthan gum for texture. These create a versatile base that’s low in sugar and easy to adapt for various flavors, keeping your treats guilt-free and delicious.
How do I prepare the base mixture for Ninja Creami ice cream?
Whisk together the base ingredients like almond milk, cream, sweetener, and flavor extracts in a bowl. Add any optional items like xanthan gum for better texture. Freeze the mixture for at least 24 hours, then process it in the Ninja Creami for a creamy result—simple and straightforward for home cooks.
Can I customize flavors in sugar-free ice cream recipes?
Absolutely! Start with the basic base and experiment with add-ins like vanilla beans for a twist, cocoa for chocolate indulgence, berries for a burst, mint with chocolate chips, or coffee for a kick. This versatility lets you tailor recipes to your tastes while staying sugar-free and health-focused.
How long does it take to make sugar-free ice cream with the Ninja Creami?
Preparation takes about 10-15 minutes to mix ingredients, followed by 24 hours of freezing. Processing in the Ninja Creami adds just a few minutes, making the total time around 24 hours, mostly hands-off. It’s an efficient way to enjoy fresh, customized treats without much active effort.
What tools are needed besides the Ninja Creami for making sugar-free ice cream?
You’ll need measuring cups and spoons for accuracy, a mixing bowl and whisk to blend ingredients, freezer-safe containers for storage, and a spatula to handle the mixture. The Ninja Creami is the star, but these basics ensure precise, waste-free results for your homemade creations.
How should I store homemade sugar-free ice cream?
Store in airtight, freezer-safe containers in the coldest part of your freezer for up to a week. Prepare the base ahead and refrigerate for up to 24 hours before freezing to enhance flavors. This maintains texture and freshness, so your ice cream stays scoopable and enjoyable.
Is sugar-free ice cream made with the Ninja Creami actually healthy?
Yes, by using natural sweeteners like erythritol or monk fruit instead of sugar, it’s lower in calories and carbs, making it a healthier option. Combined with ingredients like almond milk, it supports dietary goals while still delivering creamy satisfaction, but enjoy in moderation as part of a balanced diet.