
We’ve always cherished the Bonnie Butter Cake for its rich buttery goodness and timeless appeal. Hailing from classic American baking traditions it’s a simple yet irresistible treat that evokes cozy family gatherings and sweet nostalgia.
In our recipe we’ll walk you through easy steps to whip up this moist delight right in your kitchen. Whether you’re a novice baker or a pro it’s perfect for birthdays potlucks or just because. Let’s dive in and create something truly special together.
Ingredients
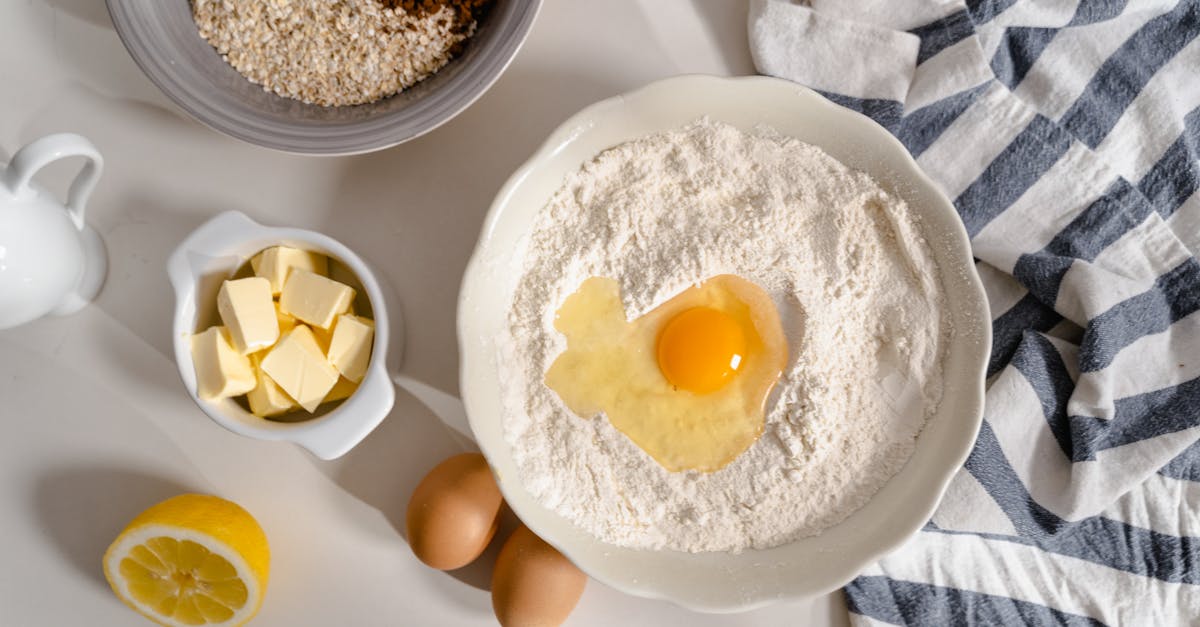
To bake our irresistible Bonnie Butter Cake, we’ve compiled a precise list of ingredients, organized in the order we typically use them during preparation. This ensures a smooth process while highlighting the rich, buttery essence that makes this classic American favorite so memorable.
Dry Ingredients
- 2 1/4 cups all-purpose flour: Sifted to remove lumps, as we start with the base for structure and texture.
- 1 1/2 cups granulated sugar: Measured accurately for the perfect sweetness that balances the butter’s flavor.
- 2 1/2 teaspoons baking powder: Fresh and leveled, to provide the lift that keeps our cake light and fluffy.
Wet Ingredients
- 1 cup unsalted butter: Softened to room temperature, as we cream it next for that signature moist crumb.
- 4 large eggs: At room temperature, beaten lightly before adding for even incorporation and richness.
- 1 cup whole milk: Chilled, to add moisture and create a tender consistency when mixed in.
Flavor Enhancers
- 2 teaspoons pure vanilla extract: Added last among liquids, to infuse a warm, aromatic note that elevates the overall taste of our Bonnie Butter Cake.
For optimal results, ensure all ingredients are at room temperature unless specified, as this helps achieve the even bake and velvety texture we love in this timeless recipe.
Tools and Equipment
Now that we have gathered our ingredients and ensured they are at the right temperature for a smooth baking process, let’s equip ourselves with the essential tools to prepare our Bonnie Butter Cake flawlessly. The right equipment not only streamlines the steps but also helps achieve that perfect, buttery texture and golden crumb we love in this classic treat.
We recommend the following key tools, organized by their role in the recipe:
- Mixing Bowls: Two to three large, sturdy mixing bowls in various sizes for combining dry and wet ingredients separately. Opt for glass or stainless steel bowls as they are easy to clean and won’t retain odors, ensuring our batter mixes evenly without lumps.
- Electric Mixer or Stand Mixer: A reliable electric mixer with beaters or a stand mixer for creaming the softened butter and sugar. This tool is crucial for incorporating air into the mixture, which contributes to the cake’s light, fluffy rise—aim for at least 200 watts for efficient performance.
- Measuring Cups and Spoons: A set of precise, heat-resistant measuring cups and spoons for accurate measurements of ingredients like flour, sugar, and milk. We always use standard US cups (1 cup = 240 ml) to avoid errors that could affect the cake’s moisture and texture.
- Sifter or Fine-Mesh Strainer: Essential for sifting dry ingredients such as flour and baking powder, which helps eliminate clumps and aerates the mixture for a finer crumb in our Bonnie Butter Cake.
- Baking Pans: Two 9-inch round cake pans with straight sides, ideally made of light-colored metal for even baking. Grease them well to prevent sticking, as this ensures our cake releases perfectly and retains its signature shape.
- Spatula and Whisk: A flexible silicone spatula for folding ingredients gently and a wire whisk for initial blending. These are indispensable for maintaining the batter’s volume and achieving that velvety consistency.
- Oven and Oven Thermometer: A standard oven preheated to 350°F (177°C), paired with an oven thermometer for precise temperature control. Consistent heat is key to baking our Bonnie Butter Cake evenly and avoiding over-browning.
- Cooling Rack: A wire cooling rack to let the baked cake cool properly, allowing air circulation for even temperature reduction and preventing sogginess.
| Tool | Recommended Size/Quantity | Why It’s Important |
|---|---|---|
| Mixing Bowls | 2–3 bowls (medium to large) | Ensures separate mixing without cross-contamination. |
| Electric Mixer | At least 200 watts | Provides the power needed for thorough creaming. |
| Baking Pans | 2 × 9-inch round | Delivers uniform baking and classic layer cake results. |
Instructions
Now that we have gathered our ingredients and essential tools, let’s guide you through baking our classic Bonnie Butter Cake with straightforward steps that yield a moist, buttery delight perfect for any gathering.
Prep Work
Before we begin mixing, proper preparation ensures our cake turns out flawlessly. Start by bringing all wet ingredients to room temperature—soften the unsalted butter by leaving it out for about 30 minutes, and let the large eggs and whole milk sit until they reach 70°F for easy blending. Next, sift the dry ingredients: Measure 2¾ cups of all-purpose flour, 1¾ cups of granulated sugar, and 2½ teaspoons of baking powder into a fine-mesh strainer or sifter, then gently sift them into a large mixing bowl to remove lumps and aerate the flour for a lighter crumb. Measure and set aside flavor enhancers: Pour 1 teaspoon of pure vanilla extract into a small bowl, and grease two 9-inch round baking pans with butter or non-stick spray, lining the bottoms with parchment paper to prevent sticking.
Mixing the Batter
With our ingredients prepped, we move on to creating the batter, aiming for a smooth, velvety texture that promises a rich, buttery flavor. In a large mixing bowl, use an electric mixer on medium speed to cream 1 cup of softened unsalted butter with 1¾ cups of granulated sugar until light and fluffy, about 3-4 minutes, watching as the mixture turns pale yellow and doubles in volume for optimal aeration. Add the eggs one at a time: Crack in 4 large eggs, beating well after each addition to incorporate air and ensure even distribution, then mix in the 1 teaspoon of pure vanilla extract for a warm, aromatic scent. Alternate adding dry and wet ingredients: Gradually add the sifted dry mixture in three parts, alternating with 1¼ cups of whole milk in two parts, beginning and ending with the dry ingredients; mix on low speed just until combined, about 1 minute per addition, to avoid overmixing and keep the batter tender and lump-free.
Baking the Cake
Now we bake our Bonnie Butter Cake to achieve a golden, irresistible crust with a soft interior. Divide the batter evenly: Pour the prepared batter into the two greased 9-inch round pans, using a spatula to smooth the tops for even rising. Preheat your oven to 350°F and place the pans on the middle rack, then bake for 30-35 minutes, or until a toothpick inserted into the center comes out clean and the cakes spring back when lightly pressed, filling your kitchen with the sweet, buttery aroma of fresh-baked goodness. Monitor closely: Rotate the pans halfway through baking if your oven heats unevenly, ensuring uniform golden browning and a perfect crumb.
Cooling and Serving
After baking, proper cooling preserves the cake’s moist texture and enhances its flavors. Remove from the oven and cool in pans: Let the cakes rest on a wire rack for 10 minutes to set, then carefully invert them onto the rack to cool completely, about 1 hour, preventing sogginess and allowing the rich buttery essence to settle. For serving, we recommend slicing into generous wedges: Pair with a simple vanilla buttercream frosting or fresh berries to complement the cake’s tender crumb, making it a standout treat for birthdays or potlucks that everyone will savor.
Make-Ahead and Storage
As we wrap up our baking adventure with the Bonnie Butter Cake, let’s explore how we can prepare this buttery delight in advance and store it to maintain its rich, golden crumb and velvety texture for maximum enjoyment.
Make-Ahead Tips
We recommend planning ahead to simplify your baking schedule, especially for events like birthdays or potlucks. Start by baking the cake layers as outlined in our step-by-step instructions, then allow them to cool completely on a wire rack. Once cooled, wrap each layer tightly in plastic wrap to prevent drying and preserve that signature buttery flavor. For added protection, we suggest placing the wrapped layers in a freezer-safe bag or container. This method lets you prepare the cake up to three days in advance if storing in the refrigerator or up to three months if freezing, ensuring it’s ready to frost and serve when needed.
If you’re assembling the full cake, we advise frosting it no more than a day ahead. Apply a thin crumb coat of vanilla buttercream to seal in moisture, then refrigerate the assembled cake. This keeps the Bonnie Butter Cake’s soft interior intact while making it easier to transport.
Storage Guidelines
Proper storage is key to keeping your Bonnie Butter Cake fresh and flavorful. Below, we break down the best methods based on duration and conditions. Always use airtight containers or wraps to avoid staleness and maintain the cake’s irresistible aroma.
| Storage Method | Duration | Key Tips |
|---|---|---|
| Room Temperature | Up to 2 days | Store in a cool, dry place away from direct sunlight. This works best for unfrosted layers, helping retain the cake’s moist, buttery texture without refrigeration. |
| Refrigerator | Up to 5 days | Wrap the cake tightly in plastic wrap or place in an airtight container. Thaw or bring to room temperature for 30-60 minutes before serving to restore its soft, golden crumb and enhance flavors. |
| Freezer | Up to 3 months | Double-wrap unfrosted layers in plastic wrap and aluminum foil for extra protection against freezer burn. When ready, thaw overnight in the refrigerator to preserve the cake’s rich taste and prevent condensation that could make it soggy. |
By following these steps, we ensure your Bonnie Butter Cake stays as delightful as the day you baked it, ready for any gathering.
Conclusion
We’ve loved sharing this Bonnie Butter Cake recipe with you. It’s a simple way to bring warmth and tradition to any table. Let’s bake more memories and enjoy those buttery layers together. You won’t regret adding it to your favorites.
Frequently Asked Questions
What is Bonnie Butter Cake?
Bonnie Butter Cake is a classic American dessert known for its rich, buttery flavor and soft, velvety texture. It’s a nostalgic treat that embodies traditional baking, perfect for occasions like birthdays or potlucks. This easy recipe suits bakers of all levels, inviting everyone to enjoy a simple yet delightful baking experience.
What ingredients are needed for Bonnie Butter Cake?
You’ll need dry ingredients like sifted all-purpose flour, granulated sugar, and baking powder, plus wet ones such as softened unsalted butter, large eggs, and chilled whole milk. Add pure vanilla extract for flavor. Using room-temperature ingredients ensures a smooth batter and optimal texture—keep it simple and measure accurately for the best results.
Why should I use room-temperature ingredients?
Room-temperature ingredients, like butter and eggs, blend more easily, creating a smoother batter and even rise. This helps achieve the cake’s velvety texture and golden crumb, preventing lumps or uneven baking. It’s a simple tip that enhances the final product’s quality without extra effort.
What tools are required to bake Bonnie Butter Cake?
Essential tools include mixing bowls, an electric mixer for smooth batter, measuring cups for accuracy, baking pans for even cooking, and a wire cooling rack. Each item plays a key role in achieving the cake’s perfect buttery texture and golden finish, making the process straightforward and efficient.
How do I bake Bonnie Butter Cake step by step?
Start by preparing ingredients at room temperature. Mix dry ingredients separately, then blend with wet ones like butter, eggs, milk, and vanilla to form a smooth batter. Pour into greased pans and bake at the recommended temperature until golden and a tester comes out clean. Cool on a rack for the best texture—total time is about 30-40 minutes.
Can I make Bonnie Butter Cake ahead of time?
Yes, bake the cake layers in advance and wrap them tightly in plastic for storage. This preserves the rich flavor and texture, allowing you to prepare up to a few days ahead. It’s ideal for events, ensuring your cake stays fresh and ready without last-minute stress.
How should I store Bonnie Butter Cake?
Store cooled cake in an airtight container at room temperature for up to 2 days, or refrigerate for up to a week to maintain freshness. For longer storage, freeze wrapped layers for up to 3 months. Thaw in the fridge before serving to keep the golden crumb and velvety texture intact.