
We’ve always cherished the simple comfort of Funeral Cookies, a timeless treat rooted in traditions of solace and community. Originating from gatherings that honor loss, these unassuming cookies offer a sweet embrace during heartfelt moments, blending nostalgia with everyday ingredients.
In our kitchen, we’ve perfected this recipe to capture that genuine warmth, making it easy for you to bake and share. Whether you’re preserving family customs or exploring new ones, our Funeral Cookies recipe promises a delightful twist on classic baking.
Ingredients
As we delve into our Funeral Cookies recipe, we start with the essential building blocks that make these comforting treats so special. Drawing from traditions of community and solace, we’ve curated a list of high-quality ingredients, ordered by how they’re used in the preparation process. This ensures a smooth baking experience while honoring the heartfelt significance of Funeral Cookies.
Here’s what you’ll need:
- Butter: 1 cup (2 sticks), softened to room temperature – We begin by creaming this with sugar to create a light, airy base for our dough.
- Granulated sugar: 1 cup – Added next, this provides the perfect sweetness and helps achieve that classic cookie crunch.
- Eggs: 2 large, at room temperature – These bind the ingredients together, incorporating them after the sugar mixture for better emulsification.
- Vanilla extract: 1 teaspoon, pure – Stirred in with the eggs, it infuses our cookies with a warm, aromatic flavor that evokes comfort.
- All-purpose flour: 2 ½ cups, sifted – Incorporated last among the dry ingredients, sifting ensures a tender texture without lumps.
- Baking powder: 1 teaspoon – Mixed with the flour, this leavening agent gives our cookies a subtle rise.
- Salt: ½ teaspoon – Combined with the dry ingredients, it enhances the overall flavor balance.
- Ground cinnamon (optional): 1 teaspoon – If you want a delightful twist, add this with the dry ingredients for a spiced variation that pairs well with tea during gatherings.
| Servings | Butter (cups) | Sugar (cups) | Eggs | Flour (cups) | Other Adjustments |
|---|---|---|---|---|---|
| 24 cookies (standard) | 1 | 1 | 2 | 2.5 | Use as listed |
| 48 cookies (doubled) | 2 | 2 | 4 | 5 | Double all other ingredients |
| 12 cookies (halved) | 0.5 | 0.5 | 1 | 1.25 | Halve all other ingredients |
Equipment Needed
With our ingredients assembled, we now focus on the essential equipment to bake Funeral Cookies effortlessly and achieve that ideal texture and flavor.
To ensure a smooth baking process, here’s a detailed list of the tools we’ll need:
- Mixing Bowls: We recommend using at least two medium-sized stainless steel or glass bowls—one for dry ingredients and one for wet—to keep everything organized and prevent cross-contamination.
- Measuring Cups and Spoons: Accurate measurements are key for consistent results, so grab a set of standard dry and liquid measuring cups along with spoons for ingredients like flour, sugar, and vanilla extract.
- Electric Mixer or Hand Whisk: For creaming butter and sugar, an electric stand mixer or hand-held mixer works best for efficiency, though a sturdy whisk will do if we’re aiming for a more hands-on approach.
- Baking Sheets: Opt for two rimmed baking sheets to allow even baking; line them with parchment paper for easy cookie removal and to prevent sticking.
- Spatula and Wooden Spoon: A silicone spatula for folding ingredients and a wooden spoon for stirring help maintain the dough’s integrity without overworking it.
- Oven and Timer: A reliable oven preheated to the correct temperature is crucial—we suggest using an oven thermometer for precision—paired with a timer to avoid overbaking.
- Cooling Rack: Once baked, a wire cooling rack allows the cookies to cool evenly, preserving their soft, comforting texture.
| Batch Size | Additional Equipment Recommendations |
|---|---|
| 12 cookies | Standard set as listed above |
| 24 cookies | Extra baking sheet and mixing bowl |
| 48 cookies | Second cooling rack and larger bowls |
Instructions
We walk you through the straightforward steps to create our comforting Funeral Cookies, drawing on the ingredients and equipment we’ve outlined to achieve a soft, flavorful treat that evokes warmth and tradition.
Prep Work
Before we dive into baking, let’s prepare our workspace and ingredients for efficiency. Preheat your oven to 375°F (190°C) to ensure even baking, and line baking sheets with parchment paper to prevent sticking and promote a golden finish. Measure out the following: 1 cup softened butter, 1 cup granulated sugar, 2 large eggs, 1 teaspoon vanilla extract, 2 cups all-purpose flour, 1 teaspoon baking powder, ½ teaspoon salt, and optional ½ teaspoon ground cinnamon for a subtle spice. If scaling for different batch sizes, refer to our earlier guidelines—here’s a quick overview in a table for clarity:
| Batch Size | Butter (cups) | Sugar (cups) | Eggs | Flour (cups) | Baking Sheets Needed |
|---|---|---|---|---|---|
| 12 cookies | 0.5 | 0.5 | 1 | 1 | 1 |
| 24 cookies | 1 | 1 | 2 | 2 | 1-2 |
| 48 cookies | 2 | 2 | 4 | 4 | 2-3 |
This setup allows us to move seamlessly into mixing, minimizing downtime and maximizing the aromatic vanilla and cinnamon scents that will soon fill our kitchen.
Mixing the Dough
We start by combining our ingredients to form a smooth, pliable dough that captures the essence of classic comfort baking. In a large mixing bowl, cream together 1 cup softened butter and 1 cup granulated sugar using an electric mixer on medium speed until the mixture turns light and fluffy—about 2-3 minutes—creating a base that’s irresistibly creamy with a sweet, buttery aroma. Add 2 large eggs one at a time, beating well after each to incorporate air and ensure a tender texture, then mix in 1 teaspoon vanilla extract for a warm, fragrant depth. In another bowl, whisk together 2 cups all-purpose flour, 1 teaspoon baking powder, ½ teaspoon salt, and optional ½ teaspoon ground cinnamon. Gradually add the dry mixture to the wet ingredients, stirring with a wooden spoon until fully combined into a soft dough—avoid overmixing to keep the cookies tender and prevent a tough result. At this stage, we achieve a dough that’s velvety smooth with hints of spice, ready for shaping.
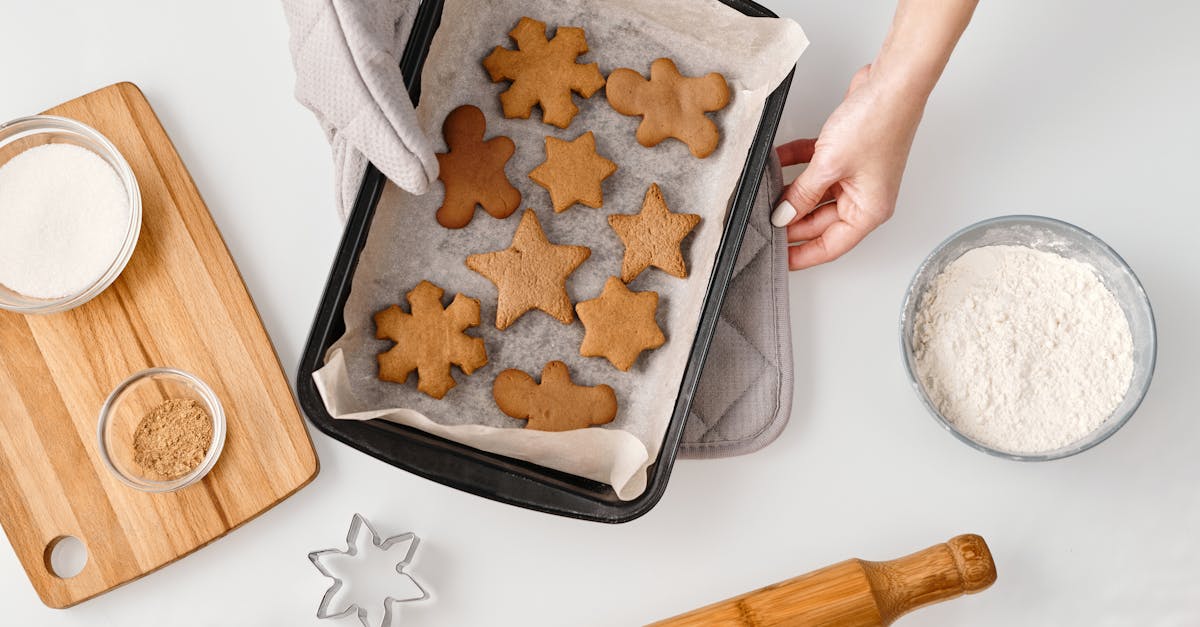
Shaping and Baking
Now we shape and bake our Funeral Cookies to produce golden, irresistible rounds that offer a satisfying crunch on the outside and a soft, chewy center. Using a spoon or your hands, portion the dough into 1-inch balls—about 12 per sheet—and place them 2 inches apart on the prepared baking sheets to allow for even spreading. Gently flatten each ball with a fork for a classic crisscross pattern, enhancing both appearance and texture. Slide the sheets into the preheated 375°F oven and bake for 10-12 minutes, until the edges turn a light golden brown and the tops set firm—the kitchen will fill with the enticing scent of baked vanilla and cinnamon, signaling perfectly done cookies. For larger batches, rotate the sheets halfway through to ensure uniform baking, yielding cookies that are crisp yet moist for that comforting bite.
Cooling and Storing
After baking, we cool and store our Funeral Cookies properly to maintain their fresh, delightful texture for sharing or savoring later. Remove the baking sheets from the oven and let the cookies rest on them for 5 minutes to firm up, allowing the heat to distribute evenly for a stable structure. Transfer them to a cooling rack using a spatula, where they should cool completely for about 10-15 minutes—the surface will harden slightly while the interior stays soft and chewy, preserving that comforting appeal. For storage, place cooled cookies in an airtight container at room temperature for up to 5 days, or freeze them in a resealable bag for up to 3 months to retain moisture and flavor—just thaw at room temperature when ready. This method ensures our cookies remain a heartfelt treat, perfect for community gatherings.
Make-Ahead Tips
As baking enthusiasts, we understand that preparing Funeral Cookies in advance can ease the emotional weight of gatherings and ensure these comforting treats are ready when needed. Let’s explore our top strategies for making dough and baked cookies ahead, while preserving their signature golden crunch and soft, heartfelt center.
Preparing Dough Ahead
We recommend starting with the dough preparation, as it’s the foundation of flawless Funeral Cookies. Begin by following our mixing instructions from the previous section, then chill or freeze the dough for convenience:
- Chill the dough: After forming the dough, shape it into balls or logs as directed. Wrap tightly in plastic wrap and refrigerate for up to 3 days. This step enhances flavor development, allowing the vanilla and cinnamon notes to meld for a more aromatic bake.
- Freeze for longer storage: For extended planning, portion the dough into balls on a baking sheet, freeze until solid (about 1-2 hours), then transfer to a freezer-safe bag or container. Our tests show this method keeps dough fresh for up to 3 months, maintaining the perfect texture for baking later.
Remember, freezing dough balls means you can bake fresh batches on demand, delivering that warm, inviting scent straight from the oven.
Baking and Storing Cookies Ahead
Once baked, Funeral Cookies hold up beautifully with proper storage, ensuring they retain their crisp edges and tender interior. Here’s how we handle make-ahead baking:
- Cool completely first: Always let cookies cool on the rack as outlined earlier, preventing sogginess that could dull their delightful contrast.
- Short-term storage: Store cooled cookies in an airtight container at room temperature for up to 1 week. Layer with parchment paper to avoid sticking, and add a slice of bread to maintain moisture—our go-to trick for keeping them soft and flavorful.
- Long-term freezing: For batches beyond immediate use, freeze baked cookies in a single layer until solid, then pack into freezer bags. They stay fresh for up to 3 months, ready to thaw at room temperature for 30 minutes or briefly warm in the oven at 300°F for 5 minutes to restore their just-baked essence.
To help you plan effectively, we’ve compiled a quick reference table for storage durations and tips:
| Storage Method | Duration | Key Tips |
|---|---|---|
| Refrigerated Dough | Up to 3 days | Wrap securely; thaw in fridge before baking. |
| Frozen Dough | Up to 3 months | Bake from frozen, adding 1-2 minutes to oven time. |
| Room Temperature Cookies | Up to 1 week | Use airtight containers; add bread for humidity control. |
| Frozen Cookies | Up to 3 months | Thaw on counter or reheat for optimal texture. |
By incorporating these Make-Ahead Tips, we empower you to prepare Funeral Cookies effortlessly, ensuring they’re always on hand to offer comfort and community during meaningful moments.
Conclusion
We’ve loved diving into the world of Funeral Cookies and how they bring folks together in heartfelt ways. Baking them lets us honor traditions while creating new memories that offer real comfort.
Remember, it’s all about the simple joy of sharing these treats, so grab your ingredients and give it a go. We’re sure you’ll cherish the process and the connections it fosters.
Happy baking—it’s more than just cookies; it’s a gesture that warms the soul.
Frequently Asked Questions
What are Funeral Cookies?
Funeral Cookies are a traditional treat symbolizing comfort and community during times of loss. They offer a heartfelt way to honor gatherings, blending sentiment with simple baking. This recipe provides a delightful twist on classics, perfect for upholding traditions or creating new ones, making them easy to share and enjoy.
What ingredients are needed for Funeral Cookies?
The essential ingredients include softened butter, granulated sugar, eggs, vanilla extract, all-purpose flour, baking powder, salt, and optional ground cinnamon. Use high-quality components for the best results. For different batch sizes, like 12, 24, or 48 cookies, simply scale the quantities proportionally to maintain flavor and texture.
What equipment is required to bake Funeral Cookies?
You’ll need mixing bowls, measuring cups and spoons, an electric mixer or hand whisk, baking sheets with parchment paper, a spatula, wooden spoon, a reliable oven with a thermometer, and a cooling rack. For larger batches, add extra baking sheets and bowls to keep the process organized and efficient.
How do I make Funeral Cookies?
Start by preheating your oven and measuring ingredients. Mix softened butter, sugar, eggs, and vanilla to form dough, then add flour, baking powder, salt, and cinnamon. Shape into balls and bake at the recommended temperature until golden with a crunchy exterior and soft center. Cool on a rack before serving.
Can I prepare Funeral Cookies in advance?
Yes, you can make Funeral Cookies ahead to ease gathering stress. Prepare dough and chill it for up to three days or freeze for up to three months. Bake fresh as needed. This allows you to have comforting treats ready, enhancing emotional support during meaningful moments.
How should I store Funeral Cookies?
Cool cookies completely before storing. Keep them in an airtight container at room temperature for up to a week, or freeze for up to three months to preserve freshness. For longer storage, thaw frozen cookies at room temperature. Proper storage ensures they remain delicious and ready to share.
How can I adjust the recipe for different batch sizes?
Easily scale the recipe by multiplying ingredients based on your needs: double for 24 cookies or quadruple for 48. Adjust baking time slightly for larger batches to ensure even cooking. This flexibility helps you prepare the perfect amount for any gathering while maintaining the cookies’ ideal texture.