
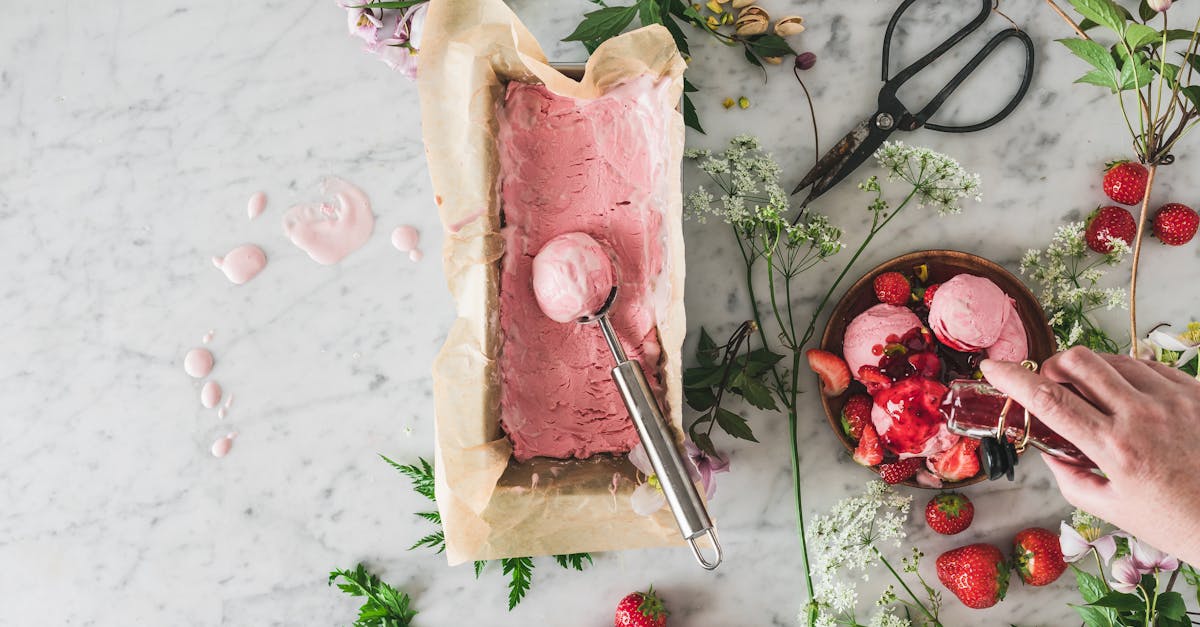
We’ve all encountered those vibrant strawberry tops that often end up in the compost, but we’re excited to share our Strawberry Top Syrup Recipe as a clever way to minimize waste and create something delicious. This easy homemade syrup captures the fresh, tangy essence of strawberries while adding a sustainable twist to your kitchen adventures.
Ingredients
In our Strawberry Top Syrup Recipe, we focus on transforming often-discarded strawberry tops into a vibrant, flavorful syrup that minimizes waste while capturing the essence of fresh strawberries. Below, we list the ingredients in the order they are used, with specific measurements and prep notes for accuracy and ease.
- Strawberry tops: 2 cups, from about 1 pound of fresh strawberries, roughly chopped to release their natural juices and flavors—ensuring we maximize every bit of the fruit.
- Granulated sugar: 1 cup, added next to balance the tartness and create a smooth, glossy texture in the syrup.
- Water: 1 cup, used to dissolve the sugar and extract flavors from the strawberry tops for a perfect syrup consistency.
- Fresh lemon juice: 2 tablespoons, squeezed from 1 lemon, incorporated to enhance the brightness and act as a natural preservative, elevating the syrup’s zesty profile.
Instructions
Now that we have our fresh ingredients gathered, let’s transform strawberry tops into a vibrant, waste-reducing syrup that bursts with natural sweetness and tang. We’ll guide you through each step to ensure a smooth, flavorful result.
Prepare the Strawberries
First, we rinse 2 cups of strawberry tops under cold water to remove any dirt or debris, ensuring they are clean and ready for use. Next, we roughly chop the tops into smaller pieces—about 1-inch segments—to release their juices and maximize flavor extraction, setting the stage for a syrup that’s rich in fresh, fruity essence.
Cook the Syrup
In a medium saucepan, we combine the 2 cups of prepared strawberry tops with 1 cup of granulated sugar, 1 cup of water, and 2 tablespoons of fresh lemon juice, stirring vigorously to dissolve the sugar evenly. We bring the mixture to a boil over medium heat, then reduce to a simmer for 15-20 minutes, occasionally stirring to prevent sticking, until the liquid thickens and develops a glossy, ruby-red hue with an irresistible aroma of ripe strawberries and citrus.
Strain and Cool
Once the syrup has cooked, we carefully strain it through a fine-mesh sieve into a heatproof bowl, pressing the solids gently to extract every drop of flavorful liquid while discarding the pulp for a smooth, silky texture. Finally, we let the syrup cool to room temperature on the counter for about 30 minutes before transferring it to an airtight container and refrigerating it for up to 2 weeks, preserving its bright, tangy sweetness for drizzling over pancakes or desserts.
Tools and Equipment
To bring our Strawberry Top Syrup Recipe to life after preparing the ingredients and following the cooking steps, we rely on a few essential tools and equipment. These items ensure efficiency, safety, and precision in creating a smooth, flavorful syrup while minimizing waste.
Here’s a curated list of the key tools we need:
- Saucepan: A medium-sized saucepan is crucial for combining and heating the strawberry tops, sugar, water, and lemon juice. We recommend one with a heavy bottom to prevent scorching and ensure even simmering for optimal flavor extraction.
- Knife and Cutting Board: A sharp chef’s knife paired with a sturdy cutting board allows us to chop the strawberry tops into smaller pieces quickly and safely. This step maximizes the release of natural juices and enhances the syrup’s vibrant taste.
- Measuring Cups and Spoons: Accurate measurements are key to balancing flavors in our Strawberry Top Syrup Recipe, so we use standard measuring cups for liquids like water and spoons for ingredients like lemon juice to achieve the perfect sweetness and acidity.
- Fine-Mesh Strainer: This tool is vital for straining the cooked mixture to remove solids, resulting in a silky texture. We prefer a fine-mesh version to capture even the smallest particles and deliver a professional-grade syrup.
- Wooden Spoon or Silicone Spatula: For stirring the mixture during boiling and simmering, a heat-resistant wooden spoon or spatula helps prevent sticking and ensures even cooking without damaging our cookware.
- Airtight Container: Once the syrup cools, we store it in a glass jar or airtight container to maintain freshness for up to two weeks, preserving the bright strawberry flavors for drizzling on pancakes or desserts.
By having these tools ready, we make our Strawberry Top Syrup Recipe not only straightforward but also a sustainable kitchen adventure.
Make-Ahead Instructions
To make our Strawberry Top Syrup even more convenient, we can prepare it in advance and store it for future use. This approach not only reduces kitchen time on busy days but also allows the flavors to meld, enhancing the syrup’s vibrant, fresh taste. Let’s break down the key steps for make-ahead preparation, ensuring our syrup remains fresh and ready to drizzle over pancakes or desserts.
Preparing and Storing the Syrup
We recommend making a batch of our Strawberry Top Syrup ahead of time by following the full recipe outlined earlier. Once the syrup has cooled completely after straining, transfer it to an airtight container for optimal preservation. Here’s how to handle the process:
- Gather your storage supplies first: Before starting, have an airtight glass jar or bottle ready, along with labels for easy tracking.
- Cool the syrup thoroughly: After straining, let the mixture sit at room temperature for about 30 minutes to avoid condensation, which can dilute flavors or promote spoilage.
- Portion for flexibility: If we plan to use smaller amounts, divide the syrup into multiple containers—such as 4-ounce jars—for quick access without exposing the entire batch.
Storage Guidelines and Shelf Life
Proper storage is crucial for maintaining the syrup’s glossy texture and bright strawberry essence. We can store it in the refrigerator or freezer, depending on how far ahead we’re planning. Below is a quick reference table for storage options and durations:
| Storage Method | Duration | Best For | Tips for Optimal Results |
|---|---|---|---|
| Refrigerator | Up to 2 weeks | Short-term use (e.g., daily) | Keep in a sealed container and stir before use to restore consistency. |
| Freezer | Up to 3 months | Long-term storage | Freeze in ice cube trays for easy portioning; thaw in the fridge overnight. |
By following these make-ahead strategies, we ensure our Strawberry Top Syrup stays fresh and flavorful, making it a sustainable staple in our kitchen. Always check for signs of spoilage, like off odors or mold, before using.
Conclusion
We’ve shown how turning strawberry tops into a delightful syrup makes our kitchens more sustainable and flavorful. It’s a simple way to savor fresh tastes while cutting down on waste.
By incorporating this recipe into our routines, we’ll enjoy versatile drizzles on everyday meals and discover the joy of eco-friendly cooking. Let’s keep innovating with what we’ve got!
Frequently Asked Questions
What is Strawberry Top Syrup?
Strawberry Top Syrup is a homemade recipe that turns usually discarded strawberry tops into a flavorful syrup. It’s a sustainable way to reduce kitchen waste while capturing the fresh taste of strawberries. Made with simple ingredients, it’s perfect for drizzling on pancakes or desserts for a burst of natural sweetness.
Why should I use strawberry tops in this recipe?
Using strawberry tops helps minimize food waste by repurposing parts of the fruit that are often thrown away. They still hold plenty of flavor and nutrients, making the syrup eco-friendly and cost-effective. Plus, it adds a fresh, tangy twist to your cooking without needing extra produce.
What ingredients are needed for Strawberry Top Syrup?
The main ingredients are 2 cups of roughly chopped strawberry tops, 1 cup of granulated sugar, 1 cup of water, and 2 tablespoons of fresh lemon juice. These are chosen to balance sweetness, enhance flavor, and create a smooth texture, keeping the recipe simple and effective.
How do I make Strawberry Top Syrup?
Start by rinsing and chopping 2 cups of strawberry tops. Combine them in a saucepan with 1 cup sugar, 1 cup water, and 2 tablespoons lemon juice. Bring to a boil, then simmer until thickened. Strain the mixture for a silky texture, cool it, and store in an airtight container. The whole process takes about 20-30 minutes.
What tools do I need to make this syrup?
You’ll need a medium-sized saucepan for cooking, a sharp knife and cutting board for chopping tops, measuring cups and spoons for accuracy, a fine-mesh strainer to remove solids, a heat-resistant spoon or spatula for stirring, and an airtight container for storage. These basics ensure safe and efficient preparation.
How long does Strawberry Top Syrup last, and how should I store it?
The syrup lasts up to two weeks in the fridge or three months in the freezer. Store it in an airtight container after cooling to prevent condensation and maintain flavor. Always check for spoilage before use to keep it fresh and safe for your recipes.
Can I make Strawberry Top Syrup ahead of time?
Yes, you can prepare it in advance for convenience. Follow the recipe, then cool and transfer to an airtight container. Refrigerate for up to two weeks or freeze for up to three months. Thaw in the fridge if frozen, and stir well before using to preserve its vibrant flavor and texture.