
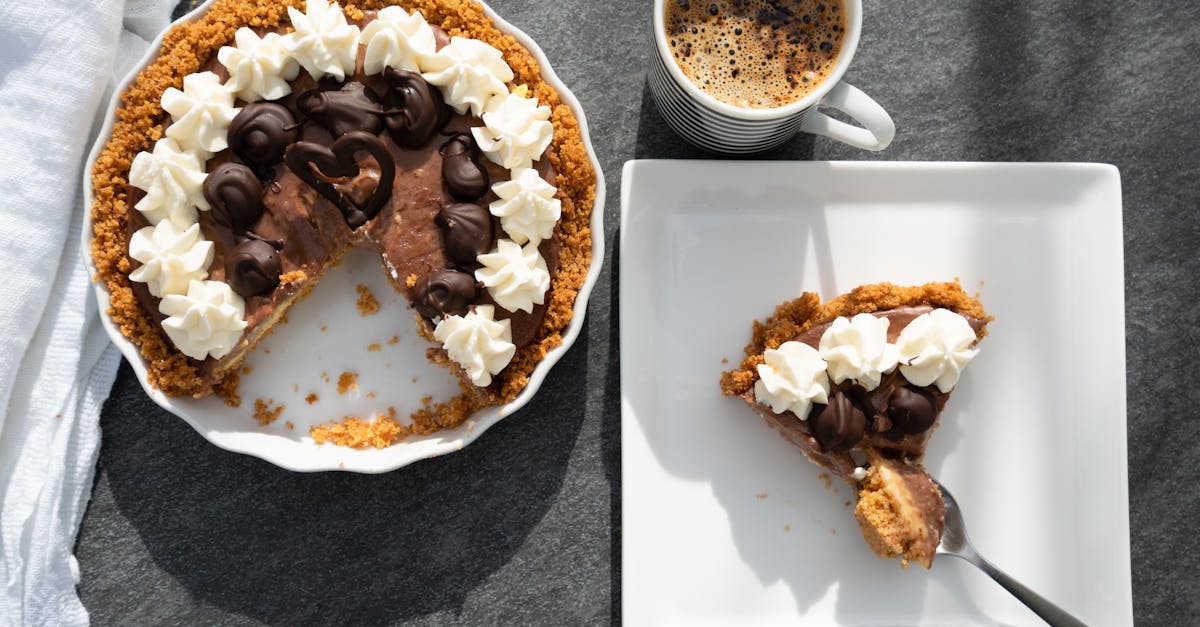
We’ve always loved the nostalgic crunch of graham crackers, turning them into irresistible mini tart shells that add a fun twist to classic desserts. Originating from American baking traditions, these bite-sized wonders are perfect for parties or quick treats, letting us get creative with fillings.
They’re incredibly easy to whip up, making them a go-to for busy kitchens. Join us as we dive into this simple recipe that’s sure to impress.
Ingredients
In our recipe for mini graham cracker tart shells, we gather simple, high-quality ingredients that deliver that irresistible, nostalgic crunch and flavor. These components, used in sequence, ensure a straightforward preparation process that ties into the ease and versatility we’ve highlighted earlier.
- Graham crackers: 1 1/2 cups, finely crushed (we start with these as the base for a sturdy, flavorful shell that evokes classic desserts).
- Unsalted butter: 1/4 cup, melted (next, we add this to bind the crumbs, creating a cohesive texture that holds up perfectly).
- Granulated sugar: 2 tablespoons (we incorporate this for a touch of sweetness, enhancing the overall taste without overpowering the graham flavor).
- Ground cinnamon: 1/2 teaspoon (optional, but we recommend it for a warm, aromatic note that complements the tart shells’ appeal).
- Salt: 1/4 teaspoon (finally, we use this to balance flavors and bring out the depth in our mini graham cracker tart shells).
Tools and Equipment
To bring our mini graham cracker tart shells to life, we rely on a few essential tools that make the preparation process smooth and efficient. These items help us crush, mix, and bake with precision, ensuring our tart shells turn out perfectly crisp and flavorful every time.
Essential Tools List
We recommend gathering the following tools before starting. Each one plays a key role in achieving that nostalgic graham cracker texture we love:
- Food Processor or Ziplock Bag and Rolling Pin: For finely crushing the graham crackers. A food processor speeds up the task for even crumbs, while a ziplock bag and rolling pin offer a hands-on alternative that works wonders in a pinch.
- Measuring Cups and Spoons: Accurate measurements are crucial for our ingredients like melted butter and granulated sugar. We use these to ensure the right balance, preventing overly dry or soggy shells.
- Mixing Bowl: A medium-sized bowl where we combine the crushed graham crackers, butter, and other elements. Opt for one with a non-slip base for easy stirring without spills.
- Muffin Tin or Mini Tart Pans: These are our go-to for shaping the tart shells. A standard 12-cup muffin tin creates uniform mini shells, ideal for parties or quick treats.
- Spatula or Wooden Spoon: Perfect for mixing and pressing the mixture into the pans. We prefer a flexible spatula for even distribution, helping achieve that sturdy base.
- Oven and Baking Sheet (if needed): A reliable oven bakes the shells to golden perfection. If using tart pans, a baking sheet underneath provides stability.
- Cooling Rack: Allows the tart shells to cool evenly after baking, preserving their crispness and preventing sogginess from trapped steam.
By having these tools ready, we seamlessly transition from mixing our high-quality ingredients to creating irresistible mini tart shells that impress at any gathering.
Instructions
Now that we have gathered our ingredients and tools, let’s walk through the steps to create irresistible mini graham cracker tart shells. We ensure each instruction is straightforward for flawless results every time.
Prep Work
Before we begin mixing, proper preparation sets the stage for success. Start by crushing the graham crackers: If using a food processor, add 2 cups of graham crackers and pulse until finely ground; alternatively, place them in a ziplock bag and crush with a rolling pin for even crumbs. Next, melt 1/2 cup of unsalted butter in the microwave or on the stovetop until fully liquid. In a mixing bowl, combine the crushed graham crackers with 1/4 cup of granulated sugar, a pinch of salt, and if desired, 1/2 teaspoon of ground cinnamon for added warmth. We recommend stirring these dry ingredients together first to distribute flavors evenly, ensuring a balanced base for our mini tart shells.
Forming the Shells
With our ingredients prepped, we now form the shells for a sturdy, golden crust. In the mixing bowl, pour the melted butter over the dry mixture and stir vigorously with a spatula until the crumbs are evenly coated and resemble wet sand—this typically takes 1-2 minutes for thorough binding. Lightly grease a muffin tin or mini tart pans to prevent sticking. Using a spoon, divide the mixture evenly among 12 cups or molds, then press the mixture firmly against the bottom and sides of each one to create a defined shell shape—aim for about 1/4-inch thickness on the sides for the perfect mini graham cracker tart shells. We suggest using the back of a measuring cup or your fingers to compact it smoothly, ensuring the shells hold their form during baking.
Baking
Finally, we bake the shells to achieve a crisp, golden finish that enhances their nostalgic appeal. Preheat your oven to 350°F for even heat distribution. Place the filled muffin tin or tart pans on a baking sheet for stability, then bake in the center rack for 8-10 minutes, or until the edges turn a light golden brown—watch closely to avoid overbaking, as this preserves the shells’ texture. Once done, remove from the oven and transfer to a cooling rack for at least 15 minutes to allow them to set and crisp up fully, preparing our mini graham cracker tart shells for filling and serving.
Make-Ahead and Storage
We understand that busy schedules demand flexibility, so making our mini graham cracker tart shells ahead of time keeps them ready for effortless fillings and serving. This approach preserves their crisp texture and nutty aroma, ensuring they remain a versatile base for your desserts.
Making Them Ahead
To maximize convenience, we recommend preparing these tart shells up to several days in advance. Follow these simple steps for optimal results:
- Prepare and bake as directed: After crushing the graham crackers and forming the shells in the muffin tin, bake them at 350°F for 8-10 minutes until the edges turn a golden brown with a satisfying crunch.
- Cool completely: Let the shells rest on a cooling rack for at least 30 minutes. This step locks in their firm structure and prevents sogginess when stored.
- Store immediately: Once cooled, transfer the shells to an airtight container to maintain their fresh, buttery flavor and prevent exposure to moisture.
By following this process, we can have a batch ready without last-minute hassle, allowing us to focus on creative fillings like fruit or cream.
Storage Options
Proper storage is key to keeping our mini graham cracker tart shells crisp and flavorful. We suggest these methods based on your needs, with options for short-term and long-term preservation.
Room Temperature Storage
For everyday use, store the shells in a cool, dry place. This method works best if you plan to use them within a few days.
Refrigerated Storage
If you need them to last longer, refrigeration helps maintain freshness while protecting against humidity.
Freezer Storage
Freezing is ideal for extended storage, ensuring the shells retain their signature crunch for future use.
To summarize storage durations, we’ve compiled the details in the table below:
| Storage Method | Duration | Key Tips |
|---|---|---|
| Room Temperature | Up to 3-5 days | Use an airtight container; avoid humid areas to prevent softening. |
| Refrigerator | Up to 1 week | Wrap shells in plastic wrap first, then place in a sealed container to retain crispness. |
| Freezer | Up to 3 months | Flash-freeze on a baking sheet before transferring to a freezer-safe bag; this preserves texture. |
When you’re ready to use stored shells, we advise bringing them to room temperature for 15-20 minutes and, if needed, briefly reheating in a 300°F oven for 2-3 minutes to restore their warm, golden appeal. Always check for any signs of staleness, like a loss of aroma, before filling.
Conclusion
We’re excited about the endless possibilities these mini graham cracker tart shells offer for your kitchen creations. They’ve got that ideal crunch and flavor base we know you’ll love tweaking.
It’s time to experiment and make each treat uniquely yours, turning simple ingredients into standout desserts that wow everyone.
Frequently Asked Questions
What are mini graham cracker tart shells?
Mini graham cracker tart shells are easy-to-make dessert bases using crushed graham crackers, offering a nostalgic, versatile option for parties or quick treats. They’re sturdy, sweet, and perfect for filling with your favorite toppings, blending simplicity with a delightful crunch.
What ingredients are needed for the recipe?
You’ll need finely crushed graham crackers for the base, melted unsalted butter for binding, granulated sugar for sweetness, optional ground cinnamon for warmth, and a pinch of salt to enhance flavors. These high-quality ingredients ensure a straightforward, tasty result in just minutes of prep.
What tools do I need to make them?
Essential tools include a food processor or ziplock bag with rolling pin for crushing crackers, measuring cups and spoons for accuracy, a mixing bowl, muffin tin or mini tart pans, spatula for mixing, and an oven with baking sheet. A cooling rack helps maintain crispness.
How do I prepare the tart shells?
Start by crushing graham crackers and melting butter. Mix with sugar, salt, and optional cinnamon, then press into greased pans. Bake at 350°F for 8-10 minutes until golden. Cool on a rack for the perfect texture, ready for fillings in under 30 minutes total.
How should I store the tart shells?
Bake and cool the shells completely, then store in an airtight container. Keep at room temperature for up to 3 days, refrigerate for up to a week, or freeze for up to 3 months. To restore crispness, let refrigerated or frozen shells come to room temperature before use.
Can I make these tart shells ahead of time?
Yes, they’re ideal for advance prep. Prepare, bake, and cool fully, then store as needed to preserve texture and aroma. This allows easy assembly later, making them perfect for events while keeping that fresh, nutty flavor intact.