
We’ve all encountered the challenges of introducing dairy to little ones with cow’s milk allergies, and that’s where Milk Ladder Recipes step in as a game-changer. These step-by-step dishes help ease back into milk consumption starting with baked forms then progressing to fresh options ensuring a safer transition.
As food lovers we’re excited to share our favorite Milk Ladder Recipes that not only taste delicious but also empower parents and caregivers. Join us in exploring these simple yet effective meals designed for building tolerance and enjoying family mealtimes again.
Stage 1: Baked Milk Recipes
We kick off the Milk Ladder with Stage 1: Baked Milk Recipes, where heating milk in baked goods helps reduce allergenicity for a gentle introduction. These recipes make it easy to build tolerance while enjoying tasty, family-friendly treats.
Ingredients
For our simple Baked Milk Muffins—a perfect Stage 1 starter—gather these ingredients in the order we use them. Note that all milk should be baked to minimize reactions.
- 1 cup all-purpose flour: Sifted for even mixing
- 1/2 cup whole milk: Warmed slightly to room temperature
- 1 large egg: Beaten lightly for better incorporation
- 1/4 cup granulated sugar: For a touch of sweetness
- 1 teaspoon baking powder: Fresh to ensure muffins rise properly
- 1/4 teaspoon salt: To enhance flavors
- 2 tablespoons unsalted butter: Melted for added moisture
Instructions
Follow these steps to prepare our Baked Milk Muffins, ensuring each one is baked to golden perfection with a soft, comforting texture that invites a sense of warmth and familiarity.
- Preheat your oven to 350°F and line a muffin tin with paper liners to create a cozy base for the batter.
- In a large mixing bowl, combine the all-purpose flour, baking powder, granulated sugar, and salt, stirring until the dry ingredients form a uniform blend that promises a light rise.
- Add the beaten egg, whole milk, and melted unsalted butter to the dry mixture, then mix gently with a spoon until just combined—avoid over-stirring to keep the batter smooth and airy.
- Spoon the batter evenly into the prepared muffin tin, filling each cup about two-thirds full for even baking and a appealing dome shape.
- Bake in the preheated oven for 18-22 minutes, or until the tops turn a golden brown and a toothpick inserted in the center comes out clean, filling your kitchen with the irresistible aroma of freshly baked goods.
- Remove the muffins from the oven and let them cool in the tin for 5 minutes before transferring to a wire rack, allowing the warm, tender interior to set while maintaining that fresh-baked appeal.
Stage 2: Well-Cooked Milk Recipes
We build on the baked milk foundation from Stage 1 by introducing well-cooked milk recipes, where milk is boiled or simmered to further minimize allergens and help children progress safely in their dairy tolerance journey.
Ingredients
For our simple Well-Cooked Milk Pudding, a gentle next step in the Milk Ladder, we use the following ingredients in the order they are prepared. This recipe yields 4 servings and takes about 20 minutes of cooking time.
- 1 cup whole milk: Choose pasteurized milk and heat it gently to ensure safety.
- 2 tablespoons cornstarch: Mix this with a little water first to create a smooth slurry for thickening.
- 1/4 cup granulated sugar: Add this for sweetness, adjusting based on taste preferences.
- 1 teaspoon vanilla extract: Stir in at the end for flavor enhancement.
- Optional: 1/2 cup fresh fruits (like berries): Wash and chop these finely before incorporating for added texture and nutrition.
Instructions
- Prepare the slurry: In a small bowl, whisk together the cornstarch and 2 tablespoons of water until smooth, ensuring no lumps form for a creamy texture.
- Heat the milk: Pour the milk into a medium saucepan and bring it to a gentle boil over medium heat, stirring constantly to prevent scorching and release a rich, comforting aroma.
- Add sugar and slurry: Once the milk boils, reduce the heat to low and stir in the sugar until it dissolves fully, then gradually add the cornstarch slurry while whisking vigorously to create a thick, velvety consistency.
- Simmer the mixture: Cook the pudding for 5-7 minutes, stirring occasionally, until it thickens to a spoon-coating state that signals it’s ready for cooling.
- Incorporate flavor: Remove the saucepan from the heat and mix in the vanilla extract, letting the warm pudding absorb its sweet, fragrant essence before portioning.
- Cool and serve: Transfer the pudding to serving bowls and let it cool for 10 minutes at room temperature, then refrigerate for at least 1 hour to achieve a smooth, chilled delight that’s perfect for family mealtimes.
Stage 3: Lightly Cooked Milk Recipes
As we advance in the Milk Ladder, we introduce Lightly Cooked Milk Recipes that gently heat milk to reduce allergens while building on the tolerance gained from Stages 1 and 2. These recipes offer a smoother transition with warm, comforting dishes that are easy to prepare and help families enjoy dairy in a controlled manner.
Ingredients
For our Lightly Cooked Milk Porridge, a simple yet nutritious recipe designed for this stage, we list the ingredients below in the order they are used. This porridge combines lightly warmed milk with oats to create a creamy texture that’s safe and appealing for children.
- 1 cup rolled oats: Use old-fashioned oats for the best texture, rinsed under cold water.
- 2 cups whole milk: Choose pasteurized milk, heated lightly to preserve its natural creaminess.
- 1 tablespoon honey or sugar: Add for sweetness, adjusting based on taste preferences.
- 1/2 teaspoon ground cinnamon: Freshly ground if possible, to infuse warm, aromatic flavors.
- 1 medium banana, sliced: Ripe and fresh, sliced just before use for added moisture and natural sweetness.
- A pinch of salt: Enhances the overall flavor without overpowering the dish.
Instructions
- Gather and prepare ingredients: We start by measuring 1 cup of rolled oats and rinsing them under cold water to remove any dust, ensuring a clean base for our porridge.
- Heat the milk gently: In a medium saucepan over low heat, pour in 2 cups of whole milk and warm it slowly for 2-3 minutes until it reaches a gentle simmer—stir occasionally to prevent scorching and achieve a silky, smooth consistency that coats the oats perfectly.
- Add oats and seasonings: Stir in the rinsed oats along with a pinch of salt and 1/2 teaspoon of ground cinnamon, then cook the mixture on low heat for 5 minutes—watch as the oats absorb the milk, transforming into a thick, hearty texture with a fragrant, spicy aroma that fills the kitchen.
- Sweeten and incorporate fruits: Mix in 1 tablespoon of honey or sugar until fully dissolved, then fold in the sliced banana and cook for another 2 minutes—the banana softens slightly, releasing a natural sweetness that blends with the warm milk for a velvety, comforting finish.
- Serve immediately: Remove the porridge from heat and let it rest for 1 minute to thicken further, then divide into bowls—enjoy the creamy, mildly sweet flavors and soft texture that make this dish not only safe for dairy reintroduction but also a delightful family favorite.
Stage 4: Fresh Milk Recipes
In this final stage of the Milk Ladder, we build on the tolerance developed from previous stages by introducing fresh milk recipes that use unheated milk directly. These recipes help children safely enjoy everyday dairy while minimizing risks associated with cow’s milk allergies.
Ingredients
- 1 cup fresh whole milk: Chilled and pasteurized for safety and optimal taste.
- 1 medium banana: Ripe and sliced for natural sweetness and creaminess.
- 1/2 cup fresh berries: Such as strawberries or blueberries, washed and hulled for added nutrition and vibrant flavor.
- 1 tablespoon honey: Raw and local, if available, to sweeten without overpowering.
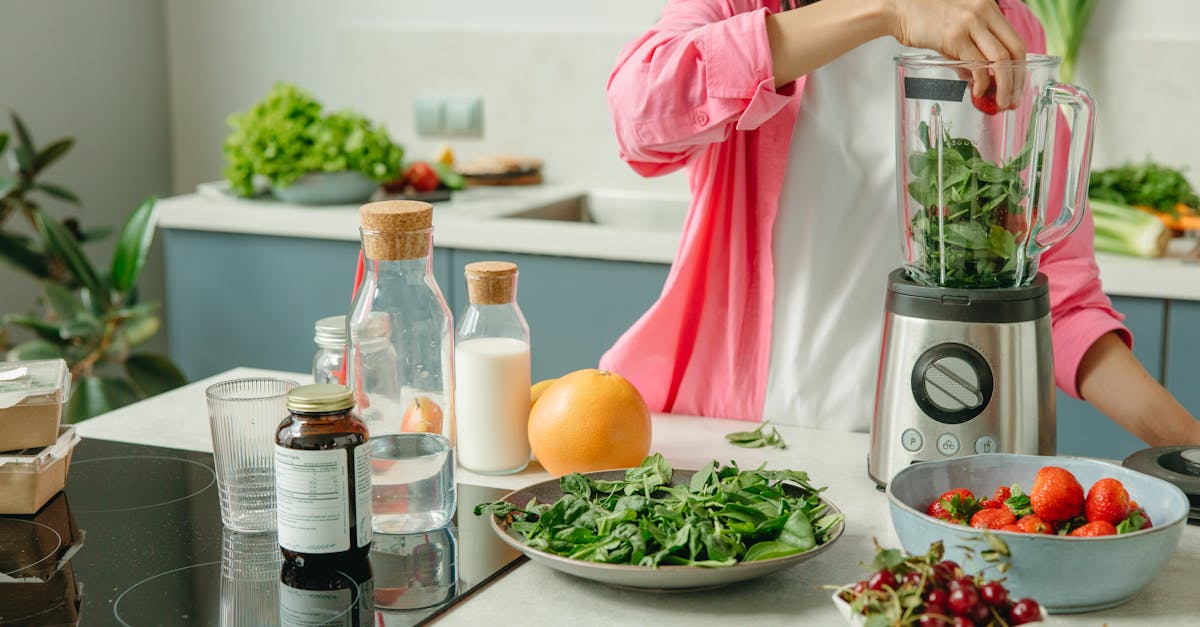
- A handful of spinach: Fresh and chopped, optional for a nutrient boost without altering the smoothie’s appeal.
Instructions
- Prepare the fruits: Start by peeling and slicing the ripe banana into the blender to create a smooth base that adds natural sweetness and thickness to our fresh milk smoothie.
- Add the berries: Wash and hull the fresh berries, then toss them into the blender to infuse the smoothie with bright flavors and essential vitamins.
- Incorporate the milk: Pour in the 1 cup fresh whole milk next, ensuring it’s well-chilled to achieve a refreshing, creamy texture that highlights the benefits of unheated milk in this Milk Ladder stage.
- Sweeten and blend: Drizzle in the 1 tablespoon honey for a touch of sweetness, then add the optional handful of chopped spinach if desired. Blend on high speed for 1-2 minutes until the mixture is silky and frothy, describing a vibrant, fruity aroma that appeals to children.
- Serve immediately: Pour the smoothie into glasses and serve right away, noting its cool, velvety consistency and fresh taste that signals a successful transition to everyday dairy enjoyment.
Tools and Equipment
As we guide you through the Milk Ladder Recipes, having the right Tools and Equipment ensures safe, efficient preparation of each stage’s dishes, from Baked Milk Muffins to Fresh Milk Smoothies. These essentials help us minimize risks while building tolerance in children with cow’s milk allergies, allowing for precise cooking and blending techniques.
Essential Tools for Baked and Well-Cooked Recipes
For stages involving baking and thorough cooking—like our Baked Milk Muffins and Well-Cooked Milk Pudding—we rely on sturdy, heat-resistant items. Here’s a breakdown:
- Oven: A standard oven preheated to the required temperature (e.g., 350°F for muffins) ensures even baking and reduces allergens through heat.
- Mixing Bowls: Large and medium-sized bowls for combining ingredients; we prefer glass or stainless steel for easy cleaning and non-reactive surfaces.
- Measuring Cups and Spoons: Accurate sets for precise measurements of flour, milk, and sugar; essential for maintaining recipe consistency and safety.
- Whisk: A wire whisk to blend dry and wet ingredients smoothly, preventing lumps in puddings and muffins.
- Saucepan: A heavy-bottomed one for simmering milk in puddings, helping achieve the creamy texture that signals proper allergen reduction.
Tools for Lightly Cooked and Fresh Recipes
Building on the previous stages, Lightly Cooked Milk Porridge and Fresh Milk Smoothies require gentler tools to preserve nutrients and textures:
- Pot: A non-stick pot for gently heating oats and milk, ensuring even cooking without scorching.
- Blender: A high-speed blender for creating smooth smoothies; we recommend one with variable speeds to blend fruits and milk without overheating.
- Spoon or Spatula: Wooden or silicone for stirring porridge, promoting a creamy consistency while avoiding scratches on cookware.
- Measuring Cups and Spoons: Again, indispensable for portioning honey, cinnamon, or berries accurately in these lighter preparations.
| Stage | Primary Tool | Key Function | Recommended Features |
|---|---|---|---|
| 1 (Baked) | Oven | Even heating for allergen reduction | Temperature control up to 400°F |
| 2 (Well-Cooked) | Saucepan | Simmering to minimize proteins | Heavy bottom for even heat distribution |
| 3 (Lightly Cooked) | Pot | Gentle stirring for texture | Non-stick surface for easy cleanup |
| 4 (Fresh) | Blender | Blending for smooth consistency | High-speed settings for quick processing |
Make-Ahead Tips
As we guide you through the Milk Ladder Recipes, preparing meals in advance can simplify your family’s routine while ensuring a safe, effective dairy reintroduction process. We focus on practical strategies that maintain the reduced allergenicity of each stage, allowing you to batch prepare, store, and reheat without compromising safety or taste. Let’s break down our top Make-Ahead Tips for each stage, helping you build confidence and convenience into your daily mealtimes.
Tips for Stage 1: Baked Milk Recipes
For recipes like our Baked Milk Muffins, we recommend leveraging the oven’s ability to minimize allergens through baking. Prepare a double batch to maximize efficiency:
- Mix and bake ahead: Combine dry ingredients (flour, baking powder, and a touch of baked milk) the night before and store in an airtight container at room temperature. In the morning, add wet ingredients and bake for 20-25 minutes until golden and aromatic, yielding fluffy muffins with a comforting, buttery scent.
- Freeze for later: Once cooled, portion muffins into freezer-safe bags. They retain their tender texture for up to 3 months—simply thaw overnight in the refrigerator and reheat in a 350°F oven for 5-10 minutes to restore that fresh-baked warmth.
- Storage guidelines: To prevent any risk of staleness or contamination, refrigerate baked goods for up to 5 days in an airtight container, checking for any off odors before serving.
Tips for Stage 2: Well-Cooked Milk Recipes
Well-Cooked Milk Pudding benefits from extended simmering, which further reduces allergens, making it ideal for make-ahead preparation. We suggest these steps to create creamy batches that hold up well:
- Cook and chill in advance: Whisk together whole milk, cornstarch, and sugar, then simmer for 10-15 minutes until thickened to a velvety consistency. Let it cool completely before transferring to individual serving containers, which allows the pudding to set into a smooth, luxurious texture.
- Refrigerate or freeze portions: Store in the fridge for up to 4 days, or freeze for up to 2 months in freezer-safe molds. Thaw in the refrigerator and gently reheat on the stovetop with a splash of milk to revive its silky mouthfeel.
- Add-ins for freshness: Prepare optional fruits separately and stir them in just before serving to maintain their vibrant flavors and nutritional value.
Tips for Stage 3: Lightly Cooked Milk Recipes
For Lightly Cooked Milk Porridge, gentle heating preserves nutrients while building tolerance, and make-ahead techniques ensure it’s ready for quick mornings. We advise the following to keep it simple and safe:
- Prepare the base early: Cook rolled oats with lightly warmed milk and spices like ground cinnamon ahead of time, then cool and store in the fridge. This base holds its creamy, hearty texture for 3-4 days.
- Customize on the spot: Keep sliced banana or honey in a separate container to add fresh elements right before serving, preventing sogginess and enhancing the porridge’s naturally sweet, comforting aroma.
- Reheating safety: Use a microwave or stovetop to gently warm portions, stirring to avoid overheating, which could alter the delicate balance of allergens.
Tips for Stage 4: Fresh Milk Recipes
Fresh Milk Smoothies introduce unheated milk, signaling a major milestone in dairy tolerance. While these are less ideal for long-term storage due to their fresh nature, we offer make-ahead hacks to minimize prep time:
- Blend and freeze components: Puree ripe banana, fresh berries, and a hint of honey into the milk base, then portion into ice cube trays or freezer bags. Freeze for up to 1 week, and blend with chilled milk when needed to achieve that refreshing, creamy blend.
- Quick assembly tips: Prepare dry or frozen add-ins (like optional spinach) in advance and store in the fridge for up to 2 days, allowing you to whip up a smoothie in under 5 minutes with its bright, fruity burst of flavor.
- Storage table for optimal safety: To ensure you’re handling fresh ingredients correctly, refer to the table below for recommended storage times and conditions, helping you track and maintain quality.
| Stage | Recipe Example | Make-Ahead Method | Recommended Storage Time | Storage Conditions | Key Notes |
|---|---|---|---|---|---|
| 1 | Baked Milk Muffins | Bake and freeze | Up to 3 months | Freezer; airtight bags | Reheat to restore texture |
| 2 | Well-Cooked Milk Pudding | Cook and refrigerate | Up to 4 days in fridge; 2 months frozen | Airtight containers; low fridge shelf | Thaw slowly to maintain creaminess |
| 3 | Lightly Cooked Milk Porridge | Cook base and chill | Up to 4 days | Fridge; sealed containers | Add fresh ingredients last |
| 4 | Fresh Milk Smoothie | Freeze portions | Up to 1 week | Freezer; ice cube trays | Blend fresh for best flavor |
By incorporating these Make-Ahead Tips, we empower you to navigate the Milk Ladder Recipes with ease, ensuring every step supports a seamless and enjoyable dairy reintroduction journey for your family.
Conclusion
We’ve explored the Milk Ladder Recipes as a gentle path to reintroducing dairy safely
and enjoyably for children with allergies. It’s rewarding to see families build confidence
through each stage while creating delicious meals.
As we wrap up our guide, remember that patience and consistency are key to success.
You’ll find these recipes not only effective but also a joyful way to enhance mealtime
and foster lasting tolerance in your little ones.
Frequently Asked Questions
What is the Milk Ladder for children with cow’s milk allergies?
The Milk Ladder is a step-by-step approach to safely reintroduce dairy to kids with cow’s milk allergies. It starts with baked milk recipes, progressing to fresh milk, to build tolerance gradually and reduce risks. This method helps parents create enjoyable family meals while minimizing allergic reactions.
How does the Milk Ladder work?
The Milk Ladder works by heating milk in stages to lessen its allergenicity. Stage 1 uses baked goods like muffins, Stage 2 involves well-cooked items like pudding, Stage 3 features lightly cooked recipes such as porridge, and Stage 4 introduces fresh milk in smoothies. This gradual process helps build tolerance safely.
What are the stages of the Milk Ladder?
There are four stages: Stage 1 (Baked Milk Recipes, e.g., muffins), Stage 2 (Well-Cooked Milk Recipes, e.g., pudding), Stage 3 (Lightly Cooked Milk Recipes, e.g., porridge), and Stage 4 (Fresh Milk Recipes, e.g., smoothies). Each stage increases milk exposure while reducing allergens through cooking methods.
What recipes are included in Stage 1 of the Milk Ladder?
Stage 1 features Baked Milk Recipes, like Baked Milk Muffins. These use heated milk in baked goods to reduce allergens. Ingredients include flour, sugar, eggs, and baked milk. Mix, bake at 350°F for 20-25 minutes, and cool. They’re easy, family-friendly treats to gently introduce dairy.
What tools are needed for Milk Ladder recipes?
Essential tools vary by stage: for baked and well-cooked recipes, use ovens, mixing bowls, measuring cups, whisks, and saucepans. For lightly cooked and fresh recipes, opt for non-stick pots and blenders. These ensure safe preparation and help minimize allergy risks while achieving the right textures.
How can I make Milk Ladder recipes ahead of time?
Prepare recipes in advance for convenience: double-batch muffins and freeze them; cook and chill pudding for up to 3 days; make porridge base ahead and add fresh ingredients before serving; blend smoothie components and freeze for quick use. Always check storage times to maintain safety and taste.
Is it safe to introduce fresh milk after the Milk Ladder?
Yes, once a child tolerates earlier stages, fresh milk can be introduced safely in Stage 4, like in smoothies. This final step signals built tolerance, but consult a doctor first. Recipes like Fresh Milk Smoothies use unheated milk with fruits for a creamy, nutritious option, minimizing risks.