
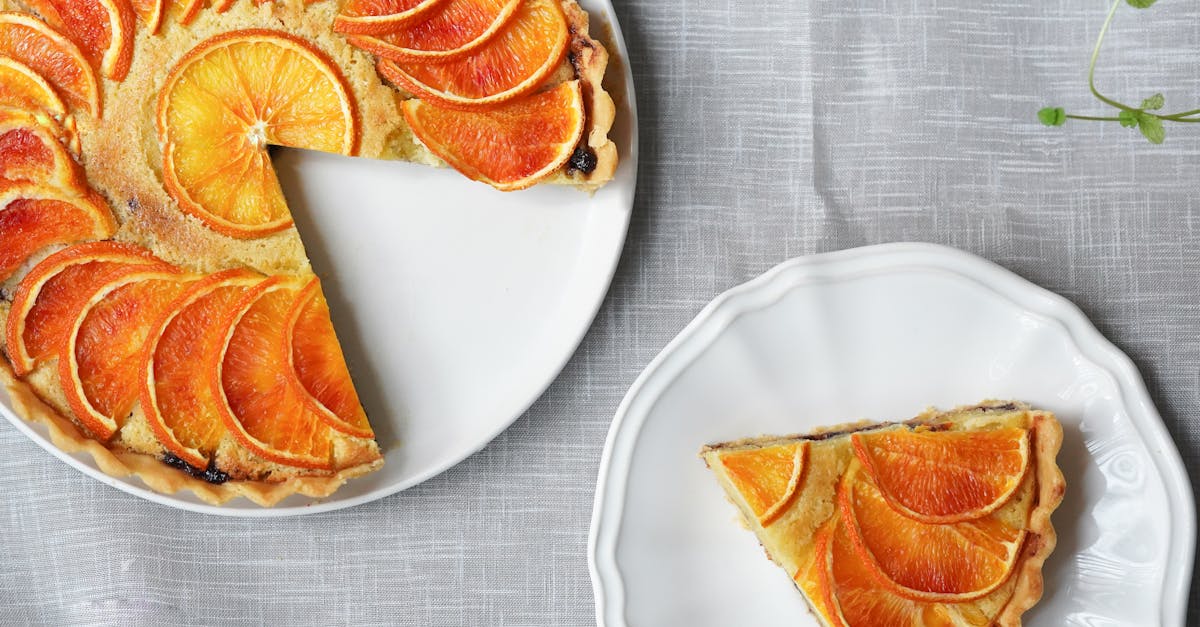
Craving a nostalgic frozen treat that brings back childhood memories? We’re thrilled to share our take on the Best Homemade Eskimo Pie Popsicle Recipe! This delightful dessert, inspired by the classic Eskimo Pie, combines creamy vanilla ice cream with a rich chocolate shell, all on a handy stick for easy enjoyment.
Originating in the early 1920s, the Eskimo Pie became an instant hit as one of the first chocolate-covered ice cream bars. We’ve recreated this iconic treat with simple ingredients and a touch of love, ensuring you can whip up a batch right in your kitchen. It’s perfect for hot summer days or anytime you need a sweet escape!
About the Best Homemade Eskimo Pie Popsicle Recipe
Dive into the delightful world of frozen treats with our Best Homemade Eskimo Pie Popsicle Recipe. We’re thrilled to share this nostalgic dessert that brings back memories of childhood summers and carefree days. This recipe captures the essence of the classic Eskimo Pie—a creamy vanilla ice cream center enrobed in a crisp chocolate shell—but with a homemade twist that elevates the flavors and textures to a whole new level. Perfect for cooling off on scorching summer days or indulging in a sweet craving any time of year, our version is both simple to make and incredibly satisfying.
Why We Love This Eskimo Pie Recipe
There’s something magical about biting into a frozen Eskimo Pie Popsicle. The way the chocolate coating cracks with a satisfying snap before revealing the smooth and velvety vanilla ice cream inside is pure bliss. We adore this recipe because it allows us to recreate that iconic experience right in our own kitchen. Plus, making these popsicles at home means we can control the quality of ingredients—opting for real vanilla extract and rich chocolate for an authentic taste. It’s a fun project for the whole family and a guaranteed crowd-pleaser at any gathering.
A Brief History of the Eskimo Pie
Let’s take a quick trip down memory lane. The original Eskimo Pie was invented in the 1920s by Christian Kent Nelson, who partnered with a chocolate manufacturer to create one of the first chocolate-covered ice cream bars. This innovative treat quickly became a sensation across America, symbolizing the joy of simple pleasures. Our homemade version pays homage to this classic by sticking to the core elements—creamy ice cream and decadent chocolate—while adding a personal touch with easy-to-follow steps and accessible ingredients.
Key Features of Our Recipe
What sets our Best Homemade Eskimo Pie Popsicle Recipe apart? We’ve fine-tuned every detail to ensure success in your kitchen. Here’s what you can expect:
- Simple Ingredients: We use everyday pantry staples to keep things hassle-free.
- Customizable Flavors: Stick with classic vanilla or experiment with other ice cream flavors for a unique spin.
- Perfect Texture: Our method guarantees a smooth ice cream core with a snappy chocolate shell that holds up beautifully.
To give you a quick glance at the time investment and yield, check out the table below:
| Aspect | Details |
|---|---|
| Prep Time | 20 minutes |
| Freezing Time | 4-6 hours |
| Total Time | About 6 hours |
| Yield | 8 popsicles |
Why Make Eskimo Pie Popsicles at Home?
Store-bought treats are convenient, but nothing beats the satisfaction of crafting your own Homemade Eskimo Pie Popsicles. We find that the process is not only rewarding but also allows us to tweak the recipe to our liking—whether it’s using organic ingredients or adjusting the sweetness of the chocolate shell. As we mentioned earlier, the nostalgic charm of this dessert ties into its history, and recreating it at home feels like preserving a piece of that legacy. Plus, the smiles on everyone’s faces when they taste these popsicles make every step worth it.
Ingredients for Eskimo Pie Popsicles
Let’s gather everything we need to create the ultimate Homemade Eskimo Pie Popsicles. With simple yet essential components, we’ll craft a nostalgic frozen treat that rivals the classic!
Ice Cream Base Ingredients
For the creamy heart of our Eskimo Pie Popsicles, we’re keeping it classic with a rich vanilla base. Here’s what you’ll need:
- 2 cups heavy cream – chilled for optimal whipping
- 1 cup whole milk – for a smooth texture
- 3/4 cup granulated sugar – to sweeten the mix
- 1 tablespoon pure vanilla extract – for that signature vanilla depth
- Pinch of salt – to enhance flavors
Chocolate Coating Ingredients
- 12 ounces semi-sweet chocolate chips – finely chopped for even melting
- 2 tablespoons coconut oil – to ensure a smooth and shiny finish
- 1 teaspoon vanilla extract – for an extra flavor boost
Equipment Needed
To craft the Best Homemade Eskimo Pie Popsicles, having the right tools at hand is essential. We’ve curated a list of must-have equipment to ensure a seamless process from mixing to freezing. With these items, creating this nostalgic frozen treat becomes a breeze, allowing us to focus on the fun of making and enjoying our chocolate-covered ice cream bars. Let’s dive into the gear that will help us recreate this iconic dessert with ease and precision.
Essential Tools for Preparation
We rely on a few key pieces of kitchen equipment to prepare the creamy ice cream base and assemble our Eskimo Pie Popsicles. These tools ensure accuracy and consistency in every step.
- Mixing Bowl: A medium-sized bowl to combine the ingredients for the vanilla ice cream base.
- Whisk: Perfect for blending the cream, milk, and sugar smoothly without lumps.
- Measuring Cups and Spoons: Essential for precise measurements of liquids and dry ingredients like heavy cream and granulated sugar.
- Saucepan: A small one for gently heating the ice cream mixture if needed to dissolve sugar fully.
Molding and Freezing Gear
Shaping and freezing are critical stages in achieving the classic Eskimo Pie form. We need specific tools to get that perfect popsicle shape and ensure easy removal after freezing.
- Popsicle Molds: Silicone or plastic molds designed for popsicles (aim for a set that makes 6-8 treats). These are key to forming our frozen delights.
- Popsicle Sticks: Wooden or reusable sticks to insert into the molds for easy handling and eating.
- Baking Sheet: Useful for placing the molds on a flat surface in the freezer to prevent spilling.
- Freezer: A reliable freezer set to 0°F (-18°C) to solidify our homemade popsicles effectively.
Chocolate Coating Setup
The signature chocolate shell of an Eskimo Pie requires a simple yet specific setup. We use these tools to melt and coat our popsicles with a smooth and glossy finish.
- Double Boiler or Microwave-Safe Bowl: For melting the semi-sweet chocolate chips and coconut oil evenly without burning.
- Spatula: A small silicone spatula to stir the chocolate mixture for a uniform consistency.
- Tall Glass or Dipping Container: A narrow container to dip the frozen popsicles into the melted chocolate, ensuring full coverage.
- Parchment Paper: To line a tray for placing the dipped popsicles, preventing sticking while the chocolate sets.
Quick Reference Equipment Table
To make things even clearer, we’ve compiled a handy table summarizing the equipment needed for each stage of making our Best Homemade Eskimo Pie Popsicles. This ensures you have everything ready before starting.
| Stage | Equipment | Purpose |
|---|---|---|
| Preparation | Mixing Bowl, Whisk, Measuring Cups/Spoons, Saucepan | Mixing and measuring the ice cream base |
| Molding and Freezing | Popsicle Molds, Popsicle Sticks, Baking Sheet, Freezer | Shaping and freezing the popsicles |
| Chocolate Coating | Double Boiler/Microwave-Safe Bowl, Spatula, Tall Glass/Dipping Container, Parchment Paper | Melting and applying the chocolate shell |
Instructions for Making Eskimo Pie Popsicles
Let’s dive into crafting the Best Homemade Eskimo Pie Popsicles with our step-by-step guide. Follow these detailed instructions to recreate this nostalgic frozen treat at home with ease and flair.
Prep the Ice Cream Base
First, we start by creating the creamy heart of our Eskimo Pie Popsicles. Grab a large mixing bowl and whisk together 2 cups of heavy cream, 1 cup of whole milk, 3/4 cup of granulated sugar, 1 tablespoon of pure vanilla extract, and a pinch of salt. Stir until the sugar fully dissolves, creating a smooth and velvety base. Taste it—can you feel the sweet vanilla essence dancing on your tongue? If you have an ice cream maker, churn the mixture according to the manufacturer’s instructions for about 20-25 minutes until it thickens to a soft-serve consistency. If not, don’t worry—we can pour it into a shallow dish and freeze it for 1 hour, stirring every 20 minutes to break up ice crystals, until it reaches the same texture.
Shape and Freeze the Popsicles
Now that our ice cream base is ready, let’s shape these delightful Eskimo Pie Popsicles. Spoon or pour the mixture into popsicle molds, filling each mold about 3/4 full to allow for expansion during freezing. Insert the popsicle sticks firmly into the center of each mold. If your molds don’t hold the sticks in place, cover the top with foil and poke the sticks through to secure them. Place the molds in the freezer and let them solidify for at least 4-6 hours or ideally overnight. We want them rock-solid before the next step—imagine biting into that creamy frozen perfection!
Prepare the Chocolate Coating
While the popsicles freeze, let’s whip up the irresistible chocolate shell that defines an Eskimo Pie. In a double boiler or a microwave-safe bowl, melt 12 ounces of semi-sweet chocolate chips with 2 tablespoons of coconut oil. If using a microwave, heat in 30-second intervals, stirring between each burst until smooth and glossy. Add 1/2 teaspoon of vanilla extract for an extra depth of flavor. Stir well and let the mixture cool slightly to room temperature—about 5-10 minutes—so it’s thick enough to coat but not too hot to melt our popsicles. Picture that rich chocolatey sheen waiting to envelop each bite!
Make-Ahead Tips
Creating the Best Homemade Eskimo Pie Popsicles can be a delightful project but we know that time is often of the essence. To help streamline the process and ensure you’re ready to enjoy these nostalgic frozen treats whenever the craving strikes, we’ve compiled some essential Make-Ahead Tips. These strategies will save you time while preserving the creamy texture of the ice cream and the rich chocolate shell that make this dessert so iconic.
Plan and Prep the Ice Cream Base
Let’s start with the heart of our Eskimo Pie Popsicles—the ice cream base. We recommend preparing this mixture up to 2 days in advance. Whisk together the heavy cream, whole milk, granulated sugar, vanilla extract, and a pinch of salt as outlined in the recipe. Once combined, store the mixture in an airtight container in the refrigerator. This allows the flavors to meld beautifully and saves you a step on the day you plan to freeze the popsicles. Just give it a quick stir before pouring into the molds to ensure everything is well incorporated.
Freeze in Batches for Convenience
If you’re making a large batch of these summertime treats for a party or simply to stock up, freeze them in stages. After pouring the ice cream base into the popsicle molds, freeze only what you need for immediate use. Keep the remaining mixture refrigerated and freeze additional batches as needed over the next couple of days. This method prevents overcrowding in your freezer and ensures each Eskimo Pie achieves that perfect solid yet creamy consistency. Remember to insert the sticks after about an hour of freezing when the mixture is semi-solid to keep them centered.
Prepare the Chocolate Coating Ahead
The glossy chocolate shell is what elevates our Homemade Eskimo Pie Popsicles to the next level and guess what? You can prep it in advance too! Melt the semi-sweet chocolate chips with coconut oil and a splash of vanilla extract up to 3 days ahead. Once melted and smooth, let it cool slightly and store it in a microwave-safe container in the refrigerator. When you’re ready to coat your popsicles, simply reheat the mixture in the microwave in 15-second bursts, stirring in between until it’s fluid again. This tip ensures a quick assembly process without sacrificing that crisp chocolate crunch.
Storage Timeline for Optimal Freshness
To help you plan your prep schedule, we’ve put together a quick reference table for storing components of your Eskimo Pie Popsicles. Keeping track of timelines ensures that every bite retains the nostalgic charm and perfect texture we all crave.
| Component | Storage Method | Maximum Storage Time | Notes |
|---|---|---|---|
| Ice Cream Base | Airtight container in refrigerator | 2 days | Stir before use to recombine ingredients. |
| Frozen Popsicles (uncoated) | Wrapped in plastic wrap in freezer | 1 week | Ensure sticks are secure before wrapping. |
| Chocolate Coating | Microwave-safe container in refrigerator | 3 days | Reheat gently to restore smooth consistency. |
| Finished Eskimo Pie Popsicles | Individually wrapped in freezer | 2 weeks | Best enjoyed within a week for peak flavor. |
Quick Assembly for Last-Minute Cravings
For those spontaneous moments when you need a sweet escape, having pre-frozen Eskimo Pie Popsicles and a ready-to-melt chocolate coating is a game-changer. We suggest keeping a stash of uncoated popsicles in the freezer wrapped individually in plastic wrap to prevent freezer burn. When the mood strikes, dip them into the reheated chocolate shell for an instant decadent treat. This method cuts down active prep time to mere minutes letting you savor the creamy vanilla and rich chocolate without delay.
With these Make-Ahead Tips, crafting the Best Homemade Eskimo Pie Popsicles becomes a breeze. Whether you’re prepping for a summer gathering or simply indulging in a nostalgic dessert, our strategies ensure you’re always a step ahead in delivering that iconic frozen delight.
Serving Suggestions
As we’ve crafted these delightful Homemade Eskimo Pie Popsicles, it’s time to elevate the experience with creative and practical ways to serve them. Our goal is to make every bite of this nostalgic frozen treat a memorable one whether it’s for a summer party or a cozy family dessert. Let’s dive into some exciting ideas to present and enjoy these classic chocolate-covered ice cream bars with flair.
Perfect Pairings for Your Popsicles
Enhance the flavors of our Eskimo Pie Popsicles by pairing them with complementary treats or beverages. Consider these irresistible combinations:
- Fresh Berries: Serve alongside a bowl of vibrant strawberries or raspberries. The tartness of the berries beautifully balances the rich chocolate shell and creamy vanilla ice cream.
- Hot Chocolate: For a cozy twist on a chilly evening offer a mug of steaming hot chocolate. The warm drink contrasts with the frozen popsicle creating a delightful hot-and-cold sensation.
- Coffee or Espresso: Pair with a shot of espresso or a latte for an adult-friendly treat. The bitter notes of coffee enhance the sweetness of our Homemade Eskimo Pie Popsicles making it a sophisticated dessert option.
Creative Presentation Ideas
Make your Eskimo Pie Popsicles the star of the show with these visually appealing serving suggestions:
- Dessert Platter: Arrange the popsicles on a chilled platter with drizzles of melted chocolate or caramel sauce for an elegant touch. Sprinkle crushed nuts or colorful sprinkles over the top to add texture and a pop of color.
- Popsicle Bar: Set up a DIY popsicle bar at your next gathering. Lay out bowls of toppings like shredded coconut, mini chocolate chips, and chopped peanuts. Let guests customize their Homemade Eskimo Pie Popsicles by dipping or sprinkling their favorites.
- Mini Bites: For bite-sized indulgence cut the popsicles into smaller pieces before serving. Skewer them on small sticks or toothpicks for easy grabbing at parties or picnics.
Serving Tips for Optimal Enjoyment
To ensure your Eskimo Pie Popsicles are enjoyed at their best follow these practical tips:
- Chill Before Serving: Keep the popsicles in the freezer until the very last moment. This preserves the firm texture of the ice cream and prevents the chocolate coating from melting too quickly.
- Use a Tray: Place the popsicles on a chilled tray or plate when serving to maintain their shape especially during hot summer days.
- Quick Dip Option: If the chocolate shell softens dip the popsicle back into the reserved melted chocolate mixture for a quick refresh. Pop it back in the freezer for a few minutes to set.
Occasion-Specific Serving Ideas
Tailor your Homemade Eskimo Pie Popsicles to fit any event with these themed suggestions:
- Summer BBQs: Serve as a refreshing dessert after grilled meals. Stick the popsicles in a bucket of ice to keep them cold while guests mingle outdoors.
- Kids’ Parties: Add a fun twist by rolling the popsicles in colorful sprinkles or edible glitter. Wrap the sticks with bright ribbons for a festive look that kids will love.
- Holiday Treats: During winter holidays drizzle with white chocolate and sprinkle with crushed peppermint candy for a seasonal spin on this classic dessert.
Storage and Serving Timeline
To help you plan ahead we’ve created a quick reference table for serving and storage timelines ensuring your Eskimo Pie Popsicles remain fresh and delicious.
| Component | Storage Duration | Serving Tip |
|---|---|---|
| Frozen Popsicles | Up to 2 weeks in freezer | Serve directly from freezer for best texture |
| Chocolate Coating (prepped) | Up to 1 week in refrigerator | Reheat gently before dipping popsicles |
| Assembled Popsicles | Up to 1 week in freezer | Keep in airtight container to avoid freezer burn |
With these Serving Suggestions we’re confident you’ll turn every occasion into a sweet celebration with our Homemade Eskimo Pie Popsicles. Experiment with pairings and presentations to make this nostalgic treat uniquely yours.
Conclusion
We hope you’re as excited as we are to whip up these Homemade Eskimo Pie Popsicles. They’re a delightful way to bring back childhood memories while creating new ones with loved ones.
With our easy recipe and handy tips, crafting this classic treat at home is a breeze. So grab your ingredients and let’s make every bite a sweet celebration of summer or any day you crave a cool indulgence!
Frequently Asked Questions
What is an Eskimo Pie popsicle?
An Eskimo Pie is a classic frozen treat from the 1920s, featuring creamy vanilla ice cream covered in a rich chocolate shell. It was one of the first chocolate-covered ice cream bars, loved for its nostalgic charm. This homemade version recreates that iconic dessert with simple ingredients and a personal touch.
How do I make Homemade Eskimo Pie Popsicles?
To make these popsicles, prepare a vanilla ice cream base with heavy cream, milk, sugar, vanilla extract, and salt. Pour into molds and freeze. Then, melt semi-sweet chocolate with coconut oil for the coating, dip the frozen popsicles, and let the shell harden. Enjoy!
What ingredients do I need for Homemade Eskimo Pie Popsicles?
You’ll need heavy cream, whole milk, granulated sugar, vanilla extract, and a pinch of salt for the ice cream base. For the chocolate coating, gather semi-sweet chocolate chips, coconut oil, and more vanilla extract. These simple ingredients create a delicious, nostalgic treat.
What equipment is essential for making these popsicles?
Key tools include mixing bowls, a whisk, popsicle molds, and a double boiler or microwave-safe bowl for melting chocolate. These items help with preparing the ice cream base, molding, freezing, and applying the chocolate coating for perfect Homemade Eskimo Pie Popsicles.
Can I make Eskimo Pie Popsicles ahead of time?
Yes! Prepare the ice cream base up to 2 days in advance and store it in an airtight container. Freeze popsicles in batches and make the chocolate coating ahead, storing it in the fridge for easy reheating. This makes assembly quick and convenient.
How should I store Homemade Eskimo Pie Popsicles?
Store the finished popsicles in an airtight container or freezer bag in the freezer to maintain freshness and texture. They’re best enjoyed within a week, though proper storage can keep them tasty for up to a month.
What are some serving suggestions for Eskimo Pie Popsicles?
Pair these popsicles with fresh berries, hot chocolate, or coffee for a delightful treat. Serve on a dessert platter or set up a DIY popsicle bar for events like summer BBQs or kids’ parties. Keep them frozen until serving to maintain texture.