
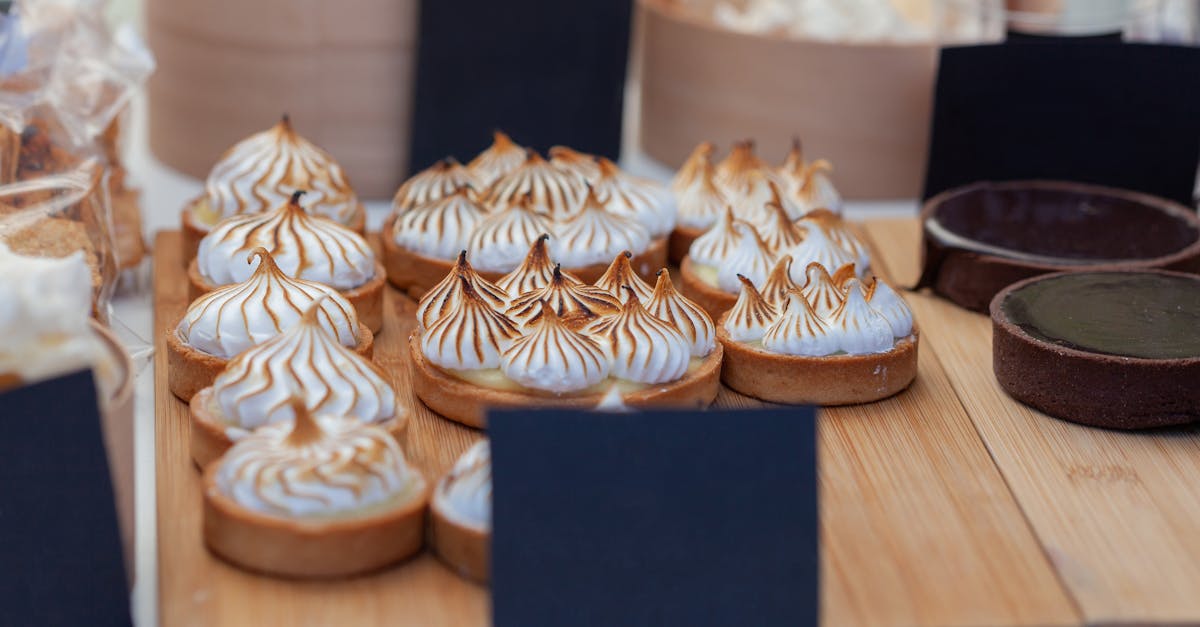
We’ve always been captivated by the Lemon Meringue Tart’s irresistible charm—a timeless dessert that balances zesty lemon filling with airy meringue peaks. Originating from classic French patisseries it’s a crowd-pleaser that brings a burst of sunshine to any table.
In our kitchen we love how this recipe combines simple ingredients for stunning results making it ideal for both beginners and seasoned bakers. Whether you’re hosting a gathering or treating yourself you’ll find our take on this classic both easy and unforgettable.
Ingredients
We select these high-quality ingredients to craft our classic Lemon Meringue Tart, capturing the zesty tang of lemon and the airy lightness of meringue for a dessert that delights every time.
For the Crust
- 1 ½ cups all-purpose flour: Sifted for a tender base.
- ½ cup unsalted butter: Chilled and cubed to ensure flakiness.
- ¼ cup granulated sugar: For a subtle sweetness.
- ¼ teaspoon salt: To enhance flavors.
- 1 large egg yolk: Beaten for binding.
- 2 tablespoons cold water: Added as needed for dough consistency.
For the Lemon Filling
- 1 cup fresh lemon juice: From about 4-5 lemons, strained for smoothness.
- Zest of 2 lemons: Finely grated for intense citrus aroma.
- 1 ¼ cups granulated sugar: To balance the tartness.
- 4 large eggs: Whisked for creamy texture.
- ½ cup unsalted butter: Cut into pieces for easy melting.
- ¼ cup cornstarch: Dissolved in water for thickening.
For the Meringue
- 4 large egg whites: At room temperature for maximum volume.
- 1 cup granulated sugar: For a glossy finish.
- ¼ teaspoon cream of tartar: To stabilize peaks.
- 1 teaspoon vanilla extract: For a hint of warmth.
Tools and Equipment
Before we dive into preparing our Lemon Meringue Tart with the ingredients we’ve gathered, let’s ensure we have the right tools and equipment on hand. These essentials help us achieve precise results, from a flaky crust to a perfectly whipped meringue, making the baking process smooth and enjoyable.
Essential Tools for Preparation
We’ll categorize the tools by their primary use to keep things organized and efficient:
- Mixing Bowls: We recommend using a set of medium and large stainless-steel or glass mixing bowls. These are ideal for combining ingredients like flour and butter for the crust or whipping egg whites for the meringue, ensuring even mixing without scratching.
- Measuring Cups and Spoons: Accurate measurements are key to our tart’s success, so opt for a standard set of dry and liquid measuring cups along with spoons. This helps us precisely measure items like the 1 cup of granulated sugar for the filling.
- Whisk and Wooden Spoon: A sturdy wire whisk is crucial for blending the lemon filling smoothly, while a wooden spoon works well for stirring mixtures on the stovetop to prevent scorching.
Baking and Assembly Equipment
For the actual baking and assembly, these tools elevate our technique:
- Rolling Pin: Choose a heavy, non-stick rolling pin to roll out the dough evenly. This ensures our tart crust fits perfectly into a 9-inch tart pan, creating that signature crisp base.
- Tart Pan: A 9-inch removable-bottom tart pan is non-negotiable for this recipe. It allows us to achieve clean edges and easy removal, resulting in a professional-looking dessert.
- Saucepan: A medium-sized heavy-bottom saucepan is essential for cooking the lemon filling. It provides even heat distribution to thicken the mixture without lumps.
Specialized Tools for Meringue and Finishing
To perfect the meringue topping and final touches:
- Electric Mixer or Stand Mixer: We rely on a hand-held or stand mixer with a whisk attachment to beat egg whites into stiff peaks for the meringue. This tool saves time and ensures airy results.
- Oven Thermometer: For consistent baking, an oven thermometer helps us maintain the precise temperature of 350°F (177°C), preventing over-browning of the crust or meringue.
- Pastry Brush: A soft-bristled pastry brush is useful for applying egg wash to the crust edges, giving them a golden sheen.
By having these tools ready, we set ourselves up for a seamless baking experience that highlights the zesty flavors and textures of our Lemon Meringue Tart. Always prioritize quality equipment to enhance safety and precision in our kitchen adventures.
Instructions
Now that we have gathered our high-quality ingredients and essential tools, let’s guide you through the precise steps to create our irresistible Lemon Meringue Tart. We’ll ensure each stage delivers the perfect balance of zesty lemon tang and airy meringue texture.
Prepare the Crust
First, we combine 1 1/4 cups of all-purpose flour, 1/2 cup of unsalted butter (chilled and cubed), 1/4 cup of granulated sugar, and a pinch of salt in a large mixing bowl. Using our hands or a pastry cutter, we work the butter into the flour mixture until it resembles coarse crumbs, ensuring the butter pieces are no larger than pea-sized for a flaky crust. Next, we add 1 egg yolk and 2 tablespoons of cold water, mixing with a wooden spoon until the dough just comes together without overworking it to avoid a tough texture. We shape the dough into a disc, wrap it in plastic wrap, and chill it in the refrigerator for at least 30 minutes to firm up and enhance its buttery flavor.
Make the Lemon Filling
In a medium heavy-bottom saucepan, we whisk together 1 cup of fresh lemon juice, zest from 2 lemons, 1 cup of granulated sugar, 4 eggs, 1/4 cup of cornstarch, and 1/2 cup of unsalted butter (cut into pieces) over medium heat. We stir constantly with a whisk for about 8-10 minutes until the mixture thickens to a pudding-like consistency, allowing the vibrant zesty lemon aroma to fill the kitchen and promise a bright, tangy burst in every bite. Once it reaches 175°F on our oven thermometer, we remove it from the heat and strain it through a fine-mesh sieve into a bowl to ensure a smooth, silky filling free of lumps.
Bake the Tart Shell
After chilling, we preheat our oven to 375°F and lightly grease a 9-inch removable-bottom tart pan. On a floured surface, we roll out the dough to about 1/8-inch thickness, then carefully transfer it to the pan, pressing it evenly against the sides and trimming any excess for a neat edge. To prevent sogginess, we line the shell with parchment paper and fill it with pie weights or dried beans, then bake it for 15 minutes. We remove the weights and parchment, then bake for an additional 10 minutes until the crust turns a golden brown, filling our kitchen with the inviting nutty scent of baked pastry.
Prepare the Meringue
In a clean, dry bowl of our electric mixer, we beat 4 egg whites with 1/2 teaspoon of cream of tartar on medium speed until soft peaks form, which takes about 2 minutes. Gradually, we add 3/4 cup of granulated sugar and 1 teaspoon of vanilla extract, increasing the speed to high and whipping for another 4-5 minutes until stiff, glossy peaks develop, creating a light, ethereal topping that will contrast beautifully with the tart’s sharp lemon notes. This step ensures our meringue holds its shape and delivers a crisp exterior with a marshmallow-like interior.
Assemble the Tart
Once the tart shell has cooled slightly, we pour the warm lemon filling into the baked shell, spreading it evenly with a spatula for a uniform layer that showcases the filling’s sunny yellow hue. Next, we spoon the prepared meringue over the top, using the back of a spoon to create decorative swirls and peaks that seal the edges to the crust, preventing any leakage during baking and ensuring a harmonious blend of tangy citrus and sweet fluffiness in every slice.
Bake the Meringue
We return the assembled tart to the oven, now set to 350°F, and bake for 10-12 minutes until the meringue turns a light golden brown and feels set to the touch, watching closely to avoid over-browning for the ideal toasted, caramelized finish. After baking, we let the tart cool completely on a wire rack for at least 1 hour before serving to allow the flavors to meld and the filling to set firmly.
Make-Ahead Instructions
To make our Lemon Meringue Tart even more accessible for busy bakers, we often prepare components in advance. This approach allows the zesty lemon flavors to develop fully while saving time on the day of serving. Below, we outline the key steps for making ahead, ensuring your tart remains fresh and delightful.
Preparing the Crust Ahead
We suggest tackling the crust first, as it holds up well when stored properly. Follow these steps to prepare it in advance:
- Mix and chill the dough: Combine the all-purpose flour, unsalted butter, granulated sugar, salt, egg yolk, and cold water as detailed in our earlier instructions. Shape the dough into a disk, wrap it tightly in plastic wrap, and refrigerate for up to 2 days. This chilling step enhances the flaky texture we love in a classic tart crust.
- Bake and store: Once baked to a golden brown, let the tart shell cool completely. Store it in an airtight container at room temperature for up to 1 day or in the refrigerator for up to 3 days. When you’re ready to assemble, simply bring it to room temperature for easier handling.
Preparing the Lemon Filling Ahead
The zesty lemon filling can be made ahead to let its bright, tangy notes intensify, but it requires careful storage to maintain its smooth consistency.
- Cook and cool the filling: Whisk together the fresh lemon juice, lemon zest, granulated sugar, eggs, unsalted butter, and cornstarch in a heavy-bottom saucepan until thickened, as per our step-by-step guide. Transfer the cooled filling to an airtight container and refrigerate for up to 1 day. This prevents any separation and keeps the vibrant citrus flavor intact.
- Reheat gently if needed: Before pouring into the tart shell, gently warm the filling on low heat while stirring to restore its silky texture, ensuring it spreads evenly for that perfect balance of tartness and sweetness.
Storing the Assembled Tart
While we don’t recommend fully assembling the tart too far in advance due to the delicate meringue, you can partially prepare it with careful storage guidelines. Here’s how:
- Assemble without meringue: Pour the lemon filling into the baked tart shell and refrigerate the base for up to 4 hours. This allows the flavors to meld without compromising the crust’s crispness.
- Add meringue fresh: Prepare and pipe the meringue (using egg whites, granulated sugar, cream of tartar, and vanilla extract) right before baking or serving to achieve those light, airy peaks and a golden finish in the oven.
For a quick reference on make-ahead times and storage, refer to the table below:
| Component | Make-Ahead Time | Storage Method | Notes |
|---|---|---|---|
| Crust Dough | Up to 2 days | Refrigerated in plastic wrap | Enhances flakiness for our tart |
| Baked Crust | Up to 3 days | Airtight container at room temperature or refrigerated | Keep away from moisture to maintain crunch |
| Lemon Filling | Up to 1 day | Refrigerated in an airtight container | Stir before use to restore smoothness |
| Assembled Base (without meringue) | Up to 4 hours | Refrigerated | Ideal for quick assembly later |
By following these make-ahead strategies, we ensure your Lemon Meringue Tart baking experience is seamless and stress-free, highlighting its irresistible combination of textures and flavors.
Conclusion
We’ve shared this Lemon Meringue Tart recipe to inspire your baking adventures. It’s a timeless treat that elevates any gathering with its bright flavors and airy texture.
Baking it lets us connect over simple joys and we’re confident you’ll master it with ease. Enjoy every zesty bite and make it your go-to dessert.
Frequently Asked Questions
What is a Lemon Meringue Tart?
A Lemon Meringue Tart is a classic French dessert featuring a zesty lemon filling topped with light, fluffy meringue on a buttery crust. It’s popular for its perfect balance of tart and sweet flavors, making it a crowd-pleaser for occasions like parties or casual treats. Originating from France, it’s accessible for both novice and experienced bakers.
What ingredients are needed for a Lemon Meringue Tart?
For the crust, you’ll need all-purpose flour, unsalted butter, sugar, salt, egg yolk, and cold water. The lemon filling requires fresh lemon juice, zest, sugar, eggs, butter, and cornstarch. Meringue calls for egg whites, sugar, cream of tartar, and vanilla extract. These high-quality ingredients ensure a flavorful, textured tart.
How do I make a Lemon Meringue Tart?
Start by preparing the crust: mix ingredients, chill, and bake until golden. Make the lemon filling by whisking ingredients and cooking until smooth, then pour into the crust. Whip the meringue to stiff peaks and spread over the filling. Bake briefly for a golden top, then cool to set. The process is straightforward for all skill levels.
What tools are required to bake a Lemon Meringue Tart?
You’ll need basic items like mixing bowls, measuring cups, a whisk, and wooden spoon for prep. For baking, use a rolling pin, 9-inch tart pan, and saucepan. Specialized tools include an electric mixer for meringue, oven thermometer for accuracy, and pastry brush for finishing. These ensure a seamless baking experience.
Can I prepare a Lemon Meringue Tart ahead of time?
Yes, make the crust up to 2 days in advance and bake it up to 3 days ahead for storage. Prepare the lemon filling a day early and refrigerate it, reheating gently before use. Avoid assembling the full tart too far in advance due to the delicate meringue, but you can refrigerate the base for up to 4 hours for convenience.