
We’ve all got a soft spot for those nostalgic Pop Tarts from our childhood but let’s elevate them with our homemade Apple Pop Tarts recipe. Drawing from classic American breakfast vibes we’re infusing fresh apples for a warm fruity filling that beats the store-bought version hands down.
This easy twist brings bold flavors and a satisfying crunch making it perfect for busy mornings or weekend treats. We’re sharing our foolproof method so you can whip up a batch that’s sure to impress.
Ingredients
In our Apple Pop Tarts recipe, we focus on fresh, high-quality ingredients to craft a homemade version that’s far superior to store-bought options. Below, we’ve organized the ingredients by category and order of use, starting with the dough for that flaky base, followed by the apple filling for that warm, fruity center, and finally any finishing touches. This ensures a seamless preparation process.
Dough Ingredients
- All-purpose flour: 2 ½ cups, sifted, as we begin by mixing the dry base for a tender crust
- Unsalted butter: 1 cup (cold and cubed), to create layers of flaky texture when incorporated
- Granulated sugar: 2 tablespoons, for a subtle sweetness in the dough
- Salt: ½ teaspoon, to enhance flavors as we blend the dough
- Ice water: ¼ cup, added gradually to achieve the right consistency for rolling
Filling Ingredients
- Apples: 4 medium Granny Smith varieties, peeled, cored, and diced (about 3 cups total), as we prepare the fresh fruit next for the star of the show
- Brown sugar: ½ cup, packed, to caramelize with the apples for depth of flavor
- Ground cinnamon: 1 teaspoon, for that signature warm spice we stir in while cooking the filling
- Lemon juice: 1 tablespoon, freshly squeezed, to brighten the apples and prevent browning
- Cornstarch: 1 tablespoon, mixed with 2 tablespoons water, as a thickener to bind the filling perfectly
Glaze and Topping Ingredients
- Powdered sugar: 1 cup, sifted, for the simple glaze we apply after baking
- Milk: 2-3 tablespoons, added as needed to thin the glaze to a drizzle consistency
- Vanilla extract: ½ teaspoon, for a hint of aroma in the final touch
For precise measurements and substitutions, note that this recipe yields about 8 pop tarts. If you’re scaling up, refer to the table below for nutritional estimates per serving based on standard values:
| Nutrient | Per Serving (1 pop tart) | Daily Value % |
|---|---|---|
| Calories | 350 | 18% |
| Total Fat | 15g | 19% |
| Carbohydrates | 50g | 18% |
| Protein | 4g | 8% |
| Sugar | 25g | Varies |
These ingredients come together to deliver the bold flavors and satisfying crunch we promised, making your homemade Apple Pop Tarts an irresistible treat.
Equipment Needed
Before we dive into preparing our homemade Apple Pop Tarts, let’s gather the essential tools to ensure a smooth baking process. With our ingredients prepped, these items will help us create that flaky crust and flavorful filling efficiently.
We recommend the following equipment, organized by the order of use in the recipe:
- Mixing bowls: Two medium-sized bowls for combining dough ingredients and preparing the apple filling, ensuring even mixing without spills.
- Measuring cups and spoons: A set for accurately measuring flour, sugar, and liquids, which is crucial for achieving the perfect texture in our pastries.
- Rolling pin: Essential for rolling out the dough to an even thickness, creating that signature flaky layer in our Apple Pop Tarts.
- Saucepan: A medium one for cooking the apple filling, allowing us to simmer the fresh apples with spices until they reach a warm, aromatic consistency.
- Knife and cutting board: For peeling and dicing the apples precisely, helping to maintain the fresh, fruity essence in every bite.
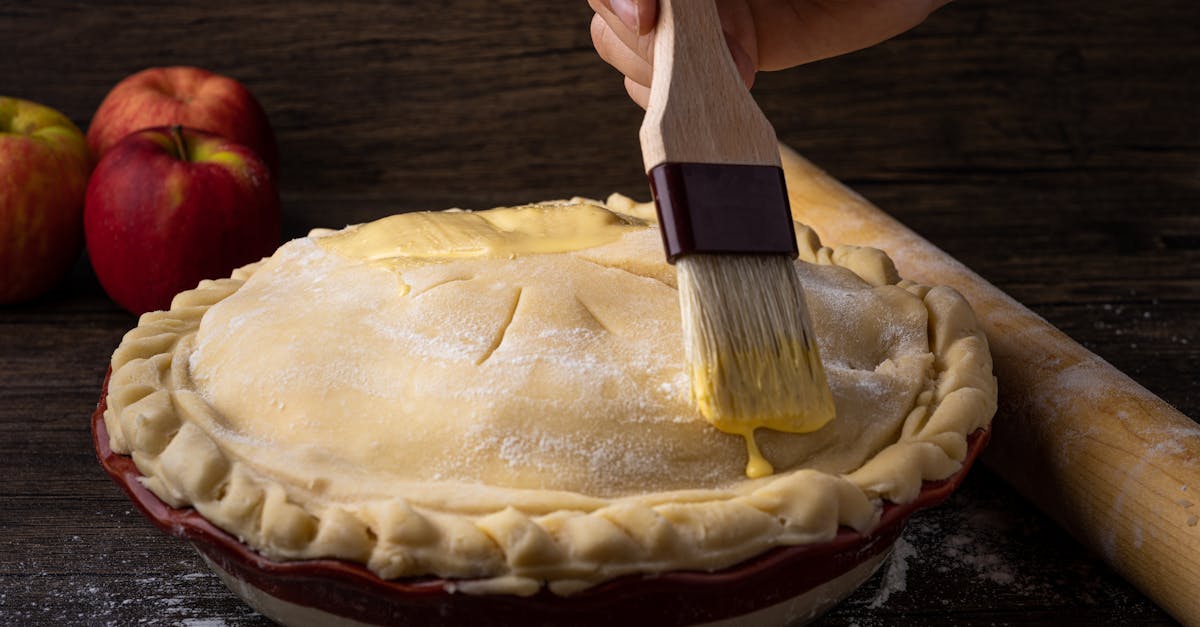
- Pastry brush or fork: Used to seal the edges of the tarts, preventing the filling from leaking during baking and ensuring a satisfying crunch.
- Baking sheet: A standard rimmed sheet lined with parchment paper, ideal for even baking and easy cleanup of our golden pastries.
- Oven: Preheated to 375°F, this is key for baking the tarts to a perfect, crispy finish.
- Cooling rack: For letting the baked tarts cool evenly, preserving their texture and making them ready for glazing.
By having these tools on hand, we’re set to craft delicious, homemade Apple Pop Tarts that outshine store-bought versions with their bold flavors and satisfying crunch.
Instructions
Now that we have gathered our high-quality ingredients and essential equipment, let’s create these irresistible homemade Apple Pop Tarts step by step. We’ll ensure each phase delivers a flaky crust and a warm, fruity filling for a treat that outshines store-bought versions.
Prepare the Dough
To start, we combine the dry ingredients in a large mixing bowl. Add 2 cups of all-purpose flour, ½ teaspoon of salt, and 2 tablespoons of granulated sugar, then whisk until well blended. Next, we cut in 1 cup of cold unsalted butter (cut into small cubes) using a pastry cutter or our fingers until the mixture resembles coarse crumbs with pea-sized pieces.
Once the butter is incorporated, we gradually add 4-6 tablespoons of ice water, one tablespoon at a time, mixing with a fork until the dough just comes together without being sticky. Form the dough into a disc, wrap it tightly in plastic wrap, and chill in the refrigerator for at least 30 minutes to achieve that perfect flaky texture we love.
Make the Apple Filling
In a medium saucepan over medium heat, we begin by cooking 2 medium Granny Smith apples (peeled, cored, and diced into ½-inch pieces) with ¼ cup of brown sugar, 1 teaspoon of ground cinnamon, 1 tablespoon of lemon juice, and 1 tablespoon of cornstarch stirred in for thickening.
We stir the mixture constantly for about 8-10 minutes until the apples soften and the filling becomes thick and aromatic with a sweet-tart aroma that fills the kitchen. Remove from heat and let it cool slightly to ensure it sets perfectly when assembled, creating a warm, fruity center that’s bursting with flavor.
Assemble the Pop Tarts
After chilling, we divide the dough in half and roll out each portion on a lightly floured surface to a 1/8-inch thick rectangle, about 9×12 inches. Using a knife or pizza cutter, we cut each rectangle into 4 equal pieces to make 8 rectangles total for our pop tarts.
Place about 2 tablespoons of the cooled apple filling onto the center of 4 rectangles, leaving a ½-inch border. Brush the borders with a bit of water, then top with the remaining rectangles and press edges firmly with a fork to seal. For a professional touch, we crimp the edges and poke a few holes in the top to vent steam, ensuring a golden, satisfying crunch.
Bake the Pop Tarts
Preheat our oven to 375°F as outlined in our equipment section. Arrange the assembled pop tarts on a parchment-lined baking sheet, spacing them about 2 inches apart for even baking.
We bake them in the preheated oven for 20-25 minutes until they turn golden brown and emit a delightful, buttery aroma. Once done, remove from the oven and transfer to a wire rack to cool for at least 10 minutes before glazing, allowing the flavors to meld into a comforting, homemade delight.
Make-Ahead and Storage
To keep our homemade Apple Pop Tarts fresh and ready for any occasion, we recommend planning ahead for convenience without compromising their flaky crust or warm, fruity filling. This approach ensures you can enjoy these nostalgic treats on busy mornings or as weekend indulgences.
Make-Ahead Instructions
We love making components of our Apple Pop Tarts in advance to save time. Follow these steps for seamless preparation:
- Prepare the Dough Early: Combine the dry ingredients and cut in the cold butter as outlined in our instructions. After forming the dough, wrap it tightly in plastic wrap and refrigerate for up to 2 days. For longer storage, freeze the wrapped dough for up to 1 month—simply thaw it in the refrigerator overnight before rolling.
- Make the Filling Ahead: Cook the diced Granny Smith apples with brown sugar, cinnamon, lemon juice, and cornstarch until thickened. Let it cool completely, then transfer to an airtight container and refrigerate for up to 3 days. This keeps the fruity filling vibrant and ready to use, maintaining its sweet-tart flavor and perfect texture.
- Assemble and Freeze Unbaked Pop Tarts: After filling and sealing the dough pockets, place the unbaked pop tarts on a baking sheet and freeze them until solid (about 1-2 hours). Transfer to a freezer-safe bag for storage up to 1 month. Bake from frozen, adding 5-7 minutes to the original baking time for that satisfying crunch.
Storage Tips
Proper storage helps preserve the golden-brown exterior and gooey center of our baked Apple Pop Tarts. Here’s how we handle it for optimal results:
For quick reference, we’ve summarized the storage methods and durations in the table below:
| Storage Method | Duration | Key Tips |
|---|---|---|
| Room Temperature | Up to 2 days | Store in an airtight container to retain the flaky crust‘s crispness and prevent the filling from drying out. |
| Refrigerator | Up to 5 days | Wrap each pop tart individually in plastic wrap or place in an airtight container to lock in moisture and flavors—reheat in a toaster oven for the best texture. |
| Freezer | Up to 3 months | Cool completely before wrapping in freezer-safe bags or containers; this preserves the warm, fruity filling‘s taste for thawing and enjoying later. |
Reheating Guidelines
To bring back the fresh-baked magic, we suggest these simple steps: For room-temperature or refrigerated pop tarts, warm in a 350°F oven for 5-7 minutes until the crust is crispy and golden. If frozen, thaw overnight in the refrigerator first, then reheat as above. Always avoid microwaving to maintain that irresistible crunch and aroma.
Conclusion
We’ve crafted this homemade Apple Pop Tarts recipe to bring fresh excitement to your kitchen adventures
It offers a simple way to enjoy bold flavors and a flaky crunch that beats store-bought options every time
Give it a try and make it your go-to treat—we’re confident it’ll become a family favorite in no time
Frequently Asked Questions
What ingredients are needed for homemade Apple Pop Tarts?
The main ingredients include all-purpose flour, unsalted butter, granulated sugar, salt, and ice water for the dough; Granny Smith apples, brown sugar, ground cinnamon, lemon juice, and cornstarch for the filling; and powdered sugar, milk, and vanilla extract for the glaze. This recipe yields about eight pop tarts, focusing on fresh, high-quality items for bold flavors and a flaky texture.
How do I make the dough for Apple Pop Tarts?
Start by mixing flour, sugar, and salt, then cut in cold butter until it forms coarse crumbs. Add ice water gradually to form a dough, then chill it for at least 30 minutes. This simple process creates a flaky base that’s easy to roll out and assemble with the apple filling.
What equipment is required to bake Apple Pop Tarts?
You’ll need mixing bowls, measuring cups and spoons, a rolling pin, saucepan, knife and cutting board, pastry brush or fork, baking sheet, and an oven preheated to 375°F. These tools ensure smooth preparation of the dough and filling for perfect results.
Can I prepare Apple Pop Tarts in advance?
Yes, make the dough and filling ahead of time. Refrigerate the dough for up to 2 days or freeze it for a month. Prepare the filling and store it in the fridge for up to 3 days, allowing for quick assembly and baking when needed.
How should I store homemade Apple Pop Tarts?
Store baked pop tarts at room temperature for up to 2 days in an airtight container, in the fridge for up to a week, or freeze for up to 3 months. Reheat in the oven at 350°F for a few minutes to restore crispiness and enjoy fresh flavors anytime.
How many servings does the Apple Pop Tarts recipe make?
This recipe yields about eight pop tarts, making it ideal for a family or small gatherings. Each serving offers a satisfying crunch with nutritional estimates, so you can enjoy a homemade treat without overindulging.