
We absolutely love apple chutney for its sweet-tangy kick that elevates everything from cheese platters to grilled meats. Originating in Indian kitchens where spices dance with fresh fruits we’ve adapted this classic for easy home canning so you can savor seasonal apples all year long.
It’s not just a condiment—it’s a versatile preserve that adds a burst of flavor to your pantry. In our recipe we’ll guide you through simple steps to create a batch that’s both delicious and shelf-stable ensuring your efforts pay off with homemade goodness.
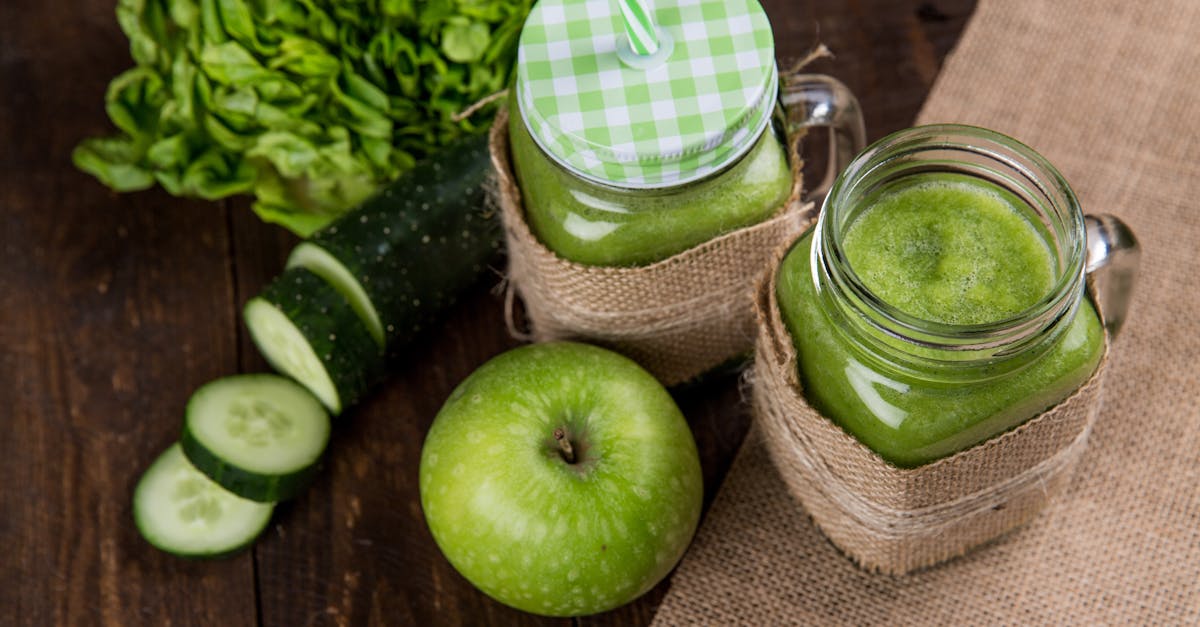
Ingredients
In our apple chutney recipe for canning, we gather fresh, high-quality ingredients to create a sweet-tangy preserve that captures the essence of seasonal apples. Below, we list the ingredients in the order they are used during preparation, including any necessary prep notes for accuracy and ease.
- Apples: 2 pounds of firm, tart apples (such as Granny Smith), cored, peeled, and diced to ensure even cooking and texture.
- Onions: 1 medium yellow onion, finely chopped to start building the base flavor.
- Fresh Ginger: 2 tablespoons of freshly grated ginger root, added for its spicy warmth and to enhance the chutney’s aromatic profile.
- Garlic: 3 cloves, minced, to introduce a subtle depth before incorporating liquids.
- Apple Cider Vinegar: 1 cup, used for acidity and preservation, helping extend the chutney’s shelf life.
- Brown Sugar: 1 cup, packed, to balance the tartness and create that signature caramelized sweetness.
- Spices: 1 teaspoon ground cinnamon and ½ teaspoon ground cloves, combined for a warm, spicy kick that complements the apples.
- Salt: 1 teaspoon sea salt, to season and draw out flavors during simmering.
- Red Chili Flakes (optional): ½ teaspoon, for a mild heat that can be adjusted based on preference.
This selection ensures our apple chutney remains versatile and flavorful, perfect for canning and enjoying year-round.
Tools and Equipment
After selecting our fresh ingredients for the apple chutney recipe, we need the right tools and equipment to ensure safe and efficient preparation and canning. Gathering these items beforehand helps us create a smooth workflow and achieve professional results in our home kitchen.
Essential Tools for Preparation
To chop, mix, and cook our chutney, we rely on basic yet crucial kitchen tools. Here’s a detailed list:
- Cutting board and sharp knife: We use a sturdy cutting board paired with a sharp chef’s knife to dice the 2 pounds of firm, tart apples and chop the medium yellow onion evenly. This ensures uniform pieces that cook consistently.
- Grater or microplane: For freshly grating ginger, we recommend a fine grater to release its pungent flavors without stringy bits.
- Measuring cups and spoons: Accurate measurements are key for our recipe’s balance, so we use standard sets to measure items like apple cider vinegar and brown sugar precisely.
- Large saucepan or stockpot: We need a heavy-bottomed pot (at least 4 quarts) to simmer the chutney, allowing even heat distribution to meld the spices like cinnamon and cloves with the apples.
Canning-Specific Equipment
Canning apple chutney requires specialized gear to ensure it’s shelf-stable and safe for long-term storage. We prioritize tools that prevent contamination and handle high temperatures effectively:
- Canning jars and lids: We suggest using 8-ounce Mason jars (about 6-8 jars depending on yield) with new lids and bands to create an airtight seal, preserving the chutney’s sweet-tangy flavor for up to a year.
- Water bath canner or large stockpot: A dedicated canner with a rack is ideal, but a deep stockpot works if it’s deep enough to submerge jars fully in boiling water, processing them for the recommended 10-15 minutes.
- Jar lifter and funnel: For safety, we always use a jar lifter to handle hot jars without risk of burns, and a wide-mouth funnel to fill jars with chutney cleanly, minimizing mess and waste.
- Ladle and bubble remover: A heat-resistant ladle helps us portion the chutney into jars, while a bubble remover tool ensures no air pockets remain, which could affect the seal.
By having these tools ready, we guarantee our apple chutney recipe for canning is not only delicious but also properly preserved for year-round enjoyment.
Instructions
Now that we have gathered our fresh ingredients and essential tools, let’s walk through the steps to create our flavorful apple chutney for canning. We’ll ensure each phase is straightforward and yields a sweet-tangy preserve perfect for your pantry.
Prep
Before we begin cooking, proper preparation sets the stage for a smooth process. Start by washing 2 pounds of firm tart apples under cool water to remove any dirt, then peel and core them before chopping into ½-inch pieces for even cooking. Next, finely dice 1 medium yellow onion to release its sharp aroma that complements the apples’ sweetness.
Grate 2 tablespoons of fresh ginger using a fine grater to capture its zesty spice, and mince 3 cloves of garlic for a pungent boost. In a small bowl, measure out 1 cup of apple cider vinegar, 1 cup of brown sugar, 1 teaspoon of ground cinnamon, ½ teaspoon of ground cloves, 1 teaspoon of sea salt, and if desired, ½ teaspoon of red chili flakes for a hint of heat. This prep work ensures our ingredients blend seamlessly, creating a chutney with vibrant flavors that evoke the essence of fresh harvest apples.
Cook
With our ingredients prepped, we transition to cooking to develop the chutney’s rich, aromatic profile. In a large saucepan over medium heat, combine the chopped apples, diced onion, grated ginger, minced garlic, apple cider vinegar, brown sugar, cinnamon, cloves, sea salt, and red chili flakes if using. Stir the mixture constantly for the first 5 minutes to dissolve the sugar and prevent sticking, then reduce the heat to low and simmer uncovered for 45-50 minutes.
As it cooks, the apples will soften and release their natural juices, transforming into a thick, glossy chutney with a tantalizing sweet-tangy aroma that fills the kitchen. Stir occasionally and use a spoon to mash any large apple pieces for a smoother texture—aim for a consistency that coats the back of a spoon, signaling it’s ready to can and enjoy with cheeses or grilled meats.
Canning
Once the chutney is cooked, we move to canning to preserve its freshness for up to a year. Begin by sterilizing your Mason jars and lids in boiling water for 10 minutes, then remove them with a jar lifter and place on a clean towel to dry. Using a funnel and ladle, carefully fill each jar with the hot chutney, leaving ½-inch headspace at the top to allow for expansion.
Run a bubble remover or non-metallic utensil around the inside of each jar to release any trapped air bubbles, then wipe the rims clean with a damp cloth. Secure the lids and rings fingertip-tight, and process the jars in a boiling water bath canner for 15 minutes, adjusting for altitude if needed (for example, add 1 minute per 1,000 feet above sea level). After processing, remove the jars and let them cool undisturbed on a towel—listen for the satisfying pop of sealing lids, confirming your apple chutney is safely stored and ready for year-round use.
Make-Ahead Instructions
As avid home canners, we understand the value of preparing apple chutney in advance to streamline your kitchen workflow and enjoy fresh flavors year-round. Whether you’re batch-cooking for the holidays or stocking your pantry, these Make-Ahead Instructions allow you to break down the process without compromising quality or safety.
Preparing Ingredients Ahead of Time
To get a head start, we recommend prepping your ingredients up to 24 hours in advance. This keeps everything fresh while minimizing last-minute chopping. Here’s how:
- Wash and chop apples: Start by washing 2 pounds of firm, tart apples under cold water. Peel, core, and chop them into ½-inch pieces. Store in an airtight container in the refrigerator to prevent browning—toss with a tablespoon of lemon juice for added protection.
- Dice onions and measure spices: Finely dice 1 medium yellow onion and measure out spices like freshly grated ginger, minced garlic, cinnamon, and cloves. Place them in separate sealed bags or containers in the fridge to maintain their pungent aroma and flavor.
- Mix dry ingredients: Combine brown sugar, sea salt, and any optional red chili flakes in a bowl. Cover and set aside at room temperature, as these don’t require chilling.
By organizing ingredients this way, we ensure your chutney assembly is efficient and reduces the risk of errors during cooking.
Cooking and Canning in Advance
If you want to cook the chutney fully before canning, you can prepare a large batch up to 3 days ahead. Simply follow our step-by-step instructions from the previous section, but stop after simmering and cooling the mixture. Here’s our advice for handling this stage:
- Cool and store the cooked chutney: After simmering until thickened, let the chutney cool completely at room temperature. Transfer it to clean, airtight containers and refrigerate it promptly. This halts the cooking process and preserves the sweet-tangy profile.
- Reheat for canning: When ready to can, gently reheat the chutney in a saucepan over low heat until it reaches a simmer. This ensures even distribution and activates the flavors before filling your sterilized Mason jars.
- Process for long-term storage: Proceed with the canning steps as outlined earlier, using a water bath canner to process the jars. Always check for proper seals to guarantee safety.
For optimal results, we advise against making the full recipe more than a week ahead unless it’s canned, as the fresh ingredients like apples and ginger can lose their vibrant taste and texture.
Storage and Shelf Life Guidelines
Proper storage is key to maintaining the chutney’s spicy-sweet essence. Below, we’ve outlined recommended storage times in a simple table to help you plan effectively:
| Storage Method | Duration | Conditions | Tips |
|---|---|---|---|
| Refrigerated (uncanned) | Up to 1 week | In an airtight container at 40°F or below | Stir before use to blend flavors; best for immediate meals like cheese platters. |
| Canned (sealed jars) | Up to 1 year | In a cool, dark place like a pantry | Inspect for bulges or off odors before opening; once opened, refrigerate and use within 2 weeks. |
| Frozen (cooked only) | Up to 6 months | In freezer-safe bags or containers | Thaw in the fridge overnight and reheat gently to retain the chutney’s thick, glossy texture. |
By following these Make-Ahead Instructions, we empower you to create delicious, shelf-stable apple chutney that enhances your meals effortlessly. Always prioritize food safety to enjoy your homemade preserves with confidence.
Conclusion
We’ve truly enjoyed guiding you through crafting your own apple chutney for canning. It’s a simple yet rewarding way to savor fresh flavors long after the season ends.
As we wrap up, remember that homemade preserves like this add a special touch to everyday meals. We’re confident you’ll love the results and make it a pantry staple.
Frequently Asked Questions
What is apple chutney?
Apple chutney is a sweet-tangy condiment made from fresh apples, spices, and vinegar. Originating in Indian cuisine, it’s a versatile preserve that enhances dishes like cheese platters, grilled meats, and more. It’s easy to make at home and can be canned for year-round enjoyment.
Where did apple chutney originate?
Apple chutney traces its roots to Indian cuisine, where chutneys have been traditional preserves for centuries. They combine fruits, spices, and vinegar to create flavorful condiments that complement meals.
What ingredients are needed for apple chutney?
Key ingredients include 2 pounds of firm, tart apples, 1 medium yellow onion, fresh ginger, minced garlic, apple cider vinegar, brown sugar, spices like cinnamon and cloves, sea salt, and optional red chili flakes. Using high-quality, fresh components ensures the best flavor.
What tools are required to make apple chutney?
You’ll need basic kitchen tools such as a cutting board, sharp knife, grater, measuring cups, and a large saucepan. For canning, gather Mason jars, a water bath canner, jar lifter, funnel, ladle, and bubble remover to ensure safe and efficient preparation.
How do you make apple chutney at home?
Start by washing, peeling, and chopping apples and onions. Combine with spices, vinegar, and sugar in a saucepan, simmer until thickened, then fill sterilized jars. Process in a boiling water bath for long-term preservation. The whole process takes about 1-2 hours.
Can I prepare apple chutney ahead of time?
Yes, prep ingredients like chopping apples and measuring spices up to 24 hours in advance. You can cook the chutney and can it up to three days ahead, but cool and store it properly in the fridge before processing for the best results.
How should I store apple chutney?
Store canned apple chutney in a cool, dark place for up to a year. Once opened, refrigerate and use within a month. Uncanned chutney lasts up to two weeks in the fridge or can be frozen for up to six months for longer shelf life.