
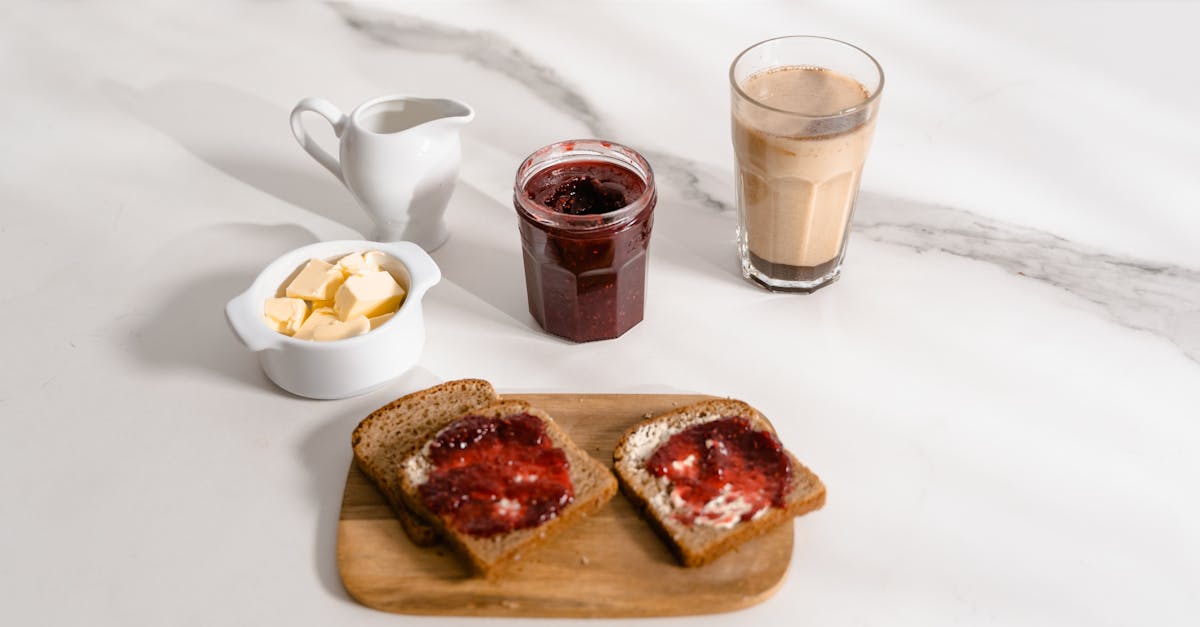
We’ve all craved that irresistible salted caramel flavor in our morning coffee but hate the artificial additives in store-bought creamers. That’s why we’re thrilled to share our easy homemade salted caramel coffee creamer recipe—it’s a game-changer for coffee lovers seeking a rich indulgent twist.
This creamer blends sweet caramel with a hint of salt for the perfect balance making your brew taste like a barista’s special. We’ll guide you through simple steps to create a versatile addition that elevates your daily routine without the fuss.
Ingredients
In our quest to craft the perfect Salted Caramel Coffee Creamer, we start by assembling high-quality ingredients that deliver that irresistible balance of sweet caramel notes and a subtle salty kick. Below, we’ve listed them in the order they’re used, with precise measurements and any necessary prep details for seamless preparation.
- 1 can (14 oz) sweetened condensed milk: This forms the creamy base; use full-fat for the richest texture.
- 1 cup heavy cream: Added next for luxurious smoothness; ensure it’s chilled to help with blending.
- ½ cup brown sugar: Introduces the caramel flavor; pack it firmly for accurate measurement.
- 2 tablespoons unsalted butter: Melt this before incorporating to create the caramel sauce.
- 1 teaspoon sea salt: Use fine sea salt for even distribution; adjust to taste for that signature salted edge.
- 1 teaspoon pure vanilla extract: Stir in last for enhanced depth and aroma; opt for high-quality extract to elevate the flavor profile.
Tools and Equipment
Having gathered our high-quality ingredients, we now turn to the essential tools and equipment that make preparing our salted caramel coffee creamer straightforward and efficient. Selecting the right items ensures precise measurements, even heating, and safe handling for a flawless result.
To streamline the process, here’s a list of the key tools we’ll need, organized by their order of use:
- Medium saucepan: A 2- to 3-quart size works best for melting and combining ingredients like butter and sugar to create the caramel base without overheating.
- Whisk: Use a sturdy wire whisk to blend the mixture smoothly and prevent lumps, ensuring our creamer achieves that velvety texture coffee lovers crave.
- Measuring cups and spoons: Opt for a set of heat-resistant ones to accurately measure liquids like heavy cream and dry ingredients like brown sugar for consistent flavor every time.
- Heatproof spatula or wooden spoon: This tool is ideal for stirring as the mixture thickens, helping to scrape the sides of the saucepan and avoid burning.
- Candy thermometer (optional): If you’re aiming for professional-level caramel, attach one to monitor temperatures between 230°F and 240°F for the perfect consistency.
- Glass jars or bottles: Choose airtight, heatproof containers with lids for storing the finished creamer in the fridge, keeping it fresh for up to two weeks.
With these tools in hand, we’re fully equipped to move seamlessly into the preparation steps.
Instructions
We make creating our homemade salted caramel coffee creamer straightforward and fun, using the ingredients and tools we’ve outlined to achieve a rich, velvety texture that elevates your daily coffee.
Prepare Ingredients
Before we start cooking, let’s gather and prepare our ingredients for efficiency. Begin by measuring out 1 can (14 ounces) of sweetened condensed milk for the creamy base, ensuring it’s at room temperature for smooth blending. Next, pour 1 cup of heavy cream into a heat-resistant measuring cup, and set aside ½ cup of brown sugar—we recommend light brown sugar for a milder caramel note, packed firmly to measure accurately.
Whisk together 2 tablespoons of melted unsalted butter in a small bowl to ensure it’s fully liquefied and free of lumps, as this forms the foundation of our caramel. Add 1 teaspoon of fine sea salt for that signature salted edge, and measure 1 teaspoon of pure vanilla extract to enhance the depth of flavor. Organize these on your workspace in the order we’ll use them—condensed milk first, followed by cream, sugar, butter, salt, and vanilla—to streamline the process and avoid any pauses.
Make the Caramel
We turn our prepared ingredients into a luscious caramel sauce that fills the kitchen with an irresistible, buttery aroma. In a medium saucepan over medium heat, combine the ½ cup of brown sugar and 2 tablespoons of melted unsalted butter, stirring constantly with a sturdy whisk until the mixture bubbles and turns a deep golden brown—about 3 to 5 minutes—to develop that signature salted caramel flavor.
Once bubbling, slowly pour in the 1 can of sweetened condensed milk and 1 cup of heavy cream, continuing to whisk vigorously to prevent scorching and create a smooth, glossy sauce. Reduce the heat to low and add 1 teaspoon of fine sea salt, stirring for another 2 to 3 minutes until the sauce thickens slightly and coats the back of a spoon with a rich, creamy sheen. Watch closely as the mixture simmers—overcooking can lead to a gritty texture, so aim for a consistency that’s pourable yet decadent.
Mix and Cool
With the caramel ready, we mix in the final touches to complete our salted caramel coffee creamer and ensure it cools properly for optimal flavor. Remove the saucepan from heat and stir in 1 teaspoon of pure vanilla extract, blending until fully incorporated for a warm, aromatic finish that enhances the overall sweetness with a subtle tang.
Transfer the hot mixture to a heatproof bowl or directly into airtight glass jars, allowing it to cool at room temperature for about 30 minutes—stir occasionally to release heat and prevent a skin from forming. Once cooled to lukewarm, seal the containers and refrigerate for at least 2 hours (or overnight for best results) to thicken into a spoonable creamer with a velvety mouthfeel that perfectly balances sweet and salty notes in your coffee.
Make-Ahead Instructions
To maximize convenience and ensure our salted caramel coffee creamer stays fresh and flavorful, we can prepare it ahead of time with these simple strategies. This approach allows us to have a barista-quality creamer ready for our daily coffee routine without last-minute effort.
Storage Tips
Follow these steps to store the creamer properly after it has cooled completely, as detailed in the previous section:
- Cool thoroughly: Let the creamer reach room temperature on a wire rack for at least 30 minutes before transferring it to containers. This step prevents condensation that could affect texture and flavor.
- Choose the right containers: Use airtight glass jars or bottles to maintain the creamer’s velvety smoothness and prevent oxidation. We recommend labeling each container with the preparation date for easy tracking.
- Refrigerate immediately: Transfer the cooled creamer to the fridge and store it on a middle shelf away from the door to avoid temperature fluctuations.
Shelf Life and Usage Guidelines
Our homemade salted caramel coffee creamer can last up to two weeks when stored correctly, but factors like ingredient freshness and storage conditions play a key role. Below is a quick reference table for shelf life based on common scenarios:
| Storage Method | Duration | Key Notes |
|---|---|---|
| Refrigerated (ideal) | Up to 2 weeks | Keeps the rich, sweet-salty profile intact; stir before use to restore creamy consistency. |
| Frozen (for longer) | Up to 3 months | Pour into ice cube trays for portion control; thaw in the fridge overnight and shake well to avoid separation. |
Reheating and Refreshing Tips
If the creamer thickens in the fridge, we can easily revive it:
- Gently warm a small portion in a saucepan over low heat, stirring constantly with a whisk until it reaches a pourable consistency—aim for about 1-2 minutes to preserve the caramel’s decadent aroma and taste.
- For single servings, add a tablespoon directly to your coffee and stir; the heat from the brew will naturally blend and enhance the salted caramel notes without altering the flavor.
By following these make-ahead instructions, we ensure our creamer remains a versatile, high-quality addition to any coffee, ready whenever we need that perfect, indulgent boost.
Conclusion
We’ve loved sharing this salted caramel coffee creamer recipe as it’s a game-changer for your coffee routine. It’s all about that homemade touch that brings out rich flavors without the fuss.
Now it’s your turn to whip up a batch and elevate every cup. We’re confident it’ll become your go-to delight.
Frequently Asked Questions
What is salted caramel coffee creamer?
Salted caramel coffee creamer is a homemade alternative to store-bought versions, made with real ingredients for a rich, barista-quality flavor. It combines sweet caramel with a hint of salt to enhance your coffee, avoiding artificial additives for a healthier option.
What ingredients are needed for homemade salted caramel coffee creamer?
You’ll need 1 can of sweetened condensed milk, 1 cup of heavy cream, ½ cup of brown sugar, 2 tablespoons of melted unsalted butter, 1 teaspoon of fine sea salt, and 1 teaspoon of pure vanilla extract. These high-quality ingredients create a creamy, flavorful base that’s easy to prepare at home.
How do I make salted caramel coffee creamer?
Start by melting brown sugar and butter in a saucepan until bubbling. Add sweetened condensed milk and heavy cream, stirring until smooth. Cook carefully for the right texture, then mix in vanilla extract and cool. This simple process takes about 10-15 minutes and yields a velvety creamer.
What tools are required to prepare this creamer?
You’ll need a medium saucepan, a sturdy whisk, heat-resistant measuring cups and spoons, a heatproof spatula, and optionally a candy thermometer. Use airtight glass jars for storage to ensure safe handling and precise results.
How should I store homemade salted caramel coffee creamer?
Store the cooled creamer in airtight glass jars or bottles in the refrigerator for up to two weeks. For longer storage, freeze in ice cube trays for up to three months to maintain freshness and flavor.
Can I make this creamer ahead of time?
Yes, prepare it in advance for convenience. Follow the recipe, let it cool completely, then store as directed. It keeps well in the fridge for up to two weeks or frozen for three months, making it ideal for busy coffee lovers.