
We’ve always loved peanut butter logs as the ultimate no-bake treat that’s both nostalgic and irresistible. Originating from simple American kitchens these chewy delights blend creamy peanut butter with everyday ingredients to create a quick energy boost or sweet snack.
They’re perfect for busy days when we crave something homemade yet effortless and they’re sure to become a family favorite in your home too. Join us as we dive into this easy recipe that’s packed with flavor and fun.
Ingredients
Now that we’ve explored the nostalgic appeal of peanut butter logs, let’s dive into the simple yet flavorful ingredients for our Peanut Butter Logs Recipe. We prioritize fresh, quality components to create a creamy, irresistible treat that’s perfect for quick preparation.
To make about 12 logs, gather these essentials in the order we’ll use them:
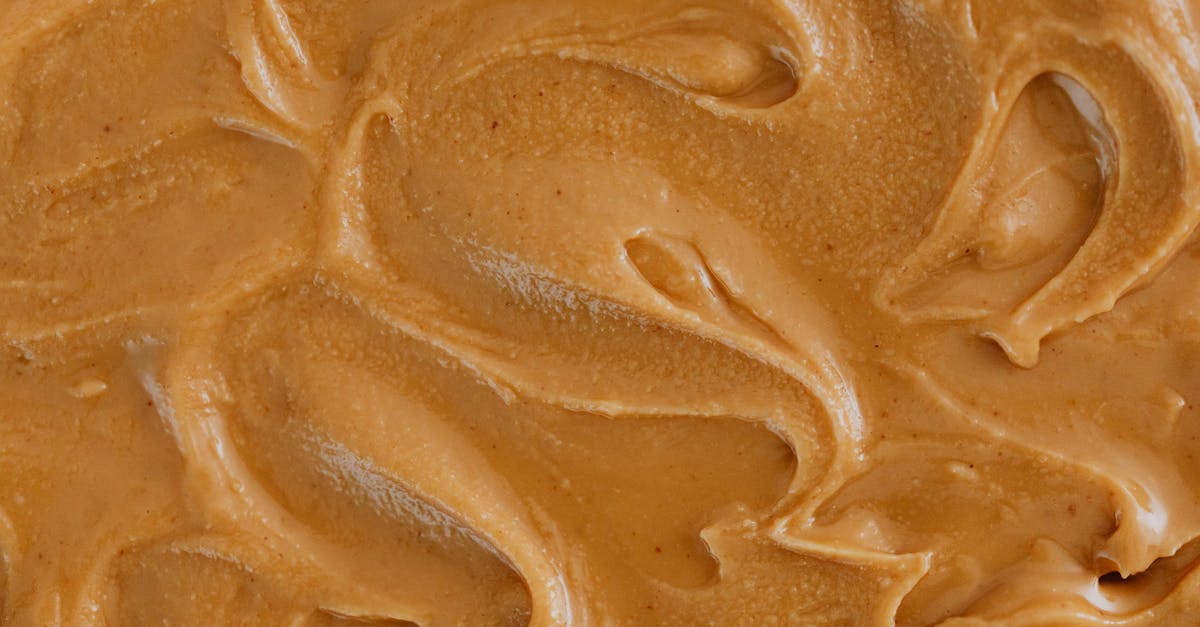
- 1 cup creamy peanut butter: Start with this as the base—it provides the rich, nutty foundation that defines our logs. Ensure it’s at room temperature for smooth mixing.
- ½ cup unsalted butter, softened: Next, add this for a silky texture; let it soften to room temperature to blend effortlessly with the peanut butter.
- 2 cups powdered sugar: Sifted for lump-free results, this sweetens and helps form the doughy consistency we need.
- 1 teaspoon vanilla extract: Incorporate this for a subtle depth of flavor that elevates the overall taste without overpowering the peanuts.
- Optional add-ins: 1/2 cup mini chocolate chips or chopped nuts, stirred in if you want extra crunch in your logs.
| Ingredient | Amount for 12 logs | Notes for Prep |
|---|---|---|
| Creamy peanut butter | 1 cup | Room temperature for easy mixing |
| Unsalted butter | ½ cup | Softened to ensure smooth blend |
| Powdered sugar | 2 cups | Sifted to avoid lumps |
| Vanilla extract | 1 teaspoon | Pure extract for best flavor |
| Mini chocolate chips (optional) | ½ cup | Add for texture; fold in gently |
Tools and Equipment
To prepare our irresistible peanut butter logs smoothly and efficiently, we need a few essential tools that keep the process quick and mess-free. Having the right equipment on hand ensures precise measurements and easy handling, especially since this is a no-bake recipe that relies on simple mixing and chilling.
Here’s a list of the key tools we recommend:
- Mixing Bowl: A medium-sized glass or stainless steel mixing bowl works best for combining ingredients like creamy peanut butter and softened butter. We prefer one with a wide rim for easy stirring and minimal splatter.
- Measuring Cups and Spoons: Accurate measuring cups (for dry ingredients like powdered sugar) and measuring spoons (for vanilla extract) are crucial to achieve the perfect texture. Opt for a set with clear markings to avoid any guesswork.
- Spatula or Wooden Spoon: A flexible silicone spatula is ideal for mixing the dough thoroughly, as it scrapes the sides of the bowl effectively. If you prefer, a sturdy wooden spoon can also work for blending in optional add-ins like chopped nuts.
- Baking Sheet or Tray: Use a standard rimmed baking sheet lined with parchment paper to shape and chill the logs. This helps maintain their form without sticking, making it easier to slice them into portions.
- Parchment Paper or Wax Paper: Essential for lining your baking sheet, this prevents the logs from adhering and simplifies cleanup. We suggest cutting sheets to fit perfectly for a professional finish.
With these tools, we can transition seamlessly from measuring our ingredients to forming the logs, ensuring a stress-free experience that highlights the nostalgic charm of peanut butter logs.
Instructions
Now that we have gathered our fresh ingredients and essential tools, we guide you through the straightforward steps to craft our creamy Peanut Butter Logs, ensuring a simple, no-bake process that delivers a nostalgic, irresistible treat.
Prep
Before assembling, we prepare the mixture to achieve the perfect smooth and creamy texture that makes these Peanut Butter Logs so addictive. Start by ensuring all ingredients are at room temperature for easy blending.
- In a medium-sized mixing bowl, combine 1 cup of creamy peanut butter and ½ cup of softened unsalted butter. Use a spatula or wooden spoon to mix vigorously until the blend is fully incorporated and has a uniform, glossy appearance – this step creates the rich, velvety base that coats your palate with every bite.
- Gradually add 2 cups of sifted powdered sugar, stirring continuously to avoid lumps and achieve a thick, dough-like consistency. The sugar helps bind the mixture while enhancing its sweet and nutty flavor profile.
- Stir in 1 teaspoon of vanilla extract for a subtle depth of aroma, then fold in any optional add-ins like mini chocolate chips or chopped nuts if desired. At this stage, the mixture should feel pliable yet firm, ready for shaping into logs that offer a satisfying crunch and creaminess.
Assemble
With the prep complete, we now assemble the logs, focusing on precise shaping and chilling to lock in that classic texture and ensure the treats hold their form for easy snacking.
- Divide the prepared mixture into about 12 equal portions on a baking sheet lined with parchment paper. Roll each portion between your hands into a log shape, approximately 4 inches long and 1 inch thick – aim for a firm yet gentle roll to create logs with a smooth exterior that promise a melt-in-your-mouth experience.
- Place the shaped logs on the parchment-lined sheet, spacing them about 1 inch apart to prevent sticking. Cover loosely with additional parchment paper and chill in the refrigerator for at least 30 minutes, or until firm. This chilling step is crucial as it sets the structure, enhancing the cool, creamy contrast against the rich peanut butter flavor.
| Chilling Time (minutes) | Resulting Texture | Best For |
|---|---|---|
| 30 | Slightly soft and pliable | Immediate snacking |
| 60 | Firm and easy to handle | Storing or gifting |
| 90+ | Extra firm and sliceable | Long-term refrigeration |
Make-Ahead Instructions
One of the joys of our Peanut Butter Logs recipe is how easily they adapt to busy schedules, allowing us to prepare them in advance for effortless snacking or events. By planning ahead, we ensure these creamy, nostalgic treats retain their irresistible texture and flavor, making them perfect for family gatherings or quick treats on the go.
Preparing the Logs in Advance
To make our Peanut Butter Logs ahead of time, we follow the core recipe steps up to the chilling phase as outlined earlier. Once the mixture is rolled into logs and placed on a parchment-lined baking sheet:
- Chill thoroughly: Transfer the baking sheet to the refrigerator and chill the logs for at least 1 hour, or until firm. This step locks in that smooth, glossy texture we love, preventing them from becoming too soft during storage.
- Portion and wrap: After chilling, divide the logs into individual portions if desired. Wrap each log tightly in wax paper or plastic wrap to maintain freshness and prevent sticking.
- Store appropriately: For short-term storage, place the wrapped logs in an airtight container in the refrigerator. For longer preservation, freeze them to extend shelf life while keeping that peanut buttery goodness intact.
Storage Options and Tips
We recommend considering storage duration based on your needs, as it directly impacts the logs’ texture—from slightly chewy to extra firm. Below is a quick reference table to guide us:
| Storage Method | Duration | Expected Texture Outcome | Key Tips |
|---|---|---|---|
| Refrigeration | Up to 1 week | Soft and creamy, ideal for immediate snacking | Keep in an airtight container to avoid absorbing odors from other foods. |
| Freezing | Up to 3 months | Firm and chewy, perfect for thawing as needed | Flash freeze on a baking sheet first, then transfer to a freezer-safe bag for easy access. |
When we’re ready to enjoy our make-ahead Peanut Butter Logs, simply thaw them in the refrigerator for 30–60 minutes if frozen, or let refrigerated ones sit at room temperature for 10 minutes. This restores their velvety smoothness and enhances the rich, nutty flavors, ensuring every bite feels freshly made.
Conclusion
We’ve truly enjoyed guiding you through this peanut butter logs adventure. It’s a straightforward treat that brings back fond memories and fits seamlessly into our busy lives.
As we wrap up, we encourage you to tweak it with your favorite twists and make it your own family favorite. Here’s to more delicious, no-fuss snacking!
Frequently Asked Questions
What are peanut butter logs?
Peanut butter logs are a simple, no-bake treat that originated in American kitchens, blending creamy peanut butter with butter, powdered sugar, and vanilla for a nostalgic snack. They’re quick to make, ideal for busy days, and can be customized with add-ins like chocolate chips for extra flavor and texture.
What ingredients do I need for peanut butter logs?
To make about 12 peanut butter logs, you’ll need 1 cup of creamy peanut butter, ½ cup of softened unsalted butter, 2 cups of sifted powdered sugar, and 1 teaspoon of vanilla extract. Optional add-ins like mini chocolate chips or chopped nuts add texture. Use fresh, quality ingredients for the best creamy results.
What tools are required to make peanut butter logs?
You’ll need a medium-sized mixing bowl, accurate measuring cups and spoons, a spatula or wooden spoon for mixing, and a baking sheet lined with parchment paper for shaping and chilling. These tools ensure precise measurements and easy cleanup, making the process smooth and enjoyable.
How do I make peanut butter logs?
Start by mixing peanut butter and softened butter until glossy, then gradually add powdered sugar and vanilla extract, plus any optional add-ins. Divide the mixture, roll into logs, and chill on a lined baking sheet. Follow the recipe for a smooth texture, with chilling times varying from 30 minutes for soft logs to 2 hours for firm ones.
How long should I chill peanut butter logs?
Chill peanut butter logs for at least 30 minutes for a slightly soft texture ready for snacking, up to 2 hours for a firmer set, or overnight for the best structure. Longer chilling, like in the freezer, makes them extra firm and ideal for storage, affecting their chewiness based on your preference.
Can I make peanut butter logs ahead of time?
Yes, peanut butter logs are perfect for making ahead. Prepare the mixture, shape into logs, and chill thoroughly. Store in the refrigerator for up to a week or freeze for up to 3 months. This allows for easy portioning and preserves freshness, so you can enjoy them anytime without hassle.
How do I store peanut butter logs?
After chilling, wrap peanut butter logs in parchment or wax paper and store in an airtight container. Refrigerate for short-term (up to 1 week) for a firm texture, or freeze for longer (up to 3 months). Thaw in the fridge and let sit at room temperature briefly to restore their creamy smoothness before serving.