
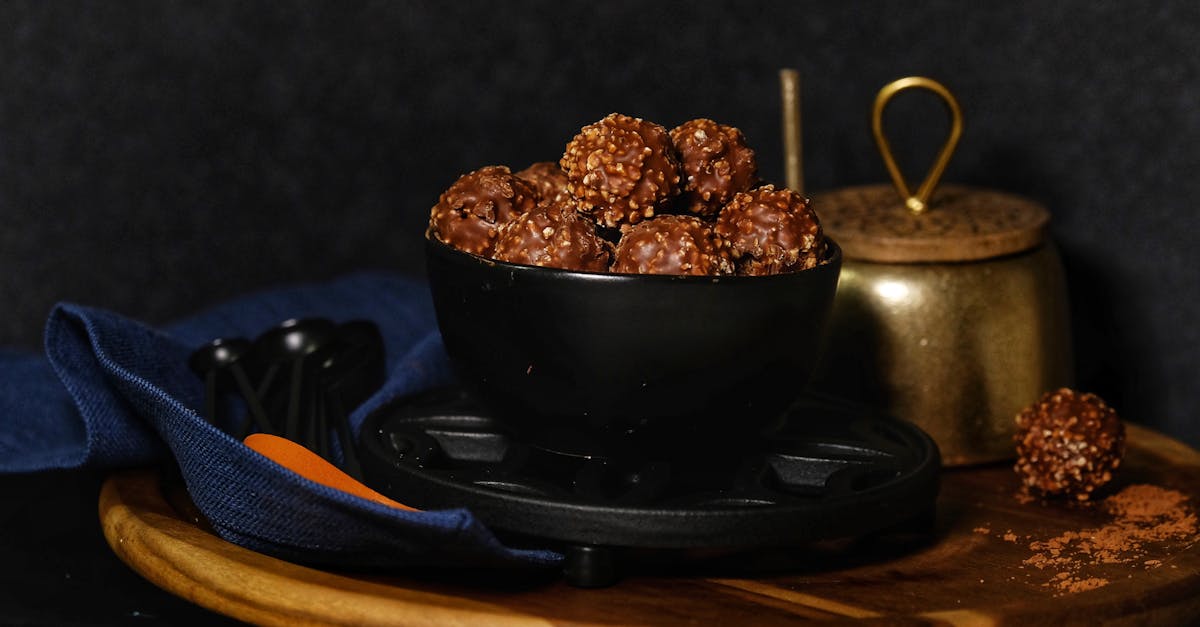
We absolutely love diving into the world of homemade treats, and our chocolate covered maple cream candy recipe is a standout favorite. Hailing from the cozy traditions of New England where maple syrup reigns supreme, this delightful candy blends creamy sweetness with a rich chocolate coating for an irresistible twist.
It’s perfect for holiday gatherings or a simple indulgence, and we’re excited to share how easy it is to whip up in your own kitchen. With just a few steps, you’ll create a batch that captures the essence of fall flavors we all crave.
Ingredients
As we dive into creating our irresistible Chocolate Covered Maple Cream Candy, let’s gather the essential ingredients. We’ll list them in the order they’re used, with specific preparation notes to ensure flawless results.
Maple Cream Base Ingredients
- 1 cup pure maple syrup: Choose Grade A amber for its rich, balanced flavor; this forms the heart of our creamy base.
- 1 cup granulated sugar: Adds sweetness and structure; measure it precisely for the perfect consistency.
- ½ cup heavy cream: Use full-fat for a luxurious texture; it should be chilled to help with emulsification.
- 2 tablespoons unsalted butter: Softened to room temperature for easy incorporation into the mixture.
- 1 teaspoon vanilla extract: Pure variety only, for authentic depth of flavor; add it once the base is cooked.
Chocolate Coating Ingredients
- 12 ounces semi-sweet chocolate: Finely chopped for even melting; we recommend high-quality baking chocolate to enhance the rich coating.
- 1 tablespoon coconut oil or vegetable shortening: Optional, but it helps achieve a smooth, glossy finish when melting the chocolate for dipping.
These carefully selected ingredients will bring out the creamy sweetness and decadent chocolate notes that make this treat a New England favorite. Now, we’re ready to move on to the preparation steps.
Tools and Equipment
Now that we’ve gathered our key ingredients for the chocolate covered maple cream candy, let’s equip ourselves with the right tools to ensure smooth preparation and perfect results. Having the proper equipment not only streamlines the process but also helps achieve that ideal creamy texture and glossy chocolate coating.
We recommend the following essential tools, organized by their role in the recipe:
- Medium-sized saucepan: This is crucial for heating and boiling the maple syrup mixture to the correct temperature, preventing scorching and ensuring even cooking.
- Candy thermometer: Accuracy is key for candy-making; use this to monitor the mixture’s temperature precisely, aiming for the soft-ball stage around 235°F to 240°F for the perfect cream consistency.
- Heatproof mixing bowl: Ideal for combining ingredients like butter and vanilla; opt for a glass or stainless steel bowl that can withstand high heat without reacting.
- Whisk or wooden spoon: A sturdy whisk works best for stirring the mixture smoothly, helping to incorporate air and achieve a creamy texture without lumps.
- Baking sheet or tray: Line this with parchment paper to set the maple cream; it provides a flat surface for even cooling and easy removal of the candies.
- Double boiler or microwave-safe bowl: Essential for melting semi-sweet chocolate evenly; a double boiler prevents burning, while a microwave-safe bowl offers a quicker alternative for that rich, decadent coating.
- Spatula or offset knife: Use a spatula for spreading the cream or dipping candies into chocolate, ensuring uniform coverage and a professional finish.
- Parchment paper or silicone mat: This non-stick surface is vital for preventing the candy from sticking during setting, making cleanup effortless.
| Tool | Best For | Why It’s Useful |
|---|---|---|
| Candy Thermometer | Precision heating | Ensures the mixture reaches the exact temperature for the right texture, reducing errors. |
| Double Boiler | Melting chocolate | Provides gentle, even heat to avoid seizing or burning chocolate. |
| Microwave-Safe Bowl | Quick melting | Saves time for smaller batches, but requires stirring every 30 seconds for consistency. |
Instructions
Now that we have gathered our ingredients and tools, we guide you through the straightforward steps to create our irresistible chocolate covered maple cream candy. Let’s achieve that perfect balance of creamy sweetness and rich chocolate coating with precision and ease.
Prepare the Maple Cream
First, we combine the base ingredients in a medium-sized saucepan to build the creamy foundation. In the saucepan, add 2 cups of pure maple syrup, 1 cup of granulated sugar, 1/2 cup of heavy cream, and 4 tablespoons of unsalted butter. Using a whisk, stir the mixture vigorously until the butter melts and the ingredients blend into a smooth, glossy liquid—envision the sweet, aromatic essence of maple filling the air as it promises a decadent treat.
Cook the Mixture
Next, we heat the blended mixture to the ideal temperature for that signature creamy texture. Place the saucepan over medium heat and insert the candy thermometer to monitor progress. Bring the mixture to a boil, stirring constantly with a wooden spoon to prevent scorching, and continue cooking until it reaches soft-ball stage at 235°F to 240°F. This precise heat transforms the liquid into a thick, velvety syrup—note the rich, buttery aroma intensifying as bubbles form, ensuring our candy sets with a melt-in-your-mouth consistency.
Shape the Candies
Once cooked, we quickly shape the mixture before it hardens, capturing its creamy essence in perfect forms. Remove the saucepan from heat and stir in 1 teaspoon of vanilla extract for added depth of flavor. Pour the hot mixture onto a baking sheet lined with parchment paper and let it cool for about 10 to 15 minutes until it’s pliable but not set. Using a spatula, divide and roll the cooled mixture into 1-inch balls or flatten into disks—feel the smooth, supple texture under your hands as you create uniform pieces ready for their chocolate embrace.
Coat with Chocolate
We dip our shaped candies into melted chocolate for that glossy, indulgent finish that elevates the treat. In a double boiler or microwave-safe bowl, melt 12 ounces of semi-sweet chocolate with 1 tablespoon of optional coconut oil over low heat, stirring until smooth and shiny—about 2 to 3 minutes in the microwave at 30-second intervals. Using an offset knife or fork, carefully coat each candy piece in the melted chocolate, allowing excess to drip off for a thin, even layer. Picture the contrast of the cool cream against the warm, velvety chocolate as it sets, creating a satisfying crunch with every bite.
Cool and Set
Finally, we let the coated candies firm up to lock in their delightful textures and flavors. Place the dipped candies on a fresh sheet of parchment paper and refrigerate them for at least 1 hour until the chocolate hardens to a crisp shell. For optimal results, store in an airtight container at room temperature after setting—enjoy the transformation as the creamy maple center contrasts with the firm chocolate exterior, making these candies a standout homemade delight.
Make-Ahead Instructions
As we perfect our chocolate covered maple cream candy recipe, preparing components in advance ensures fresh, irresistible results without last-minute rush. Let’s break down the steps for seamless planning and storage.
Preparing the Maple Cream Base Ahead
We can make the maple cream base up to 3 days in advance to save time. Start by following the initial heating and cooling instructions from our recipe. Once the mixture reaches the soft-ball stage and is shaped into balls or disks, transfer them to an airtight container lined with parchment paper. Refrigerate immediately to preserve the creamy texture— this prevents crystallization and keeps the sweetness intact. When ready to use, let the base sit at room temperature for 15-20 minutes to soften slightly before dipping.
Dipping and Coating in Advance
For events, we suggest dipping the candies in chocolate up to 2 days ahead. After melting the semi-sweet chocolate as outlined, coat the chilled maple cream centers and place them on a parchment-lined baking sheet. Allow them to set fully in the refrigerator for at least 1 hour. This step creates that signature contrast between the soft, maple-infused center and the firm, glossy chocolate exterior. Store the coated candies in a single layer in an airtight container in the fridge to maintain their shape and prevent moisture buildup.
Storage and Freezing Tips
To extend shelf life, we can freeze the fully assembled chocolate covered maple cream candies for up to 1 month. First, arrange the candies on a baking sheet and freeze until solid (about 1-2 hours). Then, transfer to a freezer-safe bag or container, separating layers with parchment paper to avoid sticking. When thawing, move them to the refrigerator overnight for even defrosting— this preserves the creamy sweetness and prevents the chocolate from blooming. For optimal flavor, consume within 3 days of thawing.
| Make-Ahead Option | Preparation Time | Storage Duration | Thawing/Prep Time |
|---|---|---|---|
| Maple Cream Base Only | Up to 3 days ahead | Refrigerator | 15-20 minutes at room temperature |
| Fully Assembled Candies | Up to 2 days ahead | Refrigerator | N/A (ready to serve) |
| Frozen Candies | Up to 1 month ahead | Freezer | Overnight in refrigerator |
Conclusion
We’ve crafted this chocolate covered maple cream candy recipe to bring a touch of homemade magic to your kitchen. It’s more than just a treat—it’s a way to savor simple pleasures and create lasting memories. Trust us, once you’ve tried it you’ll keep coming back for more.
Frequently Asked Questions
What is chocolate covered maple cream candy?
Chocolate covered maple cream candy is a classic New England treat featuring a creamy, sweet maple center dipped in rich chocolate. It’s perfect for holidays, gatherings, or everyday indulgence, blending pure maple syrup’s fall flavors with decadent chocolate for a delightful contrast.
What ingredients are needed for this recipe?
You’ll need pure maple syrup, granulated sugar, heavy cream, unsalted butter, vanilla extract, semi-sweet chocolate, and optional coconut oil or vegetable shortening. These ingredients create a creamy base and glossy chocolate coating, ensuring a balanced sweet and rich taste.
What tools are required to make maple cream candy?
Essential tools include a medium saucepan for heating, a candy thermometer for accuracy, a heatproof bowl for mixing, a whisk or wooden spoon, a baking sheet with parchment paper, and a double boiler or microwave-safe bowl for melting chocolate. A spatula helps with even dipping.
How do I prepare chocolate covered maple cream candy?
Start by heating maple syrup, sugar, cream, and butter in a saucepan to the soft-ball stage. Cool and shape into balls or disks, then dip in melted chocolate. Chill in the refrigerator until set. The process is straightforward and yields a creamy center with a firm chocolate exterior.
Can I make this candy ahead of time?
Yes, prepare the maple cream base up to 3 days in advance and store in an airtight container. Dip in chocolate up to 2 days ahead. For longer storage, freeze the finished candies for up to 1 month, making it easy for events or future enjoyment.
How should I store the finished maple cream candies?
Store in an airtight container at room temperature for up to a week, or refrigerate for up to two weeks to maintain freshness. For extended storage, freeze in a sealed bag for up to a month, thawing at room temperature before serving to preserve the creamy texture and chocolate coating.