
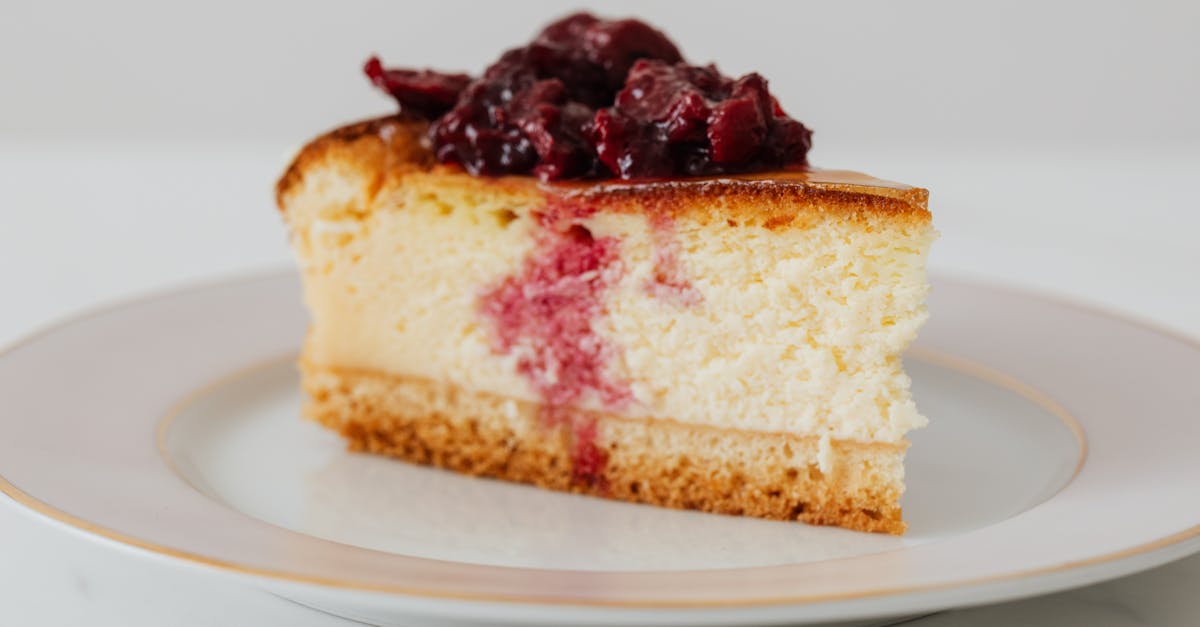
We’ve always loved the simple joy of homemade jams and our Cherry Vanilla Jam Recipe takes it up a notch. It blends the bright tartness of fresh cherries with the smooth warmth of vanilla for a flavor that’s both comforting and irresistible. This easy preserve captures summer’s best in every spoonful.
Whether you’re stocking your pantry or gifting jars to friends this recipe is a must-try. We’ll show you how to whip it up with confidence so you can enjoy homemade goodness all year round.
Ingredients
To create our Cherry Vanilla Jam, we start by gathering high-quality ingredients that capture the tart sweetness of cherries and the aromatic warmth of vanilla. Below, we’ve listed them in the order they’re used, with precise measurements and any necessary prep notes for accuracy and ease.
- Fresh cherries: 4 cups (pitted and halved) – We select ripe, juicy cherries for their vibrant flavor and natural tartness, which forms the base of this homemade jam.
- Granulated sugar: 3 cups – This sweetens the jam; we dissolve it gradually to balance the cherries’ acidity and achieve a perfect set.
- Lemon juice: 2 tablespoons (freshly squeezed) – Added early for its acidity, which helps activate pectin and enhances the jam’s bright, tangy notes.
- Vanilla extract: 1 tablespoon (pure, not imitation) – Incorporated midway to infuse the warm, floral vanilla essence that elevates the overall flavor profile.
- Pectin: 1 packet (about 1.75 ounces, low-sugar variety) – Used toward the end if needed, we recommend this for reliable thickening without overpowering the fresh fruit taste.
- Water: 1/2 cup – This is stirred in initially to create the syrup base, ensuring even cooking and a smooth texture.
Equipment Needed
Before we dive into preparing our Cherry Vanilla Jam, gathering the right equipment ensures a smooth and safe process. In our experience, having these essentials on hand makes jam-making efficient and enjoyable.
Here’s a detailed list of the key equipment we’ll need, organized by category for clarity:
- Large Stock Pot (at least 8 quarts): This is crucial for cooking the cherry mixture to prevent overflow and ensure even heating. We recommend a heavy-bottomed pot to avoid scorching our sweet cherry base.
- Cherry Pitter or Sharp Knife: For efficiently pitting and halving the fresh cherries. A cherry pitter saves time and minimizes mess, especially if we’re working with a large batch.
- Measuring Cups and Spoons: Accurate measurements are key to balancing flavors in our Cherry Vanilla Jam, so use sturdy, heat-resistant sets for both dry and liquid ingredients.
- Wooden Spoon or Silicone Spatula: Ideal for stirring the jam without scratching the pot. We find these tools help maintain the fruit’s texture while incorporating the vanilla extract smoothly.
- Canning Jars and Lids (8-ounce size, about 4-6 jars): Glass jars with airtight lids are essential for proper sealing and storage. Ensure they’re sterilized to preserve the jam’s freshness for up to a year.
- Jar Lifter and Funnel: A jar lifter keeps our hands safe when handling hot jars, and a wide-mouth funnel prevents spills when filling them with the finished jam.
- Candy Thermometer: This helps us monitor the jam’s temperature to reach the perfect set point (around 220°F), ensuring a thick, spreadable consistency without guesswork.
By preparing this equipment ahead of time, we set ourselves up for success in creating a delicious, homemade Cherry Vanilla Jam that captures the essence of summer flavors.
Instructions
Now that we have gathered our fresh ingredients and essential equipment, we guide you through the straightforward steps to create our homemade Cherry Vanilla Jam. Let’s ensure each step is executed with precision for a flavorful, textured preserve that captures the essence of summer.
Prepare the Ingredients
Before we begin cooking, proper preparation sets the stage for success. Start by washing 4 cups of fresh pitted and halved cherries under cold water to remove any debris, then pat them dry with a clean towel. Next, measure out 3 cups of granulated sugar, 2 tablespoons of freshly squeezed lemon juice, 1 tablespoon of pure vanilla extract, 1 packet of low-sugar pectin, and 1/2 cup of water, placing each in separate bowls for easy access.
For the cherries, use a cherry pitter or sharp knife to halve them efficiently, aiming for uniform pieces that release their tart juices and vibrant red color. We recommend tasting a cherry to confirm ripeness, as this ensures the jam’s balance of sweetness and acidity—a key factor for that irresistible flavor profile.
Cook the Jam
With ingredients prepped, we move to the cooking phase where the magic happens. In a large stock pot, combine the 4 cups of prepared cherries, 1/2 cup of water, and 2 tablespoons of lemon juice over medium heat, stirring gently with a wooden spoon until the mixture begins to simmer and the cherries release their fragrant juices—evoking a fresh, fruity aroma that hints at the jam’s vibrant taste.
Once simmering, gradually add the 3 cups of granulated sugar and 1 packet of low-sugar pectin, stirring continuously to dissolve completely and prevent clumping. Increase the heat to high and bring the mixture to a rolling boil, then reduce to medium and cook for about 10-15 minutes, or until it reaches 220°F on a candy thermometer. At this point, stir in the 1 tablespoon of vanilla extract for a warm, aromatic finish that infuses the jam with subtle vanilla notes, creating a glossy, thick consistency that’s visually appealing and perfectly spreadable on warm toast.
Can and Store
To preserve our Cherry Vanilla Jam for long-term enjoyment, we focus on safe canning practices. First, sterilize your canning jars and lids by boiling them in a large pot of water for 10 minutes, then remove them with a jar lifter and place them on a clean towel to air dry.
Using a funnel, ladle the hot jam into the prepared jars, leaving 1/4 inch of headspace at the top to allow for proper sealing. Wipe the jar rims with a damp cloth to remove any residue, then secure the lids and bands fingertip-tight. Process the jars in a boiling water bath for 10 minutes, ensuring they are fully submerged—this step locks in the jam’s fresh flavors and extends shelf life. Once processed, remove the jars and let them cool undisturbed for 24 hours, then store in a cool, dark place where they can last up to 12 months unopened. Always check for seals before storing, and refrigerate any opened jars for up to 3 weeks.
Make-Ahead and Storage
As we wrap up our Cherry Vanilla Jam recipe, let’s focus on practical ways to prepare it in advance and store it safely to preserve its vibrant flavors and extend its shelf life. This ensures our homemade jam remains fresh and delicious for enjoying throughout the year.
Make-Ahead Tips
To make the process smoother, we can prepare certain elements ahead of time without compromising quality. Start by washing and pitting the cherries up to 24 hours in advance—simply place them in an airtight container and refrigerate to maintain their tart, juicy sweetness. We recommend measuring out the granulated sugar and ** lemon juice** the night before, storing them at room temperature in sealed bags or jars to save time during assembly. For the vanilla extract, keep it sealed to retain its warm, aromatic essence. These steps allow us to jump straight into cooking, making our Cherry Vanilla Jam sessions more efficient and enjoyable.
Storage Methods
Proper storage is key to locking in the jam’s glossy texture and irresistible cherry-vanilla aroma. Once we’ve canned the jam using the boiling water bath method, let the jars cool completely at room temperature. For short-term storage, refrigerate any jars that didn’t seal properly; they’ll stay fresh for up to 3 weeks, with the flavors intensifying over time. For long-term storage, store sealed jars in a cool, dark pantry to prevent fading of the jam’s bright color and flavor.
To help us track shelf life accurately, here’s a quick overview in table form:
| Storage Method | Duration | Conditions | Notes |
|---|---|---|---|
| Refrigerated | Up to 3 weeks | Below 40°F (4°C) in fridge | Ideal for opened jars; flavors remain bold and fruity. |
| Pantry (Sealed Jars) | Up to 12 months | Cool, dark place below 70°F (21°C) | Check seals before storing; discard if signs of spoilage appear. |
| Frozen | Up to 12 months | Airtight freezer containers | Great for bulk batches; thaw in fridge to preserve texture. |
Always inspect jars for bulging lids or off odors before use, ensuring our Cherry Vanilla Jam stays safe and scrumptious for spreading on toast or gifting.
Conclusion
We’ve loved sharing this Cherry Vanilla Jam recipe with you, as it’s one that’s become a staple in our kitchens. It’s more than just a spread—it’s a way to capture summer’s essence for year-round enjoyment.
Try whipping up a batch and see how it adds a special touch to your meals or gifts. We’re confident you’ll find it as irresistible as we do, and we’d love to hear about your homemade successes.
Frequently Asked Questions
What is Cherry Vanilla Jam?
Cherry Vanilla Jam is a homemade preserve blending tart fresh cherries with warm vanilla for a delightful flavor. It’s perfect for pantry stocking or gifting, offering a taste of summer year-round. This easy recipe balances sweetness and acidity for a comforting treat.
What ingredients are needed for Cherry Vanilla Jam?
You’ll need 4 cups fresh pitted cherries, 3 cups granulated sugar, 2 tablespoons lemon juice, 1 tablespoon vanilla extract, 1 packet low-sugar pectin, and 1/2 cup water. Use ripe cherries for the best flavor, and measure precisely to achieve the perfect sweet-tart balance.
How do I make Cherry Vanilla Jam?
Start by washing and pitting cherries. Combine with sugar, lemon juice, pectin, and water in a stock pot, simmer, then bring to a rolling boil. Add vanilla extract, cook until thickened, then can in sterilized jars. The process takes about 30-45 minutes of active cooking.
What equipment is required for making Cherry Vanilla Jam?
Essential tools include a large stock pot for cooking, a cherry pitter or knife for preparation, measuring cups and spoons, a wooden spoon or spatula, canning jars and lids, a jar lifter, funnel, and candy thermometer. These ensure safe and efficient jam-making.
How long does Cherry Vanilla Jam last?
When properly canned, it lasts up to 12 months in a cool, dark pantry. After opening, refrigerate and use within 3-4 weeks. Always check for seals and signs of spoilage before consuming to maintain safety and quality.
Can I prepare Cherry Vanilla Jam ahead of time?
Yes, wash and pit cherries, and measure sugar and lemon juice in advance to save time. This makes the process smoother. Store prepped ingredients in the fridge for up to 24 hours before cooking for fresh results.
Are there tips for storing Cherry Vanilla Jam safely?
Cool jars completely after canning, then store in a cool, dark place. For short-term, refrigerate opened jars. A summary: pantry storage up to 12 months, fridge up to 3 weeks. Always use clean utensils to avoid contamination.