
We’ve always been captivated by the cozy charm of Danish baking, and Brunsviger stands out as a beloved coffee cake that’s both simple and indulgent. Hailing from Denmark, this treat features a soft yeasted base topped with a gooey caramel layer that makes it impossible to resist.
Our take on this classic recipe brings authentic flavors to your home, perfect for sharing with family or enjoying solo. Whether you’re a baking novice or pro, we’ll show you how to create this delightful Danish delight that pairs wonderfully with a hot cup of coffee.
Ingredients
To craft our authentic Brunsviger—a soft, yeasted Danish coffee cake with a gooey caramel topping—we begin by gathering the essential ingredients. We’ll organize them by category for clarity, listing them in the order they’re used during preparation. This ensures a smooth baking process.
For the Dough
- 1 packet (about 2 1/4 teaspoons) active dry yeast: Proof this in warm liquid to activate.
- 1 cup whole milk, warmed to 110°F: Use for dissolving the yeast and creating a tender base.
- 1/2 cup granulated sugar: Adds sweetness and helps with yeast fermentation.
- 1/2 cup unsalted butter, softened: Incorporate for richness and moisture.
- 2 large eggs: Beat lightly before adding to bind the dough.
- 4 cups all-purpose flour: Sifted for even texture, added gradually to form the dough.
- 1 teaspoon salt: Enhances flavor and balances the sweetness.
For the Topping
- 1 cup brown sugar, packed: This is key for the signature caramel gooeyness, sprinkled over the dough before baking.
- 1/2 cup unsalted butter, melted: Combines with sugar to create a decadent layer.
- 1 teaspoon vanilla extract: Added for a subtle aromatic depth.
- Optional: 1/2 cup chopped nuts (like almonds): For added crunch, if desired, mixed into the topping mixture.
These measurements yield one 9×13-inch cake, perfect for 8-10 servings. Always use fresh ingredients for the best results in our Brunsviger recipe.
Equipment Needed
Now that we’ve gathered our fresh ingredients for the Brunsviger recipe, let’s equip ourselves with the right tools to craft this irresistible Danish coffee cake. Having the proper equipment ensures smooth preparation and perfect results, from mixing the yeasted dough to baking the gooey caramel topping.
We recommend the following essential items, organized by their role in the process:
- Mixing Bowls: Two to three medium and large stainless steel or glass bowls for combining dough ingredients and preparing the topping—opt for heatproof ones if melting butter on the stove.
- Measuring Cups and Spoons: A set of dry and liquid measuring cups along with spoons for accurate measurements, crucial for activating the yeast and balancing the caramel flavors.
- Stand Mixer or Hand Mixer: A stand mixer with dough hook for kneading the soft yeasted base efficiently, or a hand mixer as an alternative for smaller batches to achieve that perfect airy texture.
- 9×13-Inch Baking Pan: A rectangular metal or glass pan greased well to prevent sticking, as it yields the ideal size for our 8-10 servings of Brunsviger with its signature gooey edges.
- Whisk and Spatula: A wire whisk for blending wet ingredients smoothly and a silicone spatula for scraping bowls and folding in toppings without damaging the dough.
- Saucepan: A small to medium non-stick saucepan for melting butter and creating the caramel topping, ensuring even heat distribution for that rich, buttery gloss.
- Oven and Timer: A standard oven preheated to the required temperature, paired with a reliable timer to bake the cake to golden perfection and avoid overcooking.
By using these tools, we can streamline the process and focus on the sensory delights of Brunsviger—its warm, caramel-scented aroma and soft, yielding crumb that pairs beautifully with coffee.
Instructions
Now that we have gathered our fresh ingredients and essential tools, let’s guide you through crafting this authentic Danish Brunsviger with its soft, yeasted base and gooey caramel topping. We promise a straightforward process that yields a 9×13-inch cake perfect for 8-10 servings.
Prepare the Dough
First, we activate the yeast by warming 1 cup of whole milk to about 110°F in a mixing bowl, then stirring in 2 teaspoons of active dry yeast and 1 tablespoon of granulated sugar. Let this mixture sit for 5-10 minutes until it becomes frothy, signaling the yeast is alive and ready.
Next, in a large mixing bowl, we cream together 1/2 cup of softened unsalted butter and 1/2 cup of granulated sugar using a stand or hand mixer on medium speed until the mixture is light and fluffy—this step ensures a tender crumb. Add 2 large eggs one at a time, beating well after each addition to incorporate air and richness.
Gradually, we mix in 4 cups of all-purpose flour and 1 teaspoon of salt, starting with the mixer on low speed to avoid a flour cloud, then switching to a dough hook or kneading by hand on a lightly floured surface for about 5-7 minutes. The dough should form a smooth, elastic ball that feels supple under our fingers and smells subtly sweet, ready for rising.
Let the Dough Rise
Once the dough is prepared, we transfer it to a lightly greased bowl, turning it once to coat all sides with oil for even rising. Cover the bowl tightly with plastic wrap or a damp kitchen towel and place it in a warm, draft-free spot—aim for around 75-80°F to encourage the yeast’s magic.
Allow the dough to rise for 1-2 hours, or until it doubles in size; watch as it transforms into a puffy, aromatic mass that hints at the cake’s light texture. For faster rising in cooler kitchens, we can use the oven’s proofing setting or a warm water bath, but patience here ensures the best flavor and structure.
Make the Topping
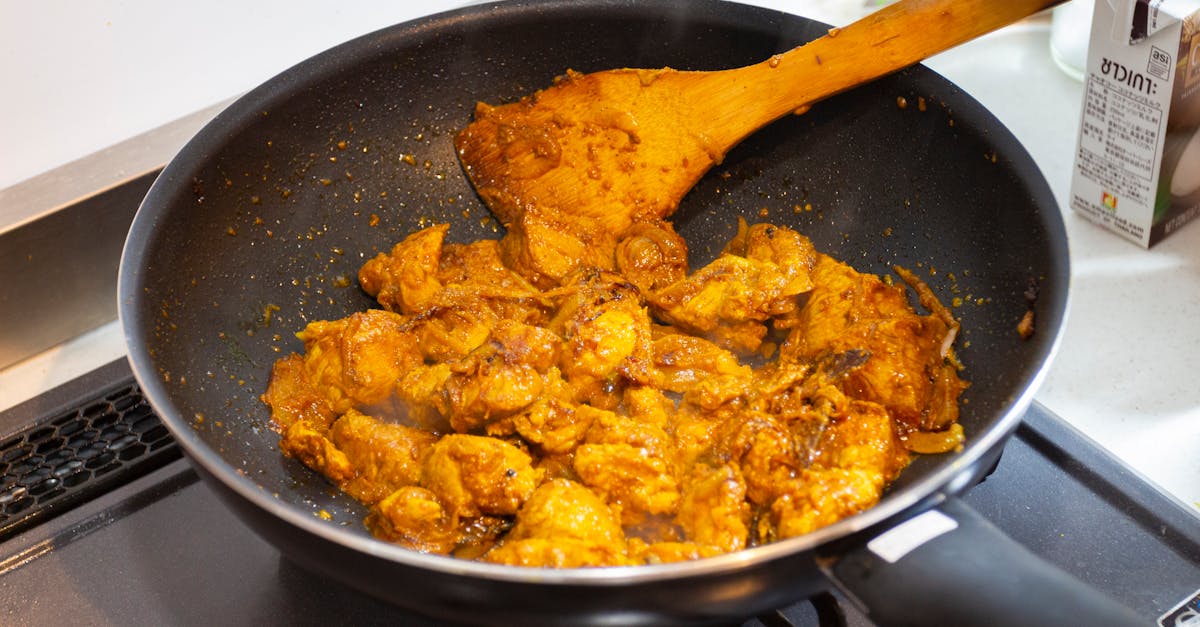
While the dough rises, we focus on the irresistible caramel topping. In a medium saucepan over medium heat, melt 1 cup of unsalted butter, then stir in 1 1/2 cups of brown sugar until fully dissolved and bubbling—this creates a gooey, golden mixture that defines Brunsviger’s appeal.
Remove the saucepan from heat and whisk in 2 teaspoons of vanilla extract along with 1/4 cup of whole milk for a smooth consistency. If desired, fold in 1/2 cup of chopped nuts like pecans or almonds for added crunch. The topping should have a rich, buttery aroma that evokes warm coffeehouse vibes, and we set it aside to cool slightly while preparing the pan.
Bake the Brunsviger
After the dough has risen, we gently punch it down to release gases, then press it evenly into a greased 9×13-inch baking pan, ensuring it reaches the edges for a uniform base. Pour the prepared topping over the dough, spreading it out so it settles into a caramelized layer that will bubble and brown beautifully.
Preheat the oven to 350°F and bake the Brunsviger on the middle rack for 25-30 minutes, or until the top is golden and a toothpick inserted in the center comes out clean with a few sticky crumbs—the kitchen will fill with an irresistible scent of sweet caramel and fresh bread. Once done, remove from the oven and let it cool in the pan for at least 10 minutes before slicing.
Make-Ahead Instructions
One of the joys of baking Brunsviger, our beloved Danish coffee cake, is its flexibility for busy schedules. We can prepare components in advance to save time while preserving that fresh, gooey caramel topping and soft yeasted base. Below, we outline reliable make-ahead strategies, ensuring your cake remains irresistible when you’re ready to bake.
Preparing the Dough Ahead
To streamline our baking process, we recommend making the dough up to 24 hours in advance. This allows the flavors to develop and gives us more time to enjoy the warm, caramel-scented aroma later.
- Step 1: After mixing and kneading the dough as described in the main instructions, shape it into a ball and place it in a lightly oiled bowl. Cover tightly with plastic wrap or a damp cloth.
- Step 2: Refrigerate the dough immediately. It will rise slowly in the cold environment, so let it chill for 1 to 24 hours.
- Step 3: When ready to use, remove the dough from the refrigerator and let it sit at room temperature for about 30-60 minutes until it softens and reaches a workable consistency. This step ensures the dough rises properly during proofing.
Making the Topping in Advance
The caramel topping for Brunsviger can be prepared ahead, as it stores well and reheats easily, maintaining its rich, buttery gloss.
- Step 1: Follow the topping instructions by melting butter and brown sugar together, then stirring in vanilla extract and any optional nuts.
- Step 2: Let the mixture cool completely, then transfer it to an airtight container. Store in the refrigerator for up to 3 days.
- Step 3: To use, gently reheat the topping in a saucepan over low heat, stirring until it becomes pourable again. Avoid overheating to prevent separation.
Assembling and Storing the Cake
For ultimate convenience, we can assemble the entire Brunsviger ahead and bake it fresh when needed, capturing that perfect golden crust and tender crumb.
- Step 1: After the dough has risen, press it into the prepared 9×13-inch baking pan as per the main recipe.
- Step 2: Spread the caramel topping over the dough, then cover the pan loosely with plastic wrap.
- Step 3: Refrigerate the assembled cake for up to 12 hours. When ready to bake, remove it from the fridge and let it sit at room temperature for 20-30 minutes to reduce chilling time in the oven.
- Step 4: Bake as directed, adding 5-10 minutes to the baking time if the cake is cold from the refrigerator.
| Make-Ahead Option | Preparation Time | Storage Duration | Key Tips |
|---|---|---|---|
| Dough only | 10-15 minutes | Up to 24 hours in fridge | Let it warm up before proofing for even rise. |
| Topping only | 5-10 minutes | Up to 3 days in fridge | Reheat gently to maintain smooth texture. |
| Fully assembled cake | 15-20 minutes | Up to 12 hours in fridge | Allow room-temperature adjustment to ensure even baking. |
By following these make-ahead tips, we ensure Brunsviger delivers its signature sensory delights— from the first whiff of sweet caramel to the satisfying softness—without the rush. Always use fresh ingredients for the best results, and adjust based on your kitchen’s conditions.
Conclusion
We’ve loved sharing this Brunsviger recipe with you, as it’s a simple way to bring Danish warmth into our kitchens. It’s not just a cake—it’s a moment of joy that pairs perfectly with coffee and creates lasting memories.
We’re confident you’ll find it rewarding to bake, whether you’re new to it or a pro. Give it a try and let us know how yours turns out—we can’t wait to hear your stories!
Frequently Asked Questions
What is Brunsviger?
Brunsviger is a classic Danish coffee cake featuring a soft, yeasted dough base topped with a gooey caramel layer. It’s cherished for its warm, comforting flavors, making it perfect for sharing with family or enjoying with coffee. This treat highlights Danish baking traditions and is easy for both novice and experienced bakers to make at home.
What ingredients are needed for Brunsviger?
For the dough, you’ll need active dry yeast, whole milk, granulated sugar, unsalted butter, eggs, all-purpose flour, and salt. The caramel topping requires brown sugar, melted butter, vanilla extract, and optional chopped nuts. These fresh ingredients make a 9×13-inch cake serving 8-10, delivering authentic Danish flavors.
What equipment is required to bake Brunsviger?
Essential tools include mixing bowls, measuring cups and spoons, a stand or hand mixer, a 9×13-inch baking pan, a whisk, spatula, saucepan, and an oven with a timer. These items help streamline the process, allowing you to focus on creating the cake’s delightful aroma and texture.
How do I make Brunsviger?
Start by activating yeast in warm milk and sugar, then cream butter and sugar, add eggs, and mix in flour and salt to form the dough. Knead until smooth, let it rise, prepare the caramel topping by melting butter and brown sugar with vanilla, press dough into a pan, add topping, and bake until golden for a scrumptious result.
Can I prepare Brunsviger in advance?
Yes, you can make the dough up to 24 hours ahead and refrigerate it to enhance flavors. The caramel topping can be prepared and stored for up to three days. You can also assemble the full cake and refrigerate it for up to 12 hours before baking, ensuring fresh, delicious results without last-minute hassle.