
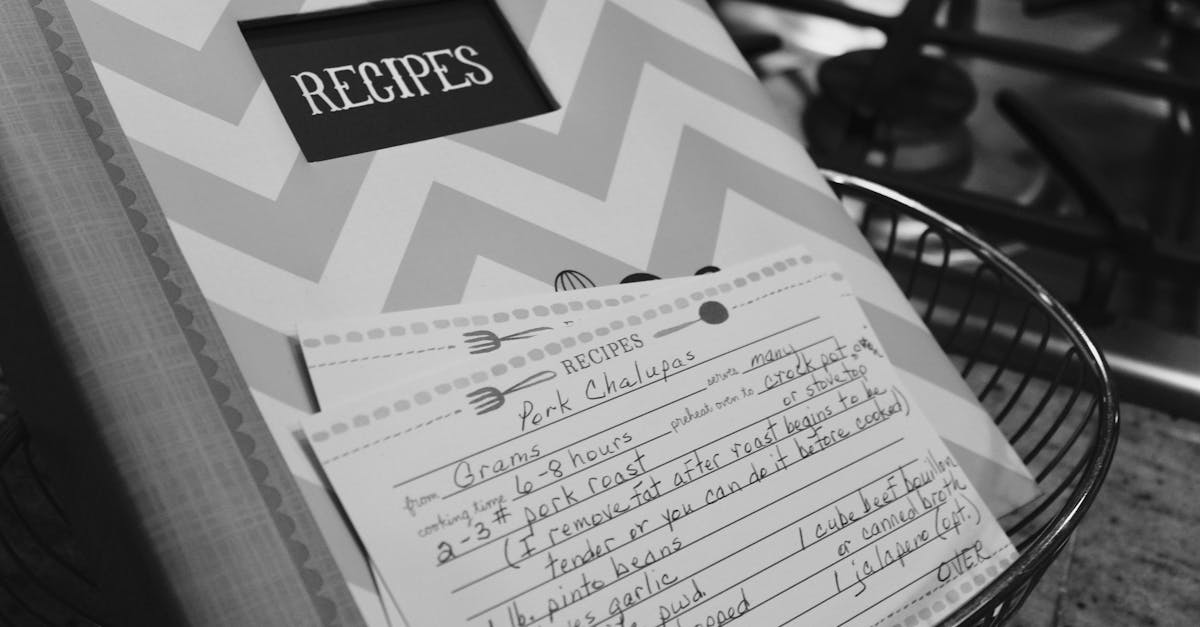
We all treasure those timeless family recipes that evoke memories of cozy kitchens and shared meals, and our Heirloom Recipe Book captures that magic. Passed down through generations these heirloom gems offer a taste of history with simple ingredients and heartfelt flavors that connect us to our roots.
In this article we’ll dive into a few cherished selections blending tradition with modern twists. Whether you’re baking for loved ones or exploring culinary heritage our guide makes it easy to preserve and enjoy these classics right at home.
Ingredients
As we delve into the heart of our heirloom recipes from the Heirloom Recipe Book, we focus on the foundational elements that bring these time-honored dishes to life. For our featured classic, Classic Heirloom Apple Pie, we select high-quality ingredients ordered by preparation sequence, with specific notes for optimal results.
Crust Ingredients
- 2 ½ cups all-purpose flour: Sifted and chilled to ensure a flaky texture.
- 1 cup unsalted butter: Cubed and frozen for 30 minutes to maintain coldness during mixing.
- 1 teaspoon salt: Added for flavor balance.
- 6–8 tablespoons ice water: Incorporated gradually to bind the dough without overworking.
Filling Ingredients
- 6–8 medium heirloom apples (such as Granny Smith or Golden Delicious): Peeled, cored, and thinly sliced to promote even cooking.
- ¾ cup granulated sugar: Mixed with spices for sweetness.
- 2 tablespoons lemon juice: Freshly squeezed to prevent browning and add tartness.
- 1 teaspoon ground cinnamon: For warm, aromatic depth.
- ¼ teaspoon ground nutmeg: Grated fresh for enhanced flavor.
- 2 tablespoons all-purpose flour: Used as a thickener to absorb juices.
- 1 tablespoon butter: Cut into small pieces for dotting the filling before baking.
These carefully chosen ingredients reflect the essence of heirloom traditions, allowing us to create pies that connect generations while adapting to modern kitchens.
Tools and Equipment
Now that we have gathered our high-quality ingredients for the Classic Heirloom Apple Pie, we turn our attention to the essential tools that ensure precise preparation and baking. These items help us honor traditional techniques while adapting to modern kitchens, making the process straightforward and enjoyable.
Essential Preparation Tools
To start, we’ll need tools for mixing and prepping our pie crust and filling. Here’s a curated list, ordered by the sequence of use:
- Large mixing bowl: For sifting and chilling the flour mixture—opt for a sturdy, stainless-steel option to handle cold ingredients effectively.
- Measuring cups and spoons: Accurate for portioning flour, sugar, and spices—use a set with clear markings to avoid errors in our heirloom recipe.
- Sifter: To aerate the flour perfectly, ensuring a flaky crust that connects us to generations of bakers.
- Pastry cutter or fork: Ideal for cutting butter into the flour—choose one with a comfortable grip for effortless blending.
- Knife and cutting board: For slicing heirloom apples evenly—select a sharp chef’s knife to maintain the fruit’s texture and flavor.
Baking and Finishing Tools
Once preparation is complete, these tools help us assemble and bake the pie with confidence:
- Rolling pin: Key for rolling out the dough to an even thickness—go for a wooden one to achieve that classic, tender crust.
- 9-inch pie dish: Specifically sized for our apple pie—prefer a glass or ceramic version to monitor browning and enhance presentation.
- Oven thermometer: To verify accurate baking temperatures—ensures our pie bakes at the optimal 375°F for golden results.
- Baking sheet: Placed under the pie dish to catch drips—prevents messes and promotes even heat distribution.
- Cooling rack: For setting the pie after baking—allows air circulation to keep the crust crisp and the filling intact.
By using these tools, we maintain the integrity of our heirloom recipes while incorporating reliable equipment for consistent outcomes.
Instructions
We gather our carefully selected ingredients and tools to craft the Classic Heirloom Apple Pie with precision and tradition. Let’s follow these steps to create a pie that honors family recipes while delivering a warm flaky crust and aromatic filling.
Prep
In this phase we prepare the dough and filling components to ensure everything integrates smoothly for our Classic Heirloom Apple Pie.
- Start with the crust dough: In a large mixing bowl combine 2 cups of sifted all-purpose flour and 1/2 teaspoon of salt. Using a pastry cutter or fork cut in 1 cup of chilled unsalted butter until the mixture resembles coarse crumbs. Gradually add 4-6 tablespoons of ice water one tablespoon at a time mixing with a fork until the dough forms a ball. Divide the dough into two equal portions wrap each in plastic wrap and chill in the refrigerator for at least 30 minutes to maintain that heirloom texture.
- Prepare the filling: Wash and peel 6-8 heirloom apples (such as Granny Smith or Golden Delicious for their tart-sweet balance). Core and slice them into thin even wedges about 1/4 inch thick yielding approximately 6 cups. In a separate bowl toss the apple slices with 3/4 cup of granulated sugar 1 tablespoon of lemon juice for brightness 1 teaspoon of ground cinnamon 1/2 teaspoon of ground nutmeg and 1/4 teaspoon of salt. Let the mixture sit for 10 minutes to draw out natural juices creating a syrupy base that evokes the essence of heirloom recipes.
Cook
Here we bake the assembled pie to achieve a golden crust and tender filling transforming our Classic Heirloom Apple Pie into a comforting delight.
- Preheat your oven to 425°F and place a baking sheet on the lower rack to catch any drips. Roll out one chilled dough portion on a lightly floured surface into a 12-inch circle about 1/8 inch thick. Transfer it to a 9-inch pie dish pressing it gently against the bottom and sides. Pour the prepared apple filling into the crust adding 2 tablespoons of unsalted butter cut into small pieces on top for richness.
- Roll out the second dough portion and either place it over the filling for a full top crust or cut into strips for a lattice design. Trim any excess dough seal the edges with a fork and lightly brush the top with 1 beaten egg mixed with 1 tablespoon of water for a glossy finish. Cut a few slits in the top crust to allow steam to escape. Bake at 425°F for 15 minutes then reduce the temperature to 350°F and continue baking for 40-50 minutes until the filling bubbles and the crust turns golden brown. Use an oven thermometer to monitor for even heirloom-quality results.
Assemble
Finally we layer the elements together building the structure of our Classic Heirloom Apple Pie before it heads into the oven.
- Remove the pie dish with the bottom crust from the refrigerator. Evenly spoon the prepared apple filling into the crust ensuring it’s mounded slightly in the center for that signature heirloom shape. If opting for a lattice top weave the dough strips over the filling alternating directions to create an intricate pattern that showcases the apples beneath.
- Fold the overhanging edges of the bottom crust over the lattice or top crust edges and crimp decoratively with your fingers or a fork. This step not only seals in the flavors but also adds a traditional touch that connects us to generations of bakers. Place the assembled pie on a cooling rack for a moment before baking to set the structure.
Make-Ahead Instructions
To keep our heirloom apple pie preparation seamless and efficient, we can prepare key components in advance, allowing us to savor the flavors of tradition without last-minute rushes. This approach honors the classic heirloom recipes while adapting them to modern lifestyles, ensuring that our pies remain fresh and flavorful when we’re ready to bake.
Preparing the Crust Dough Ahead
One of the easiest elements to make ahead is the heirloom apple pie crust. By preparing the dough in advance, we maintain its flaky texture and connect to generations of bakers who valued thoughtful planning.
- Step 1: After combining the sifted all-purpose flour, salt, and chilled unsalted butter as outlined in our earlier instructions, form the dough into a disk and wrap it tightly in plastic wrap.
- Step 2: Refrigerate the wrapped dough for up to 2 days to let the flavors meld and the butter solidify, enhancing the crust’s signature crispness.
- Step 3: For longer storage, freeze the dough for up to 3 months. Simply place the wrapped disk in a freezer-safe bag to prevent freezer burn.
| Storage Method | Duration | Thawing Instructions |
|---|---|---|
| Refrigeration | Up to 2 days | Let it sit at room temperature for 30 minutes before rolling. |
| Freezing | Up to 3 months | Transfer to the refrigerator overnight, then let it rest at room temperature for 15-20 minutes. |
Preparing the Filling Ahead
The apple filling for our heirloom apple pie can also be prepped early, allowing the spices and apples to develop a deeper, more aromatic profile over time.
- Step 1: Once the heirloom apples are washed, peeled, and sliced, mix them with granulated sugar, lemon juice, and spices in a large bowl as per the recipe steps.
- Step 2: Transfer the mixture to an airtight container, ensuring it’s covered to prevent oxidation and browning of the apples.
- Step 3: Refrigerate the filling for up to 24 hours, where the apples will release natural juices, creating a syrupy base that intensifies the pie’s nostalgic taste.
- Step 4: For extended make-ahead options, freeze the filling in a freezer-safe container for up to 1 month, stirring gently after thawing to redistribute the juices.
| Storage Method | Duration | Thawing Instructions |
|---|---|---|
| Refrigeration | Up to 24 hours | Use directly from the fridge for assembly. |
| Freezing | Up to 1 month | Thaw in the refrigerator for 4-6 hours, then drain excess liquid if needed for a firmer fill. |
Assembling and Baking from Make-Ahead Components
When we’re ready to bake, assembling our heirloom apple pie from prepped elements is straightforward and ensures a golden, aromatic result that evokes family traditions.
- Step 1: If using refrigerated or thawed dough, roll it out on a lightly floured surface to fit the 9-inch pie dish, as described in the baking section.
- Step 2: Fill the crust with the prepared apple mixture, mounding it slightly for that classic, hearty appearance.
- Step 3: Add the top crust or lattice design, seal the edges, and brush with an egg wash for a glossy finish before baking at the preheated temperature.
- Step 4: Bake immediately after assembly to capture the fresh, comforting aroma of cinnamon and baked apples, connecting us to cherished heirloom memories.
By making these components ahead, we not only streamline our kitchen routine but also allow the authentic flavors of our heirloom apple pie to shine through with minimal effort.
Conclusion
Heirloom recipes like these strengthen our ties to family and history
They remind us that simple ingredients can create profound connections
We’re confident you’ll find joy in adapting and sharing them
Let’s keep these traditions thriving in our kitchens for years to come
Frequently Asked Questions
What are heirloom recipes?
Heirloom recipes are traditional family dishes passed down through generations, evoking memories and cultural roots. They connect us to our heritage while allowing modern adaptations, helping preserve culinary traditions in today’s kitchens.
Why are heirloom recipes important?
Heirloom recipes preserve family history and cultural identity, fostering a sense of connection across generations. They blend nostalgia with everyday cooking, making it easy to honor traditions while experimenting with new twists for a fresh take on classic flavors.
What ingredients are needed for Classic Heirloom Apple Pie?
For the crust, use sifted all-purpose flour, unsalted butter, salt, and ice water. The filling requires heirloom apples, granulated sugar, lemon juice, spices, and butter. These high-quality ingredients ensure a flavorful pie that honors traditional tastes while delivering optimal results.
What tools are essential for making Classic Heirloom Apple Pie?
You’ll need a large mixing bowl, measuring cups and spoons, sifter, pastry cutter, knife with cutting board, rolling pin, 9-inch pie dish, oven thermometer, baking sheet, and cooling rack. These tools help achieve precise preparation and consistent baking for authentic results.
How do I prepare the crust and filling for the pie?
Start the crust by mixing flour, salt, and butter, then chill the dough. For the filling, wash, peel, and slice heirloom apples, then combine with sugar, lemon juice, and spices. This step-by-step process ensures a flaky crust and syrupy filling that captures heirloom essence.
How do I bake the Classic Heirloom Apple Pie?
Preheat your oven, roll out the dough, add the filling, and top with a crust or lattice. Seal the edges, brush for a glossy finish, and bake until golden. This method guarantees a perfectly baked pie that connects you to family baking traditions with minimal effort.
Can I make Classic Heirloom Apple Pie ahead of time?
Yes, prepare the crust dough and refrigerate for up to 2 days or freeze for 3 months; make the filling and chill for 24 hours or freeze for a month. Assemble and bake when ready, allowing flavors to develop while fitting into busy schedules for fresh, authentic results.