
We’ve all faced the irritation of chapped lips, especially during dry seasons, and that’s where our goat milk chapstick recipe shines as a gentle natural solution. Drawing from ancient skincare traditions, goat milk offers rich nutrients like lactic acid that hydrate and heal, making it a favorite for DIY beauty enthusiasts.
In our kitchen experiments, we’ve perfected this simple formula to bring you a chapstick that’s both effective and easy to whip up at home. Join us as we explore how a few key ingredients can transform your lip care routine.
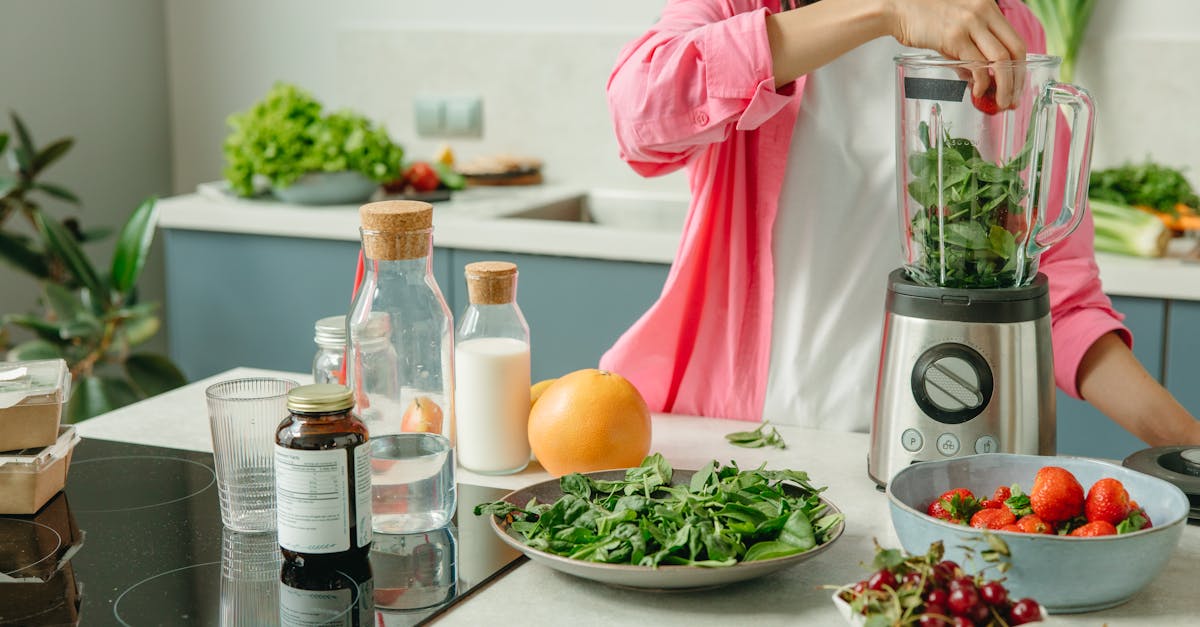
Ingredients
In our Goat Milk Chapstick Recipe, we select high-quality ingredients that harness the natural hydrating power of goat milk to create a soothing, effective lip balm. Below, we list the ingredients in the order they are typically used during preparation, with specific measurements and prep notes for accuracy and ease.
- Goat milk: 2 tablespoons (warmed to room temperature for better blending and to preserve its lactic acid benefits, which help heal and moisturize chapped lips).
- Beeswax pellets: 1/4 cup (grated if using a block, as it melts evenly and provides the solid structure essential for chapstick form).
- Coconut oil: 2 tablespoons (unrefined and melted, offering rich fatty acids that enhance the emollient properties alongside goat milk).
- Sweet almond oil: 1 tablespoon (as a lightweight carrier oil, added for its vitamin E content to boost skin barrier protection).
- Peppermint essential oil: 10-15 drops (for a refreshing scent and cooling sensation; adjust based on preference, but ensure it’s pure to avoid irritation).
- Vitamin E oil: 1 teaspoon (pierced from capsules if needed, serving as a natural preservative to extend the shelf life of your homemade chapstick).
These ingredients combine to form a simple yet potent formula, drawing on the nourishing nutrients in goat milk for optimal lip care results.
Equipment Needed
Before we dive into mixing our nourishing goat milk chapstick ingredients, let’s gather the essential equipment. This ensures a smooth, safe preparation process that maximizes the benefits of our DIY formula.
We recommend the following tools, listed in the order they are typically used:
- Double boiler or heat-safe bowl and saucepan: This is crucial for gently melting beeswax and oils without scorching them, preserving the nutritive properties of goat milk and other ingredients.
- Measuring spoons and cups: Accurate measurements are key to our recipe’s success—use a set that includes tablespoons and teaspoons for precise handling of items like goat milk and essential oils.
- Stirring spoon or silicone spatula: Opt for a heat-resistant option to blend ingredients evenly, ensuring the goat milk chapstick achieves a smooth, consistent texture.
- Small funnel or pipette: This helps transfer the melted mixture into chapstick tubes or containers without mess, making the process efficient and spill-free.
- Chapstick tubes or small tins: Choose containers that hold about 0.15 ounces each—we suggest 6-8 units based on our recipe yield—to store the final product for easy application.
- Thermometer (optional but recommended): For those aiming for perfection, a digital thermometer monitors temperatures up to 150°F to avoid overheating sensitive components like vitamin E oil.
By preparing these items ahead, we streamline our chapstick-making adventure and enhance the overall experience.
Instructions
Now that we have gathered our high-quality ingredients and essential tools, we guide you through crafting our effective Goat Milk Chapstick step by step to achieve a soothing and hydrating lip balm.
Gather and Measure Ingredients
Before we begin, we organize and prepare our ingredients to ensure accuracy and smooth preparation. Start by laying out the items from our recipe: 2 tablespoons of warmed goat milk, 1/4 cup of grated beeswax pellets, 2 tablespoons of melted unrefined coconut oil, 1 tablespoon of sweet almond oil, 10-15 drops of peppermint essential oil, and 1 teaspoon of vitamin E oil. We measure each component precisely using our measuring spoons and cups—warm the goat milk gently to about 100°F for optimal blending and grate the beeswax if it’s not already in pellets to promote even melting. This step sets the foundation for a nourishing formula that leverages goat milk’s lactic acid to heal and hydrate lips effectively.
Melt the Base
Next, we focus on creating a smooth base by melting the solid ingredients in a double boiler for safe heat distribution. Place the grated beeswax pellets and unrefined coconut oil into the double boiler set over medium heat—we stir continuously with a silicone spatula until fully melted, which typically takes 5-7 minutes. As the mixture transforms into a glossy liquid, you’ll notice a subtle, natural aroma emerging that hints at the beeswax’s protective barrier. This process ensures our chapstick base achieves the ideal consistency for locking in moisture and delivering long-lasting relief to chapped lips.
Mix in Goat Milk
Once the base is melted, we incorporate the goat milk and other oils to enhance the formula’s hydrating properties. Remove the double boiler from heat and gradually add the warmed goat milk, sweet almond oil, vitamin E oil, and peppermint essential oil—stir vigorously for 1-2 minutes until everything blends into a uniform, creamy mixture. The peppermint essential oil infuses a refreshing, cooling scent that awakens the senses while the goat milk’s natural emollients create a silky texture, making our chapstick not only effective but also a sensory delight for everyday lip care.
Pour into Chapstick Tubes
With our mixture ready, we transfer it quickly to avoid cooling and solidification. Using a small funnel or pipette, carefully pour the warm blend into clean chapstick tubes or small tins—fill each one to about 3/4 capacity to allow for expansion as it sets, which should take just 30-60 seconds per tube. This step captures the essence of our DIY approach, ensuring every application delivers the nourishing benefits of goat milk directly to your lips for immediate comfort and protection.
Cool and Set
Finally, we let the chapstick cool and solidify to achieve its firm yet smooth final form. Place the filled tubes in a cool, dry spot away from direct sunlight for 1-2 hours until they harden completely—you can speed this up by refrigerating them for 20-30 minutes if needed. Once set, the chapstick will have a velvety texture that glides on effortlessly, providing a barrier against dryness while the goat milk’s nutrients work to restore and soothe your lips.
Make-Ahead and Storage Tips
To maximize the benefits of our Goat Milk Chapstick and ensure it remains fresh and effective, we recommend thoughtful make-ahead strategies and proper storage techniques. This helps preserve the nourishing properties of ingredients like goat milk, beeswax, and essential oils, keeping your lips hydrated and protected over time.
Make-Ahead Tips
We love preparing our Goat Milk Chapstick in advance for convenience, especially during dry seasons when chapped lips are common. Follow these steps to streamline your process:
- Batch Preparation: Double or triple the recipe quantities to make multiple tubes at once. For instance, if the base recipe yields 10 chapstick tubes, scaling up to 20 allows us to have extras on hand without extra effort. Measure all ingredients ahead of time and store them in airtight containers to save time.
- Cooling and Setting: After pouring the mixture into tubes or tins, let it cool completely at room temperature for 1-2 hours before capping. This prevents condensation, which could affect the velvety texture and hydration benefits of the goat milk.
- Freezing for Later: For longer-term make-ahead options, portion the cooled chapstick into freezer-safe containers. Freeze for up to 3 months, then thaw in the refrigerator overnight to maintain its smooth, soothing glide on the lips.
Storage Tips
Proper storage is key to extending the shelf life of our DIY Goat Milk Chapstick while retaining its natural, healing qualities. Avoid exposure to heat or light to prevent the oils from degrading.
- Ideal Conditions: Store in a cool, dry place like a bathroom cabinet or drawer, away from direct sunlight. Aim for temperatures between 60°F and 70°F to keep the chapstick firm yet easy to apply.
- Container Choices: Use airtight chapstick tubes or tins to minimize oxidation. If you notice any separation, gently remelt and remix the product in a double boiler before restorage.
- Shelf Life Guidelines: Track the freshness of your chapstick with the following table, based on standard storage practices:
| Storage Method | Shelf Life | Key Considerations |
|---|---|---|
| Room Temperature | Up to 6 months | Check for rancid odors or color changes; ideal for everyday use. |
| Refrigerator | Up to 12 months | May harden slightly, so warm in hands before applying for optimal glide. |
| Freezer | Up to 12 months | Thaw slowly to preserve the nourishing goat milk essence and prevent crystallization. |
Always perform a patch test before use, and if you detect any off smells or textures, discard the chapstick to ensure safety. By following these tips, we can enjoy the consistent, hydrating performance of our homemade remedy whenever needed.
Conclusion
We’ve loved exploring this goat milk chapstick recipe and how it brings natural hydration to your lip care routine. It’s rewarding to craft something so simple yet effective right at home.
By trying it yourself, you’ll discover a personalized remedy that keeps lips soft and protected. Let’s make self-care fun and nourishing—give our formula a go and feel the difference.
Frequently Asked Questions
What is goat milk chapstick and how does it help with chapped lips?
Goat milk chapstick is a natural DIY lip balm made with goat milk, which is rich in lactic acid and nutrients that hydrate and heal dry, chapped lips. Unlike commercial products, it uses simple ingredients to create a soothing barrier that locks in moisture and reduces irritation, especially during dry seasons. This homemade recipe offers a gentle, effective alternative for everyday lip care.
What are the benefits of using goat milk in chapstick?
Goat milk provides natural hydration and healing thanks to its lactic acid content, which gently exfoliates and nourishes lips. It’s packed with vitamins and fatty acids that soothe inflammation and promote skin repair, making it ideal for chapped lips. This natural ingredient enhances the chapstick’s effectiveness without harsh chemicals, leaving lips soft and protected.
What ingredients are needed for the goat milk chapstick recipe?
The recipe calls for 2 tablespoons of warmed goat milk, 1/4 cup of grated beeswax pellets, 2 tablespoons of melted unrefined coconut oil, 1 tablespoon of sweet almond oil, 10-15 drops of peppermint essential oil, and 1 teaspoon of vitamin E oil. These high-quality ingredients work together to hydrate, protect, and add a refreshing scent to your lips.
How do I make goat milk chapstick at home?
Start by melting beeswax and coconut oil in a double boiler, then stir in goat milk, sweet almond oil, vitamin E oil, and peppermint essential oil. Pour the mixture into chapstick tubes or tins and let it cool until solid. This simple process takes about 15-20 minutes of prep and results in a velvety balm that nourishes chapped lips effectively.
What equipment is required to prepare goat milk chapstick?
You’ll need a double boiler or heat-safe bowl, measuring spoons and cups, a stirring spoon or spatula, a small funnel or pipette for pouring, and chapstick tubes or tins. A thermometer is optional for precise temperature control. These tools ensure a safe, easy preparation process for your homemade lip balm.
How should I store homemade goat milk chapstick?
Store your chapstick in a cool, dry place in airtight containers to keep it fresh for up to 6 months. For longer storage, freeze it in sealed bags. Avoid heat or moisture to maintain its texture and effectiveness, and always check for signs of spoilage before use to ensure it stays safe and hydrating.
Can I customize the goat milk chapstick recipe?
Yes, you can swap peppermint essential oil for other scents like lavender or tea tree for personalization. Stick to similar oils to keep the balance, and adjust quantities slightly for texture, but test a small batch first. This flexibility lets you tailor the recipe to your preferences while retaining its hydrating benefits.