
We’ve always loved the zesty punch of lemon in our baking and our Lemon Crackers Recipe is no exception. These crisp treats offer a refreshing twist on classic crackers blending tangy citrus with a buttery crunch that brightens any snack time.
It’s easy to whip up a batch in your kitchen making it ideal for beginners or busy days. We’ll guide you through simple steps to create something deliciously homemade that everyone will crave.
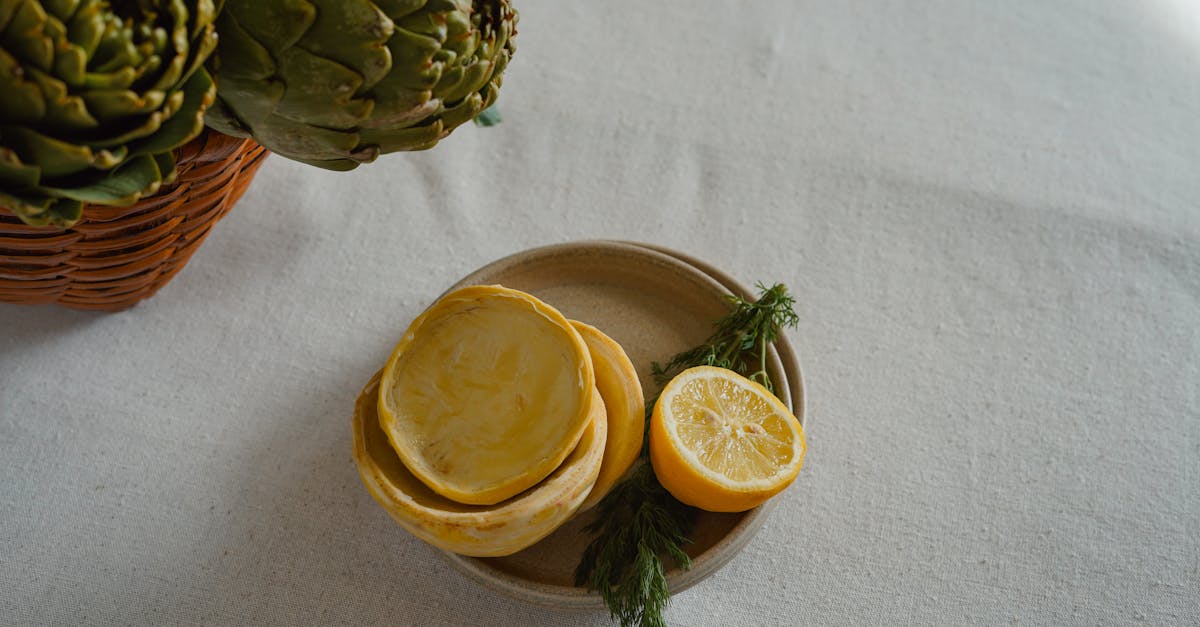
Ingredients
In our Lemon Crackers recipe, we select high-quality ingredients that deliver the zesty lemon flavor and buttery crunch you crave. These components are straightforward and easy to source, ensuring even beginners can whip up this refreshing snack with confidence.
To prepare our homemade treats, we’ll list the ingredients in the order they’re used, with precise measurements and any necessary prep notes for optimal results:
- All-purpose flour: 2 cups, sifted to ensure a light and airy texture that forms the base of our crackers.
- Unsalted butter: 1 cup (2 sticks), softened at room temperature for easy creaming and that signature buttery crunch.
- Granulated sugar: ¾ cup, which we’ll mix in next to balance the tartness of the lemon.
- Lemon zest: From 2 large lemons, finely grated for a vibrant, zesty aroma that infuses every bite.
- Fresh lemon juice: ¼ cup, squeezed from the same lemons to add tangy moisture without overwhelming the dough.
- Baking powder: 1 teaspoon, to help our crackers rise slightly for the perfect snap.
- Salt: ½ teaspoon, a key enhancer that highlights the lemon’s brightness.
- Large egg: 1, beaten to bind the ingredients and create a cohesive dough.
Gather these essentials, and you’re set to move seamlessly into the preparation steps, where the magic of our Lemon Crackers truly comes alive.
Equipment Needed
To prepare our zesty Lemon Crackers with their buttery crunch, we rely on a few essential tools that ensure precise mixing, shaping, and baking. Below, we’ve listed the key equipment in the order they are typically used, helping you achieve professional results with minimal effort.
- Mixing bowls: We suggest using a large mixing bowl for combining dry ingredients like flour and a medium mixing bowl for wet ingredients such as butter and lemon zest to keep everything organized.
- Measuring cups and spoons: Accurate measurements are crucial for our Lemon Crackers’ texture, so have a set of dry measuring cups and measuring spoons on hand for ingredients like granulated sugar and fresh lemon juice.
- Whisk or electric mixer: A whisk works for blending the dough by hand, but an electric mixer speeds things up and ensures the butter incorporates smoothly for that signature flaky bite.
- Rolling pin: Essential for rolling out the dough evenly, we recommend a non-stick rolling pin to prevent sticking and maintain the crackers’ uniform shape.
- Baking sheet and parchment paper: Use a rimmed baking sheet lined with parchment paper to avoid burning and promote even browning, capturing the fresh lemon aroma as they bake.
- Cookie cutters or sharp knife: For shaping the crackers, a set of round cookie cutters (about 2 inches in diameter) or a sharp knife allows for clean cuts, ensuring each piece bakes to golden perfection.
- Oven thermometer: To guarantee the ideal baking temperature, an oven thermometer helps monitor heat accuracy, preventing over-baking and preserving the crackers’ refreshing zest.
- Cooling rack: After baking, a wire cooling rack is vital for air circulation, allowing the Lemon Crackers to cool evenly and develop their full, tangy flavor.
Instructions
Now that we have gathered our fresh ingredients and essential tools, we guide you through crafting these irresistible Lemon Crackers with simple, precise steps for a buttery, zesty treat that bursts with citrus flavor.
Prepare the Ingredients
Before we begin mixing, let’s ensure all components are prepped for seamless assembly. Start by zesting 2 medium lemons to yield about 1 tablespoon of finely grated lemon zest, which infuses the crackers with a vibrant, tangy aroma. Next, juice 1 lemon to obtain 2 tablespoons of fresh lemon juice, making sure to strain out any seeds for a smooth texture. Measure out 2 cups of all-purpose flour, 1/2 cup of unsalted butter (softened to room temperature for easy blending), 1/2 cup of granulated sugar, 1 teaspoon of baking powder, 1/4 teaspoon of salt, and 1 large egg. Arrange these on your workspace in the order we’ll use them, so the process flows effortlessly and avoids any last-minute rushes.
Make the Dough
With ingredients ready, we combine them to create a soft, pliable dough that carries the bright essence of lemon. In a large mixing bowl, whisk together the 2 cups of all-purpose flour, 1 teaspoon of baking powder, and 1/4 teaspoon of salt until evenly distributed—this ensures a uniform rise and tender crumb. In a separate bowl, cream the 1/2 cup of softened unsalted butter with 1/2 cup of granulated sugar using an electric mixer on medium speed for about 2 minutes, until the mixture turns light and fluffy with a sweet, creamy scent. Add the large egg, 1 tablespoon of finely grated lemon zest, and 2 tablespoons of fresh lemon juice, then beat on low speed for 1 minute until fully incorporated, creating a fragrant batter that evokes the sunny taste of fresh citrus. Gradually fold in the dry ingredients with a spatula, stirring just until a soft dough forms—overmixing can make the crackers tough, so stop as soon as everything comes together for that perfect, melt-in-your-mouth texture.
Shape and Bake
Now we transform the dough into golden, crunchy Lemon Crackers that deliver a satisfying snap with every bite. On a lightly floured surface, roll out the dough to about 1/4-inch thickness, aiming for evenness to promote uniform baking and a consistent crispiness. Use a cookie cutter or sharp knife to cut the dough into 2-inch rounds or shapes, yielding approximately 24 crackers depending on your cutter size—for reference, here’s a quick overview of baking variables in a markdown table:
| Variable | Value | Notes |
|---|---|---|
| Oven Temperature | 350°F | Preheat for accurate results |
| Baking Time | 10-12 minutes | Until edges turn golden brown |
Transfer the shaped crackers to a rimmed baking sheet lined with parchment paper, spacing them 1 inch apart to allow for slight expansion. Bake in the preheated oven until the edges achieve a golden hue and the crackers emit a warm, lemon-kissed aroma that fills your kitchen, signaling they’re ready to cool.
Cool and Store
After baking, we let the crackers cool properly to maintain their delicate crunch and preserve that zesty flavor for days. Remove the baking sheet from the oven and transfer the hot crackers to a cooling rack immediately, allowing air to circulate underneath for about 10 minutes until they reach room temperature—this step prevents sogginess and locks in the buttery texture. Once cooled, store the Lemon Crackers in an airtight container at room temperature for up to 1 week, or freeze them for up to 3 months for longer enjoyment; simply thaw at room temperature before serving to recapture their fresh, citrusy appeal.
Make-Ahead Instructions
To maximize convenience without compromising the zesty lemon flavor and butter crunch of our Lemon Crackers, we suggest these straightforward make-ahead strategies. This approach builds on our earlier storage tips by allowing you to prepare dough or baked crackers in advance for effortless baking or snacking later.
Preparing the Dough Ahead
We find that making the dough up to 2 days in advance keeps it pliable and ready for shaping. Follow these steps:
- Combine ingredients as outlined: In a large mixing bowl, whisk together 2 cups of all-purpose flour, 1 teaspoon baking powder, and ½ teaspoon salt until fully blended.
- Mix and chill: After forming the dough by adding 1 cup unsalted butter, ¾ cup granulated sugar, 2 tablespoons lemon zest, 2 tablespoons fresh lemon juice, and 1 large egg, wrap it tightly in plastic wrap.
- Refrigerate promptly: Place the wrapped dough in the refrigerator for up to 48 hours. This step enhances the citrus notes and makes rolling easier.
Freezing for Longer Storage
For extended make-ahead options, freezing is our go-to method. It preserves the dough’s texture and allows you to bake fresh crackers whenever needed.
| Storage Method | Duration | Key Tips |
|---|---|---|
| Freezing unbaked dough | Up to 3 months | Divide dough into portions, wrap each in plastic wrap, then place in a freezer-safe bag. Thaw in the refrigerator overnight before rolling and baking. |
| Freezing shaped but unbaked crackers | Up to 2 months | After cutting shapes, arrange on a parchment-lined baking sheet, freeze until solid, then transfer to a freezer bag. Bake directly from frozen, adding 2-3 minutes to the original baking time of 10-12 minutes at 350°F. |
| Freezing baked crackers | Up to 1 month | Cool crackers completely on a wire rack, then store in an airtight container or freezer bag. Re-crisp in a 300°F oven for 5 minutes before serving to maintain that signature crunch. |
Thawing and Baking Tips
When you’re ready to enjoy, we advise thawing gradually to retain the delicate lemon aroma and prevent sogginess.
- Thaw dough safely: Transfer frozen dough to the refrigerator for 8-12 hours. Once thawed, proceed with rolling to ¼-inch thickness and cutting into shapes.
- Adjust baking for frozen items: If baking from frozen, preheat your oven to 350°F and increase the time by 2-3 minutes, checking for a golden edge to ensure even baking.
- Quality check: Always taste a sample after thawing or reheating to confirm the bright, tangy flavor remains intact—adjust with a light dusting of powdered sugar if needed for extra appeal.
By following these methods, we help you streamline your baking routine while keeping our Lemon Crackers as irresistible as ever.
Conclusion
We’ve loved sharing this Lemon Crackers Recipe, packed with zesty flavor and simple prep that fits any schedule. It’s a go-to for fresh, homemade treats that impress without the fuss.
Trust us, once you’ve baked a batch, you’ll keep coming back for that buttery crunch. Let’s make your kitchen adventures even tastier!
Frequently Asked Questions
What is the Lemon Crackers Recipe?
This recipe combines zesty lemon with a buttery crunch for a refreshing snack. It’s easy for beginners, using simple ingredients like flour, butter, sugar, lemon zest, juice, baking powder, salt, and an egg. The guide provides step-by-step instructions for quick preparation, ideal for busy individuals.
What ingredients are needed for Lemon Crackers?
You’ll need all-purpose flour, unsalted butter, granulated sugar, lemon zest, fresh lemon juice, baking powder, salt, and a large egg. These high-quality, easy-to-find items are measured precisely for optimal results, ensuring a soft, pliable dough with a zesty flavor.
What equipment is required to make Lemon Crackers?
Essential tools include mixing bowls, measuring cups and spoons, a whisk or electric mixer, rolling pin, rimmed baking sheet with parchment paper, cookie cutters or knife, oven thermometer, and a cooling rack. These help with accurate mixing, shaping, and baking for professional results.
How do I prepare the Lemon Crackers dough?
Start by zesting and juicing lemons, then measure ingredients. Combine dry ingredients (flour, baking powder, salt) in one bowl and wet (butter, sugar, egg, lemon zest, juice) in another. Mix until a soft dough forms, then chill if needed for easier handling.
How long should I bake the Lemon Crackers?
Roll the dough to about 1/4-inch thickness, cut into shapes, and bake at 350°F for 10-12 minutes until golden and crisp. Use an oven thermometer for accuracy, and watch closely to avoid over-baking for the perfect crunch.
How do I store Lemon Crackers properly?
Cool crackers completely on a rack, then store in an airtight container at room temperature for up to 5 days. For longer storage, freeze baked crackers for up to 3 months; thaw at room temperature. This keeps their crunch and lemon flavor intact.
Can I make Lemon Crackers ahead of time?
Yes, prepare the dough up to 2 days in advance and refrigerate it to enhance flavors. You can also freeze unbaked dough or shaped crackers for up to 1 month, or bake and freeze for 3 months. Thaw in the fridge and bake as needed for fresh results.