
We’ve always cherished the timeless appeal of Mrs. Cubbison’s Dressing Recipe a staple for holiday feasts that brings warmth and flavor to the table. This easy-to-make version draws from the brand’s rich tradition offering a mix of herbs and breadcrumbs that elevate any meal.
What makes it special is its versatility and quick prep time perfect for busy cooks like us. Whether you’re hosting a family gathering or adding a twist to weeknight dinners our guide to this classic ensures delicious results every time.
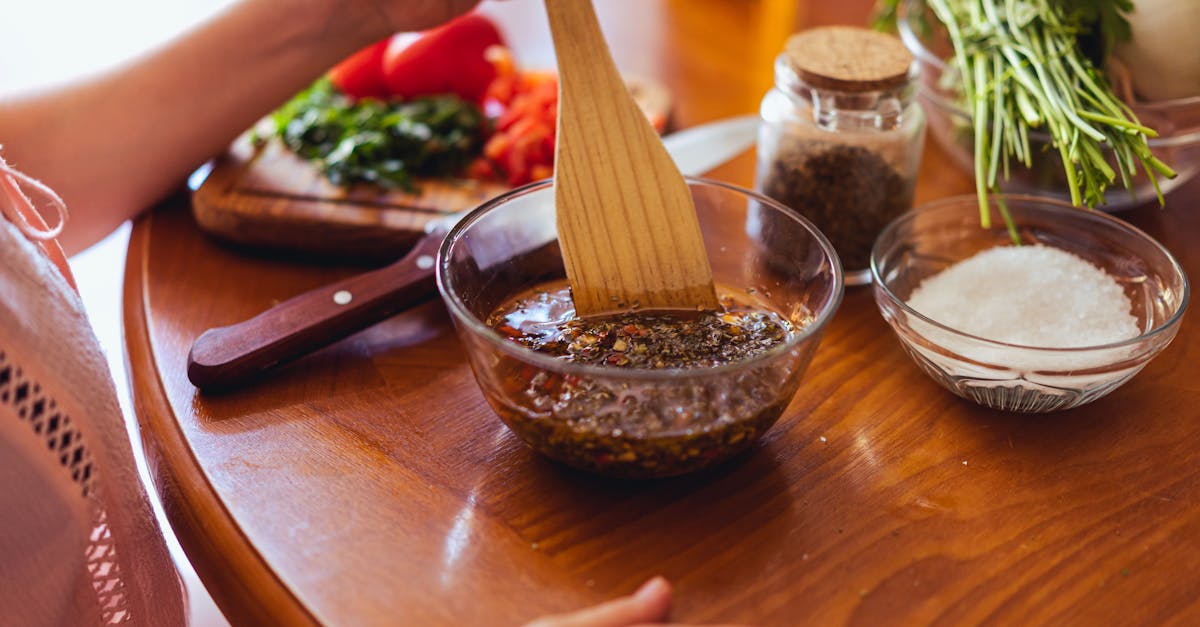
Ingredients
To craft our Mrs. Cubbison’s Dressing Recipe with its signature warmth and flavor, we start by gathering these key ingredients. We’ve organized them in the order of use for seamless preparation, including any necessary prep notes for accuracy.
- Mrs. Cubbison’s Stuffing Mix: 1 package (12 ounces) – This is our base, providing the hearty bread cubes that form the foundation of the dressing.
- Unsalted Butter: ½ cup (1 stick), melted – We use this first to sauté aromatics, ensuring a rich, golden sheen.
- Onion: 1 medium, finely chopped – Prepared by dicing it fresh for optimal crunch and flavor release.
- Celery Stalks: 2 stalks, thinly sliced – We add these next for a crisp texture and subtle earthiness.
- Garlic Cloves: 2 cloves, minced – Freshly chopped to infuse a bold, aromatic punch without overpowering the mix.
- Chicken Broth: 2 cups, low-sodium – We incorporate this gradually to achieve the perfect moisture level.
- Fresh Herbs: ¼ cup chopped (a mix of sage, thyme, and parsley) – We use these whole leaves, finely chopped, for a burst of fresh, herbaceous notes.
- Eggs: 2 large, beaten – Lightly whisked before adding to bind the ingredients together.
- Salt and Black Pepper: 1 teaspoon salt and ½ teaspoon pepper, to taste – We season at the end for balanced flavor enhancement.
This selection ensures our Mrs. Cubbison’s Dressing delivers consistent, crowd-pleasing results every time.
Required Tools and Equipment
Now that we’ve outlined the key ingredients for our Mrs. Cubbison’s Dressing Recipe, let’s gather the essential tools and equipment to ensure smooth preparation. Having the right items on hand allows us to transition seamlessly from mixing and sautéing to baking, delivering consistent results every time.
We recommend organizing these tools in the order of use to maintain efficiency:
- Large Mixing Bowl: This serves as our primary vessel for combining the Mrs. Cubbison’s Stuffing Mix, eggs, and other dry ingredients. Opt for a sturdy, heat-resistant bowl to handle any brief warming if needed.
- Skillet or Frying Pan: Essential for sautéing aromatics like onion, celery, and garlic in unsalted butter. We suggest a 10- to 12-inch non-stick skillet for even heat distribution and easy cleanup.
- Cutting Board and Chef’s Knife: These are crucial for precisely chopping fresh vegetables and herbs. Use a chef’s knife with a sharp 8-inch blade to minimize effort and ensure uniform pieces that enhance texture in the final dish.
- Measuring Cups and Spoons: Accuracy is key for our recipe’s balance, so use a set of dry measuring cups for ingredients like the stuffing mix and liquid measuring cups for low-sodium chicken broth. Include spoons for precise seasoning measurements.
- Whisk or Wooden Spoon: Ideal for blending eggs, herbs, and broth into the mixture. A whisk works best for incorporating air and ensuring a fluffy consistency.
- Baking Dish: Choose a 9×13-inch oven-safe baking dish if baking the dressing, allowing for even cooking and a golden finish. Glass or ceramic options help retain moisture.
- Oven or Stovetop: Depending on the recipe variation, a preheated oven set to 350°F is standard for baking, while a stovetop is used for initial sautéing. Ensure your oven has accurate temperature controls for optimal results.
By preparing these tools ahead of time, we streamline the process and focus on creating a flavorful, crowd-pleasing dressing.
Instructions
Now that we have gathered our ingredients and tools, let’s walk through the step-by-step process for creating Mrs. Cubbison’s Dressing Recipe. We will ensure each instruction is straightforward and yields a flavorful, golden-brown dish that’s perfect for any gathering.
Prepare the Ingredients
Before we begin cooking, we need to prepare our ingredients in the order of use to streamline the process and enhance flavors. Start by chopping the fresh vegetables for even cooking and optimal texture.
- Onion and Celery: Dice 1 medium onion and 2 stalks of celery into ¼-inch pieces. This size ensures they soften perfectly without becoming mushy, releasing their sweet and earthy aromas as they cook.
- Garlic: Mince 2 cloves of garlic finely to infuse a pungent, savory depth into the dressing.
- Fresh Herbs: Chop ¼ cup of fresh herbs like parsley, sage, and thyme. We recommend using a sharp knife to preserve their vibrant green color and fragrant oils.
- Mrs. Cubbison’s Stuffing Mix: Measure out 6 cups of the stuffing mix and set it aside in a large mixing bowl. This base provides the hearty, traditional foundation for our dressing.
- Other Items: Crack 2 large eggs into a small bowl and whisk lightly until combined. Measure 2 cups of low-sodium chicken broth and 4 tablespoons of unsalted butter, ensuring everything is at room temperature for seamless blending.
This preparation step sets the stage for a cohesive mix, allowing the natural flavors of the fresh herbs and vegetables to shine through.
Make the Dressing
With our ingredients prepped, we now combine and cook them to create a warm, aromatic dressing that’s crispy on top and moist inside. Follow these steps carefully for consistent, mouthwatering results.
- Sauté the Aromatics: In a large skillet over medium heat, melt 4 tablespoons of unsalted butter until it foams and releases a nutty scent. Add the diced onion, celery, and minced garlic, stirring constantly for 5-7 minutes until they turn golden and fragrant. This step builds a flavorful base that elevates the entire dish.
- Combine with Stuffing Mix: Transfer the sautéed mixture to the large mixing bowl with the 6 cups of Mrs. Cubbison’s Stuffing Mix. Add the chopped fresh herbs, whisked eggs, and seasoning (such as 1 teaspoon salt and ½ teaspoon black pepper). Use a wooden spoon to mix thoroughly, ensuring every piece is coated for a uniform texture and rich flavor profile.
- Add Liquid and Bake: Gradually pour in the 2 cups of low-sodium chicken broth, stirring until the mixture is evenly moist but not soggy. Transfer the blend to a greased 9×13-inch baking dish, spreading it evenly. Preheat your oven to 350°F and bake for 30-40 minutes, or until the top is golden brown and crispy, filling your kitchen with an irresistible, herbaceous aroma.
Throughout this process, we focus on achieving a balance of textures—from the tender vegetables to the crunchy top—making Mrs. Cubbison’s Dressing Recipe a standout side that pairs beautifully with any meal.
Make-Ahead Instructions
One of the beauties of Mrs. Cubbison’s Dressing Recipe is its flexibility for busy schedules, allowing us to prepare it in advance without sacrificing that signature crispy texture and warm, herbaceous flavor. By planning ahead, we ensure the ingredients have time to meld, creating a more robust and flavorful side that elevates holiday meals or weeknight dinners effortlessly.
Preparing Ingredients in Advance
To get started, we begin by prepping the key components the day before. This step keeps everything organized and minimizes last-minute stress:
- Chop vegetables: Finely dice the onion, celery, and garlic as outlined in our earlier steps. Store them in an airtight container in the refrigerator to preserve their fresh crunch and aroma.
- Measure dry ingredients: Portion out the Mrs. Cubbison’s Stuffing Mix, herbs, and seasonings into separate sealed bags or containers. This ensures accurate measurements and prevents any flavor loss.
- Prepare the broth mixture: In a bowl, whisk together the low-sodium chicken broth and eggs. Cover and refrigerate this mixture to keep it fresh and ready for quick assembly.
Assembling the Dressing Ahead of Time
Once the ingredients are prepped, we move to assembling the full dish. This method allows the flavors to deepen overnight, resulting in a more aromatic and cohesive Mrs. Cubbison’s Dressing Recipe.
Follow these steps for seamless preparation:
- In a large mixing bowl, combine the stuffing mix with the chopped vegetables and herbs.
- Add the broth and egg mixture, stirring until everything is evenly coated for a moist, flavorful base.
- Transfer the mixture to a greased baking dish, cover it tightly with plastic wrap or foil, and refrigerate for up to 24 hours. This resting period lets the herbs infuse the mix with earthy notes and enhances the overall taste.
Storage and Reheating Tips
Proper storage is key to maintaining the dish’s texture and flavor. We recommend the following guidelines to keep your Mrs. Cubbison’s Dressing Recipe at its best:
- Refrigeration: Store the assembled dressing in the fridge at 40°F (4°C) or below. It will hold for 1–2 days, allowing flavors to intensify without sogginess.
- Freezing option: For longer storage, freeze the unbaked mixture in a freezer-safe dish for up to 3 months. Thaw it overnight in the refrigerator before baking.
To reheat, preheat your oven to 350°F (175°C), uncover the dish, and bake for 30–40 minutes until golden and heated through. The result? A perfectly crisp exterior with a tender, savory interior that makes every bite irresistible.
| Storage Method | Duration | Key Notes |
|---|---|---|
| Refrigeration | 1–2 days | Best for short-term make-ahead to enhance flavor melding. |
| Freezing | Up to 3 months | Ideal for holiday planning; thaw fully before baking. |
Conclusion
We’ve shared how Mrs. Cubbison’s Dressing Recipe adds warmth to any table
with its simple yet flavorful approach. It’s a go-to for us when creating memorable meals that bring everyone together.
As we wrap up we’re confident you’ll enjoy experimenting with this classic. Let’s make it a staple in our kitchens and elevate everyday dining effortlessly.
Frequently Asked Questions
What is Mrs. Cubbison’s Dressing Recipe?
Mrs. Cubbison’s Dressing Recipe is a popular, easy-to-make side dish that’s perfect for holidays or everyday meals. It uses a stuffing mix base combined with fresh veggies, herbs, and broth to create a warm, flavorful dish that’s versatile and crowd-pleasing. This recipe simplifies cooking for busy folks while delivering consistent, delicious results.
What ingredients are needed for Mrs. Cubbison’s Dressing?
The key ingredients include Mrs. Cubbison’s Stuffing Mix as the base, unsalted butter, fresh onions and celery, garlic, low-sodium chicken broth, fresh herbs, eggs, and seasonings. They’re listed in order of use for easy prep, ensuring a balanced flavor and texture that enhances any meal.
What tools and equipment are required to make Mrs. Cubbison’s Dressing?
You’ll need a large mixing bowl, skillet for sautéing, cutting board and chef’s knife, measuring cups and spoons, a whisk or wooden spoon, and a baking dish. Organize them in order of use for efficiency, and have a preheated oven ready to keep things smooth and stress-free.
How do I prepare Mrs. Cubbison’s Dressing step by step?
Start by chopping veggies, mincing garlic, and measuring ingredients. Sauté onions, celery, and garlic in butter, then mix with stuffing mix, broth, herbs, and eggs. Transfer to a baking dish and bake until golden and crispy. This process takes about 30-45 minutes and results in a perfectly textured side dish.
Can I make Mrs. Cubbison’s Dressing ahead of time?
Yes, you can prep components like chopping veggies and measuring ingredients in advance. Assemble the dressing a day ahead to let flavors deepen, then refrigerate. This makes it ideal for busy schedules, allowing you to bake it fresh when needed for optimal taste and convenience.
How should I store and reheat Mrs. Cubbison’s Dressing?
Store assembled dressing in the fridge for 1-2 days or freeze for up to 3 months. To reheat, thaw if frozen, then bake at 350°F until heated through and crispy. This preserves the texture and flavor, making it easy to enjoy leftovers without losing quality.