
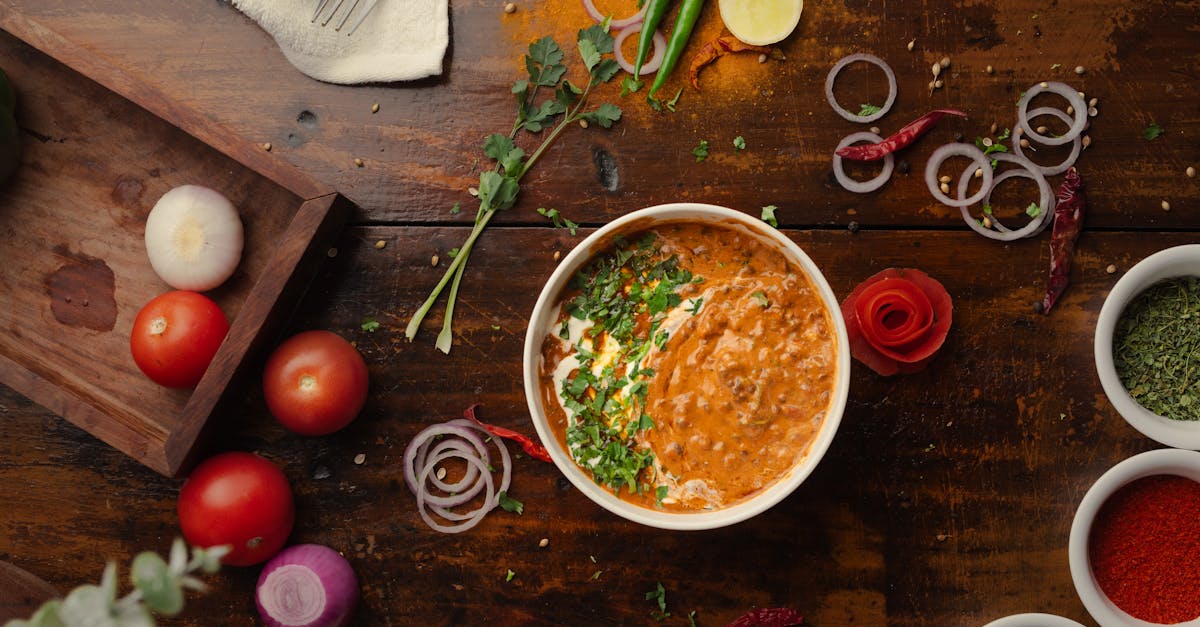
We can’t resist the cozy allure of a steaming bowl of chili, especially when it’s our take on Lindy’s Chili recipe. This hearty classic draws from American comfort food roots, blending bold spices and simple ingredients for a flavor-packed meal that’s perfect for family gatherings or chilly evenings.
What sets our version apart is its easy preparation and customizable heat, making it a go-to favorite in our kitchen. We’ll guide you through creating this crowd-pleaser that warms the soul and satisfies every craving.
Ingredients
In our Lindy’s Chili recipe, we focus on straightforward, high-quality ingredients that deliver bold, comforting flavors. Below, we list them in the order they’ll be used, complete with precise measurements and any necessary prep notes for easy preparation.
- Ground beef: 1 pound (lean, 80/20 for optimal flavor and texture; we’ll brown this first to build a rich base).
- Onion: 1 large (finely chopped; this adds sweetness and depth as we sauté it next).
- Garlic: 4 cloves (minced; fresh garlic enhances the aroma, which we’ll incorporate right after the onions).
- Bell pepper: 1 medium (diced; choose red or green for a slight crunch and color contrast, added early for softening).
- Canned diced tomatoes: 1 can (14.5 ounces, undrained; these provide juicy acidity and are stirred in to form the sauce).
- Kidney beans: 1 can (15 ounces, drained and rinsed; hearty and traditional, we’ll add these for protein and texture).
- Chili powder: 2 tablespoons (high-quality blend for that signature spicy kick; adjust to taste as we season).
- Ground cumin: 1 teaspoon (this earthy spice elevates the flavor profile, mixed in during the simmering stage).
- Dried oregano: 1 teaspoon (adds a subtle herbal note; we’ll include it with other spices for balance).
- Beef broth: 2 cups (low-sodium preferred; this liquid base helps achieve the perfect consistency as we simmer).
- Salt and black pepper: To taste (season gradually; we use these to fine-tune flavors throughout cooking).
For substitutions or variations, keep in mind that our Lindy’s Chili is highly customizable—swap beans or adjust spices based on dietary needs, but these core ingredients ensure authentic results.
Tools and Equipment
To bring our Lindy’s Chili recipe to life with ease, we need a few key tools and equipment that streamline the preparation process. These essentials help us handle the ingredients efficiently, ensuring a flavorful and hassle-free cooking experience.
Here’s a list of the must-have items, organized by their primary use in the recipe:
- Large Pot or Dutch Oven: We recommend a 5- to 6-quart size for cooking the chili. This sturdy pot allows for even heat distribution, preventing scorching and helping develop the rich, bold flavors of our Lindy’s Chili as it simmers.
- Chef’s Knife: A sharp, 8-inch blade is ideal for chopping onions, garlic, and bell peppers quickly and safely. Using a quality knife ensures precise cuts, which enhances the texture and aroma in every bite.
- Cutting Board: Opt for a sturdy wooden or plastic board at least 12×18 inches. It provides a stable surface for prep work, keeping our kitchen organized as we prepare the fresh ingredients.
- Wooden Spoon or Silicone Spatula: This tool is perfect for stirring the ground beef and vegetables without scratching the pot. We find it essential for blending flavors uniformly during cooking.
- Measuring Cups and Spoons: Accurate measurements are key to our Lindy’s Chili’s success, so a set of standard cups (1 cup, ½ cup, etc.) and spoons (1 tablespoon, 1 teaspoon, etc.) helps us add the right amounts of spices and broth.
- Can Opener: A manual or electric opener makes quick work of canned diced tomatoes and kidney beans, saving time and minimizing mess in our prep routine.
With these tools on hand, we’re set to transition smoothly from gathering ingredients to the cooking steps, creating a comforting pot of Lindy’s Chili that’s full of depth and warmth.
Instructions
We make Lindy’s Chili easy and foolproof with these step-by-step directions, drawing on classic ingredients like ground beef and chili powder for a bold, comforting dish. Our method ensures rich flavors and perfect texture every time.
Prep
Before we dive into cooking, we prepare our ingredients to build a flavorful base for Lindy’s Chili. Start by gathering the essentials from our ingredients list—ground beef, onion, garlic, and bell pepper—and follow these steps for efficient setup:
- Chop the vegetables: Dice 1 large onion, 3 garlic cloves, and 1 bell pepper into even, ½-inch pieces to ensure they cook uniformly and release their aromatic essence.
- Measure the spices: In a small bowl, combine 2 tablespoons chili powder, 1 teaspoon ground cumin, and 1 teaspoon dried oregano for quick addition later, allowing their earthy notes to shine.
- Drain and rinse beans: Open and rinse one 15-ounce can of kidney beans under cold water to remove excess sodium, then set aside for a cleaner, fresher taste.
- Prepare the meat: If your ground beef isn’t pre-chilled, place 1 pound in the refrigerator for 10 minutes to keep it firm, making it easier to brown without sticking.
This prep sets the stage for a seamless cook, maximizing the hearty aromas that will fill your kitchen.
Cook
Now that our ingredients are ready, we cook the components to develop deep flavors in Lindy’s Chili. Using your large pot or Dutch oven, we focus on browning and layering tastes for a satisfying result.
- Brown the meat: Heat 2 tablespoons oil in the pot over medium-high heat, then add the 1 pound ground beef and cook for 5-7 minutes, stirring with a wooden spoon until it’s evenly browned and releases its savory juices, creating a rich base.
- Sauté the vegetables: Add the chopped onion, garlic, and bell pepper to the pot with the browned beef, cooking for 4-5 minutes until they soften and turn translucent, filling the air with a fragrant, irresistible aroma that hints at the chili’s warmth.
- Incorporate spices and liquids: Stir in the measured spices (chili powder, cumin, and oregano), then add one 14.5-ounce can diced tomatoes, the rinsed kidney beans, and 2 cups beef broth. Season with 1 teaspoon salt and ½ teaspoon black pepper, mixing thoroughly to blend the bold, spicy notes with the meat’s heartiness.
This cooking phase builds layers of flavor, turning simple ingredients into a robust mixture ready for simmering.
Simmer and Finish
With the base cooked, we simmer Lindy’s Chili to meld flavors and achieve that perfect, thick consistency. This final step enhances the dish’s comforting appeal, resulting in tender beans and a deeply savory taste.
- Simmer the mixture: Reduce the heat to low, cover the pot, and let the chili simmer for 30-45 minutes, stirring occasionally to prevent sticking and allow the flavors to intensify, creating a thick, velvety texture that coats your spoon.
- Taste and adjust: After simmering, sample the chili and adjust seasoning if needed—add more salt or a pinch of black pepper for balance, noting how the spices bloom into a warm, smoky finish.
- Finish with flair: For an extra touch, stir in fresh cilantro or a squeeze of lime if desired, then remove from heat and let it rest for 5 minutes to thicken further, ensuring every bite delivers a satisfying depth that makes this chili unforgettable.
Make-Ahead and Storage
One of the best features of our Lindy’s Chili recipe is its flexibility for busy schedules—we can prepare it in advance to save time and let flavors deepen. This approach makes it perfect for meal prep or entertaining, ensuring a hearty, comforting dish is ready when we need it.
Making Ahead
To maximize the bold flavors of Lindy’s Chili, we recommend preparing the full recipe up to 3 days in advance. Start by following our step-by-step cooking instructions, then allow the chili to cool completely at room temperature for about 30 minutes. This cooling step helps preserve texture and prevents condensation, which could dilute the rich, savory essence. Once cooled, portion the chili into airtight containers for easy reheating later. Pro tip: Adding a fresh squeeze of lime just before serving enhances the vibrant, tangy notes and keeps the dish feeling new.
Storage Guidelines
Proper storage is key to maintaining the depth and warmth of Lindy’s Chili. We always use high-quality, freezer-safe containers to lock in freshness and prevent freezer burn.
For refrigeration, store the chili in the fridge for up to 4 days. This method works well for short-term needs, as the flavors continue to meld, making each bite even more satisfying.
For longer storage, freezing is ideal. Below is a quick overview of freezing options and durations:
| Storage Method | Duration | Best Practices |
|---|---|---|
| Freezer (in containers) | Up to 3 months | Divide into single-serve portions for quick thawing; label with the date to track freshness. |
| Freezer (in freezer bags) | Up to 3 months | Remove as much air as possible before sealing to maintain the chili’s hearty consistency. |
Reheating Tips
When it’s time to enjoy our Lindy’s Chili, reheating should be straightforward and safe to retain its comforting appeal. For refrigerated chili, transfer it to a pot and heat over medium-low until it reaches a simmer, stirring occasionally to blend the spices and achieve that signature thick texture—this takes about 10-15 minutes.
For frozen chili, thaw it overnight in the fridge first, then reheat as above. If short on time, use the microwave: heat in a microwave-safe bowl on high in 1-minute intervals, stirring in between, until hot throughout. Always check that the internal temperature reaches 165°F for food safety, and taste to adjust seasonings like chili powder for that extra kick. This ensures every spoonful delivers the bold, unforgettable flavors we love.
Conclusion
We’ve loved sharing Lindy’s Chili recipe, a timeless favorite that’s simple yet packed with flavor. It’s perfect for creating memorable meals with family or friends.
As we wrap up, remember this dish lets you customize it to your tastes while delivering that comforting warmth every time. Give it a try and make it your go-to classic.
Frequently Asked Questions
What is Lindy’s Chili?
Lindy’s Chili is a comforting American classic featuring bold flavors from simple ingredients like ground beef, beans, and spices. It’s easy to prepare, customizable for dietary needs, and perfect for family gatherings or chilly evenings, offering a warm, satisfying meal that’s both hearty and delicious.
What ingredients are needed for Lindy’s Chili?
The key ingredients include ground beef, onion, garlic, bell pepper, canned diced tomatoes, kidney beans, chili powder, ground cumin, dried oregano, beef broth, salt, and black pepper. This straightforward list uses high-quality components for rich flavor, and you can substitute based on preferences while keeping the core elements for authenticity.
What tools are required to make Lindy’s Chili?
You’ll need a large pot or Dutch oven for even cooking, a sharp chef’s knife and cutting board for chopping veggies, a wooden spoon or spatula for stirring, measuring cups and spoons for accuracy, and a can opener for canned goods. These basics ensure an efficient, organized preparation process.
How do I prepare Lindy’s Chili step by step?
Start by prepping ingredients: chop vegetables, measure spices, drain beans, and brown the ground beef. Sauté veggies, add spices and liquids, then simmer the mixture to blend flavors and thicken. Taste and adjust seasoning, finishing with fresh cilantro or lime. The whole process is straightforward and takes about 45-60 minutes.
Can I make Lindy’s Chili ahead of time?
Yes, Lindy’s Chili is ideal for make-ahead meals. Prepare it up to three days in advance, let it cool, then store in airtight containers. This allows flavors to deepen, making it perfect for busy schedules while retaining its comforting appeal.
How should I store and reheat Lindy’s Chili?
Refrigerate cooled chili in airtight containers for up to three days or freeze for up to three months. To reheat, warm refrigerated portions on the stove over low heat, stirring occasionally, or thaw frozen chili in the fridge overnight before reheating. This keeps the bold flavors and texture intact for enjoyable meals.