
We’ve always been captivated by Pain Poilane, the rustic French sourdough that’s become a bakery icon since its creation in Paris. Originating from Lionel Poilâne’s legendary ovens this hearty loaf combines simple ingredients for a crave-worthy crust and flavorful crumb.
Today we’re excited to guide you through our approachable take on this classic. Whether you’re a novice baker or a seasoned pro baking Pain Poilane at home brings a touch of Parisian charm to your table.
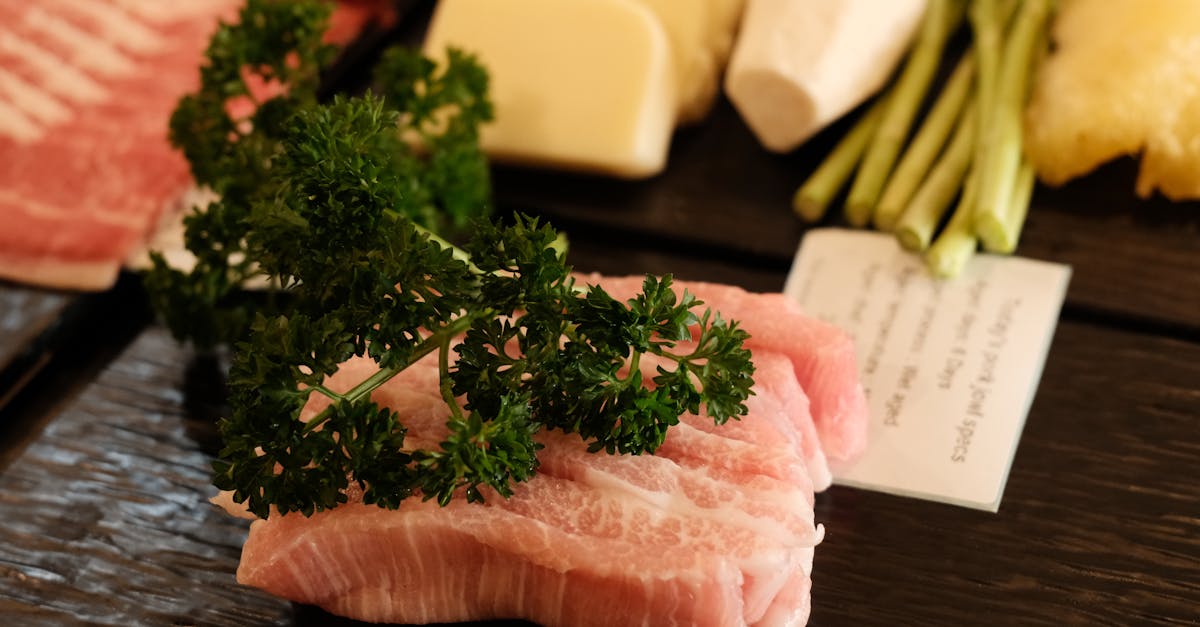
Ingredients
To bring the rustic charm of our Pain Poilâne to life, we focus on a simple yet precise selection of ingredients that capture its signature crust and flavorful crumb.
We organize these essentials in the order they are typically used during preparation, ensuring accuracy for both novice and experienced bakers.
- Sourdough Starter: 100 grams, active and bubbly to kickstart fermentation and develop that tangy flavor.
- Water: 300 grams, lukewarm (around 35°C/95°F) for hydrating the dough and activating the starter.
- Bread Flour: 500 grams, high-protein variety to build structure and achieve the bread’s hearty texture.
- Salt: 10 grams, fine sea salt added later to enhance taste without inhibiting initial yeast activity.
Tools and Equipment
To transform our carefully selected ingredients—such as the active sourdough starter, lukewarm water, high-protein bread flour, and fine sea salt—into the rustic, flavorful Pain Poilâne loaf, we need the right tools and equipment. These items ensure precision, ease, and the authentic texture that defines this classic French bread. Below, we outline the essential tools in the order they are typically used during preparation and baking.
Essential Tools List
We recommend gathering these items beforehand to streamline our baking process:
- Digital Kitchen Scale: This is crucial for accurate measurements, especially since our recipe uses grams for the 100 grams of sourdough starter, 300 grams of water, 500 grams of flour, and 10 grams of salt. Weighing ingredients precisely helps achieve the perfect dough hydration and consistency.
- Large Mixing Bowl: Used first to combine the sourdough starter and water, allowing for easy mixing without spills. Opt for a glass or stainless-steel bowl that holds at least 4 liters to give our dough room to develop.
- Dough Scraper: An indispensable tool for handling the sticky dough mixture after adding flour and salt. It helps us scrape and fold the dough efficiently, promoting better gluten development and that signature chewy crumb.
- Stand Mixer with Dough Hook (optional): If we prefer mechanized kneading, this speeds up the process; however, for a traditional approach, we can use our hands. Ensure it’s powerful enough for up to 500 grams of flour.
- Proofing Basket (Banneton): Specifically for shaping and proofing our dough, this basket imparts the distinctive ring pattern on the crust of Pain Poilâne. Line it with a cloth dusted with flour to prevent sticking and enhance the bread’s rustic appearance.
- Dutch Oven or Baking Stone: Essential for baking to create a steamy environment that yields a crispy, golden crust. A 6-quart Dutch oven works best for our loaf size, mimicking the professional bakery ovens.
- Oven with Temperature Control: We need an oven that reaches at least 450°F (232°C) for the initial bake. Include an internal thermometer if possible to monitor and maintain even heat for optimal rise and flavor.
- Lame or Sharp Knife: Used for scoring the dough before baking, which allows for controlled expansion and adds an artisanal touch. A well-scored loaf enhances the visual appeal and texture of our finished Pain Poilâne.
By using these tools, we ensure our homemade Pain Poilâne captures the authentic Parisian charm, from the hearty crust to the tender crumb. Now, we’re fully equipped to move on to the preparation steps.
Instructions
Now that we have gathered our ingredients and tools, let’s walk through the steps to bake our authentic Pain Poilâne at home. We will break down the process into clear, manageable stages to help you achieve that signature rustic French sourdough with its crispy crust and tender, flavorful crumb.
Prepare the Starter
Before we begin, ensure your sourdough starter is active and bubbly. In a clean medium bowl, combine 100 grams of active sourdough starter with 50 grams of lukewarm water and 50 grams of bread flour. Stir vigorously with a spoon until fully incorporated, forming a thick, elastic mixture. Cover the bowl loosely with a damp cloth and let it sit at room temperature for about 4-6 hours, or until it doubles in size and shows signs of fermentation like a pleasant, tangy aroma. This step kickstarts the natural yeasts that give our Pain Poilâne its distinctive flavor and rise.
Mix the Dough
With our starter ready, it’s time to mix the dough. In a large mixing bowl, add 300 grams of lukewarm water and pour in the prepared sourdough starter, whisking gently to dissolve it evenly. Gradually incorporate 500 grams of high-protein bread flour, using a dough scraper to fold and mix until a shaggy dough forms—avoid overworking it at this stage to preserve the wild yeasts. Once combined, sprinkle 10 grams of fine sea salt over the dough and knead by hand for 5-7 minutes on a lightly floured surface, or use a stand mixer on low speed for 3-4 minutes, until the dough is smooth, slightly sticky, and springs back when poked. This creates the foundation for our bread’s hearty structure and taste.
First Fermentation
We let the dough ferment to develop its complex flavors. Transfer the mixed dough to a lightly oiled large bowl, cover it with a damp cloth, and place it in a warm, draft-free spot. Allow it to undergo bulk fermentation for 3-4 hours at room temperature, performing a series of folds every 30-45 minutes—gently stretch and fold the dough over itself four times in the bowl to build strength and incorporate air. Watch for the dough to roughly double in size with visible bubbles on the surface, filling the kitchen with the enticing, yeasty scent of rising Pain Poilâne. This step is crucial for achieving that fluffy, airy crumb bakers love.
Shape the Loaf
Once fermentation is complete, it’s time to shape our loaf. Lightly flour a clean work surface and gently turn out the dough, being careful not to deflate it too much. Fold the edges inward to form a tight ball, then use your hands or a dough scraper to shape it into a round boule, rotating and tucking as needed for a smooth, taut surface. Place the shaped dough seam-side up in a floured proofing basket, cover with a cloth, and let it rest for 10-15 minutes to seal the shape. This technique ensures our Pain Poilâne holds its form, resulting in that iconic rustic, artisanal look with a perfect rise.
Second Fermentation
For the final rise, we proof the shaped loaf to enhance its texture and flavor. Keep the dough in the proofing basket, covered with a damp cloth, and let it ferment for 1-2 hours at room temperature, or refrigerate overnight for a more developed taste—we recommend the overnight option for deeper, tangy notes. Check for readiness by gently pressing the dough; it should feel puffy and leave a slight indentation. During this stage, envision the dough transforming into a loaf with that irresistible golden, crackly exterior and soft interior, building anticipation for the bake.
Bake the Bread
Finally, we bake to capture the essence of traditional Pain Poilâne. Preheat your oven to 450°F (232°C) with a Dutch oven inside for at least 30 minutes to create a steamy environment. Carefully transfer the proofed dough onto parchment paper, score the top with a lame or sharp knife in a classic pattern for even expansion, then place it into the hot Dutch oven. Bake covered for 20 minutes to build steam, then uncover and bake for another 20-25 minutes until the crust is deeply golden and the internal temperature reaches 200-210°F (93-99°C). Let the bread cool on a wire rack for at least 1 hour before slicing, allowing the aromatic, earthy flavors to fully develop for an authentic Parisian experience.
Make-Ahead Tips
One of the joys of baking Pain Poilâne is its flexibility, allowing us to prepare elements in advance for fresh, flavorful results with minimal last-minute effort. Whether we’re balancing busy schedules or aiming for that perfect overnight flavor development, these strategies help maintain the bread’s rustic charm and tangy crumb.
Preparing the Sourdough Starter Ahead
We recommend activating your sourdough starter a day or two in advance to ensure it’s bubbly and vigorous. Begin by feeding 100 grams of your starter with 100 grams of flour and 100 grams of water, then let it ferment at room temperature until it doubles in size—typically 4 to 12 hours depending on ambient temperature. This step not only saves time but also enhances the bread’s complex flavors. Once ready, store the starter in the refrigerator for up to 24 hours; simply let it come to room temperature before use.
For longer storage, we can maintain the starter in the fridge for up to a week. Here’s a quick reference for feeding and storage times:
| Action | Time Frame | Key Benefit |
|---|---|---|
| Initial Feeding | 4-12 hours | Activates starter for optimal rise |
| Refrigeration Storage | Up to 1 week | Preserves vitality without daily maintenance |
| Room Temperature Revival | 1-2 hours before use | Ensures starter is active and ready |
Mixing and First Fermentation in Advance
To streamline our baking process, we can mix the dough and complete the first fermentation ahead of time. Combine the 300 grams of lukewarm water, 100 grams of active sourdough starter, 500 grams of high-protein bread flour, and 10 grams of fine sea salt as outlined in the previous steps, then perform the initial folds every 30 minutes for the first 2 hours. After this, let the dough ferment in a covered bowl at room temperature for 3 to 4 hours until it has risen noticeably.
For make-ahead convenience, transfer the fermented dough to the refrigerator overnight or up to 24 hours. This cold fermentation intensifies the tangy notes and improves texture. When ready to proceed, remove the dough from the fridge and let it warm up for about 1 hour before shaping.
Shaping and Second Fermentation Tips
Shaping the loaf can also be done ahead to fit our schedule. After the first fermentation, shape the dough into a boule and place it in a floured proofing basket. Cover and refrigerate for an overnight proof, which we find develops a deeper, more authentic Parisian flavor profile.
If baking the next day, remove the shaped dough from the fridge 1 to 2 hours before baking to allow it to proof at room temperature. For extended plans, the shaped dough holds well in the fridge for up to 48 hours—just monitor for over-proofing to avoid a deflated loaf. Always score the dough just before baking to achieve that signature rustic crust.
By incorporating these make-ahead tips, we ensure our Pain Poilâne remains effortless yet exceptional, capturing the essence of a true French classic.
Conclusion
We’ve loved exploring the art of Pain Poilâne together, turning simple ingredients into a slice of Parisian magic right in our kitchens. It’s more than bread—it’s a rewarding ritual that connects us to timeless traditions.
As we wrap up, remember this recipe invites creativity and patience for the best results. Give it a go and savor the authentic flavors that make every bite special.
Happy baking—your perfect loaf awaits!
Frequently Asked Questions
What is Pain Poilâne?
Pain Poilâne is a classic rustic French sourdough bread from Paris, created by Lionel Poilâne. It’s known for its thick, appealing crust and flavorful, tender crumb, made with simple, high-quality ingredients. This bread brings a touch of Parisian charm to home bakers, offering an authentic taste that’s perfect for everyday meals or special occasions.
What ingredients are needed for Pain Poilâne?
To make Pain Poilâne, you’ll need 100 grams of active sourdough starter for fermentation, 300 grams of lukewarm water, 500 grams of high-protein bread flour for structure, and 10 grams of fine sea salt for flavor. These simple ingredients are mixed in order to create a dough that develops rich, complex tastes, capturing the essence of traditional French baking.
What tools are required to bake Pain Poilâne?
Essential tools include a digital kitchen scale for accurate measurements, a large mixing bowl, and a dough scraper for handling sticky dough. A stand mixer with a dough hook can help with kneading, while a proofing basket shapes the loaf and a Dutch oven or baking stone creates steam for a perfect crust. A lame or sharp knife is needed for scoring.
How do I bake Pain Poilâne step by step?
Start by activating your sourdough starter. Mix ingredients, then let the dough ferment with folds for flavor development. Shape the loaf and proof it, ideally overnight. Bake in a preheated oven with steam for a golden crust, typically at 450°F for 20-25 minutes covered, then 20 minutes uncovered. Cool fully before slicing for the best texture and aroma.
Can I prepare Pain Poilâne ahead of time?
Yes, activate your sourdough starter a day or two in advance for better rise and flavor. Mix and ferment the dough ahead, then refrigerate after shaping to pause the process. For the second fermentation, proof overnight in the fridge to fit your schedule. This makes baking effortless while maintaining that authentic French taste and texture.
Why is sourdough starter important for Pain Poilâne?
Sourdough starter provides natural fermentation, giving Pain Poilâne its distinctive tangy flavor and airy crumb. It acts as the leavening agent, helping the bread rise without commercial yeast, and contributes to better digestibility and a longer shelf life. Using an active starter ensures the bread captures the rustic charm of traditional Parisian loaves.
How do I achieve the perfect crust on Pain Poilâne?
To get a golden, hearty crust, bake in a Dutch oven or on a baking stone with steam to mimic a professional oven. Preheat to 450°F, score the dough for even expansion, and bake covered initially for moisture, then uncovered for browning. Let it cool completely to set the crust, resulting in that signature crunchy exterior with a soft interior.