
We’ve always loved the magic of whipping up fresh, creamy ice cream at home, and the Oster Ice Cream Maker Recipe Book makes it easier than ever. Packed with simple yet innovative recipes, this guide turns your kitchen into a delightful ice cream parlor, whether you’re craving classic vanilla or exotic flavors.
Ingredients
As we dive into the recipes from our Oster Ice Cream Maker Recipe Book, we focus on the essential ingredients that bring those fresh, creamy treats to life. These components, sourced from simple and innovative recipes in the book, ensure delicious results every time we churn our homemade ice cream.
For a classic vanilla ice cream recipe—one of the staples in the Oster Ice Cream Maker Recipe Book**—we’ll list the ingredients in the order they’re typically used, with precise measurements and any necessary prep notes for accuracy.
- Heavy cream (2 cups, chilled): Start with this as the base for rich texture; chill it beforehand to help achieve a smoother freeze.
- Whole milk (1 cup): Add next for creaminess; use full-fat for the best consistency in our ice cream maker.
- Granulated sugar (3/4 cup): Incorporate this sweetener early to dissolve evenly and balance the flavors.
- Pure vanilla extract (2 teaspoons): Stir in last among the liquids for authentic, bold vanilla notes—opt for high-quality extract from the Oster recommendations.
- Large egg yolks (4, at room temperature): Beat these separately before adding; they’re key for a custard-style base that enhances creaminess.
Remember, these ingredients align with the straightforward guidelines in our Oster Ice Cream Maker Recipe Book, making it easy to customize for classic or exotic flavors.
Equipment Needed
We know that the right tools make all the difference in turning our fresh ingredients into creamy homemade ice cream masterpieces from the Oster Ice Cream Maker Recipe Book.
Oster Ice Cream Maker Setup
For optimal results with our Oster Ice Cream Maker, proper setup is essential to ensure even freezing and mixing. Here’s a detailed breakdown of the equipment you’ll need and how to prepare it:
- Primary Equipment:
- Oster Ice Cream Maker (2-quart capacity model recommended for standard recipes, as it aligns with the book’s guidelines for batch sizes).
- Freezer-safe bowl (included with most models; ensure it’s pre-frozen for at least 12-24 hours to reach the required -18°C or 0°F for effective ice cream churning).
- Mixing paddle or dasher (comes with the maker; this component agitates the mixture to incorporate air and prevent ice crystals).
- Additional Tools:
- Sturdy mixing bowl (glass or stainless steel, at least 4-quart size, to combine ingredients before pouring).
- Measuring cups and spoons (precise 1-cup and 1-tablespoon sets for accurate measurements of liquids and extracts).
- Rubber spatula (heat-resistant for scraping down sides during preparation).
- Timer or kitchen clock (to monitor the 20-30 minute churning process, depending on recipe).
If you’re comparing models, here’s a quick overview of key specifications for popular Oster ice cream makers:
| Model | Capacity (Quarts) | Freeze Time Required (Hours) | Power (Watts) | Best For |
|---|---|---|---|---|
| Oster 2-Quart | 2 | 12-24 | 50 | Small families |
| Oster 4-Quart | 4 | 15-24 | 70 | Larger batches |
| Oster Compact | 1.5 | 8-12 | 40 | Quick, single servings |
To set up our Oster Ice Cream Maker, follow these steps in active sequence:
- Prepare the Freezer Bowl: Remove the bowl from the freezer and place it into the maker’s base. Ensure it’s fully frozen—test by shaking; you shouldn’t hear liquid sloshing.
- Assemble the Maker: Insert the mixing paddle into the bowl and secure the lid. Pro Tip: Double-check that all parts snap firmly to avoid leaks during operation.
- Position for Use: Place the assembled maker on a flat, stable countertop away from heat sources. Plug it in and let it run for 1-2 minutes to confirm the motor engages smoothly before adding your mixture.
By following this setup, we can seamlessly transition from gathering ingredients to creating delicious, custom ice cream flavors as outlined in the Oster Ice Cream Maker Recipe Book.
Instructions
With our essential ingredients and Oster Ice Cream Maker setup in place as outlined in the Oster Ice Cream Maker Recipe Book, we can now guide you through the straightforward steps to craft a rich, creamy vanilla ice cream that delights the senses with its velvety texture and aromatic vanilla essence.
Prepare the Base
First, we combine the key ingredients to create a smooth, custard-like base that forms the heart of our homemade vanilla ice cream. In a sturdy mixing bowl, whisk 6 large egg yolks with 3/4 cup of granulated sugar until the mixture turns pale yellow and thick, which typically takes about 2-3 minutes by hand or 1 minute with an electric mixer—this step ensures a luxurious, silky mouthfeel.
Next, in a medium saucepan over medium heat, heat 2 cups of whole milk and 1 cup of chilled heavy cream until it just begins to steam but does not boil, stirring constantly to prevent scorching and infuse a warm, creamy aroma. Gradually pour the hot milk mixture into the egg yolk mixture while whisking vigorously to temper the eggs and avoid curdling.
Return the combined mixture to the saucepan and cook over low heat, stirring continuously with a rubber spatula, until it thickens enough to coat the back of a spoon—this usually takes 5-7 minutes and reaches about 170°F on a thermometer for optimal safety and texture. Remove from heat and stir in 2 teaspoons of pure vanilla extract for that signature, fragrant flavor that evokes fresh vanilla beans. Let the base cool to room temperature, then cover and refrigerate for at least 2 hours or until thoroughly chilled, allowing the flavors to meld into a decadent base ready for churning.
Churn the Mixture
Once the base is chilled, we transfer it to our Oster Ice Cream Maker for the churning process, which incorporates air and freezes the mixture evenly to achieve that light, scoopable consistency celebrated in the Oster Ice Cream Maker Recipe Book.
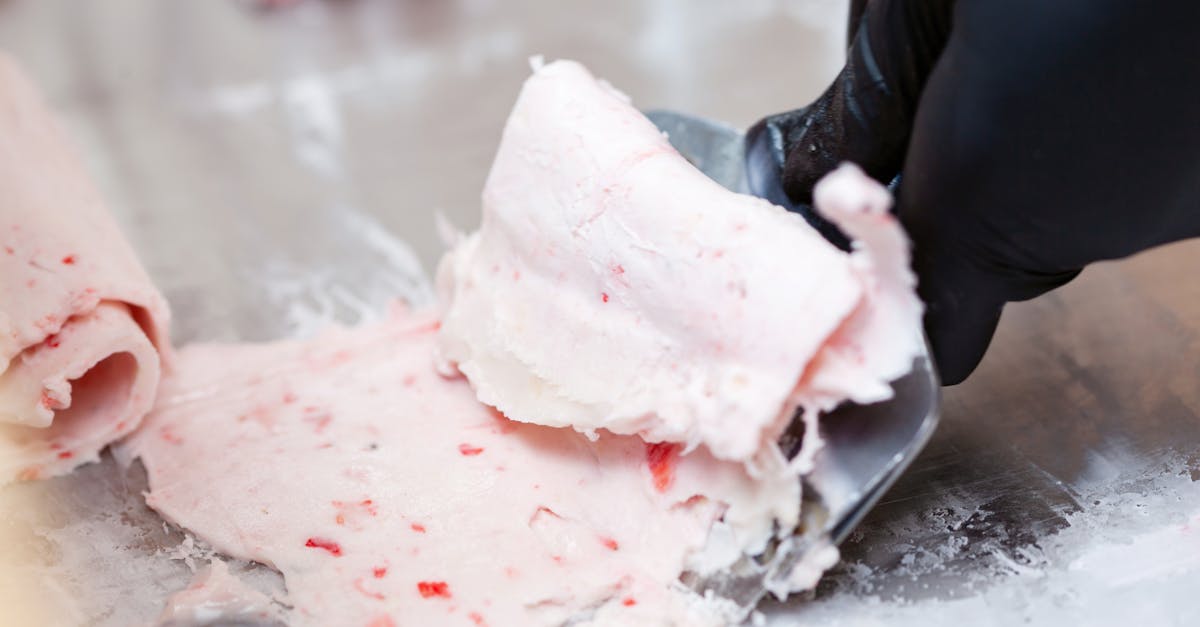
Pour the chilled base into the pre-frozen freezer-safe bowl of your 2-quart Oster Ice Cream Maker, ensuring it doesn’t exceed the fill line to allow for expansion. Attach the mixing paddle and cover, then turn on the machine and let it churn for 20-25 minutes, or until the mixture reaches a soft-serve texture—listen for the motor’s steady hum and watch as it transforms into a fluffy, pale mixture with a satisfyingly creamy appearance.
During this time, the Oster Ice Cream Maker works its magic, freezing the base while constantly agitating it to prevent ice crystals and create a smooth, velvety finish that coats your tongue with pure bliss. If you desire add-ins like chocolate chips or nuts, fold them in gently during the last 2-3 minutes of churning for even distribution.
Freeze and Ripen
After churning, we move the ice cream to the freezer for final setting, allowing the flavors to intensify and the texture to firm up as per the guidelines in the Oster Ice Cream Maker Recipe Book.
Transfer the soft ice cream from the maker to an airtight container, using a rubber spatula to smooth the top and prevent freezer burn—aim for a depth of no more than 2 inches for even freezing. Cover the container and freeze for at least 2-4 hours, or until the ice cream reaches a firm yet creamy state, enhancing its rich vanilla notes and creating that irresistible, scoopable consistency.
For best results, we recommend ripening the ice cream overnight in the freezer, as this step allows the flavors to deepen and the structure to stabilize, ensuring each bite delivers a perfectly balanced, homemade treat straight from your kitchen.
Make-Ahead Instructions
One of the joys of using our Oster Ice Cream Maker Recipe Book is the flexibility to prepare components in advance, ensuring we can whip up creamy vanilla ice cream with minimal effort on the day of serving. By planning ahead, we streamline the process and maintain that rich, velvety texture that makes homemade ice cream irresistible.
Preparing the Custard Base Ahead
To get a head start on our classic vanilla ice cream, we begin by making the custard base up to 2 days in advance. This step allows the flavors to meld beautifully, resulting in a more intense and smooth taste. Follow these steps for optimal results:
- Whisk and cook the base: In a medium saucepan, we whisk together 6 large egg yolks, 3/4 cup granulated sugar, and 2 teaspoons pure vanilla extract until the mixture is pale and creamy. Heat 2 cups whole milk and 2 cups heavy cream over medium heat until it simmers, then temper the egg mixture by slowly adding a ladle of the hot cream mixture while stirring constantly. Return everything to the saucepan and cook until it thickens to coat the back of a spoon – this typically takes 5 to 7 minutes.
- Cool and store: Immediately transfer the custard to a heatproof bowl and place it in an ice bath to cool rapidly. Once cooled to room temperature, cover the bowl with plastic wrap, pressing it directly onto the surface to prevent a skin from forming. Refrigerate for at least 4 hours or up to 48 hours. We find that overnight chilling enhances the flavor profile, making the ice cream even more decadent.
Freezing the Ice Cream Maker Bowl
For seamless churning, we always recommend freezing the Oster Ice Cream Maker bowl well in advance. This ensures even freezing and prevents any last-minute delays.
- Preparation timeline: Freeze the 2-quart bowl for a minimum of 12 to 24 hours before use. If we’re planning a batch, we mark our calendars to freeze it the night before for peak performance.
- Storage tips: Store the bowl in the back of the freezer where temperatures are consistently below 0°F (-18°C). Avoid opening the freezer frequently to maintain the cold environment, as this could extend freezing time.
Storing Finished Ice Cream
After churning our vanilla ice cream in the Oster Ice Cream Maker, we can prepare it for longer storage to enjoy later. Proper make-ahead techniques preserve the creamy consistency and prevent ice crystals.
| Storage Method | Duration | Key Tips |
|---|---|---|
| Freezer Storage | Up to 2 weeks | Transfer the churned ice cream to an airtight container, leaving 1/2 inch of headspace for expansion. Press a piece of plastic wrap onto the surface before sealing to minimize air exposure, then store at 0°F (-18°C) or below for best texture. |
| Ripening in Freezer | 4 to 24 hours | For optimal flavor, let the ice cream ripen in the freezer after churning. This step allows the mixture to firm up, enhancing creaminess – we aim for at least 4 hours if serving soon. |
By incorporating these make-ahead strategies, we maximize our time and elevate the homemade ice cream experience straight from the Oster Ice Cream Maker Recipe Book.
Tips and Variations
As we explore the Oster Ice Cream Maker Recipe Book further, we can enhance our homemade ice cream adventures with practical tips and creative variations. Building on our vanilla ice cream base, these suggestions help troubleshoot common issues, optimize results, and inspire flavor innovations for a truly personalized treat.
Essential Tips for Success
To ensure our ice cream turns out perfectly creamy and flavorful every time, here are key tips drawn from the Oster Ice Cream Maker guidelines:
- Chill ingredients thoroughly: Always refrigerate heavy cream, milk, and other liquids for at least 2 hours before use. This prevents uneven freezing and helps achieve a smoother texture in our Oster Ice Cream Maker.
- Avoid over-churning: Monitor the churning process closely—stop after 20-25 minutes when the mixture reaches a soft-serve consistency. Over-churning can lead to a grainy result, so use a timer for precision.
- Experiment with add-ins timing: For mix-ins like chocolate chips or nuts, fold them in during the last 5 minutes of churning. This distributes them evenly without compromising the rich, velvety mouthfeel we love in homemade ice cream.
- Troubleshoot temperature issues: If your ice cream isn’t setting properly, ensure the freezer bowl is frozen for a minimum of 12-24 hours beforehand. Warmer kitchens may require additional chilling time to maintain that ideal frozen state.
- Storage for peak freshness: After churning, transfer ice cream to an airtight container and freeze for at least 4 hours. To prevent ice crystals, press parchment paper directly onto the surface before sealing.
| Tip Category | Recommended Timeframe | Potential Benefit |
|---|---|---|
| Ingredient Chilling | 2 hours minimum | Smoother texture and faster freezing |
| Freezer Bowl Prep | 12-24 hours | Even churning and reduced risk of melting |
| Ripening Ice Cream | 4-24 hours post-churn | Enhanced flavor depth and creamier consistency |
Flavor Variations to Customize Your Creations
With the classic vanilla recipe as our foundation, we can easily adapt it using ingredients from the Oster Ice Cream Maker Recipe Book. These variations allow us to cater to different tastes and dietary needs while keeping the process straightforward.
- Chocolate Lover’s Twist: Swap half the sugar for cocoa powder and add 1/2 cup of melted dark chocolate to the custard base. The result is a decadent, indulgent chocolate ice cream that pairs perfectly with our Oster maker’s efficient churning.
- Fruit-Infused Options: Incorporate fresh berries or citrus zest—try 1 cup of mashed strawberries—for a refreshing burst. For example, strawberry variation yields a vibrant, tangy sweetness that highlights the natural flavors without overpowering the creamy base.
- Vegan Adaptation: Replace dairy with coconut milk and use aquafaba as an egg substitute. This creates a dairy-free version that’s equally light and airy, ideal for those seeking plant-based alternatives as outlined in the recipe book.
- Low-Sugar Version: Reduce granulated sugar by 25% and add a natural sweetener like stevia. We recommend tasting the base before churning to maintain that balanced, subtle sweetness while cutting calories.
- Nutty or Exotic Add-Ins: Enhance with 1/2 cup of toasted almonds or spices like cinnamon for added crunch and warmth. These variations transform simple vanilla into complex, aromatic delights that reflect seasonal inspirations.
By incorporating these tips and variations, we maximize the versatility of our Oster Ice Cream Maker, turning every batch into a customized masterpiece that’s as fun to make as it is to enjoy.
Conclusion
We’ve explored how the Oster Ice Cream Maker Recipe Book turns simple ingredients into delightful treats right in our kitchens. It’s a game-changer for anyone eager to whip up custom flavors with ease.
By following these steps, we’re not just making ice cream—we’re creating memorable moments. Let’s dive in and enjoy the creamy rewards of our homemade efforts.
Frequently Asked Questions
What is the Oster Ice Cream Maker Recipe Book?
The Oster Ice Cream Maker Recipe Book is a guide filled with simple recipes for homemade ice cream. It helps turn your kitchen into an ice cream parlor with classic and innovative flavors, using straightforward ingredients and methods. Perfect for beginners and enthusiasts alike, it emphasizes easy customization for a variety of tastes.
What are the key ingredients for classic vanilla ice cream?
Key ingredients include chilled heavy cream, whole milk, granulated sugar, pure vanilla extract, and large egg yolks. These create a rich, creamy texture when combined. Follow the book’s guidelines for measurements to ensure a smooth custard base that churns into delicious ice cream.
How do I set up the Oster Ice Cream Maker?
Start with a 2-quart Oster Ice Cream Maker and a pre-frozen freezer-safe bowl. Assemble the mixing paddle, place the bowl in the machine, and plug it in. Use additional tools like a mixing bowl, measuring cups, spatula, and timer. Freeze the bowl for at least 24 hours beforehand for even freezing and mixing.
What are the steps to make vanilla ice cream?
Whisk egg yolks and sugar until smooth, then heat milk and cream. Temper the eggs by slowly adding the hot mixture, cook until thickened, and cool completely. Churn in the Oster Ice Cream Maker for about 20-30 minutes until creamy. Finally, freeze for several hours or overnight for the best texture.
Can I make the ice cream base ahead of time?
Yes, prepare the custard base up to 48 hours in advance to enhance flavor and texture. Whisk and cook the mixture as directed, then cool and store in an airtight container in the fridge. This streamlines the process, allowing you to churn and freeze when ready for fresh homemade ice cream.
How should I store homemade ice cream?
Store in an airtight container in the freezer for up to two weeks. For optimal texture, let it ripen overnight after churning. Press plastic wrap directly on the surface to prevent ice crystals, and keep at 0°F (-18°C) for creaminess. Thaw slightly before serving for the best scoop.
What tips can help me make better homemade ice cream?
Chill ingredients thoroughly before starting, avoid over-churning to prevent a grainy texture, and add mix-ins like nuts or chocolate at the end. Use a timer for precision and troubleshoot temperature issues by ensuring your freezer is cold enough. These tips from the recipe book ensure creamy results every time.
How can I customize ice cream flavors?
Experiment with variations like adding cocoa for chocolate, fresh fruits for infusions, or plant-based milks for vegan options. Try low-sugar versions with alternatives like honey, or mix in nuts and exotic add-ins. The Oster book provides ideas to adapt recipes, making it easy to create personalized flavors at home.