
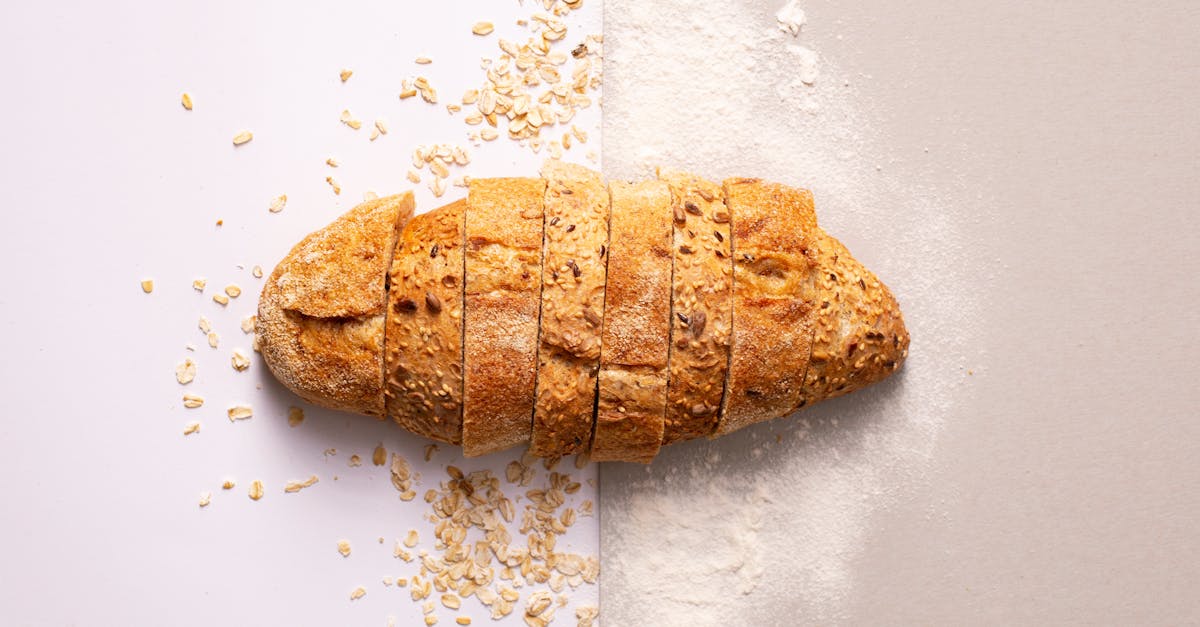
We’ve fallen in love with our oat tortilla recipe, a fresh take on the classic wrap that brings wholesome goodness to your table. Made from hearty oats, it’s a simple swap for traditional flour versions and packs in fiber and nutrients for a healthier bite.
Perfect for gluten-free diets or busy weeknights, these tortillas are versatile enough to cradle your favorite fillings. Join us as we dive into this easy recipe that’ll elevate your meals without the fuss.
Ingredients
In our oat tortilla recipe, we focus on wholesome, nutrient-rich ingredients that make this gluten-free option both simple and satisfying. Below, we’ve listed the ingredients in the order they’re typically used, with prep specifics for accuracy.
- Oat flour (2 cups, made from grinding rolled oats in a blender for a fine texture, ensuring it’s gluten-free certified if needed)
- Water (1 cup, lukewarm to help with binding and creating a pliable dough)
- Olive oil (2 tablespoons, for added moisture and a subtle flavor that enhances the tortillas’ flexibility)
- Salt (½ teaspoon, fine sea salt to season and bring out the natural nuttiness of the oats)
- Optional: Garlic powder (½ teaspoon, freshly ground for a savory twist that pairs well with various fillings)
This selection keeps our oat tortillas hearty, fiber-packed, and ready for quick assembly in your kitchen.
Required Tools
To bring our oat tortilla recipe to life efficiently, we rely on a few essential tools that ensure smooth preparation and cooking. These items help us mix, shape, and cook the dough with precision, making the process straightforward even for beginners.
We have compiled a list of the key tools below, organized by their role in the recipe. Each tool is vital for achieving the perfect texture and consistency in our hearty, fiber-rich oat tortillas.
- Mixing Bowl: A medium-sized bowl for combining oat flour, water, and other ingredients. We suggest using a glass or stainless steel option for easy mixing and cleaning.
- Measuring Cups and Spoons: Accurate measurements are crucial for our recipe’s success. Use a set of dry measuring cups for flour and liquid measuring cups for water and oil to avoid inconsistencies.
- Whisk or Wooden Spoon: Ideal for stirring the dough mixture until smooth. A whisk works best for breaking up lumps in the oat flour.
- Rolling Pin: Essential for rolling out the dough into thin, even circles. We recommend a non-stick rolling pin to prevent sticking and ensure uniform tortillas.
- Skillet or Griddle: A non-stick skillet (about 10 inches) for cooking the tortillas to a golden brown. It provides even heat distribution, which is key for that perfect, pliable texture.
- Spatula: A flexible spatula for flipping the tortillas without tearing them. This tool helps us achieve an even cook on both sides.
By gathering these tools beforehand, we streamline the process from mixing to serving, allowing our oat tortilla recipe to shine as a quick and nutritious option for any meal.
Instructions
Now that we have gathered our wholesome ingredients and essential tools, we guide you through crafting these fiber-rich oat tortillas with ease and precision. Follow our step-by-step process to achieve soft, pliable results that elevate your meals.
Prepare the Oats
First, we measure out the oat flour—using 2 cups for this recipe—to ensure a hearty, nutrient-packed base. In a large mixing bowl, add the oat flour along with 1 teaspoon of salt and ½ teaspoon of optional garlic powder, stirring them together with a whisk to create an even, aromatic dry mix that promises a subtle, savory flavor.
Form the Dough
Next, we pour in 1 cup of water and 2 tablespoons of olive oil into the dry mix, using a wooden spoon to stir vigorously until the ingredients combine into a sticky dough. Knead the dough on a lightly floured surface for about 2 minutes until it feels smooth and elastic, developing a texture that’s easy to handle and full of that satisfying, earthy oat essence.
Roll and Cook the Tortillas
To shape the tortillas, we divide the dough into 8 equal portions, rolling each one into a ball before using a rolling pin to flatten it into a thin, 6-inch circle on a floured surface. Heat a non-stick skillet over medium heat, cook each tortilla for 1-2 minutes per side until golden brown and lightly puffed with a warm, toasty aroma, then use a spatula to flip and ensure even cooking for that perfect, flexible finish.
Make-Ahead and Storage
One of the best features of our oat tortilla recipe is how easily it adapts to busy lifestyles, allowing us to prepare batches in advance for quick meals throughout the week. By planning ahead, we can streamline cooking and maintain that fresh, hearty texture without compromising on flavor or nutrition.
Make-Ahead Tips
We recommend preparing the dough or tortillas ahead to save time on hectic days. Start by mixing and kneading the dough as outlined in our instructions, then wrap it tightly in plastic wrap or store it in an airtight container. This make-ahead dough can rest in the refrigerator for up to 24 hours, giving the oats time to hydrate fully and develop a more robust, nutty flavor.
For fully cooked tortillas, we suggest rolling and cooking a larger batch right after preparing the dough. Once cooled, stack the tortillas with parchment paper between each one to prevent sticking. This method lets us have ready-to-use oat tortillas that retain their flexible, golden-brown appeal, making them perfect for wraps, tacos, or breakfast roll-ups.
Storage Guidelines
Proper storage is key to preserving the freshness and nutritional benefits of our oat tortillas, as they are packed with fiber-rich oats that can dry out if not handled correctly. We always opt for airtight containers or resealable bags to lock in moisture and extend shelf life.
To help us track storage options effectively, here’s a quick reference table:
| Storage Method | Duration | Key Tips for Best Results |
|---|---|---|
| Refrigerator | Up to 5 days | Store in an airtight container; reheat in a dry skillet for 30 seconds per side to restore warmth and flexibility without sogginess. |
| Freezer | Up to 3 months | Wrap individually in plastic or use freezer-safe bags; thaw in the refrigerator overnight and refresh in a skillet to maintain that crisp-yet-pliable texture we love. |
Always check for signs of spoilage like off odors or mold before use, and avoid overloading the storage container to prevent the tortillas from becoming brittle. By following these steps, we ensure our oat tortillas stay delicious and ready for any meal.
Conclusion
We’re thrilled you’ve explored our oat tortilla recipe with us
It’s a game-changer for nutritious eating without the fuss
Experiment with it in your meals and enjoy the benefits
We know it’ll become a staple in your kitchen routine
Frequently Asked Questions
What are oat tortillas and why should I try them?
Oat tortillas are a nutritious twist on traditional flour tortillas, made primarily from oat flour for a hearty, fiber-rich option. They’re perfect for gluten-free diets and add a wholesome boost to meals like wraps or tacos. Try them for their health benefits, including high fiber and nutrients, making them an easy, delicious alternative for quick weeknight dinners.
Are oat tortillas gluten-free?
Yes, oat tortillas are naturally gluten-free as long as you use certified gluten-free oat flour. This makes them ideal for those with gluten sensitivities or celiac disease. They’re packed with fiber and nutrients, offering a healthier swap for regular tortillas without sacrificing taste or flexibility.
What ingredients are needed for this oat tortilla recipe?
You’ll need 2 cups of oat flour, water, olive oil, salt, and optional garlic powder for flavor. These simple, nutrient-rich ingredients create a hearty dough that’s easy to prepare. Combine them to make soft, fiber-packed tortillas that enhance any meal while keeping things gluten-free and wholesome.
How do I prepare oat tortillas step by step?
Start by mixing 2 cups of oat flour with salt and garlic powder if desired. Add water and olive oil to form a dough, knead until smooth, then divide into eight balls. Roll each into 6-inch circles and cook in a non-stick skillet for 1-2 minutes per side until golden and flexible. It’s a straightforward process for tasty, homemade results.
What tools are required to make oat tortillas?
Essential tools include a mixing bowl, measuring cups and spoons, a whisk or wooden spoon, a rolling pin, a non-stick skillet, and a spatula. These items help streamline mixing, shaping, and cooking, making the recipe quick and efficient for any kitchen setup.
Can I make oat tortillas in advance?
Yes, you can prepare the dough or fully cook the tortillas ahead of time. This is great for busy schedules, allowing you to have nutritious options ready. Simply follow the recipe and store as directed to maintain freshness and flavor for your meals throughout the week.
How should I store homemade oat tortillas?
Store cooked oat tortillas in an airtight container in the fridge for up to 5 days or freeze for up to 2 months. Let them cool completely before storing to preserve texture and nutrients. Reheat in a skillet or microwave for the best results, keeping them fresh and convenient for future use.