
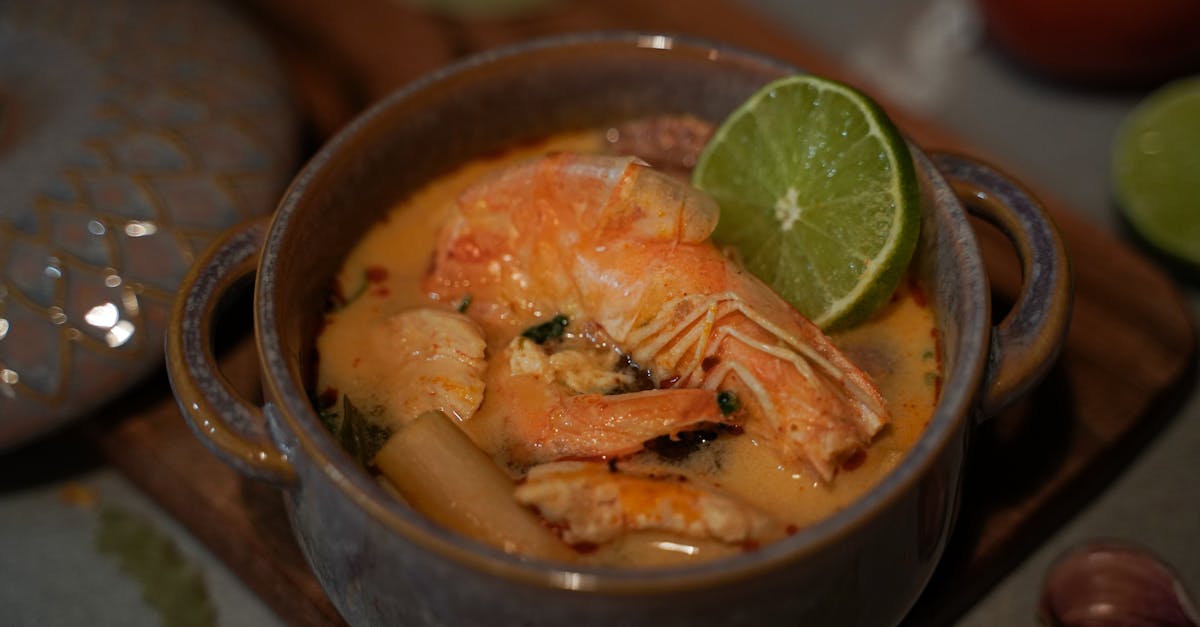
We’ve always been fans of Outback Steakhouse’s coconut shrimp—those golden, crispy bites with a tropical twist that make any meal feel like a vacation. Inspired by the restaurant’s popular appetizer we love recreating it at home for a fun and flavorful treat.
This copycat recipe brings the magic of Outback’s version straight to your kitchen offering juicy shrimp coated in sweet coconut and served with a zesty dip. We’re excited to share how simple it is to whip up this crowd-pleaser that’s perfect for gatherings or weeknight dinners.
Ingredients
We love how these simple ingredients transform ordinary shrimp into the irresistible, golden-crisp delight of Outback Steakhouse’s coconut shrimp. Let’s break them down to ensure our homemade version captures that tropical flavor and texture perfectly.
Shrimp and Coating Ingredients
For the shrimp and its crunchy coconut coating, we start with the base and build up to the signature elements. Here’s the list, ordered as they’ll be used in preparation:
- 1 pound large shrimp, peeled and deveined (fresh or thawed, for that juicy bite that mimics the restaurant’s quality)
- 1 cup all-purpose flour, sifted (this forms the first layer of the coating for even adhesion)
- 2 large eggs, beaten (used next to help the coating stick and add moisture)
- 1 cup panko breadcrumbs (provides extra crunch to complement the coconut)
- 1 cup sweetened shredded coconut, finely chopped (the star element that delivers that sweet, tropical essence)
- 1 teaspoon salt (season to enhance flavors right before coating)
- ½ teaspoon black pepper, freshly ground (adds a subtle kick as we mix the dry ingredients)
- Vegetable oil, for frying (enough to fill a deep pan to about 2 inches, ensuring the shrimp fries to a perfect golden brown)
Dipping Sauce Ingredients
- ½ cup orange marmalade (the base for a sweet and citrusy foundation)
- 2 tablespoons prepared horseradish (adds the spicy zest that balances the sweetness)
- 1 tablespoon Dijon mustard (incorporated next for a sharp, tangy depth)
- 1 tablespoon fresh lime juice (squeezed in last to brighten and tie the flavors together)
- ¼ teaspoon salt (a final touch to season and enhance the overall sauce)
Tools and Equipment
To bring our Outback Steakhouse-inspired coconut shrimp to life, we rely on a few essential tools and equipment that make the preparation smooth and efficient. These items help us achieve that perfect golden, crispy coating while keeping the process straightforward and safe.
Essential Kitchen Tools
We’ll start with the basics for prepping and cooking:
- Mixing bowls: We need at least three medium-sized bowls—one for the flour mixture, one for the beaten eggs, and one for combining panko breadcrumbs and shredded coconut. This setup ensures our breading station stays organized and mess-free.
- Measuring cups and spoons: Accurate measurements are key for our ingredients, so we use a set of dry measuring cups and spoons to portion out flour, eggs, and seasonings precisely.
- Whisk: A simple whisk helps us blend the dipping sauce ingredients smoothly, incorporating the orange marmalade, horseradish, and lime juice without lumps.
Cooking Equipment
For the frying and handling steps, these tools are crucial:
- Deep fryer or large skillet: We prefer a deep fryer for even cooking and that authentic restaurant-style crispiness, but a heavy-bottomed skillet works if filled with about 2 inches of vegetable oil. This ensures the shrimp fry evenly to a golden brown.
- Tongs or slotted spoon: These are indispensable for safely flipping and removing the shrimp from hot oil, preventing splatters and maintaining the coating’s integrity.
- Cutting board and sharp knife: We use a sturdy cutting board paired with a sharp knife to devein and prepare the large shrimp, making the process quick and hygienic.
- Thermometer: An instant-read thermometer helps us monitor the oil temperature, ideally keeping it at 350°F for optimal frying—overheating can burn the coconut coating, while underheating makes it greasy.
By having these tools ready, we streamline our workflow from prep to plate, ensuring every batch of coconut shrimp turns out as delicious and professional as the original Outback version.
Instructions
Now that we have our ingredients and tools assembled, let’s create our irresistible Outback Steakhouse Coconut Shrimp with straightforward steps that deliver juicy, crispy results. We’ll focus on precision and technique to achieve that signature golden crunch and tropical flavor.
Prep the Shrimp
First, we rinse 1 pound of large shrimp under cold water to remove any debris, then pat them dry with paper towels for optimal coating adhesion. Next, we peel the shrimp, leaving the tails intact for easy handling, and carefully devein them using a sharp knife along the back to ensure a clean, enjoyable bite. For added tenderness, we butterfly the shrimp by making a shallow cut along the deveined edge, which helps the coating cling better and allows the shrimp to cook evenly.
Make the Coconut Coating
We start by setting up a breading station with three shallow bowls to streamline the process. In the first bowl, we whisk together 1 cup of all-purpose flour, 1 teaspoon of salt, and ½ teaspoon of black pepper to form a seasoned base. In the second bowl, we beat 2 large eggs until smooth, creating a sticky binder that locks in flavors. Finally, in the third bowl, we combine 1 cup of panko breadcrumbs with 1 cup of sweetened shredded coconut, mixing thoroughly to craft a crunchy, tropical topping that promises a delightful contrast of textures.
Fry the Shrimp
We heat 2 cups of vegetable oil in a large skillet or deep fryer to 350°F (175°C), using an instant-read thermometer for accuracy to achieve that perfect golden crispiness without sogginess. Dredging each prepared shrimp first in the flour mixture, then dipping it into the beaten eggs, and finally coating it generously with the coconut mixture, we ensure even coverage for a satisfying crunch. Carefully, we fry the shrimp in batches for 2-3 minutes per side, flipping once with tongs until they turn a deep golden brown and the shrimp inside becomes tender and succulent, filling the kitchen with an irresistible aroma of toasted coconut and seafood.
Prepare the Dipping Sauce
In a small mixing bowl, we combine ½ cup of orange marmalade, 2 tablespoons of prepared horseradish, 1 tablespoon of Dijon mustard, 1 tablespoon of fresh lime juice, and ¼ teaspoon of salt, whisking vigorously until the mixture is smooth and well-blended. This zesty sauce offers a vibrant balance of sweet, spicy, and tangy notes that complements the shrimp’s crisp exterior, elevating each bite with a burst of tropical freshness. We let the sauce chill in the refrigerator for at least 10 minutes to allow the flavors to meld perfectly before serving.
Make-Ahead Instructions
One of the best aspects of our Outback Steakhouse Coconut Shrimp recipe is its flexibility for meal prep. We can prepare components in advance to save time while preserving that irresistible golden crispiness and tropical coconut flavor. Below, we outline the key steps for making ahead, ensuring our shrimp remain juicy and the dipping sauce stays zesty.
Preparing the Shrimp and Breading
To streamline our cooking process, we recommend prepping the shrimp and breading station ahead of time:
- Peel and devein the shrimp: Start by rinsing and patting dry 1 pound of large shrimp. Peel them while leaving the tails intact, then remove the veins. This step can be done up to 24 hours in advance. Store the prepared shrimp in an airtight container in the refrigerator to maintain their fresh, succulent texture.
- Assemble the breading mixture: In a shallow bowl, combine 1 cup of panko breadcrumbs with 1 cup of sweetened shredded coconut, along with ½ teaspoon of salt and ¼ teaspoon of black pepper. We can mix this up to 2 days ahead and keep it in a sealed bag or container at room temperature. This ensures our coconut shrimp coating is ready for a quick dredge, locking in that crunchy, tropical essence.
Making the Dipping Sauce
The zesty dipping sauce is perfect for advance preparation, as chilling enhances its bold flavors:
- Whisk together ½ cup of orange marmalade, 2 tablespoons of prepared horseradish, 1 tablespoon of Dijon mustard, 1 tablespoon of fresh lime juice, and a pinch of salt in a small bowl. Once blended, transfer the sauce to an airtight container and refrigerate it for up to 3 days. This allows the tangy, spicy notes to meld, creating a vibrant contrast to the crispy shrimp.
Storage and Reheating Tips
For optimal results, we can fry the shrimp ahead and reheat them without losing their signature golden-brown exterior. Here’s how:
- Frying and storing: After breading and frying the shrimp as per our step-by-step instructions, let them cool completely on a wire rack. Place them in a single layer in an airtight container, separating layers with parchment paper to prevent sticking. Refrigerate for up to 2 days or freeze for up to 1 month. Freezing helps retain the shrimp’s moist interior and coconutty crunch.
- Reheating for peak freshness: To reheat refrigerated shrimp, preheat our oven to 400°F and bake on a wire rack for 5-7 minutes until heated through and crispy. For frozen shrimp, thaw in the refrigerator overnight first, then reheat as above. This method revives the shrimp’s delightful texture, ensuring they pair perfectly with the chilled dipping sauce.
| Storage Method | Duration | Key Benefits |
|---|---|---|
| Refrigeration | Up to 2 days | Maintains moisture and flavor |
| Freezing | Up to 1 month | Preserves crispiness for later |
Conclusion
We’ve loved sharing this take on Outback Steakhouse’s coconut shrimp, bringing that tropical flair right to our kitchens. It’s a simple way to impress at any gathering or enjoy a quick treat.
By following our tips, you’ll nail that crispy texture and zesty dip every time. We’re confident it’ll become a favorite in your home too, so give it a try and savor the results.
Frequently Asked Questions
What is Outback Steakhouse’s coconut shrimp recipe?
Outback’s coconut shrimp is a crispy, golden appetizer with juicy shrimp coated in sweet coconut, served with a zesty dipping sauce. This copycat recipe lets you recreate it at home using simple ingredients like shrimp, flour, eggs, panko, and shredded coconut for frying. It’s perfect for gatherings or quick dinners, offering a tropical vibe with minimal effort.
What ingredients are needed for the coconut shrimp?
You’ll need large shrimp, all-purpose flour, beaten eggs, panko breadcrumbs, sweetened shredded coconut, salt, black pepper, and vegetable oil for frying. For the dipping sauce, gather orange marmalade, prepared horseradish, Dijon mustard, fresh lime juice, and salt. These ingredients ensure a crispy coating and tangy flavor, making the dish easy to prepare.
How do I make the dipping sauce?
Whisk together orange marmalade, prepared horseradish, Dijon mustard, fresh lime juice, and a pinch of salt in a bowl. Mix until smooth, then chill for at least 30 minutes to let flavors meld. This simple sauce takes about 5 minutes to prepare and complements the coconut shrimp with its zesty, tropical taste.
What tools are required to make this recipe?
Essential tools include mixing bowls for the breading station, measuring cups and spoons for accurate portions, a whisk for the sauce, a deep fryer or large skillet for frying, tongs or a slotted spoon for handling shrimp, a cutting board, sharp knife for prep, and an instant-read thermometer for oil temperature. These keep the process efficient and safe.
Can I prepare the coconut shrimp ahead of time?
Yes, peel and devein shrimp up to 24 hours in advance, storing in an airtight container. Prepare the breading mixture 2 days ahead and keep at room temperature. Make the dipping sauce up to 3 days ahead and refrigerate. Fried shrimp can be stored refrigerated for 2 days or frozen for 1 month, then reheated in a 400°F oven for crispiness.
How should I store and reheat leftover coconut shrimp?
Store cooled shrimp in an airtight container in the fridge for up to 2 days or freeze for up to 1 month. To reheat, bake at 400°F for 10-15 minutes until crispy—avoid microwaving to prevent sogginess. This method helps maintain the golden texture and flavor for the best results.