
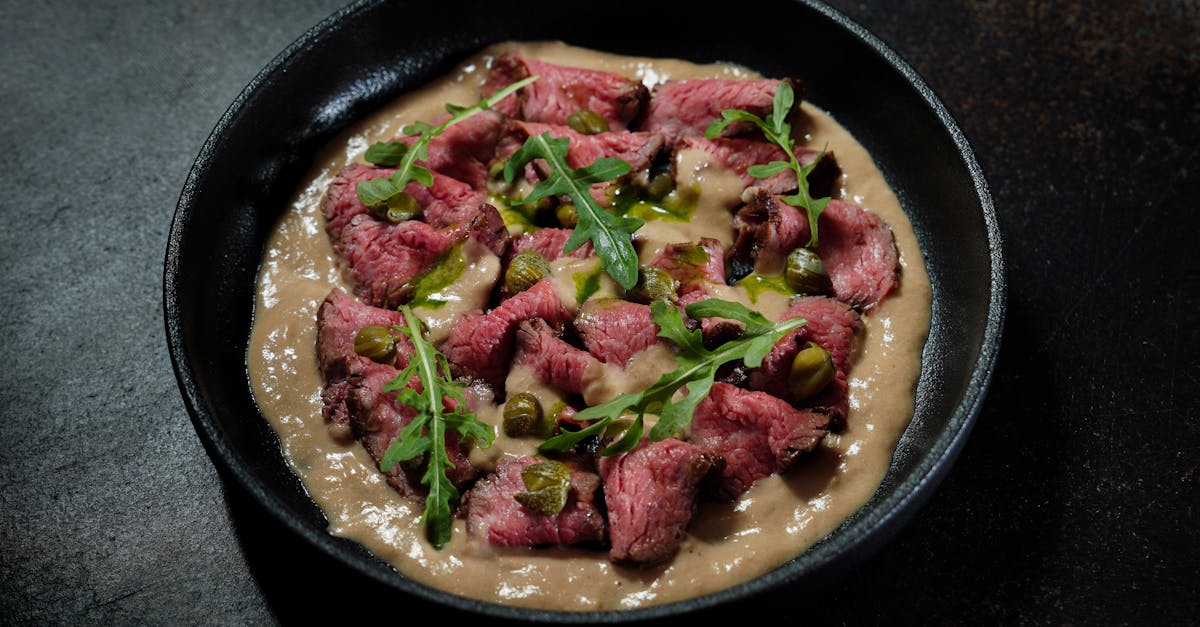
We’ve all experienced the disappointment of dry roast beef, but that’s where our brine recipe steps in to save the day. It transforms ordinary cuts into juicy, flavorful masterpieces that lock in moisture and enhance taste with minimal effort. As food enthusiasts, we’re excited to share this straightforward method that’s perfect for elevating your next family dinner.
Ingredients
In our brine for roast beef recipe, we select high-quality ingredients to infuse maximum flavor and moisture, transforming even the toughest cuts into tender, juicy masterpieces. Below, we list the ingredients in the order they are typically prepared and added, with precise measurements and prep notes for accuracy.
- Water: 4 cups – Use cold, filtered water as the base to dissolve salts and sugars evenly.
- Kosher salt: 1/4 cup – This is our go-to for brining; dissolve completely to enhance seasoning without overpowering the meat.
- Brown sugar: 1/4 cup – Adds a subtle sweetness that balances the salt; pack it lightly for consistent results.
- Garlic cloves: 4 cloves, minced – Fresh garlic infuses aromatic depth; prepare by crushing or mincing just before adding.
- Fresh thyme: 2 tablespoons, leaves stripped from stems – Provides an earthy, herbal note; use fresh for the best flavor impact.
- Black peppercorns: 1 tablespoon – Whole peppercorns release their spicy essence gradually; crush lightly if you prefer more intensity.
- Bay leaves: 2 leaves – These add a woody, aromatic layer; ensure they are whole and fresh for optimal infusion.
This combination ensures our brine delivers a moisture-locking effect, making your roast beef succulent and full of flavor.
Instructions
We will walk you through the straightforward steps to prepare and apply our brine for roast beef, transforming tough cuts into tender, succulent masterpieces packed with flavor.
Prepare the Brine
To create this flavorful brine that locks in moisture and enhances the taste of your roast beef, follow these steps carefully. We start by combining the key ingredients from our earlier list to build a robust mixture.
- In a large pot, add 4 cups of cold filtered water and stir in 1/2 cup of kosher salt until fully dissolved. This forms the base that draws moisture into the meat.
- Next, mix in 1/2 cup of brown sugar for a sweet balance that caramelizes during roasting, creating a delicious crust.
- Add 4 cloves of minced garlic, a handful of fresh thyme sprigs, 1 tablespoon of black peppercorns, and 2 bay leaves to the pot. These herbs and spices infuse the brine with aromatic notes that penetrate deeply.
- Heat the mixture over medium heat until it simmers gently releasing the earthy scents of thyme and garlic that will make your kitchen smell irresistible. Remove from heat and let it cool completely to ensure it doesn’t cook the beef prematurely.
Once prepared, this brine solution will work its magic, tenderizing the meat and delivering a burst of savory flavors.
Brine the Beef
Now that our brine is ready, we move on to submerging the roast beef to achieve that juicy, flavorful result. This step is crucial for even flavor distribution and moisture retention.
- Select a 3-5 pound cut of roast beef such as a chuck or brisket, and pat it dry with paper towels to help the brine adhere effectively.
- Place the beef in a large, non-reactive container or resealable plastic bag, then pour the cooled brine over it until the meat is fully submerged allowing the herbs and spices to envelop it in a symphony of tastes.
- Cover the container and refrigerate the beef in the brine for 12 to 24 hours, depending on the cut’s thickness—thicker pieces benefit from the longer soak to maximize tenderness.
- After brining, remove the beef from the solution and rinse it briefly under cold water to remove excess salt. Pat it dry again before roasting, ensuring the surface is ready for a perfect sear.
By following these precise steps, your roast beef will emerge from the oven with enhanced juiciness and a depth of flavor that elevates every bite.
Equipment Needed
Before we dive into the tools that make preparing our brine for roast beef straightforward and efficient, let’s ensure you have everything on hand to achieve that perfectly juicy, flavorful result. Having the right equipment streamlines the process, from heating the brine mixture to submerging and refrigerating the beef for optimal moisture retention.
We recommend the following essential items, organized by their role in the recipe:
- Large Stock Pot: Ideal for heating and simmering the brine. Use a pot that holds at least 4 quarts to accommodate the full batch of cold filtered water, kosher salt, and other ingredients without overflow.
- Measuring Cups and Spoons: Precision is key for accurate measurements. Opt for a set that includes 1-cup, 1/2-cup, and various spoon sizes to measure brown sugar, kosher salt, and minced garlic exactly as needed.
- Stirring Spoon or Whisk: For even dissolution and mixing. A long-handled wooden spoon or stainless steel whisk works best to blend the salt and sugar into the water until fully dissolved, ensuring uniform flavor infusion.
- Large Container or Brining Bag: Crucial for submerging the beef. Choose a non-reactive container like a glass bowl or food-grade plastic bag that can hold a 3-5 pound cut of chuck or brisket, allowing the brine to fully surround the meat for even absorption.
- Refrigerator with Space: Essential for safe, effective brining. Ensure your fridge has enough room to store the container, maintaining a consistent temperature to prevent bacterial growth during the 12 to 24-hour brining period.
With these tools, we guarantee a seamless transition from preparing the aromatic brine to achieving tender, succulent roast beef that impresses at every family dinner.
Make-Ahead Instructions
To streamline our roast beef preparation and ensure maximum flavor without last-minute rushes, we can make key elements of this brine recipe ahead of time. This approach allows the flavors to develop fully while keeping the beef tender and juicy.
Preparing the Brine in Advance
We recommend mixing the brine solution up to 48 hours before use. Start by combining kosher salt, brown sugar, minced garlic, fresh thyme, black peppercorns, and bay leaves in a large stock pot with cold filtered water. Heat the mixture until it simmers, stirring to dissolve the solids completely. Once cooled to room temperature, transfer it to a clean, airtight container and refrigerate it immediately. This step not only saves time but also enhances the infusion of aromatic herbs and spices, resulting in a more flavorful brine.
Storing and Handling Brined Beef
If we want to brine the beef ahead, select a 3-5 pound cut like chuck or brisket, pat it dry, and submerge it fully in the prepared brine. Refrigerate the setup in a large non-reactive container for 12 to 24 hours—the optimal range for moisture retention and flavor penetration. For extended make-ahead options, we can brine the beef up to 24 hours in advance, then rinse, pat dry, and store it wrapped tightly in the refrigerator for an additional 12 hours before roasting.
Here’s a quick reference table for make-ahead timelines to guide our planning:
| Make-Ahead Task | Recommended Time Frame | Key Benefits |
|---|---|---|
| Prepare brine mixture | Up to 48 hours | Allows flavors to meld and simplifies day-of prep |
| Brine the beef | 12 to 24 hours | Ensures even seasoning and tenderness without over-brining |
| Store brined beef post-rinse | Up to 12 hours | Maintains juiciness while freeing up kitchen space |
Always prioritize food safety by using a refrigerator set to 40°F (4°C) or below, and discard any brine after use to prevent bacterial growth. By following these steps, we guarantee a succulent roast beef that impresses every time.
Conclusion
We’ve shown you how brining elevates roast beef to new heights of flavor and tenderness. It’s a game-changer that turns everyday meals into memorable feasts for family and friends.
By incorporating this technique we’ll help you achieve consistently juicy results every time. Give it a try and watch your dinners become the highlight of your week.
Frequently Asked Questions
What is a brine recipe for roast beef?
A brine recipe for roast beef is a simple saltwater solution that infuses meat with flavor and moisture. It uses ingredients like kosher salt, brown sugar, garlic, thyme, peppercorns, and bay leaves mixed in cold filtered water. This method helps prevent dry meat, turning even tough cuts like chuck or brisket into juicy, tender roasts perfect for family dinners.
What ingredients are needed for the brine?
The key ingredients include cold filtered water, kosher salt, brown sugar, minced garlic, fresh thyme, black peppercorns, and bay leaves. These high-quality items are selected to enhance flavor and tenderness. Measure them accurately for the best results in your roast beef preparation.
How do I prepare the brine?
Start by dissolving kosher salt in cold filtered water, then add brown sugar, garlic, thyme, peppercorns, and bay leaves. Heat the mixture until it simmers, stirring well, then cool it completely. This ensures the flavors blend properly before submerging your beef for brining.
How long should I brine a 3-5 pound cut of beef?
Brine a 3-5 pound cut like chuck or brisket for 12 to 24 hours in the refrigerator. This time allows optimal flavor absorption and moisture retention. After brining, rinse and dry the meat before roasting for the best results.
What equipment is needed for brining beef?
You’ll need a large stock pot for mixing, measuring cups and spoons for accuracy, a stirring spoon or whisk, a non-reactive container or brining bag, and enough refrigerator space. These basics make the process straightforward and effective.
Can I make the brine ahead of time?
Yes, prepare the brine up to 48 hours in advance to let flavors develop. Store it in the fridge until use. For the beef, brine it 12-24 hours ahead, then rinse and store for up to 12 hours before roasting, ensuring food safety and convenience.
How does brining improve roast beef?
Brining enhances roast beef by adding moisture and seasoning deep into the meat, making it juicier and more flavorful. It breaks down proteins in tougher cuts, resulting in tender, succulent results that elevate ordinary dinners to impressive meals.