
We love diving into the wild world of game meats, and antelope backstrap stands out as a true gem. This tender cut from the antelope offers a lean, flavorful alternative to beef, perfect for anyone craving a taste of the great outdoors.
Hailing from North American plains, it’s a hunter’s favorite packed with protein and minimal fat. In our recipe, we’ll show you how to prepare it simply for a mouthwatering dish that’s both nutritious and exciting.
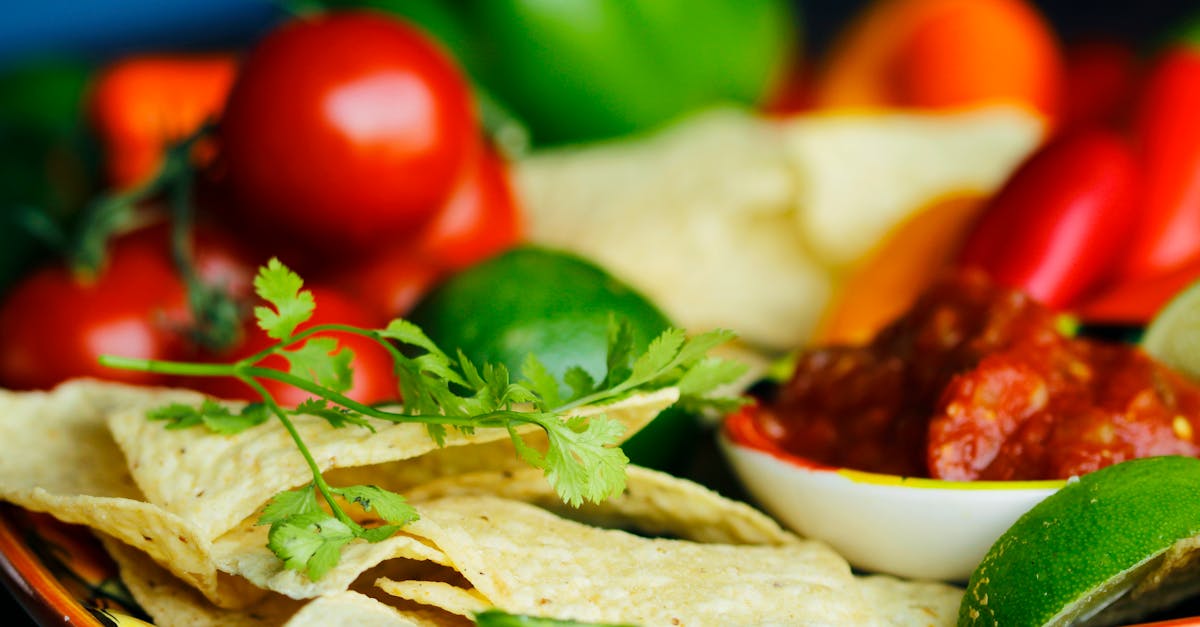
Ingredients
As passionate food enthusiasts, we’re excited to dive into the key components for our Antelope Backstrap Recipe. This lean, flavorful cut from wild game offers a nutritious twist on traditional meats, and selecting the right ingredients ensures a tender, juicy result. Below, we list the ingredients in the order they’re typically used—from preparation to cooking—for a straightforward, delicious meal that highlights the meat’s natural qualities.
- Antelope Backstrap: 1 pound (about 450 grams), trimmed of any silver skin and fat for optimal tenderness—we recommend sourcing from a reputable hunter or butcher for the freshest flavor.
- Olive Oil: 2 tablespoons, used as the base for marinating to lock in moisture and enhance the meat’s rich taste.
- Garlic: 3 cloves, minced—this aromatic adds a robust, earthy depth that pairs perfectly with the gamey notes of the backstrap.
- Fresh Rosemary: 1 tablespoon, finely chopped—this herb infuses a fragrant, pine-like essence that complements the outdoor-inspired origins of antelope.
- Soy Sauce: ¼ cup, for a savory umami boost that tenderizes the meat during marination.
- Lemon Juice: 2 tablespoons, freshly squeezed to provide acidity that balances the richness and prevents the meat from drying out.
- Salt and Freshly Ground Black Pepper: 1 teaspoon of salt and ½ teaspoon of pepper, added just before cooking to season and enhance the natural flavors without overwhelming them.
- Optional Vegetables: 1 cup of sliced onions and 1 cup of mushrooms, prepared and added during the searing step for a simple, nutritious accompaniment that elevates the dish’s overall appeal.
Tools You’ll Need
To bring our antelope backstrap recipe to life, we rely on a few essential tools that ensure precise preparation and cooking. These items help us handle the meat’s tenderness while enhancing flavors from the ingredients we discussed earlier.
- Knife: A sharp chef’s knife for trimming the antelope backstrap and slicing vegetables. We recommend one with a blade at least 8 inches long for clean, even cuts.
- Cutting Board: A sturdy wooden or plastic board to provide a safe surface for prep work. This keeps our workspace organized and prevents cross-contamination.
- Mixing Bowl: A medium-sized glass or stainless steel bowl for combining the marinade ingredients like olive oil, garlic, and soy sauce. It allows us to mix thoroughly for maximum flavor infusion.
- Measuring Cups and Spoons: Accurate tools for measuring liquids and spices, such as 2 tablespoons of lemon juice or 1 teaspoon of salt, to guarantee our recipe’s balance.
- Tongs: Long-handled metal tongs for flipping and handling the antelope backstrap during grilling or searing, ensuring we maintain its juicy texture without piercing the meat.
- Grill or Cast-Iron Skillet: Depending on our cooking method, a gas or charcoal grill for outdoor flavor, or a 12-inch cast-iron skillet for indoor searing to achieve that perfect char.
- Meat Thermometer: A digital instant-read thermometer to check the internal temperature of the antelope backstrap, targeting 130°F for medium-rare doneness to preserve its lean quality.
| Tool | Primary Use | Why It’s Essential for Our Recipe |
|---|---|---|
| Knife | Trimming and slicing | Ensures precise cuts for even cooking and tenderness. |
| Cutting Board | Prep surface | Provides stability and hygiene during ingredient handling. |
| Mixing Bowl | Marinade preparation | Facilitates even mixing of flavors to enhance the meat’s natural taste. |
| Measuring Cups and Spoons | Accurate measurements | Maintains recipe consistency for reproducible results. |
| Tongs | Handling meat | Prevents over-handling, locking in juices for a succulent finish. |
| Grill or Skillet | Cooking | Delivers the ideal sear or grill marks, amplifying the outdoor-inspired appeal. |
| Meat Thermometer | Temperature checking | Guarantees safe, optimal doneness without overcooking the lean cut. |
Instructions
Now that we have gathered our high-quality ingredients and essential tools, we will walk you through the straightforward steps to prepare a tender and flavorful antelope backstrap. Our method ensures the meat retains its natural juiciness while enhancing its gamey taste.
Prep Work
First, we trim the antelope backstrap to remove any silver skin or excess fat, using our sharp chef’s knife on a sturdy cutting board for precise cuts. This step is crucial for achieving a clean, even cook—aim for a 1-pound piece that’s evenly shaped. Next, we prepare the supporting ingredients in the order they’ll be used: mince 2 cloves of garlic, chop fresh rosemary (about 1 tablespoon), slice optional vegetables like 1 onion and 8 ounces of mushrooms into uniform pieces, and measure out ¼ cup olive oil, 2 tablespoons soy sauce, 1 tablespoon lemon juice, 1 teaspoon salt, and ½ teaspoon freshly ground black pepper into a mixing bowl. These preparations set the stage for a seamless cooking process, allowing the vibrant flavors to shine through.
Marinate the Backstrap
We begin by combining the marinade ingredients in our mixing bowl—whisk together the olive oil, minced garlic, fresh rosemary, soy sauce, lemon juice, salt, and black pepper until fully blended, creating a fragrant mixture that will tenderize and flavor the meat. Place the trimmed antelope backstrap into the bowl, ensuring it’s fully coated, then cover and refrigerate for at least 30 minutes or up to 2 hours for optimal infusion—this allows the herbs and acids to penetrate deeply, enhancing the meat’s natural leanness with a savory, herbaceous essence. If using vegetables, toss them in any remaining marinade for added depth.
Cook the Backstrap
Heat our grill or cast-iron skillet over medium-high heat until it reaches about 400°F, then lightly oil the surface to prevent sticking. Using long-handled tongs, we place the marinated antelope backstrap on the heat and sear it for 3-4 minutes per side, flipping once, until it develops a beautiful golden-brown crust that locks in the juices. To ensure perfection, insert a meat thermometer into the thickest part—remove it from the heat at 130°F for medium-rare, preserving the meat’s tender texture and rich, gamey flavor. If including vegetables, add them to the grill or skillet in the last 5 minutes, stirring occasionally until they caramelize with a smoky aroma.
Rest and Serve
After cooking, we transfer the antelope backstrap to a clean cutting board and let it rest for 5-10 minutes, allowing the juices to redistribute and ensure each bite is moist and flavorful—this resting period is key to avoiding dryness in this lean cut. Slice the meat against the grain into ½-inch thick pieces, arrange on plates with the optional grilled vegetables, and serve immediately to savor the warm, succulent texture and bold tastes that highlight this North American favorite.
Make-Ahead Instructions
To make our antelope backstrap recipe even more convenient, we recommend preparing certain elements in advance. This approach allows you to enjoy a flavorful, tender meal without last-minute rush, while preserving the meat’s rich, gamey taste and lean texture.
Preparing the Marinade Ahead of Time
We can prepare the marinade up to 24 hours in advance to let flavors meld perfectly. In a mixing bowl, combine 2 tablespoons of olive oil, 2 cloves of minced garlic, 1 tablespoon of fresh rosemary, 2 tablespoons of soy sauce, and 1 tablespoon of lemon juice. Stir until well blended, then store in an airtight container in the refrigerator. This step enhances the marinade’s depth, making it easier to infuse the antelope backstrap with bold, aromatic notes when you’re ready to cook.
Trimming and Marinating the Meat
For optimal results, trim the antelope backstrap up to 1 day ahead. Using a sharp chef’s knife, remove any silver skin or excess fat from 1 pound of backstrap, then place it in a resealable plastic bag or shallow dish. Pour the prepared marinade over the meat, ensuring it’s fully coated. Seal and refrigerate for at least 30 minutes or up to 24 hours—the longer marination time tenderizes the lean meat without overpowering its natural flavors. Remember, marinating beyond 24 hours can make the meat too soft, so monitor the time closely.
Cooking and Storing the Dish
If you want to cook the antelope backstrap fully ahead, sear it on a grill or cast-iron skillet until it reaches a medium-rare internal temperature of 130°F, as measured with a meat thermometer. Let it rest for 5-10 minutes, then slice thinly. For storage, cool the cooked meat quickly and transfer it to an airtight container. Refrigerate for up to 2 days or freeze for up to 3 months to maintain its juicy texture.
| Storage Method | Duration | Key Tips for Quality |
|---|---|---|
| Refrigeration | Up to 2 days | Wrap tightly to prevent drying; reheat gently in a skillet over low heat to avoid toughening the lean meat. |
| Freezing | Up to 3 months | Use freezer-safe bags; thaw overnight in the refrigerator before reheating to preserve the backstrap’s tender, succulent qualities. |
Adding Vegetables and Final Assembly
Prepare optional vegetables like sliced onions and mushrooms in advance by cleaning and chopping them up to 1 day ahead. Store them separately in the refrigerator to keep them fresh. When assembling, simply add these to the antelope backstrap during reheating for a burst of complementary flavors and textures, ensuring the dish remains vibrant and ready to serve.
Conclusion
We’ve loved sharing this antelope backstrap recipe as it’s a fantastic way to enjoy lean game meat with minimal effort. It’s perfect for turning your outdoor adventures into memorable meals that impress family and friends.
Remember we’re all about making cooking simple yet rewarding so you can savor that rich flavor every time. Give it a try and let us know how it turns out—we’re confident it’ll become a favorite in your kitchen.
Frequently Asked Questions
What is antelope backstrap?
Antelope backstrap is a tender, lean cut of meat from the antelope, often compared to beef for its rich, gamey flavor. It’s popular among hunters in North America and prized for its connection to the outdoors, offering a nutritious alternative to traditional meats.
What are the nutritional benefits of antelope backstrap?
Antelope backstrap is high in protein and low in fat, making it a healthy choice for those seeking lean game meats. It’s packed with essential nutrients, supporting muscle health and weight management, while providing a delicious, flavorful option for balanced diets.
What ingredients are needed for the antelope backstrap recipe?
You’ll need 1 pound of trimmed antelope backstrap, olive oil, minced garlic, fresh rosemary, soy sauce, lemon juice, salt, and black pepper. Optional additions include sliced onions and mushrooms for extra flavor. Focus on high-quality ingredients to ensure tenderness and taste.
What tools are essential for preparing antelope backstrap?
Key tools include a sharp chef’s knife for trimming, a cutting board, mixing bowl, measuring cups and spoons, long-handled tongs, and a grill or cast-iron skillet for cooking. A meat thermometer is crucial to reach 130°F for medium-rare perfection.
How do I prepare antelope backstrap?
Start by trimming and marinating the backstrap for at least 30 minutes with garlic, rosemary, soy sauce, and lemon juice. Sear it in a hot skillet or grill until it reaches 130°F for medium-rare, about 3-5 minutes per side. Let it rest before slicing for juicy results.
Can I make antelope backstrap ahead of time?
Yes, prepare the marinade up to 24 hours in advance and trim the meat a day ahead. Cook and store in the fridge for up to 2 days or freeze for up to 3 months. Reheat gently with optional vegetables for the best flavor and texture.
How should I store leftover antelope backstrap?
Refrigerate leftovers in an airtight container for up to 2 days, or freeze for up to 3 months. Thaw in the fridge before reheating to maintain moisture. Add fresh vegetables during reheating to enhance flavors and ensure a delicious meal.