
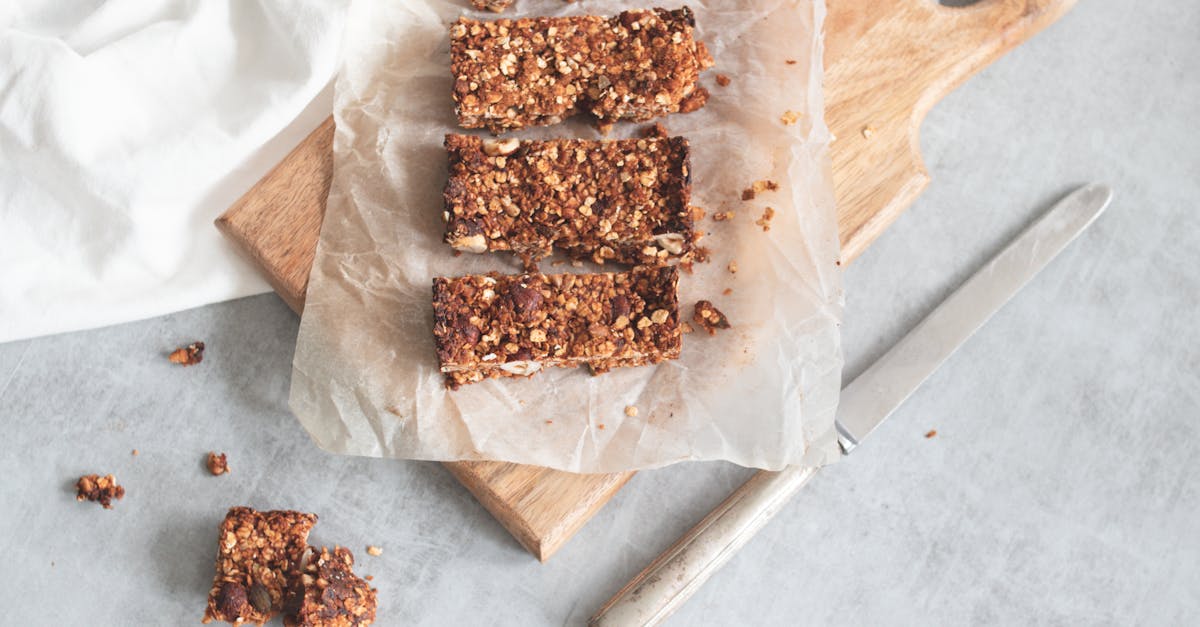
We’ve always been hooked on the irresistible chewiness of Ben’s Cookies, a beloved treat that originated from a famed London bakery. These cookies boast a perfect balance of buttery richness and chocolatey delight, making them a go-to favorite for cookie lovers everywhere.
Now we’re excited to share our easy adaptation of this classic recipe right in your kitchen. With our straightforward tips you’ll whip up batches that rival the original every time.
Ingredients
To bring our adaptation of the classic Ben’s Cookies recipe to life, we gather these key ingredients in the order they are used during preparation. This ensures a seamless baking process that captures the buttery richness and chocolatey flavor our readers love.
Dry Ingredients
- All-purpose flour: 2 cups, sifted to remove lumps and ensure even mixing.
- Baking soda: 1 teaspoon, for that perfect rise and chewy texture.
- Salt: ½ teaspoon, to enhance the flavors without overpowering.
Wet Ingredients
- Unsalted butter: 1 cup (2 sticks), softened at room temperature to cream smoothly.
- Granulated sugar: ¾ cup, for sweetness and structure.
- Brown sugar: ¾ cup, packed to add moisture and a caramel-like depth.
- Eggs: 2 large, at room temperature to blend easily and provide binding.
Add-Ins and Flavorings
- Vanilla extract: 2 teaspoons, for a warm, aromatic note that ties everything together.
- Chocolate chips: 2 cups, preferably semi-sweet to mimic the renowned chocolatey chunks in Ben’s Cookies.
This selection of ingredients, measured precisely, allows us to craft batches that rival the original London bakery’s delight.
Equipment Needed
To bake our delicious homemade Ben’s Cookies with precision and ease, we need a few key pieces of equipment that streamline the process and help achieve that perfect buttery texture and chocolatey goodness. Let’s outline the essentials below, ensuring everything is ready before we mix and bake.
- Mixing Bowls: We suggest using at least two medium-sized stainless steel or glass bowls—one for dry ingredients and one for wet—to keep our preparation organized and prevent cross-contamination of flavors.
- Measuring Cups and Spoons: Accurate measurements are crucial for replicating the rich taste of Ben’s Cookies, so opt for a set of standard US measuring cups (1 cup, ½ cup, etc.) and spoons (1 tablespoon, 1 teaspoon, etc.) made from durable plastic or metal.
- Electric Mixer or Whisk: For creaming butter and sugars to that ideal light and fluffy consistency, we prefer an electric stand mixer or hand-held version for efficiency, though a sturdy wire whisk works if you’re aiming for a more hands-on approach.
- Baking Sheets: Choose two rimmed baking sheets (around 18×13 inches) lined with parchment paper to ensure even baking and easy cleanup, helping our cookies spread perfectly without sticking.
- Spatula or Cookie Scoop: A silicone spatula for folding ingredients and a 1-tablespoon cookie scoop for portioning dough evenly—we find this helps create uniform cookies that bake to golden perfection.
- Oven Thermometer: To guarantee our oven is at the precise temperature (typically 350°F for cookies), we recommend this tool to avoid underbaking or overbrowning, maintaining the signature Ben’s Cookies quality.
- Cooling Rack: After baking, a wire cooling rack allows our fresh cookies to cool evenly and retain their crisp edges while the centers stay soft and chewy.
With these items on hand, we’re set to transition seamlessly from measuring ingredients to creating batches of cookies that capture the essence of the original Ben’s Cookies recipe.
Instructions
With our ingredients measured and equipment at the ready, we guide you through creating homemade Ben’s Cookies that boast that signature buttery richness and gooey chocolate center.
Prepare the Ingredients
Before we begin mixing, let’s ensure all components are prepped for efficiency and accuracy. Start by gathering the ingredients in the order we’ll use them: first, whisk together 2 cups of all-purpose flour, 1 teaspoon of baking soda, and ½ teaspoon of salt in a medium bowl to create a uniform dry mix. Next, soften 1 cup (2 sticks) of unsalted butter by leaving it at room temperature for about 30 minutes or microwaving it briefly on low power—aim for a pliable texture that creams easily. Measure out ¾ cup of granulated sugar and ¾ cup of packed brown sugar, crack 2 large eggs into a small bowl, and have 2 teaspoons of vanilla extract on hand. Finally, prepare 2 cups of chocolate chips by checking for even distribution; this step sets the stage for that irresistible melt-in-your-mouth chocolate flavor we love in Ben’s Cookies.
Mix the Dough
We mix the dough to achieve that perfect, chewy texture. In a large mixing bowl, use an electric mixer on medium speed to cream the softened butter with the granulated sugar and brown sugar until the mixture is light and fluffy—about 2 to 3 minutes—creating a base that’s airy and full of sweet aroma. Add the eggs one at a time, beating well after each to incorporate fully, then mix in the vanilla extract for a warm, fragrant boost. Gradually add the dry mixture from the first step, stirring on low speed until just combined to avoid overworking the dough and keep it tender. Finally, fold in the chocolate chips using a spatula for even distribution, resulting in a dough that’s irresistibly studded with chunks that promise gooey bites in every cookie.
Shape the Cookies
Shaping ensures uniform baking and that classic Ben’s Cookies appearance. Using a cookie scoop or tablespoon, portion the dough into balls about 1½ inches in diameter—aim for 12 to 15 cookies per batch for even results. Place these balls on a rimmed baking sheet lined with parchment paper, spacing them about 2 inches apart to allow for spreading and achieve those golden, crinkled edges. Gently press each ball slightly with your fingers to flatten the tops, enhancing the cookies’ appealing texture and ensuring they bake into beautifully rounded shapes with a soft, chewy interior.
Bake the Cookies
Baking transforms the dough into the warm, chocolatey delight of Ben’s Cookies. Preheat your oven to 375°F (190°C) and use an oven thermometer for precise temperature—undercooked cookies can be doughy, while overcooked ones lose that melt-in-the-mouth quality. Bake one sheet at a time on the middle rack for 10 to 12 minutes, watching for edges to turn golden brown while the centers remain soft; this timing yields cookies with a crisp exterior and tender center. Rotate the sheet halfway through for even heat exposure, filling your kitchen with the irresistible scent of fresh-baked treats.
Cool and Store
Cooling and storing preserve the cookies’ freshness and flavor for days. Immediately transfer the baked cookies from the hot baking sheet to a cooling rack using a spatula, allowing them to set for about 5 minutes so the centers firm up without becoming tough. Once fully cooled—about 15 to 20 minutes—store them in an airtight container at room temperature for up to 5 days to maintain that buttery softness, or freeze for up to 3 months for longer enjoyment; simply thaw at room temperature when ready, ensuring every bite retains the authentic taste of Ben’s Cookies.
Make-Ahead Instructions
To help us streamline our baking process and enjoy fresh Ben’s Cookies anytime, we can prepare elements in advance without compromising that signature buttery richness and chocolatey flavor. Let’s break down the key make-ahead strategies step by step, ensuring our cookies remain as delectable as if freshly baked.
Preparing the Dough Ahead
We recommend making the cookie dough up to 3 days in advance for optimal freshness. Start by following the dough-mixing steps from our earlier instructions—whisking dry ingredients and creaming butter with sugars until fluffy. Once mixed, shape the dough into balls or keep it in a covered bowl.
- Chill the Dough: After mixing, transfer the dough to an airtight container or wrap it tightly in plastic wrap. Refrigerate it immediately to preserve texture and prevent over-spreading during baking. This step enhances the chewy quality that defines Ben’s Cookies.
- Freezing for Longer Storage: For extended make-ahead options, portion the dough into individual scoops using a cookie scoop. Place them on a lined baking sheet to freeze until solid (about 1-2 hours), then transfer to a freezer-safe bag or container. This method allows us to bake fresh batches straight from frozen.
Storing Baked Cookies
If we bake a full batch ahead, our Ben’s Cookies can be stored to maintain their irresistible crisp edges and soft centers for up to 5 days at room temperature or longer in the freezer.
| Storage Method | Duration | Tips for Best Results |
|---|---|---|
| Room Temperature | Up to 5 days | Store in an airtight container at a cool spot away from direct sunlight to lock in moisture and flavor. |
| Refrigerator | Up to 1 week | Wrap cookies individually in plastic wrap before placing in a sealed container to avoid staleness. |
| Freezer | Up to 3 months | Flash-freeze baked cookies on a tray first, then store in a freezer bag. Thaw at room temperature for 30 minutes before enjoying. |
Additional Tips
We can maximize convenience by labeling containers with dates and portion sizes to avoid waste. Always thaw dough or cookies gradually in the refrigerator to retain the authentic taste and texture of Ben’s Cookies, ensuring every bite delivers that perfect blend of buttery goodness and melted chocolate chips.
Conclusion
We’ve shared our favorite take on Ben’s Cookies recipe, making it simple for you to bake incredible treats at home.
Now it’s your turn to whip up batches that capture that signature buttery bliss and chocolatey melt.
Remember, with these tips, you’ll enjoy fresh, homemade cookies that impress every time.
Frequently Asked Questions
What is Ben’s Cookies?
Ben’s Cookies is a popular London bakery treat known for its buttery, chocolatey cookies. This article adapts the classic recipe for home baking, helping you recreate that perfect blend of rich flavor and chewy texture with simple ingredients and steps.
What ingredients are needed for Ben’s Cookies?
The key ingredients include all-purpose flour, baking soda, salt, unsalted butter, granulated sugar, brown sugar, eggs, vanilla extract, and chocolate chips. Measure them precisely for the best results, ensuring a seamless mix that captures the original’s buttery richness and chocolatey goodness.
What equipment is required to bake Ben’s Cookies?
You’ll need at least two mixing bowls, accurate measuring cups and spoons, an electric mixer or whisk, rimmed baking sheets with parchment paper, a spatula or cookie scoop, an oven thermometer, and a cooling rack. This setup promotes organization and precision for optimal baking.
How do I make Ben’s Cookies at home?
Start by whisking dry ingredients like flour, baking soda, and salt. Cream softened butter with sugars, add eggs and vanilla, then mix in dry ingredients and chocolate chips. Shape dough into balls, bake at the right temperature, and cool on a rack. Follow the steps for chewy, flavorful results in under 30 minutes of prep.
Can I prepare the dough in advance?
Yes, you can make the dough up to three days ahead and chill it in the fridge to enhance texture. For longer storage, freeze individual scoops for up to three months. Thaw in the fridge before baking for fresh, authentic Ben’s Cookies anytime.
How should I store homemade Ben’s Cookies?
Store cooled cookies in an airtight container at room temperature for up to five days to keep them fresh with crisp edges and soft centers. For longer storage, freeze them for up to three months; thaw at room temperature. Label containers with dates for easy tracking.
Why are Ben’s Cookies so popular?
Ben’s Cookies are beloved for their perfect balance of buttery richness and melted chocolate chips, offering a chewy texture that’s hard to resist. This easy home adaptation lets you enjoy that iconic London bakery flavor without leaving your kitchen, making it a favorite for cookie lovers worldwide.