
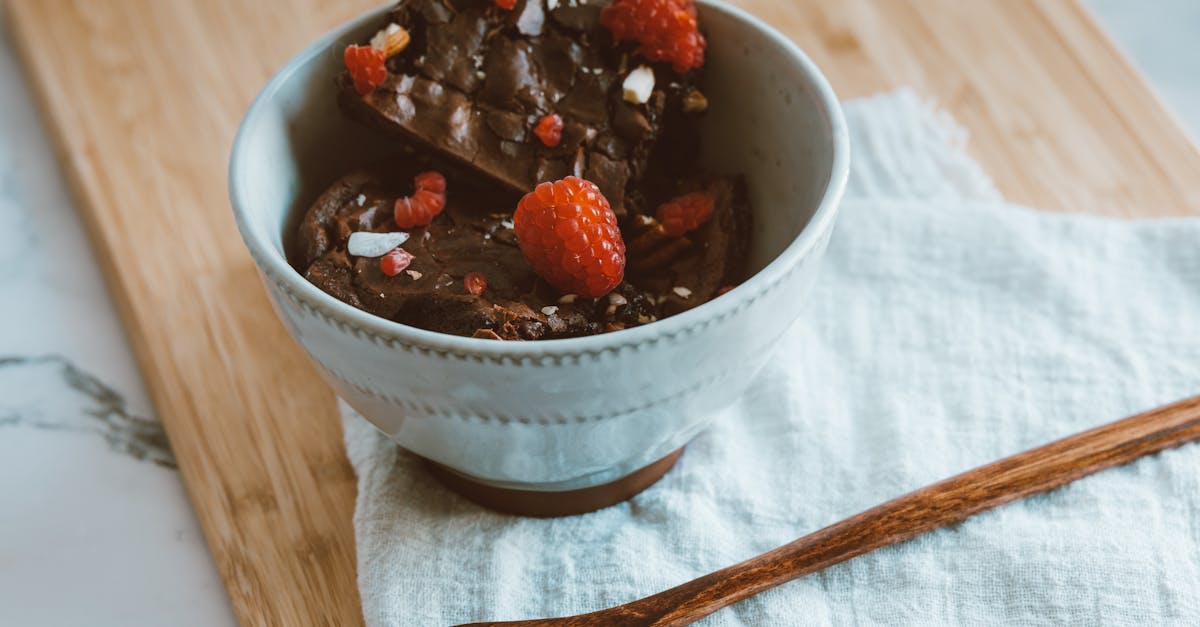
We’ve all craved that rich creamy goodness of Fannie Mae Fudge a classic American treat that’s been delighting families for generations. Originating from simple kitchen traditions it’s the perfect blend of chocolatey indulgence and easy preparation that makes it a go-to favorite in our homes.
What sets our Fannie Mae Fudge Recipe apart is its foolproof method yielding velvety results every time. We’re sharing this nostalgic delight to bring a touch of homemade magic to your table so join us as we whip up something truly special.
Ingredients
As we dive into creating our beloved Fannie Mae Fudge, we start with the essential ingredients that deliver its signature rich and creamy texture. We’ve curated this list in the order they’re typically used, with prep specifics noted for accuracy and ease.
- Granulated sugar (2 cups): Measure precisely to ensure the perfect sweetness base; sift if clumpy for even dissolving.
- Unsalted butter (1 cup, or 2 sticks): Cut into tablespoon-sized pieces and soften at room temperature for smooth melting.
- Evaporated milk (1 can, 12 ounces): Use full-fat for creaminess; shake well before opening to incorporate any settled contents.
- Semi-sweet chocolate chips (2 cups): High-quality chips melt faster and enhance the fudge’s velvety chocolate flavor—opt for ones with at least 60% cocoa.
- Mini marshmallows (1 bag, 10 ounces): These provide the airy lift; tear larger ones if using regular for uniform distribution.
- Vanilla extract (1 tablespoon): Pure extract only for authentic taste—add at the end to preserve its aromatic essence.
- Chopped walnuts or pecans (1 cup, optional): Toast lightly in a dry skillet for 5 minutes to amplify their nutty crunch, then chop coarsely.
This selection guarantees the foolproof results we’ve promised, making your Fannie Mae Fudge a nostalgic hit every time.
Required Tools and Equipment
Now that we’ve gathered our key ingredients for the Fannie Mae Fudge, we turn our attention to the essential tools and equipment that ensure a smooth preparation process. These items help us achieve the fudge’s signature creamy texture and precise consistency, making our homemade treat foolproof and delightful.
To prepare this classic recipe efficiently, we recommend the following tools. We’ve organized them by category for clarity, emphasizing those that are crucial for temperature control and even mixing.
Basic Cooking Tools
- Heavy-bottomed saucepan: This is our go-to for melting sugar, butter, and milk together. Its thick base prevents scorching and ensures even heat distribution, which is vital for that velvety finish.
- Candy thermometer: An absolute must-have for monitoring the mixture’s temperature—aim for 234°F (soft-ball stage)—to guarantee the fudge sets perfectly without becoming grainy.
- Wooden spoon or heat-resistant spatula: We use this for vigorous stirring to combine ingredients smoothly and prevent sticking, promoting a homogeneous blend.
Measuring and Prep Tools
- Measuring cups and spoons: Accuracy is key in fudge-making, so we rely on these for precise measurements of ingredients like sugar and vanilla extract.
- Mixing bowl: A medium-sized, heat-safe bowl where we’ll combine chocolate chips and marshmallows after cooking, allowing for quick melting and easy incorporation.
Baking and Finishing Tools
- 8×8-inch baking dish or square pan: This serves as the mold for our fudge, providing the ideal shape for even cooling and cutting. Line it with parchment paper for effortless removal.
- Parchment paper or aluminum foil: Essential for greasing the pan lightly, it prevents the fudge from sticking and makes cleanup a breeze.
By using these tools, we can confidently replicate the rich, nostalgic flavor of Fannie Mae Fudge every time. Remember, investing in quality equipment like a candy thermometer can make all the difference in achieving professional results at home.
Directions
We guide you through the straightforward steps to create our irresistible Fannie Mae Fudge, using the ingredients and tools we’ve outlined for perfect results every time.
Prep
Before we begin cooking, let’s prepare our workspace and ingredients to ensure smooth execution. Start by gathering all items: measure out 4 cups granulated sugar, 2 sticks (1 cup) unsalted butter cut into pieces, 1 can (12 ounces) evaporated milk, 12 ounces semi-sweet chocolate chips, 7 ounces mini marshmallows (or marshmallow creme), 1 teaspoon vanilla extract, and if desired, 1 cup chopped walnuts or pecans for added crunch.
- Line the pan: Take an 8×8-inch baking dish and line it with parchment paper, leaving overhang on two sides for easy lifting later. This step prevents sticking and ensures clean, professional cuts.
- Set up tools: Place a candy thermometer in your heavy-bottomed saucepan and have a wooden spoon or heat-resistant spatula ready. Measure and set aside all ingredients in your mixing bowl to maintain efficiency and avoid pauses during cooking.
Cook
Now we move to the cooking phase where precise heat control transforms our mixture into a velvety, rich fudge with a glossy sheen and deep chocolate aroma that fills the kitchen.
- Combine and heat: In the heavy-bottomed saucepan, add 4 cups granulated sugar, 1 cup unsalted butter, and 12 ounces evaporated milk. Stir constantly over medium heat until the mixture reaches a full rolling boil – this usually takes 4-5 minutes – and watch the candy thermometer climb to 234°F (soft-ball stage) for the ideal creamy texture.
- Boil and add ingredients: Once boiling, continue cooking for exactly 5 minutes without stirring to prevent crystallization, then remove from heat. Quickly stir in 12 ounces semi-sweet chocolate chips until fully melted, followed by 7 ounces mini marshmallows for that signature fluffiness, 1 teaspoon vanilla extract for a warm vanilla note, and optional 1 cup chopped walnuts or pecans for nutty contrast. The mixture will thicken into a smooth, glossy mass with an irresistible chocolate scent.
Cool and Set
Finally, we cool and set the fudge to achieve its firm-yet-melt-in-your-mouth consistency, locking in the rich flavors for a treat that evokes nostalgic family gatherings.
- Pour and level: Immediately pour the hot fudge mixture into the prepared 8×8-inch baking dish, using your spatula to spread it evenly. Tap the dish gently on the counter to release air bubbles and create a flawlessly smooth surface.
- Cool completely: Let the fudge cool at room temperature for 1-2 hours until firm, or refrigerate for 30-45 minutes if you’re short on time – avoid cutting too soon to prevent crumbling. Once set, lift it out using the parchment overhang, and cut into 1-inch squares for perfect, shareable portions that showcase the fudge’s creamy texture and decadent shine.
Make-Ahead and Storage
One of the joys of our Fannie Mae Fudge recipe is its versatility for make-ahead preparation, allowing us to savor that rich, creamy texture and decadent chocolate flavor whenever we crave a nostalgic treat. To keep the fudge’s velvety smoothness intact, we suggest preparing it up to a week in advance. Start by following our detailed directions in the previous section, then let the fudge cool completely at room temperature for about 2 hours until it sets firmly. Once set, cut it into squares and layer them between sheets of parchment paper in an airtight container to prevent sticking and preserve that glossy shine.
For optimal storage, we recommend tailoring your method based on how long you plan to keep the fudge. This ensures it retains its signature melt-in-your-mouth quality without compromising flavor or texture. Below, we’ve outlined the best practices:
- Room Temperature Storage: If you’ll enjoy the fudge within a few days, store it in a cool, dry place away from direct sunlight. This method highlights its soft, buttery consistency, making it perfect for impromptu gatherings.
- Refrigerator Storage: For longer freshness, transfer the fudge to the fridge in an airtight container. Chill it for up to 4 weeks to maintain that irresistible creaminess, but let it sit at room temperature for 15-20 minutes before serving to restore its ideal fudgy texture.
- Freezer Storage: To extend shelf life even further, freeze the fudge for future indulgence. Wrap individual squares tightly in plastic wrap, then place them in a freezer-safe bag or container to lock in moisture and prevent freezer burn.
When it comes to longevity, here’s a quick reference for shelf life based on storage conditions:
| Storage Method | Duration | Key Tips for Best Results |
|---|---|---|
| Room Temperature | Up to 2 weeks | Keep in a dark, cool spot to avoid melting or softening. |
| Refrigerator | Up to 4 weeks | Use an airtight container to minimize moisture exposure, preserving the fudge’s rich flavor. |
| Freezer | Up to 3 months | Thaw overnight in the fridge for even texture recovery, ensuring that signature velvety finish. |
By following these steps, we can effortlessly prepare batches of Fannie Mae Fudge ahead of time and store them confidently, ready to delight us with their homemade magic at any moment. Always check for signs of spoilage, such as off odors or discoloration, before enjoying.
Conclusion
We’ve loved guiding you through this timeless Fannie Mae Fudge recipe
and we’re confident it’ll become a staple in your home.
It’s more than just a treat
it’s a way to create lasting memories with family and friends.
Give it a go and let us know how yours turns out.
Frequently Asked Questions
What is Fannie Mae Fudge?
Fannie Mae Fudge is a classic American dessert known for its rich, creamy texture and nostalgic appeal. It’s a homemade treat made with simple ingredients, offering a velvety chocolate flavor that’s perfect for family gatherings. This foolproof recipe ensures easy preparation, bringing a touch of homemade magic to your table.
What ingredients are needed for Fannie Mae Fudge?
To make Fannie Mae Fudge, you’ll need granulated sugar, unsalted butter, evaporated milk, semi-sweet chocolate chips, mini marshmallows, vanilla extract, and optional chopped walnuts or pecans. Measure accurately for the best results, as these ingredients create the fudge’s signature creamy texture when combined in order.
What tools are required to make Fannie Mae Fudge?
Essential tools include a heavy-bottomed saucepan for even heating, a candy thermometer for precise temperature control, a wooden spoon or heat-resistant spatula for mixing, measuring cups and spoons for accuracy, a mixing bowl, and an 8×8-inch baking dish lined with parchment paper. These ensure professional results at home.
How do I make Fannie Mae Fudge?
Start by measuring ingredients and setting up your workspace. Combine sugar, butter, and evaporated milk in a saucepan, bring to a boil while stirring, then add chocolate chips and marshmallows for a smooth mixture. Pour into a prepared baking dish, cool, and cut into squares. Follow precise heat control for that perfect velvety texture.
Can I make Fannie Mae Fudge ahead of time?
Yes, you can prepare Fannie Mae Fudge up to a week in advance. Cool and cut it first, then store as needed. This makes it versatile for events, allowing you to enjoy fresh-tasting fudge without last-minute effort.
How should I store Fannie Mae Fudge?
Store Fannie Mae Fudge at room temperature for up to 2 weeks, in the refrigerator for up to 4 weeks, or in the freezer for up to 3 months. Use an airtight container to maintain its creamy texture and flavor. Let it thaw at room temperature before serving for the best results.