
Elderberry syrup has long been our go-to remedy for boosting immunity during cold seasons, drawing from ancient herbal traditions that make it a kitchen favorite. Packed with antioxidants, it’s not just effective—it’s delicious too, perfect for warding off winter woes.
We’ll walk you through our easy canning recipe so you can stock up on this homemade elixir. With a few simple steps, you’ll preserve its vibrant flavors and health benefits for months ahead.
Ingredients
To craft our elderberry syrup canning recipe, we gather fresh, high-quality ingredients that enhance both flavor and health benefits. We’ll list them in the order they’re typically used, with prep notes for accuracy and ease.
- Elderberries: 2 cups dried elderberries (we recommend rinsing them thoroughly under cold water to remove any debris, then draining well before use, as they form the base of our syrup’s immune-boosting properties).
- Water: 4 cups filtered water (this helps extract the rich antioxidants and flavors from the elderberries during the initial simmering process).
- Sweetener: 1 to 1.5 cups raw honey or granulated sugar (opt for raw honey if available, as it retains more nutrients; adjust based on your desired sweetness level for canning).
- Lemon: 1 medium lemon, juiced and zested (freshly squeezed for about ¼ cup juice, which adds natural acidity crucial for safe canning and a vibrant citrus note to balance the syrup’s tartness).
- Spices: 2 cinnamon sticks and 1 tablespoon fresh ginger, peeled and sliced (these aromatic additions infuse warmth and depth, making our syrup more appealing for everyday use).
| Batch Size | Elderberries (cups) | Water (cups) | Sweetener (cups) | Lemon Juice (cups) |
|---|---|---|---|---|
| Small (1x) | 2 | 4 | 1 to 1.5 | 0.25 |
| Medium (2x) | 4 | 8 | 2 to 3 | 0.5 |
| Large (3x) | 6 | 12 | 3 to 4.5 | 0.75 |
Equipment Needed
Before we dive into preparing our elderberry syrup canning recipe, let’s gather the essential tools that ensure a safe, efficient process. Having the right equipment helps us preserve the syrup’s vibrant flavors, rich antioxidants, and immune-boosting benefits without any hassle.
We recommend the following items, organized by category for clarity:
- Canning Jars and Lids: Glass jars in sizes like 8-ounce or 16-ounce with new lids and bands are crucial. They provide an airtight seal to maintain the syrup’s freshness and potency over time.
- Pots and Pans: A large stock pot (at least 8 quarts) for simmering the elderberry mixture, and a water bath canner or deep pot with a rack for processing jars. This setup allows for even heating and proper sterilization.
- Straining Tools: A fine-mesh strainer or cheesecloth to separate solids from the liquid, ensuring our syrup is smooth and ready for canning.
- Pouring and Measuring Tools: A funnel to transfer syrup into jars without spills, paired with measuring cups and spoons for accurate quantities. Don’t forget a ladle for easy handling of hot liquids.
- Safety Accessories: A jar lifter for safely removing hot jars from the canner, and a kitchen thermometer to monitor temperatures and prevent under-processing.
By using these tools, we can confidently handle the canning process, linking seamlessly from our ingredient preparation to creating batches of shelf-stable elderberry syrup.
Instructions
Now that we have gathered our ingredients and essential equipment, we guide you through the straightforward steps to create and preserve our nutrient-rich elderberry syrup, ensuring it retains its vibrant flavors and immune-boosting properties.
Prepare the Ingredients
Before we begin cooking, let’s organize our ingredients for smooth preparation. Start by measuring and prepping each item in the order we’ll use them to avoid any delays.
- Dried elderberries: Measure 1 cup for a standard batch; rinse them under cold, filtered water to remove any dust, then drain thoroughly.
- Filtered water: Pour 4 cups into a clean container, ensuring it’s at room temperature for even simmering.
- Raw honey: Set aside 1 cup, which acts as our natural sweetener; gently warm it if it’s crystallized for easier mixing later.
- Lemon juice: Squeeze ¼ cup fresh from 2 lemons to add tangy brightness and acidity for canning safety.
- Spices: Grate 1 tablespoon of fresh ginger and break 2 cinnamon sticks into pieces for infusion, releasing their warm, aromatic notes.
This preparation ensures our ingredients are ready, allowing the flavors to meld seamlessly during cooking.
Cook the Syrup
With ingredients prepped, we now simmer our syrup to extract the deep, berry-rich essence and create a velvety texture that tantalizes the senses.
- In a large stock pot, combine the dried elderberries and filtered water, then bring the mixture to a boil over medium-high heat, stirring occasionally to prevent sticking.
- Once boiling, reduce the heat to low and simmer for 45 minutes, allowing the berries to release their vibrant purple hues and earthy aroma that fills the kitchen.
- Add the grated ginger and cinnamon sticks, continuing to simmer for another 15 minutes until the syrup thickens slightly and develops a spicy, floral scent.
- Remove the pot from heat and let it cool for 10 minutes, then strain the mixture through a fine-mesh strainer or cheesecloth into a clean bowl, pressing the solids to extract every drop of the smooth, antioxidant-packed liquid.
- Stir in the raw honey and lemon juice until fully dissolved, creating a sweet-tart symphony that enhances the syrup’s glossy appearance and immune-supporting benefits.
This step yields approximately 2-3 cups of syrup per batch, depending on evaporation—monitor closely for the perfect consistency.
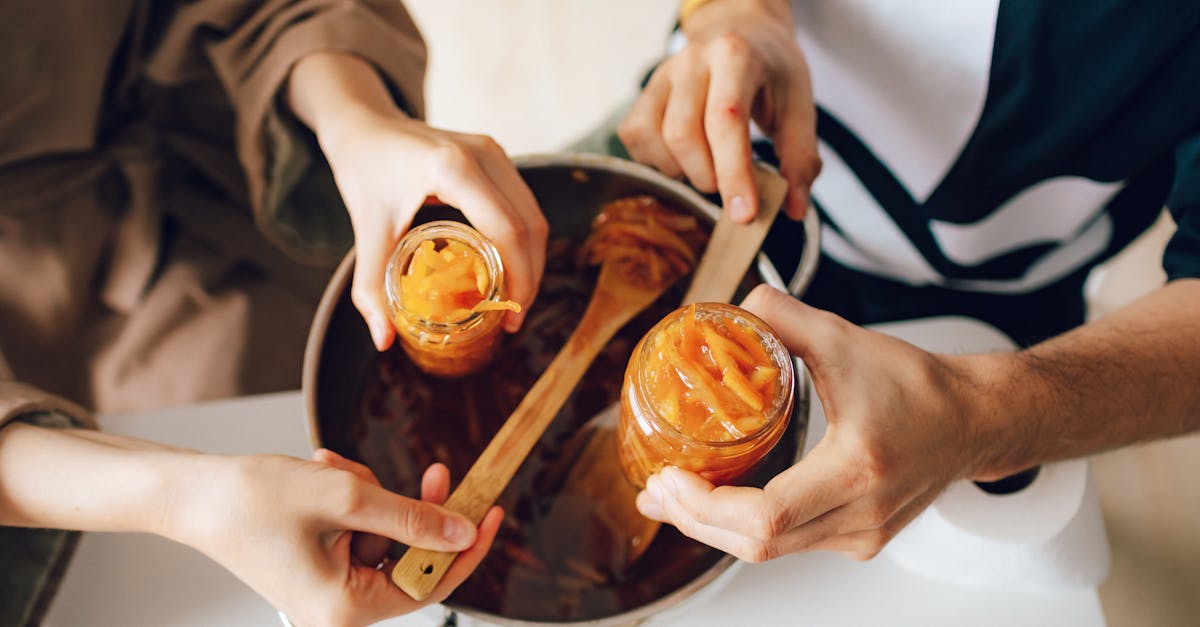
Canning the Syrup
Finally, we can our syrup to ensure it stays fresh and shelf-stable, locking in its bold flavors and health properties for up to a year when stored properly.
- Sterilize your glass canning jars and new lids by boiling them in a water bath canner for 10 minutes, then remove them carefully with a jar lifter to keep them hot and ready.
- Using a funnel and ladle, fill each jar with the warm syrup, leaving ½ inch of headspace at the top to allow for proper sealing and prevent spoilage.
- Wipe the jar rims clean with a damp cloth to remove any residue, then secure the lids and rings fingertip-tight for an airtight fit.
- Process the jars in the boiling water bath canner for 10 minutes, ensuring the water covers the jars by at least 1 inch to achieve a safe seal.
- Remove the jars with the jar lifter and place them on a clean towel to cool for 12-24 hours, listening for the satisfying pop of the lids as they seal.
| Altitude (feet) | Additional Processing Time (minutes) |
|---|---|
| 0-1,000 | 10 |
| 1,001-3,000 | 15 |
| 3,001-6,000 | 20 |
| Above 6,000 | 25 |
Storage and Make-Ahead Tips
As we wrap up the canning process for our elderberry syrup, let’s focus on how to store it safely and prepare batches in advance. Proper storage extends the syrup’s shelf life while preserving its rich, antioxidant-packed flavor and immune-boosting benefits.
Proper Storage Guidelines
Once your jars have cooled and sealed, we recommend storing them in a cool, dark place like a pantry or basement. This helps maintain the syrup’s vibrant, tart-sweet taste and prevents nutrient degradation. Always check that the jar lids have popped down to confirm a proper seal—if they haven’t, refrigerate the jar immediately and use within two weeks.
- Shelf Life for Canned Elderberry Syrup: For optimal quality, store sealed jars at room temperature (below 75°F or 24°C). Here’s a quick breakdown of shelf life based on storage conditions:
| Storage Condition | Expected Shelf Life | Key Notes |
|---|---|---|
| Cool, dark pantry (ideal) | Up to 1 year | Monitor for signs of spoilage like bulging lids or off odors to ensure safety. |
| Room temperature (average) | 6–9 months | Flavor may fade slightly; always label jars with the canning date. |
| Refrigerated after opening | 4–6 weeks | The syrup retains its fresh, berry-forward essence longer when chilled. |
If you notice any changes, such as mold or an unusual fermentation scent, discard the syrup immediately to avoid health risks.
Make-Ahead Strategies
We love making elderberry syrup ahead of time, especially during cold and flu season, as it allows us to stock up on this natural remedy without last-minute prep. Start by doubling or tripling the recipe batch sizes outlined earlier—use a medium batch for quick family needs or a large batch for gifting.
Follow these steps to make ahead effectively:
- Prepare Ingredients in Advance: Rinse and measure your dried elderberries, spices, and lemon juice the day before. Store them in airtight containers in the fridge to keep flavors fresh and reduce cooking time.
- Simmer and Strain Early: Cook the syrup base up to 24 hours ahead, then strain it and store in the refrigerator. This lets the flavors meld, resulting in a smoother, more potent syrup with a deeper berry aroma.
- Freeze for Extended Storage: If you’re not canning right away, pour the cooled syrup into freezer-safe containers. It can last up to 6 months in the freezer, thawing beautifully for later use while preserving its glossy texture and immune-supporting properties.
- Batch Planning Tips: For efficiency, we suggest aligning your make-ahead efforts with peak harvest seasons—process multiple batches in one session to maximize your yield and minimize equipment setup.
By following these tips, we ensure our elderberry syrup remains a reliable, flavorful staple in your pantry.
Conclusion
We’re thrilled you’ve explored this guide to crafting your own elderberry syrup
It’s a rewarding way to harness nature’s benefits for everyday wellness
By canning it yourself you’ll have a reliable boost on hand
Let’s make this a staple in our routines for healthier seasons ahead
Frequently Asked Questions
What are the benefits of elderberry syrup?
Elderberry syrup is a natural remedy that boosts immunity, especially during cold seasons, thanks to its rich antioxidants. It helps fight off illnesses and has a delicious taste that makes it easy to enjoy. Plus, it can be canned for long-term use, preserving its health benefits and flavor.
What ingredients do I need for elderberry syrup?
You’ll need dried elderberries, filtered water, a sweetener like raw honey, lemon juice, and spices such as cinnamon and ginger. These ingredients enhance both the flavor and health benefits, providing antioxidants and immune support. The recipe offers options for small, medium, or large batches to suit your needs.
How do I make elderberry syrup at home?
Start by rinsing elderberries and simmering them with water and spices like cinnamon and ginger. Strain the mixture, then mix in honey and lemon juice for flavor and preservation. Follow the easy recipe for a smooth syrup that’s ready to use or can for later.
What equipment is needed for canning elderberry syrup?
Essential tools include glass canning jars with new lids, a large stock pot for simmering, a water bath canner for processing, a fine-mesh strainer or cheesecloth for straining, and a funnel or ladle for filling. Don’t forget a jar lifter and kitchen thermometer for safe handling.
How do I safely can elderberry syrup?
Sterilize jars, fill them with hot syrup, and process in a boiling water bath for the recommended time, adjusting for altitude. Simmer ingredients first, strain, add honey and lemon, then seal jars tightly. This ensures your syrup is shelf-stable and safe to store.
How should I store elderberry syrup?
Store canned elderberry syrup in a cool, dark place to maintain flavor and extend shelf life up to a year. Once opened, keep it refrigerated and use within a few weeks. Proper storage preserves its immune-boosting benefits for cold and flu season.
Can I make elderberry syrup ahead of time?
Yes, prepare ingredients in advance, simmer and strain the base early, then add honey and lemon before canning or freezing. This allows you to have ready-to-use syrup on hand, making it convenient for boosting immunity during peak cold seasons.