
We love diving into Dairy Ladder Recipes, a smart approach to gradually introduce dairy products and build tolerance, especially for little ones or those with sensitivities. Originating from pediatric nutrition guidelines, it’s all about starting simple and building up flavors without overwhelming the system.
In our kitchen, we’ve crafted these recipes to make the journey enjoyable and nutritious, blending creamy textures with everyday ingredients. Whether you’re a parent or just curious, you’ll find our step-by-step ideas both easy and effective for a smoother dairy transition.
Ingredients
As we guide you through our Dairy Ladder Recipes, we focus on selecting high-quality, easy-to-source ingredients that support a gradual introduction of dairy products. This ensures a safe and enjoyable progression for those building tolerance, starting with milder options like yogurt before advancing to richer items like cheese or milk.
To keep things organized, we’ve listed the ingredients below in the order they might be used in a simple introductory recipe, such as a basic fruit yogurt parfait. We’ve noted any prep specifics for accuracy and ease.
- Fresh fruits (e.g., 1 cup sliced strawberries or bananas): Start with these as the base for natural sweetness and texture; wash and slice them just before use to maintain freshness and vibrant flavors.
- Plain yogurt (1 cup, low-fat or full-fat): Choose a mild, unsweetened variety to introduce dairy gently; we recommend straining it if a thicker consistency is needed for layering.
- Honey or mild sweetener (1 tablespoon): Add this next for subtle flavor enhancement; opt for raw honey to balance the tartness of yogurt without overwhelming sensitive palates.
- Dairy milk (½ cup, whole or 2%): Introduce this in small amounts for creaminess; warm it slightly if using in a recipe to aid blending, but only after initial stages are tolerated.
- Optional nuts or seeds (2 tablespoons, e.g., chopped almonds): Incorporate last for added crunch and nutrition; toast them lightly if desired, but skip if nut allergies are a concern to keep the focus on dairy progression.
By using these ingredients in sequence, we make our Dairy Ladder Recipes both nutritious and adaptable, helping you create dishes that are creamy, flavorful, and perfect for building confidence in dairy consumption.
Required Tools and Equipment
To prepare our Dairy Ladder recipes effectively, we rely on a few essential tools that ensure safety, precision, and ease during the gradual introduction of dairy products. These items help us handle ingredients like fresh fruits, yogurt, and honey with confidence, making the process smooth and enjoyable.
Basic Kitchen Essentials
We begin with the foundational tools that every home cook needs for simple recipes such as our fruit yogurt parfait:
- Measuring cups and spoons: These allow us to measure ingredients accurately, ensuring the right balance of flavors without overwhelming sensitive palates.
- Mixing bowls: We use medium-sized bowls to combine elements like yogurt and fruits, promoting even blending for a creamy texture.
- Cutting board and knife: A sturdy cutting board paired with a sharp knife helps us slice fresh fruits quickly and safely, minimizing waste and enhancing preparation efficiency.
Specialized Tools for Dairy Handling
For recipes involving dairy milk or yogurt, certain tools make the process more hygienic and controlled:
- Whisk or spoon: We opt for a sturdy whisk to gently incorporate sweeteners into yogurt, creating a smooth mixture that eases dairy digestion.
- *Blender or food processor (optional)*: If we’re aiming for a smoother parfait, this tool purees fruits effortlessly, but it’s only necessary for advanced variations in our Dairy Ladder progression.
- Storage containers: Airtight containers keep our prepared parfaits fresh in the fridge, supporting the step-by-step introduction by preserving nutrients and flavors.
By gathering these tools, we set the stage for creating nutritious, dairy-friendly dishes that align with our structured approach to building tolerance. Always prioritize clean and well-maintained equipment to maintain food safety standards.
Instructions
We guide you through the Dairy Ladder Recipes with step-by-step instructions that build dairy tolerance gradually, using the ingredients and tools we’ve discussed to ensure safe and enjoyable preparation.
Stage 1: Baked Milk Recipes
In this initial stage of our Dairy Ladder Recipes, we focus on gently baked dishes that introduce milk in a mild, heated form to ease digestion and enhance subtle flavors. These recipes emphasize simple baked milk creations like a basic baked custard, helping build confidence with creamy textures and comforting warmth.
Ingredients (for Baked Custard, serves 4):
- 2 cups whole milk (warmed to room temperature for even baking)
- 3 large eggs (beaten lightly for smooth incorporation)
- 1/4 cup sugar (granulated, measured precisely for balanced sweetness)
- 1 teaspoon vanilla extract (pure, added for aromatic enhancement)
Step-by-Step Instructions:
- Preheat your oven to 325°F and prepare a baking dish by greasing it lightly with butter to prevent sticking and ensure easy release.
- In a mixing bowl, whisk the beaten eggs with sugar until fully dissolved, creating a smooth base that coats the back of a spoon.
- Gradually pour in the warmed whole milk and vanilla extract, stirring constantly to blend into a silky mixture that hints at its future creamy texture.
- Pour the mixture into the prepared baking dish and place it in a larger pan filled with hot water halfway up the sides for even, gentle baking that avoids curdling.
- Bake for 40-45 minutes until the custard sets with a slight jiggle in the center, filling your kitchen with a soothing, vanilla-scented aroma that signals it’s ready to cool and chill for 2 hours before serving.
Stage 2: Lightly Cooked Milk Recipes
As we progress in our Dairy Ladder Recipes, Stage 2 involves lightly cooked preparations that add a bit more warmth and flavor complexity, making milk more approachable while maintaining digestive ease. We recommend starting with recipes like simple milk porridge to introduce a comforting, slightly thickened consistency.
Ingredients (for Milk Porridge, serves 2):
- 1 cup whole milk (heated gently to avoid scorching)
- 1/2 cup rolled oats (rinsed for quick cooking)
- 1 tablespoon honey (local, drizzled for natural sweetness)
- 1/4 teaspoon ground cinnamon (freshly ground for spicy warmth)
Step-by-Step Instructions:
- In a saucepan, heat the whole milk over medium heat until it steams but does not boil, stirring to release its creamy essence.
- Add the rinsed rolled oats, reducing heat to low and simmering for 5 minutes while stirring occasionally to achieve a soft, hearty texture.
- Stir in the honey and ground cinnamon, cooking for another 2 minutes to infuse a warm, aromatic flavor that coats the oats evenly.
- Remove from heat and let it rest for 1 minute to thicken slightly, then serve warm to enjoy the soothing, mildly sweet taste that builds on Stage 1’s foundation.
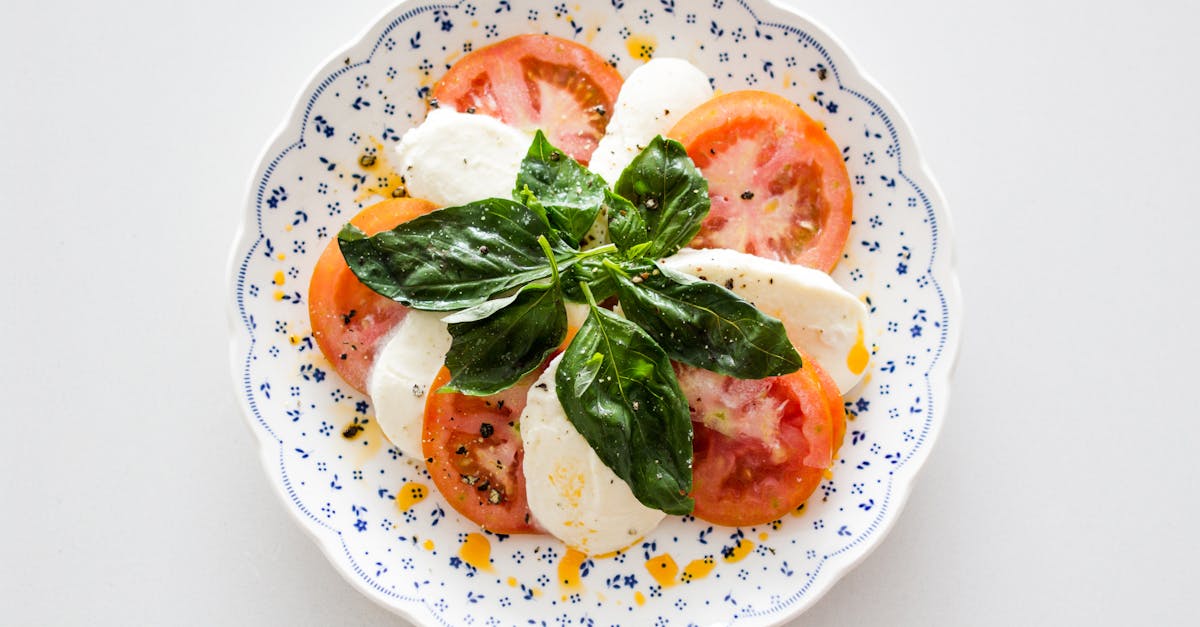
Stage 3: Yogurt and Fermented Dairy Recipes
Advancing further in our Dairy Ladder Recipes, Stage 3 highlights fermented options like yogurt, which are easier on the gut due to beneficial bacteria, allowing for richer tastes and textures. We suggest trying homemade yogurt parfaits to combine tanginess with nutrition, fostering a smoother transition.
Ingredients (for Yogurt Parfait, serves 2):
- 1 cup plain yogurt (full-fat, fermented for at least 8 hours for optimal tang)
- 1 cup fresh fruits (such as berries, sliced for layering)
- 2 tablespoons honey (raw, used for drizzling sweetness)
- 1/4 cup granola (store-bought or homemade, added for crunch)
Step-by-Step Instructions:
- In a bowl, layer half the plain yogurt at the base to create a creamy foundation that sets the stage for flavors.
- Add the sliced fresh fruits on top, pressing gently to release their juicy sweetness and vibrant colors.
- Drizzle the honey over the fruits, followed by sprinkling the granola for a contrasting crunch that enhances the parfait’s tangy profile.
- Repeat the layers with the remaining yogurt and toppings, then chill for 10 minutes to meld the fermented notes with fruity freshness, resulting in a refreshing, probiotic-rich treat.
Stage 4: Fresh Dairy Recipes
In the final stage of our Dairy Ladder Recipes, we embrace fresh dairy preparations that showcase unheated milk and cheeses for full flavor integration, building complete tolerance with bold tastes and versatility. A simple fresh milk smoothie serves as an ideal recipe to celebrate this milestone.
Ingredients (for Fresh Milk Smoothie, serves 2):
- 1 1/2 cups whole milk (chilled for a refreshing base)
- 1 banana (ripe, mashed for creamy thickness)
- 1/2 cup spinach leaves (fresh, blended for subtle nutrition)
- 1 tablespoon fresh lemon juice (squeezed for zesty brightness)
- In a blender, add the chilled whole milk and mashed banana, blending on high for 30 seconds to create a smooth, velvety mixture.
- Toss in the fresh spinach leaves and blend for another 20 seconds until fully incorporated, yielding a vibrant green hue and earthy undertones.
- Add the fresh lemon juice and pulse for 10 seconds to brighten the flavors, resulting in a frothy, invigorating blend.
- Pour into glasses and serve immediately to savor the cool, creamy sensation and fresh dairy essence that marks successful progression through the ladder.
Make-Ahead and Storage Tips
To keep your Dairy Ladder recipes fresh, safe, and convenient, we outline practical strategies for preparing components in advance and storing them properly. This ensures you maintain the nutritional integrity and flavors of each stage while minimizing waste and effort.
Make-Ahead Strategies
When following our Dairy Ladder approach, preparing elements ahead of time helps streamline the process, especially for busy families introducing dairy gradually. We focus on make-ahead techniques that preserve texture and taste without compromising safety.
- Stage 1 and 2 Recipes (Baked or Lightly Cooked Milk Dishes): For recipes like baked custard or milk porridge, we suggest prepping the milk mixture up to 24 hours in advance. Whisk together milk, eggs, and sweeteners in a bowl, then cover and refrigerate it. This allows flavors to meld while keeping the mixture ready for baking. Always use pasteurized milk to reduce risks.
- Stage 3 Recipes (Yogurt and Fermented Options): Ahead of serving homemade yogurt parfaits, prepare the yogurt base 1–2 days early by culturing milk and letting it set in the fridge. Layer in fresh fruits and nuts just before eating to avoid sogginess. We recommend portioning ingredients into individual containers for quick assembly.
- Stage 4 Recipes (Fresh Dairy Items): For fresh milk smoothies, blend and freeze fruits in advance for up to a week. When ready, simply add fresh milk or yogurt from the fridge for a quick blend. This method helps maintain the unheated nature of these recipes while saving time.
Storage Guidelines
Proper storage is crucial for dairy products, as they are perishable and can spoil quickly if not handled correctly. We provide storage tips based on the stage of your Dairy Ladder recipes to ensure safety and extend shelf life.
| Recipe Stage | Item | Recommended Storage Method | Shelf Life | Key Notes |
|---|---|---|---|---|
| Stage 1 (Baked Milk) | Baked custard | Refrigerate in an airtight container | 3–4 days | Cool completely before storing; reheat gently to preserve creaminess and avoid bacterial growth. |
| Stage 2 (Lightly Cooked Milk) | Milk porridge | Store in the fridge in a sealed bowl | 2–3 days | Stir well before reheating; add a splash of milk to restore texture and prevent drying. |
| Stage 3 (Yogurt-Based) | Homemade yogurt parfait | Refrigerate in layers within glass jars | 2–4 days | Keep away from the fridge door to maintain consistent temperature; discard if you notice off odors or separation. |
| Stage 4 (Fresh Dairy) | Milk smoothie (prepared) | Freeze in portions or refrigerate immediately | Refrigerated: 1–2 days; Frozen: Up to 1 month | Thaw frozen smoothies in the fridge overnight; consume refrigerated ones within 24 hours to retain fresh taste and nutrients. |
By following these Make-Ahead and Storage Tips, we help you navigate the Dairy Ladder with ease, ensuring your recipes remain safe, delicious, and aligned with your gradual dairy introduction plan.
Conclusion
We’ve explored the Dairy Ladder together, turning dairy introduction into an enjoyable journey.
It’s empowering to build tolerance step by step while savoring nutritious recipes.
Let’s embrace this approach and create lasting habits that enhance our well-being.
Frequently Asked Questions
What is Dairy Ladder Recipes?
Dairy Ladder Recipes is a structured method to gradually introduce dairy products, especially for individuals with sensitivities like children. It starts with simple flavors and builds up to more complex ones to ease digestion and make the process enjoyable. This approach helps build tolerance while offering nutritious, easy-to-make recipes shared by the author.
Who can benefit from Dairy Ladder Recipes?
Anyone with dairy sensitivities, such as children or adults, can benefit from this method. It focuses on a gentle introduction to prevent overwhelming the digestive system, making dairy enjoyable and manageable. Parents and curious readers find it helpful for creating nutritious meals that promote long-term tolerance.
What are the different stages in Dairy Ladder?
The Dairy Ladder has four stages: Stage 1 uses baked milk recipes like custard for mild introduction; Stage 2 involves lightly cooked options like milk porridge; Stage 3 features yogurt and fermented dairy, such as parfaits; and Stage 4 includes fresh dairy recipes like smoothies. Each stage progressively builds tolerance for a smooth transition.
What ingredients are used in the introductory recipes?
Introductory recipes use simple, high-quality ingredients like fresh fruits for sweetness, plain yogurt for gentle dairy introduction, honey for flavor, dairy milk for creaminess, and optional nuts or seeds for nutrition. They’re sourced easily and layered in order to ensure a nutritious, adaptable start to building dairy tolerance.
What kitchen tools do I need for Dairy Ladder recipes?
Essential tools include measuring cups, mixing bowls, cutting boards for basic prep, and specialized items like whisks for handling dairy and storage containers for hygiene. These basics ensure safe, efficient preparation of nutritious dishes, helping you follow the structured approach with ease.
How should I store Dairy Ladder recipes?
Store recipes based on stage: keep baked custard or porridge in the fridge for up to 24 hours, yogurt parfaits for 1-2 days after culturing, and fresh smoothies for immediate use. Use airtight containers to maintain freshness, safety, and nutritional value, always checking for spoilage before consuming.
Can I prepare Dairy Ladder recipes in advance?
Yes, you can prep components ahead: mix ingredients for baked custard or porridge up to 24 hours in advance, and culture yogurt 1-2 days ahead for parfaits. This makes the process convenient while ensuring recipes stay fresh and aligned with your dairy introduction plan, reducing daily effort.