
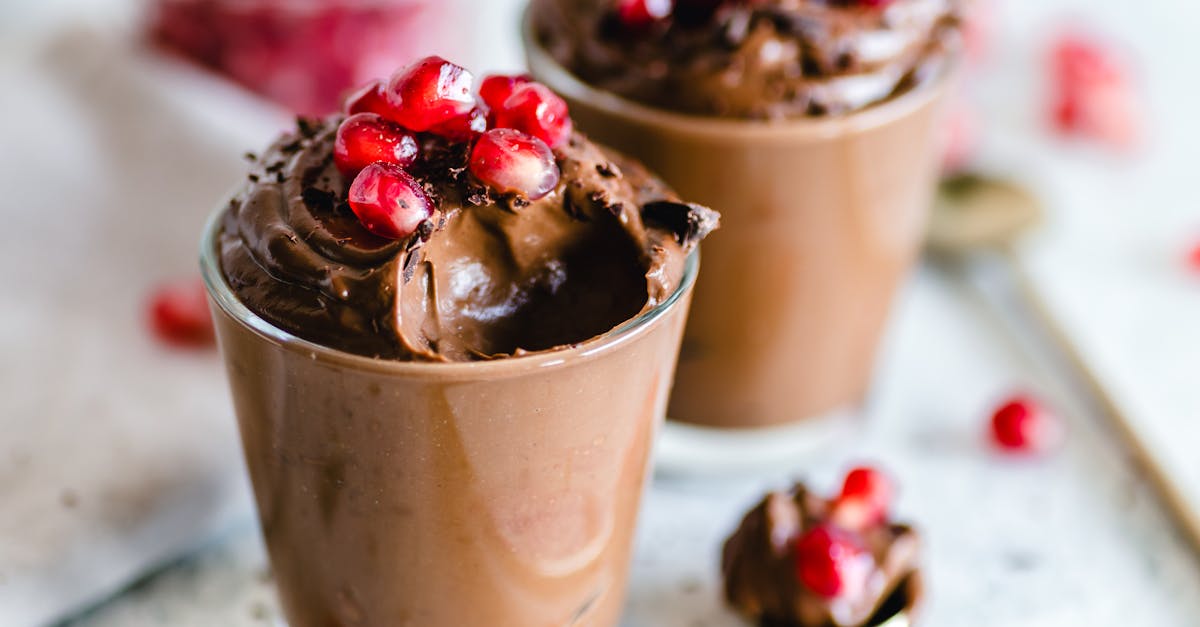
We’ve always been fans of indulgent treats that blend rich caramel with smooth chocolate, and our Caramello Slice recipe delivers just that. Hailing from Australia, this no-bake delight offers a simple twist on classic desserts that’s perfect for beginner bakers or busy days.
It’s no wonder this slice has become a crowd-pleaser in our kitchen—easy to whip up yet packed with flavor that’ll have everyone asking for seconds. Join us as we share the joy of creating this timeless favorite.
Ingredients
For our Caramello Slice, a simple no-bake dessert that combines rich caramel and chocolate flavors, we gather these essential ingredients. We organize them by layer as they’re used in preparation to ensure smooth assembly.
- Base Layer Ingredients:
- 250g digestive biscuits, crushed into fine crumbs for a sturdy foundation
- 125g unsalted butter, melted to bind the base together
- Caramel Filling Ingredients:
- 395g sweetened condensed milk, stirred for creamy texture
- 50g unsalted butter, cubed for easy melting
- 2 tablespoons golden syrup, for that signature caramel sweetness and gloss
- Chocolate Topping Ingredients:
- 200g milk chocolate, chopped into even pieces for quick melting
- 15g unsalted butter, added for a smooth shiny finish
We recommend using high-quality ingredients like fresh butter and real chocolate to enhance the treat’s indulgent taste and texture.
Equipment Needed
Before we dive into preparing our irresistible Caramello Slice—a no-bake delight that combines layers of buttery base, creamy caramel, and glossy chocolate topping—let’s ensure we have the right tools on hand. This simple setup will make assembly straightforward and efficient, building on the ingredients we’ve already organized by layer.
We recommend these essential pieces of equipment to streamline the process:
- Mixing bowls: Two medium-sized bowls for combining the base ingredients like crushed digestive biscuits and melted butter, and for preparing the caramel filling.
- Measuring cups and spoons: Accurate sets for precise measurements of ingredients such as sweetened condensed milk and golden syrup, ensuring the perfect balance in each layer.
- Saucepan: A medium saucepan for melting the butter and golden syrup for the caramel layer, allowing for even heating without scorching.
- Food processor or rolling pin: A food processor to quickly crush the digestive biscuits for the base, or a sturdy rolling pin if crushing by hand for a more hands-on approach.
- Spatula or wooden spoon: A heat-resistant spatula for stirring and spreading the caramel filling and chocolate topping evenly into a baking tin.
- Baking tin or square pan: An 8×8-inch tin lined with parchment paper, ideal for pressing the base and layering the components to achieve that signature slice shape.
- Refrigerator: Essential for setting the layers, allowing the Caramello Slice to firm up and develop its rich, indulgent texture.
With this equipment, we’ll make the preparation of our Caramello Slice as effortless as possible, turning basic ingredients into a crowd-pleasing treat.
Instructions
Now that we have our ingredients and equipment prepared, let’s walk through the simple steps to craft our irresistible Caramello Slice. We’ll use active techniques to ensure each layer sets perfectly for a no-bake dessert that’s both indulgent and easy.
Prepare the Base
First, gather the crushed digestive biscuits and melted unsalted butter from our ingredients list. In a large mixing bowl, combine 2 cups of crushed digestive biscuits with 1/2 cup of melted unsalted butter until the mixture resembles wet sand, ensuring every crumb is evenly coated for a sturdy foundation. Using a heat-resistant spatula, press this mixture firmly and evenly into the bottom of our lined 8×8-inch baking tin to create a smooth, compact base that will hold up against the caramel layer. This step is crucial for achieving that classic, crisp texture we love in Caramello Slice.
Make the Caramel Filling
Next, turn our attention to the caramel filling using the sweetened condensed milk, cubed unsalted butter, and golden syrup. In a medium saucepan over medium heat, melt 1 can (14 ounces) of sweetened condensed milk, 1/2 cup of cubed unsalted butter, and 2 tablespoons of golden syrup, stirring constantly with a heat-resistant spatula to prevent sticking and ensure a silky consistency. As the mixture heats, it will bubble and thicken into a rich, golden caramel with a glossy sheen and sweet aroma that fills the kitchen—continue cooking for about 5-7 minutes until it reaches a soft, spreadable stage. For the best results, use a timer to avoid overcooking, as this layer adds the signature creamy indulgence to our Caramello Slice.
Assemble the Slice
With the base ready and caramel prepared, it’s time to layer everything together for our Caramello Slice. Carefully pour the warm caramel filling over the biscuit base in the tin, then use a spatula to spread it evenly, making sure it reaches the edges for a uniform layer. Immediately top this with the chocolate mixture by melting 1 1/2 cups of chopped milk chocolate with 1/4 cup of unsalted butter in a heatproof bowl over simmering water, stirring until smooth and glossy, then pour it over the caramel and smooth it out. This assembly creates a decadent contrast of crunchy base, gooey caramel, and velvety chocolate that makes our no-bake treat truly standout.
Chill and Set
Finally, to lock in the flavors and textures, transfer the assembled tin to the refrigerator. Let it chill for at least 2 hours—or ideally 4 hours for optimal firmness—allowing the layers to set completely and develop that perfect, sliceable consistency we crave. Once set, remove from the fridge, and use a sharp knife to cut into squares, revealing the glossy chocolate top and creamy caramel interior ready for serving. Chilling times can vary by refrigerator, so check after 2 hours for a firm texture before slicing.
Make-Ahead and Storage Tips
One of the joys of our Caramello Slice recipe is its flexibility for busy schedules, allowing us to prepare it in advance without sacrificing that irresistible caramel-chocolate harmony. By planning ahead, we ensure the flavors deepen and the texture sets perfectly, making it a go-to treat for gatherings or spontaneous cravings.
Make-Ahead Instructions
We love making Caramello Slice the day before to let the layers meld into a decadent, fudgy delight. Follow these simple steps for seamless preparation:
- Prepare the full recipe as outlined in our step-by-step instructions, then chill the assembled slice in the refrigerator for the recommended 2 hours or overnight.
- Once set, slice it into portions using a sharp knife for clean edges, which helps maintain the glossy chocolate topping and prevents crumbling.
- Store the unsliced portions in the fridge, covered with plastic wrap or in an airtight container, to preserve the rich, buttery aroma and prevent the caramel from drying out.
This approach not only saves time but also enhances the dessert’s sensory appeal, as the biscuit base absorbs subtle caramel notes over time.
Storage Guidelines
Proper storage keeps our Caramello Slice fresh and flavorful, extending its shelf life while maintaining that smooth, melt-in-your-mouth texture. Below, we break down the best methods based on our tested recommendations.
For quick reference, here’s a summary of storage durations and tips:
| Storage Method | Duration | Key Tips |
|---|---|---|
| Refrigerator | Up to 5 days | Store in an airtight container to lock in moisture and prevent the chocolate from softening; we suggest placing parchment paper between layers to avoid sticking. |
| Freezer | Up to 3 months | Wrap individual slices tightly in plastic wrap, then place in a freezer-safe bag or container; thaw in the fridge overnight for the best creamy consistency. |
Always check for freshness before serving—look for any signs of separation in the caramel layer, and re-chill if needed to restore that firm, indulgent bite. With these tips, we make sure every piece of our Caramello Slice stays as delicious as the day we made it.
Conclusion
We’ve enjoyed guiding you through this Caramello Slice adventure. It’s one of our favorite no-bake treats that brings joy with every bite.
Whip it up for your next gathering and watch it become a crowd favorite.
Frequently Asked Questions
What is a Caramello Slice?
A Caramello Slice is a popular no-bake Australian dessert featuring layers of biscuit base, rich caramel filling, and smooth chocolate topping. It’s simple to make, perfect for beginners or busy schedules, and delivers a delicious balance of textures and flavors that make it a crowd-pleaser in any kitchen.
What ingredients are needed for Caramello Slice?
You’ll need ingredients organized by layers: for the base, crushed digestive biscuits and melted unsalted butter; for the caramel filling, sweetened condensed milk, unsalted butter, and golden syrup; and for the topping, chopped milk chocolate and unsalted butter. Using high-quality items enhances the taste and texture for an indulgent result.
What equipment is required to make Caramello Slice?
Essential tools include mixing bowls, measuring cups and spoons, a saucepan for melting, a food processor or rolling pin for crushing biscuits, a heat-resistant spatula for spreading, and an 8×8-inch baking tin lined with parchment paper. Don’t forget the refrigerator to set the layers properly.
How do I make Caramello Slice step by step?
Start by mixing crushed biscuits with melted butter and pressing into a tin for the base. Next, melt sweetened condensed milk, butter, and golden syrup to create the caramel filling, then layer it over the base. Top with melted chocolate mixture and chill for at least 2 hours. Slice and serve for a simple, delicious treat.
Can I make Caramello Slice ahead of time?
Yes, you can prepare Caramello Slice a day in advance to let flavors deepen and texture set, making it ideal for busy schedules. This no-bake dessert holds up well, allowing you to focus on other tasks while it chills in the fridge.
How should I store Caramello Slice?
Store unsliced portions in an airtight container in the refrigerator for up to 5 days to maintain freshness. For longer storage, freeze individual slices for up to 3 months; thaw in the fridge before serving to keep the texture rich and enjoyable.