
We can’t resist the allure of Gogosi, those fluffy Romanian doughnuts that bring a taste of Eastern Europe right to our kitchens. Originating from traditional Romanian fare these golden treats offer a perfect blend of crispiness and sweetness making them ideal for breakfast or a cozy snack.
They’re not just delicious—they’re a fun way to explore global flavors without leaving home. We’ve perfected this recipe to ensure it’s easy and rewarding so you can whip up a batch that impresses family and friends.
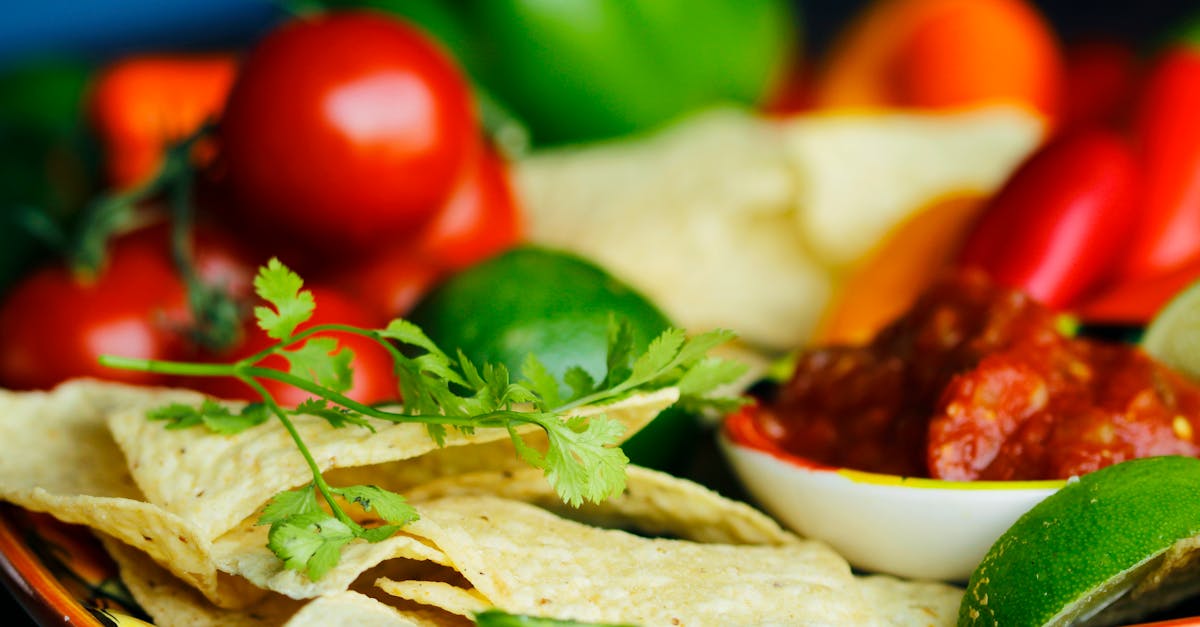
Ingredients
To craft our fluffy, golden Gogosi—traditional Romanian doughnuts—we start with these essential ingredients. We’ve organized them in the order they’re typically used during preparation, including any necessary prep notes for accuracy and ease.
- All-purpose flour (3 cups, sifted to ensure a light texture that contributes to the dough’s fluffiness)
- Active dry yeast (2¼ teaspoons, proofed in warm liquid to activate and promote a perfect rise)
- Warm milk (1 cup, heated to 110°F for optimal yeast activation and to create a soft, tender dough)
- Granulated sugar (½ cup, divided—use part for the dough and the rest for sweetening, enhancing the delightful crispiness)
- Large eggs (2, beaten to incorporate air and richness into the mixture)
- Unsalted butter (¼ cup, melted and cooled to add moisture and a subtle buttery flavor)
- Salt (1 teaspoon, to balance the sweetness and highlight the dough’s flavors)
- Vanilla extract (1 teaspoon, for a hint of aromatic warmth that elevates the overall taste)
- Vegetable oil (for frying, about 2 quarts, heated to 350°F to achieve that irresistible crispy exterior)
These carefully measured components come together to deliver the signature crispiness and sweetness of Gogosi, making it a rewarding homemade treat.
Required Tools and Equipment
Having gathered our ingredients for the Gogosi recipe, we now turn to the essential tools and equipment that ensure a smooth and successful preparation process. These items help us achieve the perfect fluffy texture and crisp fry, making homemade doughnuts a breeze.
To organize our setup effectively, here’s a list of the key tools we’ll need, categorized by their primary use in the recipe:
- Large Mixing Bowl: We use this for combining dry ingredients like flour and yeast with wet ones such as milk and eggs, allowing for thorough mixing without spills.
- Measuring Cups and Spoons: Accurate measurements are crucial for our Gogosi dough—opt for a set that includes both dry and liquid cups to precisely measure flour, sugar, and liquids.
- Whisk or Wooden Spoon: This tool helps us blend the dough evenly, ensuring the yeast activates properly for that signature rise.
- Rolling Pin: We’ll rely on this to roll out the dough to the ideal thickness, typically about ½ inch, for uniform doughnuts.
- Cookie Cutters or Doughnut Cutter: A round cutter (around 2-3 inches in diameter) lets us shape the doughnuts precisely, while a smaller one creates the center hole.
- Deep Fryer or Heavy-Bottomed Pot: For frying, we recommend a deep fryer with a temperature control for maintaining oil at 350°F, or a sturdy pot if using a stove.
- Candy Thermometer: This ensures our frying oil reaches the optimal temperature—use it to monitor and prevent undercooking or burning.
- Slotted Spoon or Tongs: Essential for safely flipping and removing the Gogosi from hot oil, minimizing splatters and handling the doughnuts with ease.
- Cooling Rack: After frying, we place the doughnuts here to drain excess oil and cool evenly, preserving their crisp exterior.
- Parchment Paper or Baking Sheet: We line this for proofing the dough, keeping our workspace clean and the dough from sticking.
By having these tools ready, we can focus on the joy of crafting authentic Gogosi that boast a golden, crispy finish and irresistible fluffiness.
Instructions
Now that we have gathered our ingredients and essential tools, we guide you through crafting authentic Gogosi with ease and precision. Let’s create these fluffy Romanian doughnuts step by step for a crispy exterior and soft interior that delights the senses.
Prepare the Dough
First, we activate the yeast to ensure our dough rises perfectly. In a large mixing bowl, combine 2 1/4 teaspoons of active dry yeast with 1/2 cup of warm milk and 1 tablespoon of granulated sugar. Stir gently and let it sit for about 5-10 minutes until it becomes frothy signaling the yeast is active.
Next, we add the remaining wet ingredients to build flavor and texture. Incorporate 2 large eggs, 1/4 cup of melted unsalted butter, 1 teaspoon of vanilla extract, and 1/2 teaspoon of salt into the yeast mixture. Gradually mix in 3 cups of all-purpose flour using a whisk or wooden spoon until a sticky dough forms.
Once combined, we knead the dough on a lightly floured surface for 5-7 minutes until it is smooth and elastic. This step is crucial for achieving that signature fluffiness. Transfer the dough to a greased bowl, cover it with a clean kitchen towel, and let it rise in a warm spot for 1-1.5 hours or until it doubles in size. As it rises, you’ll notice the delightful aroma of yeast filling the air preparing you for the treat ahead.
Fry the Gogosi
After the dough has risen, we punch it down gently to release air and roll it out on a floured surface to about 1/2-inch thickness using a rolling pin. Cut the dough into circles or shapes with a doughnut cutter or cookie cutters yielding approximately 12-15 pieces depending on size.
Heat vegetable oil in a deep fryer or heavy-bottomed pot to 350°F monitored with a candy thermometer. Carefully lower 2-3 dough pieces at a time into the hot oil using a slotted spoon or tongs. Fry for 1-2 minutes per side until they turn a golden brown and puff up creating a crispy outer layer that contrasts beautifully with the soft inside.
Remove the fried Gogosi with tongs and place them on a cooling rack to drain excess oil. This process ensures each bite offers a satisfying crunch followed by a tender, airy center that makes these doughnuts irresistible.
Coat and Serve
While the Gogosi are still warm, we enhance their sweetness by rolling them in a bowl of 1 cup of granulated sugar or a mixture of sugar and cinnamon for added flavor. This coating step locks in the freshness and provides a sparkling finish that elevates the taste.
Serve the coated Gogosi immediately on a plate or baking sheet lined with parchment paper. Enjoy their warm, fluffy texture and sweet aroma as a perfect breakfast or snack that brings a touch of Romanian tradition to your table.
Make-Ahead Instructions
To make preparing Gogosi even more convenient, we often prepare components in advance so you can enjoy fresh, fluffy doughnuts with minimal effort on the day of serving. This approach is perfect for busy mornings or special occasions, allowing us to focus on the frying and finishing touches while maintaining that signature crispiness and sweetness.
Preparing the Dough Ahead
We suggest making the dough up to 24 hours in advance to let flavors develop and save time. Follow these steps for optimal results:
- Activate the yeast as usual: In a large mixing bowl, combine 1 packet (about 2 1/4 teaspoons) of active dry yeast with 1/2 cup of warm milk and 1 tablespoon of granulated sugar. Let it sit for 5-10 minutes until foamy.
- Mix and knead the dough: Add the remaining wet ingredients—1 cup warm milk, 2 large eggs, 1/4 cup melted unsalted butter, and 1 teaspoon vanilla extract—then incorporate 4 cups of all-purpose flour and 1/2 teaspoon salt. Knead until you form a smooth, sticky dough, as described in our earlier steps.
- First rise and chill: Cover the dough with plastic wrap and let it rise in a warm place for about 1 hour until doubled in size. Once risen, punch it down gently, then transfer to an airtight container or wrap tightly in plastic wrap and refrigerate for up to 24 hours.
- Thaw if needed: If you’re using the dough after chilling, let it sit at room temperature for 30-60 minutes until it softens enough to shape.
Shaping and Freezing Uncooked Gogosi
For even more flexibility, we recommend shaping the doughnuts ahead and freezing them, so you can fry them fresh when ready.
- Shape the dough: After the dough has risen and been punched down, roll it out to about 1/2-inch thickness on a floured surface. Use a doughnut cutter to form rings or shapes, placing them on a parchment-lined baking sheet.
- Freeze immediately: Arrange the shaped doughnuts without touching, then freeze on the baking sheet for 1-2 hours until solid. Transfer to a freezer-safe bag or container for storage up to 1 month.
- Fry from frozen: When ready to cook, remove the desired number of doughnuts from the freezer and let them thaw slightly for 10-15 minutes. Fry in hot oil at 350°F as per our main instructions, adding 1-2 extra minutes to the frying time for a golden, crispy finish.
Storing and Reheating Fried Gogosi
If you’ve already fried a batch, we have tips to keep them tasting fresh.
| Storage Method | Duration | Key Tips |
|---|---|---|
| Room Temperature | Up to 2 hours | Store in an airtight container to maintain crispiness; ideal for immediate consumption. |
| Refrigerator | Up to 2 days | Place cooled Gogosi in an airtight container; reheat in a 350°F oven for 5 minutes to restore texture. |
| Freezer | Up to 1 month | Cool completely, then freeze in a single layer before bagging; thaw at room temperature and reheat in the oven for 5-7 minutes to avoid sogginess. |
By following these make-ahead strategies, we ensure your Gogosi remain irresistibly fluffy and crunchy, making it easier to bring Romanian flavors to your table anytime.
Conclusion
We’ve loved guiding you through this Gogosi adventure, bringing a touch of Romanian charm to your kitchen.
It’s rewarding to create these fluffy treats that blend crisp edges with sweet centers, perfect for sharing with loved ones.
Now it’s your turn—whip up a batch and savor the homemade magic.
Frequently Asked Questions
What is Gogosi?
Gogosi are traditional Romanian doughnuts known for their fluffy texture, crispy exterior, and sweet flavor. They’re a versatile treat, perfect for breakfast or as a snack, and offer a fun way to explore global flavors at home. This easy recipe lets you make them to impress family and friends.
What are the key ingredients for making Gogosi?
The main ingredients include all-purpose flour, active dry yeast, warm milk, granulated sugar, large eggs, unsalted butter, salt, vanilla extract, and vegetable oil for frying. Each helps achieve the signature fluffiness and crispiness, making your homemade version authentic and delicious.
What tools do I need to make Gogosi at home?
You’ll need a large mixing bowl, measuring cups and spoons, a whisk or wooden spoon, a rolling pin, cookie cutters or a doughnut cutter, a deep fryer or heavy-bottomed pot, a candy thermometer, slotted spoon or tongs, a cooling rack, and parchment paper. These ensure smooth preparation and perfect results.
How do I prepare the dough for Gogosi?
Start by activating the yeast in warm milk and sugar, then mix with flour, eggs, butter, salt, and vanilla to form a sticky dough. Knead until smooth, let it rise until doubled, then roll and cut into shapes. Fry in hot oil until golden, and coat with sugar while warm for a sweet finish.
Can I make Gogosi ahead of time?
Yes, prepare the dough up to 24 hours in advance by mixing, kneading, and chilling it in the fridge. You can also shape the doughnuts and freeze them uncooked for later frying. This makes it easy to enjoy fresh Gogosi anytime without rushing.
How should I store fried Gogosi?
Store fried Gogosi in an airtight container at room temperature for up to 2 days, in the fridge for up to a week, or freeze for up to 3 months. Reheat in the oven or air fryer to restore crispiness. Always let them cool first to maintain texture and freshness.