
We’ve all craved that perfect hoagie roll for our favorite sandwiches, but going gluten-free doesn’t mean sacrificing flavor or texture. That’s why we’re excited to share our take on gluten-free hoagie rolls that deliver a soft, chewy bite while keeping things simple and accessible.
These rolls hail from the classic American sub tradition yet cater to modern dietary needs, making them ideal for anyone with gluten sensitivities. We’ll guide you through an easy process that ensures bakery-quality results right at home, so you can enjoy guilt-free meals that taste just as amazing.
Ingredients
To craft our mouthwatering gluten-free hoagie rolls that deliver the same soft texture and flavor as traditional versions, we start by assembling these key ingredients. We’ll list them in the order they’re typically used, with specific measurements and any necessary prep notes for accuracy.
Dry Ingredients
- 2 1/4 cups gluten-free all-purpose flour blend (ensure it contains xanthan gum for optimal elasticity; sift if clumpy to avoid lumps)
- 1 tablespoon granulated sugar (helps activate the yeast for a light, airy rise)
- 1 teaspoon salt (fine sea salt works best for even distribution)
Wet Ingredients
- 2 1/4 teaspoons active dry yeast (one standard packet; proof in warm liquid first for reliable fermentation)
- 1 cup warm water (around 110°F/43°C; too hot may kill the yeast)
- 2 tablespoons olive oil (or melted coconut oil for a neutral flavor)
- 1 large egg (room temperature; for a vegan option, substitute with a flax egg for binding)
| Servings | Flour (cups) | Yeast (teaspoons) | Water (cups) |
|---|---|---|---|
| 6 | 2 1/4 | 2 1/4 | 1 |
| 12 | 4 1/2 | 4 1/2 | 2 |
Equipment Needed
We gather the right equipment to prepare our gluten-free hoagie rolls effortlessly ensuring a seamless transition from mixing ingredients to baking. With these tools we achieve the perfect texture and rise for bakery-quality results.
Essential Tools
For mixing and preparing the dough we recommend these essential tools to handle our gluten-free hoagie rolls recipe with precision:
- Mixing Bowl: A large glass or stainless steel bowl for combining dry and wet ingredients; ensures even mixing without residue.
- Measuring Cups and Spoons: Accurate stainless steel sets for measuring flour yeast and other ingredients to maintain the recipe’s balance.
- Whisk or Stand Mixer: A sturdy whisk or electric stand mixer with dough hook to incorporate air and achieve the right consistency in the dough.
- Spatula: A silicone spatula for scraping down sides of the bowl and folding ingredients gently.
Baking Equipment
- Baking Sheet: A rimmed baking sheet lined with parchment paper for even heat distribution and easy removal of rolls.
- Parchment Paper: Unbleached sheets to prevent sticking and promote a crisp exterior on the rolls.
- Oven: A standard conventional or convection oven preheated to the specified temperature for optimal baking.
- Cooling Rack: A wire rack to cool the rolls evenly after baking preserving their soft interior and crust.
Instructions
Now that we have our ingredients and equipment prepared, let’s guide you through crafting these soft, flavorful gluten-free hoagie rolls. We ensure each step is straightforward and yields bakery-quality results with a tender interior and golden crust.
Prep Work
Before we begin mixing, we gather and prepare our ingredients for smooth execution. Start by measuring out 2 cups of gluten-free all-purpose flour (ensure it contains xanthan gum for elasticity), 1 teaspoon of sugar, 1 teaspoon of salt, 1 packet of active dry yeast (about 2 1/4 teaspoons), 1 cup of warm water (around 110°F), 2 tablespoons of olive oil, and 1 large egg. Proof the yeast by dissolving it in the warm water with the sugar—stir until combined, then let it sit for 5-10 minutes until it becomes frothy and active, signaling it’s ready for use.
Mixing the Dough
With our prepped ingredients in hand, we combine them to form a cohesive dough. In a large mixing bowl, whisk together the gluten-free flour, salt, and any other dry components. In a separate bowl, beat the egg and mix it with the olive oil. Pour the frothy yeast mixture and the egg-olive oil blend into the dry ingredients, then use a stand mixer fitted with a dough hook on medium speed for 3-5 minutes until the dough pulls away from the sides and feels smooth and slightly sticky—imagine the satisfying texture transforming into a pliable base for our rolls.
First Rise
Once the dough is mixed, we allow it to rise for optimal flavor and texture development. Transfer the dough to a lightly oiled bowl, turning it once to coat all sides, then cover it with a clean kitchen towel or plastic wrap. Place the bowl in a warm, draft-free spot—such as an oven with the light on—and let it rise for about 1 hour, or until it doubles in size, becoming light, airy, and full of those enticing yeasty aromas that promise a delightfully soft gluten-free hoagie roll.
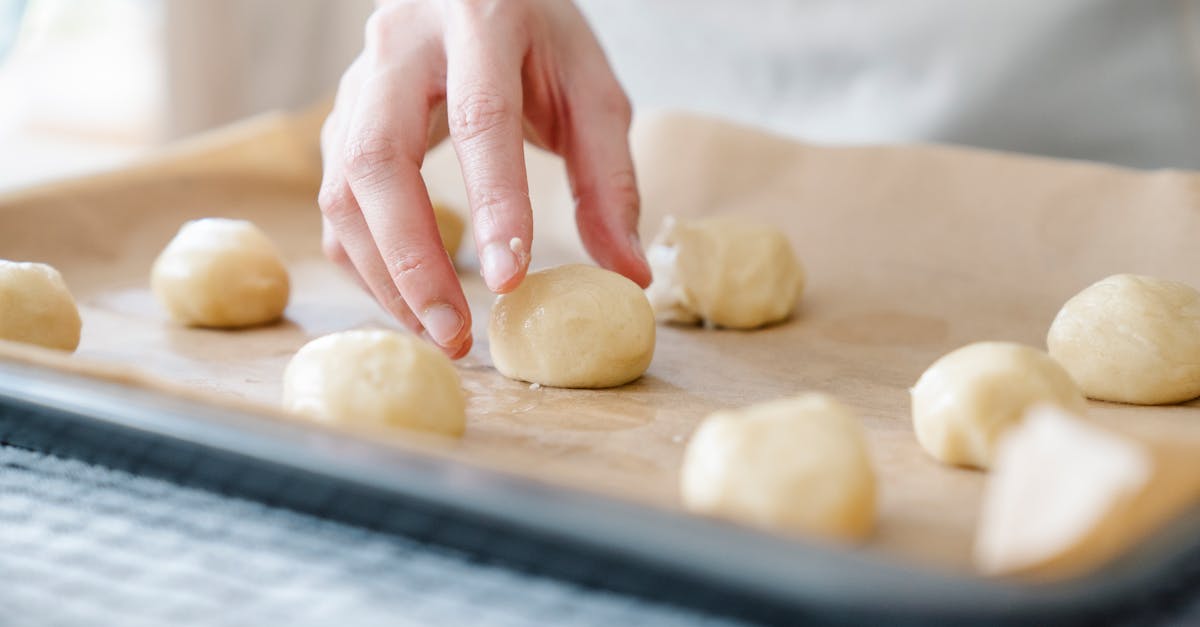
Shaping the Rolls
After the first rise, we shape the dough into individual rolls for even baking. Gently punch down the risen dough to release air bubbles, then turn it out onto a lightly floured surface (use more gluten-free flour to prevent sticking). Divide the dough into 6 equal portions—each about 4-5 ounces—using a bench scraper for precision. Roll each portion into a 6-inch log shape, tucking the ends under for a neat, elongated form, and place them on a parchment-lined rimmed baking sheet, spaced 2 inches apart to allow for expansion.
Second Rise
To achieve that perfect, pillowy texture, we give the shaped rolls a second rise. Cover the baking sheet loosely with a towel and let the rolls sit in a warm area for 30-45 minutes, or until they puff up noticeably and increase by about 50% in size—envision the dough rising gracefully, ready to bake into golden, crispy-on-the-outside perfection for our gluten-free hoagie rolls.
Baking
We bake the rolls to lock in their flavor and texture. Preheat your oven to 375°F and, for extra rise, place a pan of hot water on the lower rack to create steam. Bake the rolls on the middle rack for 20-25 minutes, rotating the sheet halfway through, until they turn a deep golden brown and sound hollow when tapped on the bottom—the aroma of freshly baked, warm gluten-free hoagie rolls will fill your kitchen, inviting you to enjoy their irresistible crunch and softness.
Cooling
Finally, we cool the rolls to set their structure and maintain freshness. Remove the baking sheet from the oven and transfer the rolls immediately to a wire cooling rack to prevent sogginess. Let them cool for at least 15-20 minutes before slicing—this step ensures the interior stays tender while the crust crisps up, making them ideal for your next sandwich creation.
Make-Ahead Instructions
To make our gluten-free hoagie rolls even more convenient, we can prepare them ahead of time without compromising their soft, pillowy texture or flavorful crust. This approach allows us to streamline our meal prep and enjoy fresh-tasting rolls for sandwiches anytime. Below, we outline the best methods for making ahead, including storage and reheating tips to maintain quality.
Preparing the Dough in Advance
We recommend proofing and mixing the dough up to 24 hours ahead. After the first rise as described in our step-by-step instructions, cover the bowl tightly with plastic wrap or a damp cloth and refrigerate it. This slow fermentation in the fridge enhances the dough’s flavor, giving it a more complex, yeasty depth. When you’re ready to bake, let the dough sit at room temperature for about 30-45 minutes to warm up before shaping and proceeding with the second rise. This ensures the rolls rise evenly and achieve that irresistibly chewy interior.
Freezing Unbaked Rolls
For longer storage, we can shape the rolls ahead and freeze them unbaked. Once the dough has completed its second rise, place the shaped rolls on a parchment-lined baking sheet and freeze them until solid—typically 1-2 hours. Then, transfer the frozen rolls to a freezer-safe bag or container. They can be stored this way for up to 3 months.
To bake from frozen, simply preheat your oven as per the original instructions, place the frozen rolls on a baking sheet, and add 5-10 minutes to the baking time. This method keeps the rolls golden and crisp on the outside while preserving their soft center, making it ideal for spontaneous gluten-free meals.
Storing Baked Rolls
If we’ve already baked the rolls, we can store them at room temperature in an airtight container for 1-2 days to keep them fresh and moist. For extended storage, let the rolls cool completely, then wrap them individually in plastic wrap and freeze in a resealable bag for up to 2 months.
When reheating, thaw them overnight in the fridge or at room temperature for 1-2 hours, then warm in a 350°F oven for 5-7 minutes. This revives their warm, aromatic appeal and prevents sogginess, ensuring our gluten-free hoagie rolls taste just-baked every time.
| Storage Method | Duration | Key Tips |
|---|---|---|
| Refrigerated dough | Up to 24 hours | Cover tightly; let warm before shaping |
| Frozen unbaked rolls | Up to 3 months | Bake from frozen with extra time |
| Room temperature rolls | 1-2 days | Use airtight container |
| Frozen baked rolls | Up to 2 months | Thaw and reheat in oven |
Conclusion
We’ve crafted this gluten-free hoagie rolls recipe to bring joy back to your table without compromise. It’s our way of showing that delicious, bakery-style sandwiches are within everyone’s reach.
With these rolls you’ll enjoy fresh, flavorful options that fit your lifestyle. We’re confident they’ll become a staple in your kitchen so go ahead and savor every bite.
Frequently Asked Questions
What are gluten-free hoagie rolls?
Gluten-free hoagie rolls are a delicious alternative to traditional rolls, made without gluten to accommodate sensitivities while keeping the same great flavor and texture. They’re perfect for sandwiches and can be baked at home for bakery-quality results.
What ingredients do I need for gluten-free hoagie rolls?
You’ll need dry ingredients like gluten-free all-purpose flour (with xanthan gum for elasticity), sugar, and salt, plus wet ones such as active dry yeast, warm water, olive oil, and an egg. The recipe provides precise measurements for different serving sizes to ensure success.
What equipment is required to make gluten-free hoagie rolls?
Essential tools include a large mixing bowl, measuring cups and spoons, a whisk or stand mixer, silicone spatula, rimmed baking sheet with parchment paper, and a wire cooling rack. These help mix, shape, and bake the rolls evenly for the best texture.
How do I make gluten-free hoagie rolls?
Start by proofing the yeast, mix the dough with dry and wet ingredients, let it rise, shape into rolls, and give a second rise. Bake in a preheated oven with steam for extra lift, then cool on a wire rack. The process is straightforward and yields soft, flavorful rolls.
Can I make gluten-free hoagie rolls ahead of time?
Yes, prepare the dough up to 24 hours in advance and refrigerate for better flavor. You can also freeze unbaked rolls after the second rise or bake them and freeze for up to 2 months. This makes it easy to have fresh rolls whenever you need them.
How should I store gluten-free hoagie rolls?
Store baked rolls at room temperature for 1-2 days in an airtight container. For longer storage, freeze for up to 2 months and reheat in the oven to maintain texture. Unbaked rolls can be frozen and baked directly from frozen with adjusted time.
Are gluten-free hoagie rolls suitable for people with gluten sensitivities?
Absolutely, they’re made with gluten-free ingredients and designed to mimic traditional rolls’ taste and texture, making them safe and enjoyable for those with gluten sensitivities while delivering bakery-quality results at home.