
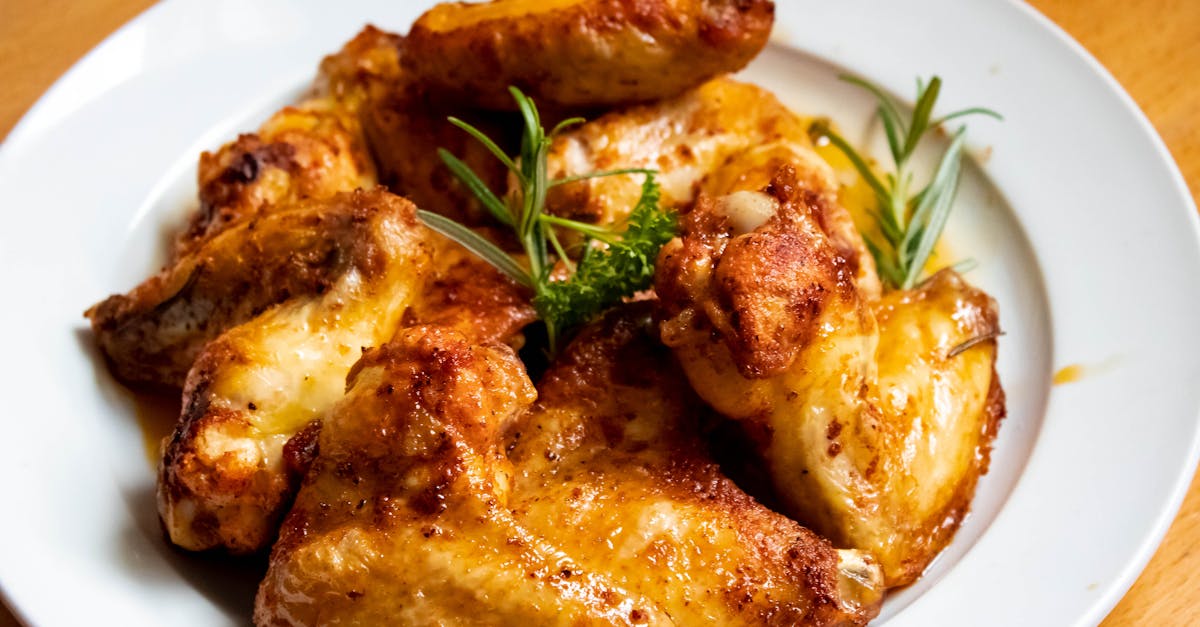
We absolutely love diving into classic Italian dishes, and Chicken Cappelletti stands out as a comforting favorite. This delightful pasta features tender pockets stuffed with flavorful chicken, offering a taste of Emilia-Romagna’s rich culinary heritage that warms the soul.
In our kitchen we’ve simplified the process so you can whip up this hearty meal with ease. Whether you’re hosting a gathering or enjoying a quiet night in, Chicken Cappelletti brings authentic flavors to your table that everyone will crave.
Ingredients
To craft our flavorful Chicken Cappelletti—a classic Italian pasta dish filled with tender chicken and aromatic herbs—we start with a selection of fresh, high-quality ingredients. We’ve organized them by category for ease, ensuring you can prepare each component smoothly.
For the Pasta Dough
- 2 cups all-purpose flour: Sifted to ensure a smooth texture.
- 3 large eggs: At room temperature for better binding.
- 1/2 teaspoon salt: Fine sea salt to enhance the dough’s flavor.
For the Chicken Filling
- 1 pound ground chicken: Freshly ground for a juicy, tender fill.
- 1 medium onion: Finely chopped to add a sweet, savory base.
- 2 cloves garlic: Minced for a robust, aromatic punch.
- 1/2 cup Parmesan cheese: Grated to provide a nutty, creamy contrast.
- 1/4 cup fresh parsley: Chopped for a bright, herbaceous note.
- 1/4 teaspoon ground nutmeg: Freshly grated to introduce warm, subtle spice.
- 1/2 teaspoon salt: To season the filling perfectly.
- 1/4 teaspoon black pepper: Ground for a hint of heat.
For Cooking and Serving
- 4 cups chicken broth: Low-sodium, for boiling the cappelletti to infuse extra flavor.
- 2 tablespoons olive oil: Extra-virgin, for sautéing the filling ingredients.
These ingredients combine to deliver the comforting, rich tastes of authentic Emilia-Romagna cuisine right in your kitchen.
Tools and Equipment
To prepare our Chicken Cappelletti with ease and precision, we rely on a few essential tools that streamline the process from dough-making to serving. These items ensure that our authentic Italian dish comes together smoothly, allowing us to focus on the rich flavors and comforting textures of this Emilia-Romagna classic.
Essential Kitchen Tools
We’ll organize our tools by the stages of preparation for better flow. Here’s a detailed list of what you’ll need:
- Mixing Bowls: Large and medium-sized bowls for combining ingredients like the pasta dough and chicken filling. We recommend glass or stainless steel for easy cleaning and to avoid any flavor transfer.
- Measuring Cups and Spoons: Accurate sets for measuring flour, eggs, and seasonings. Precision here helps us achieve the perfect dough consistency without guesswork.
- Rolling Pin: A sturdy wooden or silicone pin to roll out the pasta dough evenly. This tool is key for creating thin, tender sheets that encase the flavorful filling.
- Pasta Machine or Knife: If available, a manual pasta roller for uniform sheets; otherwise, a sharp chef’s knife works for cutting. We find that a pasta machine saves time and ensures professional results.
- Food Processor: Ideal for quickly mincing onions, garlic, and blending the chicken filling mixture. If you don’t have one, a good knife and cutting board can substitute for manual chopping.
Cooking and Serving Essentials
Once the dough and filling are ready, these tools help with assembly and final preparation:
- Pasta Cutter or Mold: A ravioli cutter or dedicated cappelletti mold for shaping the pasta pockets. This ensures our Chicken Cappelletti maintains its traditional form, enhancing both presentation and taste.
- Large Pot: For boiling the pasta in chicken broth, ensuring even cooking and infusing extra flavor. Choose one with a lid to control simmering.
- Skillet or Saucepan: Useful for any quick sautéing of filling ingredients, like browning onions and garlic.
- Tongs and Slotted Spoon: For handling delicate pasta during cooking and serving, preventing breakage while draining excess liquid.
By gathering these tools beforehand, we make the transition from ingredients to a beautifully crafted dish seamless. This setup not only simplifies our recipe but also elevates the overall experience of creating homemade Chicken Cappelletti.
Directions
With our ingredients measured and tools assembled, we’re excited to guide you through crafting our delicious Chicken Cappelletti. These steps ensure you capture the authentic Italian flavors and textures that make this dish a comforting favorite.
Prepare the Chicken Filling
First, heat 2 tablespoons of extra-virgin olive oil in a large skillet over medium heat. Add 1 finely chopped onion and 2 minced garlic cloves then sauté for 3-4 minutes until they turn golden and release a fragrant aroma that fills the kitchen.
Next, stir in 1 pound of freshly ground chicken and cook for 5-7 minutes breaking it up with a spoon until it’s no longer pink and has a juicy texture.
Finally, remove from heat and mix in 1/2 cup of grated Parmesan cheese 1 tablespoon of chopped parsley 1/4 teaspoon of ground nutmeg, 1 teaspoon of salt, and 1/2 teaspoon of black pepper. Stir until well combined creating a savory filling that’s creamy and packed with herbaceous notes for the perfect pasta pocket.
Make the Pasta Dough
In a large mixing bowl, combine 2 cups of sifted all-purpose flour and 1/2 teaspoon of fine sea salt creating a well in the center.
Crack 3 large eggs into the well then use a fork to gradually incorporate the flour mixing until a shaggy dough forms.
Turn the dough onto a lightly floured surface and knead for 8-10 minutes until it’s smooth and elastic with a silky feel under your hands. Wrap it in plastic wrap and let it rest for 30 minutes allowing the gluten to develop for that tender pasta dough consistency.
Assemble the Cappelletti
After resting, divide the pasta dough into 4 equal portions and roll each one through a pasta machine on the thinnest setting or use a rolling pin to achieve a thin translucent sheet.
Using a pasta cutter or knife, cut the dough into 2-inch squares then place about 1 teaspoon of the prepared chicken filling in the center of each square.
Fold each square into a triangle sealing the edges with your fingers then bring the two corners together twisting gently to form the signature hat-like shape of Cappelletti ensuring they’re tightly sealed to lock in the flavorful juices.
Cook the Cappelletti
Bring 8 cups of low-sodium chicken broth to a gentle boil in a large pot.
Carefully add the assembled Cappelletti in batches and cook for 4-6 minutes until they float to the surface and have a tender al dente bite with a savory broth that enhances their rich flavors.
Use a slotted spoon to remove them then drizzle with a touch of extra-virgin olive oil and serve immediately savoring the comforting warmth and aromatic essence of this authentic Italian dish.
Make-Ahead Instructions
To keep our Chicken Cappelletti preparation seamless and stress-free, we recommend making certain components ahead of time. This approach allows us to preserve the dish’s tender pasta pockets and rich, comforting flavors without sacrificing authenticity. Below, we outline the key steps for preparing the filling, dough, and assembled pasta in advance, ensuring everything stays fresh and ready for your next gathering.
Preparing the Chicken Filling Ahead
We can make the chicken filling up to 2 days in advance to let the flavors meld beautifully. Start by following the sautéing and mixing steps from our preparation section—cook the onions, garlic, ground chicken, and seasonings until fully combined. Once cooled, transfer the mixture to an airtight container and refrigerate it. This method keeps the filling moist and aromatic, so when you’re ready to assemble, it will effortlessly enhance the pasta’s savory essence.
Making the Pasta Dough in Advance
Our pasta dough can be prepared up to 24 hours ahead, giving it ample time to rest and develop a smooth, elastic texture. After kneading the dough as directed, wrap it tightly in plastic wrap or place it in a sealed bag to prevent drying. Store it in the refrigerator, and remember to let it sit at room temperature for about 30 minutes before rolling. This make-ahead technique ensures the dough rolls out perfectly, maintaining the delicate, homemade quality that defines authentic Emilia-Romagna Cappelletti.
Assembling Cappelletti Ahead of Time
For ultimate convenience, we suggest assembling the full Cappelletti up to 1 day in advance. Once you’ve filled and shaped the pasta squares, arrange them in a single layer on a parchment-lined baking sheet dusted with flour to avoid sticking. Freeze them until solid, then transfer to a freezer-safe bag or container for up to 1 month. If refrigerating instead, cover loosely and use within 24 hours. Freezing assembled Cappelletti preserves their signature pocket shape and tender bite, so they cook up fresh when needed.
Storage and Reheating Tips
Proper storage is key to maintaining the dish’s comforting warmth and flavors. Here’s a quick overview of storage times and methods in the following table:
| Component | Storage Method | Duration | Reheating Instructions |
|---|---|---|---|
| Chicken Filling | Airtight container in refrigerator | Up to 2 days | Let it come to room temperature, then use directly in assembly. |
| Pasta Dough | Wrapped in plastic in refrigerator | Up to 24 hours | Let rest at room temperature for 30 minutes before rolling. |
| Assembled Cappelletti | Freezer-safe bag in freezer or airtight container in refrigerator | Up to 1 month (freezer) or 24 hours (refrigerator) | Boil directly from frozen, adding 1-2 minutes to cook time; if refrigerated, boil as per original instructions until they float. |
By following these steps, we ensure our Chicken Cappelletti remains a flavorful, easy-to-prepare favorite for any occasion.
Conclusion
We’ve loved sharing this Chicken Cappelletti recipe with you
It’s a simple way to bring authentic Italian warmth to your table
You’ll find it’s not just a meal but a comforting tradition
We can’t wait for you to make it and savor every flavorful bite.
Frequently Asked Questions
What is Chicken Cappelletti?
Chicken Cappelletti is a classic Italian dish from Emilia-Romagna, featuring tender pasta pockets filled with flavorful chicken. It’s known for its comforting, rich tastes and can be enjoyed at gatherings or quiet dinners. This simplified recipe keeps the authentic heritage alive while making it easy to prepare at home.
What ingredients are needed for Chicken Cappelletti?
For Chicken Cappelletti, you’ll need ingredients for the dough (all-purpose flour, eggs, and salt), filling (ground chicken, onion, garlic, Parmesan, parsley, nutmeg, salt, and pepper), and serving (chicken broth and olive oil). These fresh components combine to create the dish’s authentic Italian flavors, organized by category for easy shopping.
What tools are required to make Chicken Cappelletti?
Essential tools include mixing bowls, measuring cups, a rolling pin, and a pasta machine or knife for dough preparation. For assembly and cooking, use a pasta cutter, large pot, tongs, and a slotted spoon. Gathering these items beforehand ensures a smooth process for this homemade Italian favorite.
How do I prepare Chicken Cappelletti?
Start by making the filling: sauté onions and garlic, add ground chicken and seasonings. Then, prepare dough by mixing flour, salt, and eggs, knead, and let rest. Roll out dough, cut into squares, fill, and shape into pockets. Cook in chicken broth until they float, and serve with olive oil for a warm, aromatic meal.
Can I make Chicken Cappelletti ahead of time?
Yes, prepare the filling up to 2 days in advance and store in an airtight container. Make dough up to 24 hours ahead and wrap tightly. Assemble Cappelletti and refrigerate for up to 24 hours or freeze for a month. This makes it convenient for busy schedules while preserving flavors.
How should I store and reheat Chicken Cappelletti?
Store uncooked Cappelletti in the fridge for up to 24 hours or freeze for up to a month. For cooked ones, cool and refrigerate in an airtight container for 1-2 days. Reheat by boiling in broth until warmed through, or gently in a pan with olive oil to maintain the dish’s comforting texture and taste.