
Craving a snack that’s both crunchy and packed with flavor? We’ve got just the thing with our Garlic Rye Chips recipe! These irresistible bites transform humble rye bread into golden, garlicky perfection that’s perfect for dipping or munching on their own. Inspired by classic deli flavors, this recipe brings a nostalgic twist to your snack game.
What makes these chips stand out is their bold garlic kick paired with the hearty, nutty taste of rye. They’re a fantastic way to use up leftover bread while creating something utterly addictive. Whether you’re hosting a party or just need a quick treat, these chips won’t disappoint.
About Garlic Rye Chips
Dive into the irresistible world of Garlic Rye Chips—a snack that combines the hearty texture of rye bread with the bold punch of garlic. We’re thrilled to share this unique recipe that transforms simple ingredients into a crunchy delight perfect for any occasion. Whether you’re hosting a party or craving a quick bite, these chips bring a nostalgic deli-inspired flavor to your table.
Why We Love Garlic Rye Chips
Let’s talk about what makes Garlic Rye Chips so special. First, they’re an incredible way to repurpose leftover rye bread—turning something ordinary into a gourmet treat. The nutty undertones of rye paired with the savory kick of garlic create a flavor profile that’s hard to resist. Imagine the aroma of freshly baked chips wafting through your kitchen—a scent that promises a satisfying crunch with every bite. Plus, they’re versatile! Serve them with your favorite dip or enjoy them solo as a crunchy snack.
The Inspiration Behind Our Recipe
Our Garlic Rye Chips recipe draws from classic deli flavors—think of the robust sandwiches piled high with pastrami and rye. We wanted to capture that essence in a snackable form. By infusing garlic and a hint of herbs, we’ve crafted a chip that’s both nostalgic and modern. It’s a nod to tradition while offering a creative twist that’s perfect for today’s food lovers. We’ve fine-tuned this recipe to ensure every batch delivers that perfect crispiness you crave.
Nutritional Highlights
For those curious about the nutritional aspect of Garlic Rye Chips, we’ve got you covered. While these chips are a treat, they can fit into a balanced diet when enjoyed in moderation. Below is a quick breakdown of approximate nutritional values per serving (based on a standard batch of 4 servings):
| Nutrient | Amount per Serving |
|---|---|
| Calories | 150 |
| Total Fat | 7g |
| Saturated Fat | 1g |
| Carbohydrates | 18g |
| Protein | 3g |
| Sodium | 200mg |
Note: Values may vary based on specific ingredients and portion sizes.
Why Make Garlic Rye Chips at Home?
Making Garlic Rye Chips at home isn’t just about the taste—it’s about the experience. We love how easy it is to customize the flavors to suit your palate. Add a sprinkle of chili flakes for heat or a dash of parmesan for extra richness. Plus, baking your own chips lets you control the quality of ingredients—no preservatives or artificial flavors here! As we craft each batch, the satisfaction of creating something homemade adds to the joy of snacking. Stick with us as we guide you through the simple steps to make this addictive snack in your own kitchen.
Ingredients for Garlic Rye Chips
As we dive into crafting the perfect batch of Garlic Rye Chips, let’s gather all the essentials to transform humble rye bread into a crunchy, savory snack. Our recipe focuses on bold flavors and simple ingredients to ensure that irresistible garlic punch and nutty rye essence shine through. Below, we’ve listed everything you need with precise measurements and preparation notes to make this process seamless. These ingredients are ordered as you’ll use them, so follow along to create a snack that’s perfect for dipping or munching solo at your next party.
- Rye Bread – 1 loaf (about 12-16 slices) preferably day-old or slightly stale, thinly sliced into 1/8-inch pieces for maximum crunch
- Olive Oil – 1/3 cup to coat the bread evenly for crisp baking
- Garlic Powder – 2 teaspoons for that bold garlic kick we crave
- Dried Oregano – 1 teaspoon to add a subtle herby depth
- Sea Salt – 1/2 teaspoon to enhance all the savory notes
- Black Pepper – 1/4 teaspoon freshly ground for a hint of spice
- Paprika (optional) – 1/2 teaspoon for a smoky undertone and vibrant color
Pro Tip: “Using day-old rye bread is key to achieving the ultimate crunch in your Garlic Rye Chips. Fresh bread can turn soggy, so plan ahead or let your loaf sit out overnight!”
We’ve kept the list concise to focus on quality over quantity ensuring each ingredient plays a vital role in building that nostalgic deli-inspired flavor. If you’re curious about the nutritional breakdown of these chips when prepared with these exact measurements, check out the table below for a quick glance at what you’re whipping up in your kitchen.
| Nutritional Component | Amount per Serving (1 oz) |
|---|---|
| Calories | 120 |
| Total Fat | 6g |
| Carbohydrates | 14g |
| Protein | 2g |
| Sodium | 200mg |
With these ingredients ready, we’re set to move into the hands-on part of crafting our Garlic Rye Chips. Make sure to measure accurately and prep your bread slices thinly to guarantee that signature crispiness paired with the robust garlic and rye harmony we love.
Essential Tools and Equipment
As we dive into crafting our Garlic Rye Chips, having the right tools and equipment is crucial for achieving that perfect crunch and bold flavor. We’re excited to guide you through the essentials that will make this recipe a breeze in your kitchen. Let’s ensure everything is prepped and ready for transforming simple rye bread into an irresistible snack with a nutty and garlicky punch.
Must-Have Kitchen Tools
To create these crispy Garlic Rye Chips, we rely on a few key tools that streamline the process and guarantee success. Here’s what you’ll need:
- Sharp Bread Knife: A sturdy knife is essential for slicing day-old rye bread into thin even pieces. Precision here ensures uniform baking and crunch.
- Cutting Board: Use a stable surface for safely cutting your bread. Opt for a large board to handle multiple slices at once.
- Mixing Bowl: A medium-sized bowl works best for combining olive oil with our signature blend of garlic powder and herbs.
- Pastry Brush or Spoon: This helps us evenly coat the bread slices with the flavorful oil mixture. A brush offers precision while a spoon works for a quicker drizzle.
- Baking Sheet: Choose a large rimmed baking sheet to spread out the bread slices in a single layer. This prevents overcrowding and promotes even crisping.
- Parchment Paper: Line your baking sheet with parchment to prevent sticking and make cleanup effortless.
- Oven Mitts: Protect your hands when handling hot baking sheets. Safety first as we pull out those golden Garlic Rye Chips!
Optional but Helpful Equipment
While the basics will get the job done, a few additional tools can elevate your Garlic Rye Chips game. Consider these for an extra edge:
- Mandoline Slicer: If you’re aiming for ultra-thin slices with minimal effort, a mandoline is a game-changer. Just watch your fingers!
- Cooling Rack: Place this on your baking sheet after baking to let the chips cool evenly. It helps maintain that crisp texture we’re after.
- Small Whisk: Useful for blending the oil and seasoning mix smoothly in the bowl. It ensures every drop is infused with garlic goodness.
Quick Setup Tips
Before we start slicing and seasoning, let’s set up our workspace for efficiency. Lay out all tools on a clean counter near your oven. Preheat the oven to 300°F (150°C) as we gather everything—this low-and-slow baking is key to perfect Garlic Rye Chips. Keep a small bowl of water nearby to clean sticky hands or tools during prep. With everything in place, we’re ready to transform humble rye bread into a snack that’s bursting with flavor.
“A well-organized kitchen is the secret to stress-free cooking. Let’s make these Garlic Rye Chips with ease and flair!”
By equipping ourselves with these tools, we ensure a smooth process from start to finish. Whether you’re a seasoned home cook or a beginner, having the right setup will help you nail the crunchy texture and savory aroma of our beloved Garlic Rye Chips. Now that our tools are ready, let’s move on to the hands-on steps of crafting this addictive treat.
Instructions for Making Garlic Rye Chips
Let’s dive into the hands-on process of creating Garlic Rye Chips—a snack that’s as easy to make as it is addictive. Follow our detailed steps to transform simple rye bread into a crunchy, garlicky delight.
Preparing the Rye Bread
First, we need to get our rye bread ready for transformation. Grab your day-old or slightly stale rye bread—this is key for that perfect crunch. Using a sharp bread knife or a mandoline slicer for precision, slice the bread into thin pieces, about 1/8 inch thick. Aim for uniformity to ensure even baking. Lay the slices on a cutting board and trim off any thick crusts if you prefer a more delicate chip. Spread them out in a single layer to prepare for the next step. This process sets the foundation for our Garlic Rye Chips, ensuring they crisp up beautifully in the oven.
Mixing the Garlic Seasoning
Let’s whip up the bold garlic seasoning that gives our chips their irresistible flavor. In a small mixing bowl, combine 3 tablespoons of olive oil with 1 teaspoon of garlic powder, 1/2 teaspoon of dried oregano, 1/2 teaspoon of sea salt, 1/4 teaspoon of black pepper, and an optional pinch of paprika for a smoky kick. Whisk everything together until well blended. The aroma of garlic and herbs will hit your senses immediately, promising a savory treat. Use a pastry brush or spoon to evenly coat both sides of each rye bread slice with this mixture. As we say, “Don’t skimp on the seasoning—it’s the heart of Garlic Rye Chips!” Make sure every piece gets a generous layer for maximum flavor.
Baking the Chips
Finally, it’s time to bake our Garlic Rye Chips to golden perfection. Preheat your oven to 325°F (163°C) and line a baking sheet with parchment paper to prevent sticking. Arrange the seasoned rye bread slices in a single layer on the sheet, ensuring they don’t overlap for even crisping. Pop the tray into the oven and bake for 10-12 minutes, flipping the chips halfway through to guarantee a uniform crunch. Keep a close eye near the end—rye bread can go from perfectly crisp to burnt quickly. Once they’re golden brown and the garlicky aroma fills your kitchen, remove them using oven mitts and let them cool on a rack or the baking sheet for 5 minutes. The result? Crispy, fragrant Garlic Rye Chips that are ready to be devoured as a snack or paired with your favorite dip.
Serving Suggestions
Dive into the delightful world of Garlic Rye Chips with us as we explore the best ways to enjoy this crunchy and savory snack. Whether you’re hosting a party or simply craving a quick bite, these Garlic Rye Chips are versatile enough to shine in various settings. Let’s elevate your snacking game with creative pairings and presentation ideas that highlight their bold garlic flavor and nutty rye undertones.
Perfect Pairings for Dips and Spreads
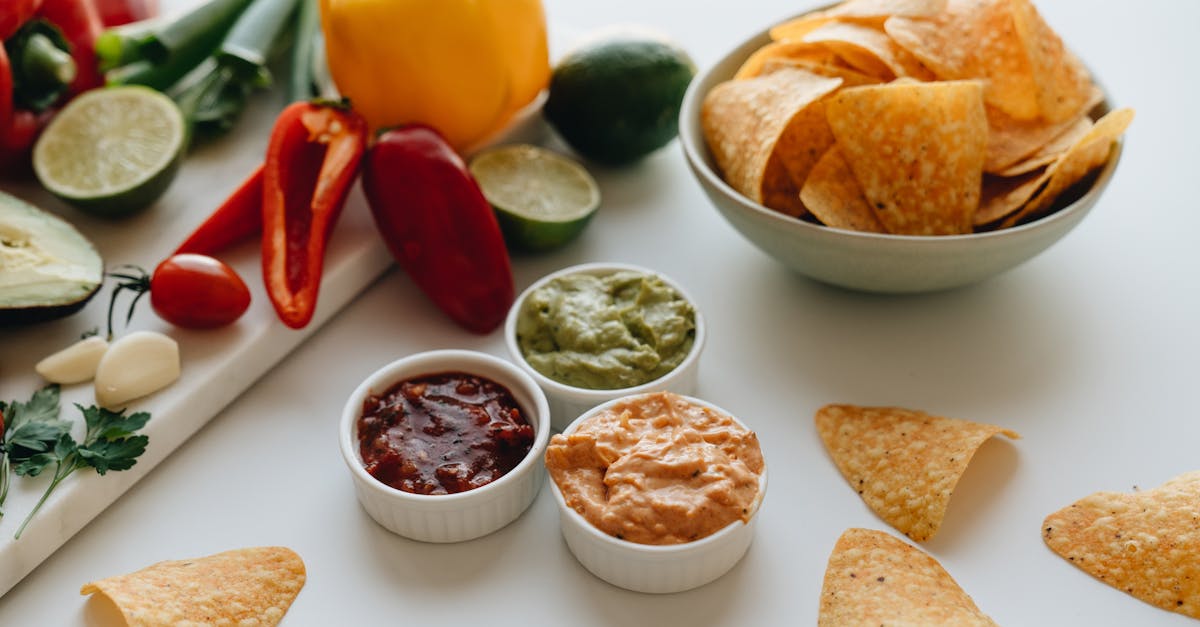
Enhance the robust taste of our Garlic Rye Chips by pairing them with a variety of dips and spreads. Serve them alongside a creamy hummus for a Mediterranean flair or a tangy sour cream and onion dip to complement their savory notes. For a bolder option, try a spicy salsa or a rich guacamole to add a fresh kick. If you’re feeling indulgent, a warm spinach-artichoke dip will melt in your mouth with every crisp bite of these chips. Arrange a dip platter with multiple options to let your guests mix and match their favorites.
Ideal Companions for Soups and Salads
Transform a simple meal into a gourmet experience by adding Garlic Rye Chips as a crunchy side. Crumble them over a hearty bowl of tomato basil soup or a creamy potato leek soup for an added texture that mimics croutons but with more flavor. Toss a handful into a Caesar salad or a fresh garden salad to bring a garlicky punch that ties the dish together. Their sturdy texture holds up well against wet ingredients making them a perfect substitute for traditional bread sides.
Creative Snacking and Party Platters
Make your next gathering unforgettable with a stunning charcuterie board featuring Garlic Rye Chips. Surround them with an assortment of cured meats like salami and prosciutto fine cheeses such as aged cheddar or brie and olives for a sophisticated touch. Add small bowls of mustard or fig jam to balance the savory chips with sweet and tangy notes. Stack the chips in a decorative bowl or scatter them across the board for a rustic yet elegant look that screams “party perfection”.
Beverage Pairings to Complement the Flavor
Don’t overlook the power of a well-matched drink to elevate your Garlic Rye Chips experience. Pair them with a crisp lager or a hoppy IPA to cut through the rich garlic flavor. For a non-alcoholic option sip on a refreshing iced tea with a hint of lemon or a bold ginger ale to cleanse the palate between bites. If you’re in the mood for something cozy enjoy the chips with a glass of mulled wine during cooler months as the warm spices harmonize beautifully with the rye essence.
Portion and Presentation Tips
Serve Garlic Rye Chips in style while keeping portion control in mind for balanced snacking. Use small ramekins or mini baskets to offer individual servings at gatherings preventing overindulgence while maintaining an aesthetic appeal. For a casual vibe pile them high in a large wooden bowl as a centerpiece snack. Garnish with a sprinkle of fresh parsley or a dusting of paprika to enhance visual appeal and hint at the flavors within. Check out the table below for quick serving size ideas based on occasion.
| Occasion | Serving Size per Person | Presentation Idea |
|---|---|---|
| Casual Snack | 8-10 chips | Small bowl with a napkin liner |
| Party Appetizer | 12-15 chips | Charcuterie board with dips |
| Meal Side | 6-8 chips | Crumbled over soup or salad |
| Game Night | 10-12 chips | Mini baskets for easy grabbing |
With these Serving Suggestions we’re confident you’ll find countless ways to enjoy Garlic Rye Chips at any time. Experiment with these ideas or create your own pairings to make this garlic-infused snack a staple in your kitchen.
Storage and Make-Ahead Tips
We’re excited to share our expert advice on how to keep your Garlic Rye Chips fresh and flavorful with proper storage techniques and make-ahead strategies. These crunchy delights can be prepared in advance or stored for later enjoyment, making them a convenient snack for any occasion. Let’s dive into the best ways to store and prep these irresistible chips to maintain their bold garlic and nutty rye essence.
Storing Your Garlic Rye Chips
To ensure your Garlic Rye Chips stay crispy and delicious, follow these storage tips:
- Cool Completely: Allow the chips to cool fully on a wire rack after baking. This prevents moisture buildup which can make them soggy.
- Airtight Container: Store the cooled chips in an airtight container or resealable plastic bag. This keeps out humidity and preserves their crunch.
- Room Temperature: Keep the container at room temperature in a cool dry place. They’ll stay fresh for up to 5-7 days this way.
- Avoid Refrigeration: Don’t refrigerate the chips as the cold environment can introduce moisture and ruin their texture.
Pro Tip: If your chips lose their crispness over time, pop them back into a preheated oven at 300°F (150°C) for 3-5 minutes to revive that satisfying snap.
Make-Ahead Preparation
Planning a party or just want to have Garlic Rye Chips ready for a quick snack? We’ve got you covered with these make-ahead tips to save time without sacrificing flavor:
- Prep the Bread: Slice your rye bread into thin uniform pieces up to 1-2 days in advance. Store the slices in a breathable paper bag at room temperature to keep them slightly stale for optimal crunch during baking.
- Seasoning Mix: Prepare the garlic seasoning blend by mixing olive oil, garlic powder, oregano, sea salt, black pepper, and optional paprika ahead of time. Store this mix in a small airtight jar in a cool dark place for up to 1 week.
- Bake in Batches: Bake large batches of Garlic Rye Chips up to 3 days before serving. Follow our storage tips above to keep them fresh and ready to impress.
Time-Saving Hack: “Double the recipe and store half for later. It’s like having a deli snack on demand!” This ensures you always have a stash of these addictive chips for unexpected guests or sudden cravings.
Freezing for Long-Term Storage
For even longer storage, consider freezing your Garlic Rye Chips or their components:
- Freeze Unbaked Slices: Slice the rye bread and lay the pieces flat on a baking sheet to freeze individually for 1-2 hours. Then transfer them to a freezer-safe bag. They can be stored for up to 1 month. When ready, thaw slightly and proceed with seasoning and baking.
- Freeze Baked Chips: If you’ve already baked the chips, cool them completely and store in a freezer-safe airtight container or bag. They’ll keep for up to 2 months. Reheat in a 300°F (150°C) oven for 5-7 minutes to restore crispness.
| Storage Option | Duration | Best Practices |
|---|---|---|
| Room Temperature (Airtight) | 5-7 Days | Cool completely; store in a dry cool place |
| Freezer (Unbaked Slices) | Up to 1 Month | Freeze individually; thaw before seasoning |
| Freezer (Baked Chips) | Up to 2 Months | Cool completely; reheat to restore crispness |
Note: Always label your containers or bags with the date to keep track of freshness. With these tips, we ensure our Garlic Rye Chips remain a go-to snack anytime you need a burst of garlic and rye flavor.
Conclusion
We’re thrilled to share this Garlic Rye Chips recipe with you and can’t wait for you to try it out. It’s a fantastic way to transform simple ingredients into a snack that’s bursting with flavor.
If you’ve enjoyed crafting these chips as much as we have, don’t hesitate to experiment with different seasonings or dips. Your creativity can take this recipe to new heights!
Drop a comment below to let us know how yours turned out or share your unique twists. We’d love to hear from our community of snack enthusiasts!
Frequently Asked Questions
What are Garlic Rye Chips?
Garlic Rye Chips are a crunchy, flavorful snack made from rye bread, seasoned with garlic, herbs, and olive oil, then baked to perfection. They offer a nutty taste with a bold garlic kick, making them ideal for dipping or enjoying solo. Inspired by classic deli flavors, they’re a nostalgic treat and a great way to repurpose leftover bread.
How do I make Garlic Rye Chips at home?
To make Garlic Rye Chips, slice day-old rye bread thinly, mix olive oil with garlic powder, oregano, salt, and pepper, then coat the slices. Bake at a preheated oven until golden, flipping halfway for even crispness. It’s a simple, customizable recipe for a tasty snack.
What ingredients do I need for Garlic Rye Chips?
You’ll need day-old rye bread, olive oil, garlic powder, dried oregano, sea salt, black pepper, and optional paprika. These ingredients create a savory, aromatic coating for the chips. Use stale bread for the best crunch, and adjust seasonings to your taste.
What tools are essential for making Garlic Rye Chips?
Key tools include a sharp bread knife, cutting board, mixing bowl, pastry brush or spoon, baking sheet, parchment paper, and oven mitts. Optional tools like a mandoline slicer and cooling rack can enhance precision and texture. A well-organized kitchen setup helps streamline the process.
How should I store Garlic Rye Chips to keep them fresh?
Cool the chips completely, then store them in an airtight container at room temperature for 5-7 days. Avoid refrigeration to maintain crispness. For longer storage, freeze unbaked slices or baked chips, and reheat to restore crunch when ready to eat.
What are some serving suggestions for Garlic Rye Chips?
Pair Garlic Rye Chips with dips like hummus, salsa, or spinach-artichoke dip. They’re great with soups, salads, or on charcuterie boards with meats and cheeses. Complement them with crisp lagers or iced tea for a refreshing match, and serve stylishly for parties or snacks.
Can I make Garlic Rye Chips ahead of time?
Yes, prep the bread slices and seasoning mix in advance, then store separately until ready to bake. Bake in batches for convenience, or freeze unbaked slices for later. This make-ahead strategy ensures you always have a quick, delicious snack on hand.